 Crunchy outside, melting inside, a lovely vegetarian lunch Mushroom Croquetas (vegetarian)
In February I gave a recipe for ham and smoked cod croquetas, as you might find in Spain if you are tapas-cruising in Malaga or Bilbao. Now I tried a similar recipe for mushroom croquetas, which have a very intense flavour and a lovely interesting black colouring. They are a perfect dish for a vegetarian lunch along with a side salad, or as part of a Spanish themed spread. They are a bit of a faff to make as the bechamel is soft and tends to stick to your hands, but you can do most of the work ahead of time and they are so satisfying to eat I can forgive them the slight hassle. Makes 25 croquetas - which is enough for a party, as they are quite filling. Timings – 60 minutes on Day 1, 90 minutes on Day 2.
Fry the fresh mushrooms in a pan with some vegetable oil and butter – the liquid will start to come out. Keep cooking on a low heat. Put your dried mushrooms in a bowl and cover with boiling water. After 5 minutes take out the rehydrated mushrooms, cut up finely and add to the pan with the other mushrooms. Keep the soaking water. When the liquid has evaporated from the pan, chop or blend up the mushrooms to give quite a solid paste. Use 100ml of the soaking liquid (which will be dark brown and smell strongly of fungi) the bechamel but make sure there isn’t any grit in it. Make the bechamel in a fairly heavy bottomed saucepan. Melt the butter and the oil together, add the flour and stir over a gentle heat, cooking the flour without letting it burn. Add the liquid and keep stirring. It will thicken as you stir. Keep adding the liquid to make a very thick bechamel sauce. You need to keep stirring and cooking for a while to make sure any flouriness is cooked out, and the sauce is creamy. Add the pureed mushrooms and taste for seasoning. A sprinkling of salt and a generous grinding of pepper lifts the flavour. It will be an interesting sooty black colour. Line a container with cling film – I try to avoid using cling film these days but I have tried other things and the sauce sticks and you waste a lot, so I do use cling film for this. Pour the cooled flavoured bechamel into your container and wrap the cling film over the top to stop a hard skin forming. Place in the fridge for 24 hours to chill thoroughly and set firm. Next day, prepare a flat bowl with beaten egg and another one with breadcrumbs. Working on a floured baking tray, take a dessert spoonful of the set bechamel mixture and roll it in the flour, using flour to stop your hands sticking too. Form it into a cylinder about as long as your thumb and a bit thicker. Then drop two at a time into the egg mixture, then into the breadcrumbs, firmly pressing the breadcrumbs onto the eggy surface. They should stick and make a firm dry coating. Put the completed croquetas on a plate to set again. It is fiddly, and it takes a while – it might be easier if you have a production line of helpers assisting you with this. When the croquetas have had a few minutes to set, heat 2cm of oil in a heavy pan, or fire up your deep fat fryer or your air fryer. Fry the croquetas quite briefly in medium hot oil – the filling is already cooked, so you just want to warm it up and brown the breadcrumbs. Remove from the hot oil or from the air fryer and serve as soon as you can – they do keep warm in the oven quite nicely but are best straight from the pan. Serve with a little pot of mayonnaise mixed with crushed garlic and a simple green salad.
0 Comments
 Punchy tangy tingly gazpacho, full of vegetables to make you smile Gazpacho (vegan)
Packs a punch, Gazpacho does. It doesn’t leave you in the dark as to its intentions. It wants to jump up and shout, and make you do the same. It’s a cold soup, made from raw vegetables, and you can feel it doing you good, as well as waking up your tastebuds. I used to make this quite often in the summer and take it to work in a chilled thermos flask for my lunch. Apart from the aroma of garlic making it obvious what I was eating, the little moans of pleasure from my desk caused much merriment in the office. Never mind, anything that makes you feel that good at work should be encouraged. Do make it a day ahead so the flavours can meld, and serve it as chilled as you can, as that suits it. You can adjust the proportions to your own tastes – I quite like the sharp vinegary tang, but you can reduce the amount of vinegar if you want a gentler approach. If you have fresh parsley to hand, it’s lovely to add some towards the end of the blend so you get it rather roughly chopped, but it’s not part of the classic recipe. For a dinner party, you can serve little chopped vegetables as a topping and let everyone choose their own, but it’s not necessary for a family lunch. Serves 4 Timings: 30 minutes and then at least 2 hours to chill
Put the whole lot into the bowl of your blender and add about 200ml cold water, some salt and pepper. Blend until fairly smooth. Add the parsley at this time if using. Blend again, and taste for seasoning and acidity. You can add a teaspoon of sugar to balance the acidity, a little more salt or a little more oil. Blend and chill until needed. The soup will keep at least 2 days in the fridge. 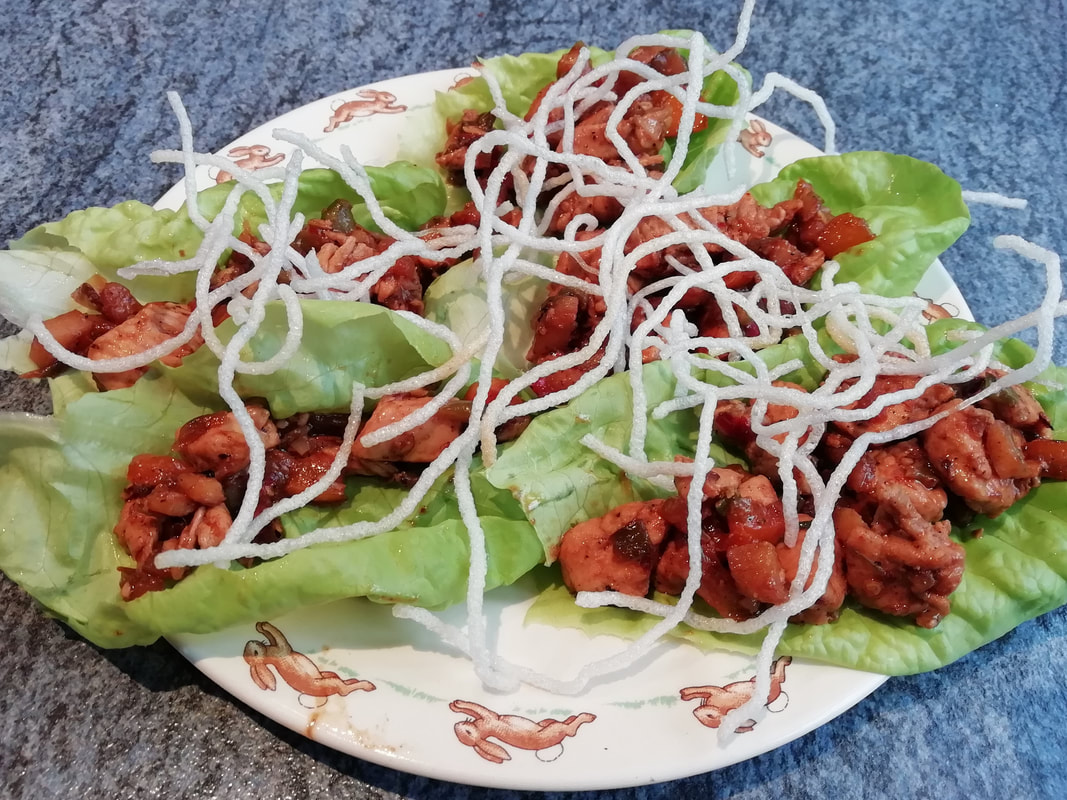 Light, spicy and crunchy. Chicken pieces, wrapped in lettuce leaves with crispy vermicelli topping. Chicken Yuk Sung - lettuce leaf wraps
Light, fresh and tasty, these are ideal for a make-it-yourself starter (always the most relaxed way to begin a meal) and even for a light low-carb lunch. Yuk Sung comes from the Chinese word for “fluffy meat” and describes the almost shredded texture of a dried meat you can buy which is used for topping a rice porridge or tofu dish. This recipe has moved a long way from there, and the only fluffy thing about it is the crispy rice vermicelli, which impart a fabulous crunch to the mouthful. I have used preserved Chinese vegetable in the recipe, which gives a deep sour salty background and a slightly squeaky texture. You buy this in packs from a Chinese grocery or on line, and you can use it in a lot of Chinese food. If you can’t get it, substitute some well chopped firm fresh white cabbage, and soak it in salted water for 10 minutes. I have based the filling on a recipe from the always reliable Kwoklyn Wan, (kwoklynwan.com) with a few additions from other sources. It went down a treat with my family and we made it into a main course and served rice alongside too. Serves 4 Timings: 60 minutes – which is mostly vegetable chopping, the cooking only takes 10 minutes
Wash the lettuce well and separate the leaves but keep them whole. You can leave the lettuce in cold water to crisp up while you fry. Combine the sauce ingredients and set aside in a small bowl. Put about 2cm of oil in your wok, heat up well and deep fry the vermicelli a few at a time. They will puff up instantly and turn brown nearly as quickly, so scoop them out and put them on kitchen towel to drain. You can salt them lightly. Remove most of the oil from the wok and start to stir fry. Fry the ginger, garlic and chilli for 30 seconds to release the aromas, then add the chicken. Stir fry for 5 minutes or more until the chicken is cooked through and the juices have evaporated and concentrated back into the meat. Set aside on a plate. Fry the onions, carrot, pepper, water chestnuts and preserved vegetable briefly to soften them. Add the sauce to the wok and cook for a couple of minutes to start to concentrate it. Add the chicken mixture back in, stir and cook. There shouldn’t be liquid in the bottom of the wok, you are looking for a fairly dry mix. Remove the wok from the heat and let cool a couple of minutes while you drain and spin the lettuce and get the vermicelli on the table. Let everyone make their own parcels of delicious delight, wrapping the filling of spicy chicken and vegetables and a pinch of crunchy vermicelli in the tender lettuce. 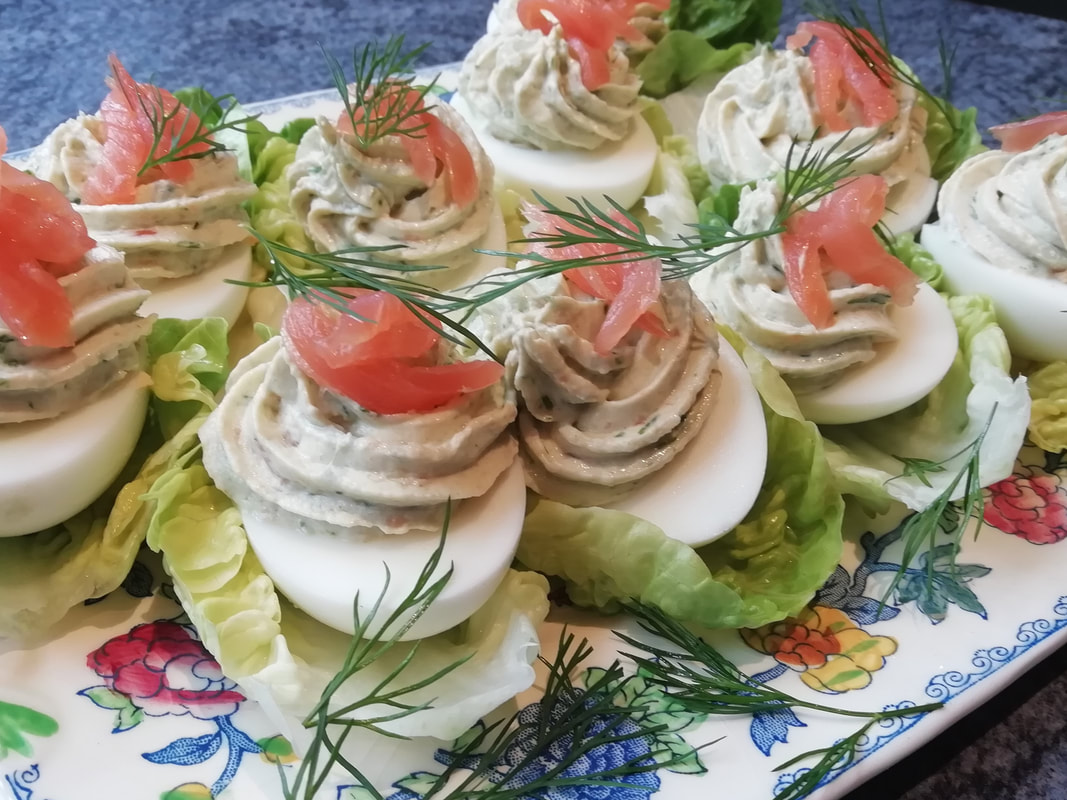 Eggs stuffed with salmon mousse and topped with smoked salmon and dill Swedish Stuffed Eggs
Eggs and fish are a classic Scandinavian combination. Add some fresh herbs and a spritz of lemon or a fizz of horseradish and you have a thing of beauty. Stuffed eggs are a staple of any Scandinavian buffet. They are the perfect party food, easy to prepare ahead, pass round and let your guests eat with their hands as they wander through the garden. Often, in a stuffed eggs recipe (see my own recipe for Devilled Eggs) the yolk of the hard boiled egg is combined with a variety of other ingredients and then used to stuff the egg cavity. In this recipe, the smoked salmon mousse is just piped on top of the whole egg, leaving the yolk in place for an even richer combination. Top with a strip of smoked salmon or even a little sprinkle of salmon roe if the budget runs to it. Serves 6 Timings: 40 minutes
Reserve one slice of smoked salmon for decoration, snip it into lengths and leave aside. Reserve some fronds of dill for decoration too. Wash the lettuce thoroughly, separating the leaves but keeping them whole, and leave in cold water to crisp up. Make the mousse by blending the smoked salmon, cream cheese, chives, dill, sour cream, horseradish and lemon juice. I like to use a hand blender for a smooth result. Taste and adjust the seasoning – you might need a little salt and pepper to bring up the flavours. Scoop the mousse into a piping bag with a wide star nozzle. Halve the eggs, and you might need to take a sliver off the bottom of the white to stabilise them. Pipe the mousse on top of the eggs and chill in the fridge until ready to serve. To serve just place each egg on a lettuce leaf and add a strip of smoked salmon and a frill of dill.  Mildly spiced grilled prawns match perfectly with buttery juicy pineapple chunks in this fusion of seafood and fruit Tandoori Prawn and Pineapple Kebabs
Simple and fresh: straight off the grill! These are everyone’s favourite appetiser. Mildly spiced prawns in a green herby tandoori marinade contrast with the buttery juicy pineapple for an explosion of flavour. Great for parties and for starting off a summer garden celebration or barbeque. Serve with garlic bread, a few bitter salad leaves or just as they are, with lime juice and a sprinkle of chopped coriander. Serves 6 Timings: 30 minutes preparation, 2 hours marinate, 30 minutes to assemble and cook
Marinade:
Mix up the marinade ingredients, stir well and add the prawns. Marinade for at least 2 hours. Heat up the butter in a shallow frying pan and fry the chunks of pineapple for a few minutes to caramelise and release the juices. Keep the chunks cool until ready to assemble the kebabs. Heat up your grill or barbeque. Simply skewer the pineapple chunks and prawns onto wooden sticks (pre soaked) or metal skewers, allowing 2 prawns per skewer and interspersing the pineapple. Grill quickly – about 3 minutes on each side, making sure the prawns are cooked through. Serve straight from the grill, squeezing over a little lime juice as you go. 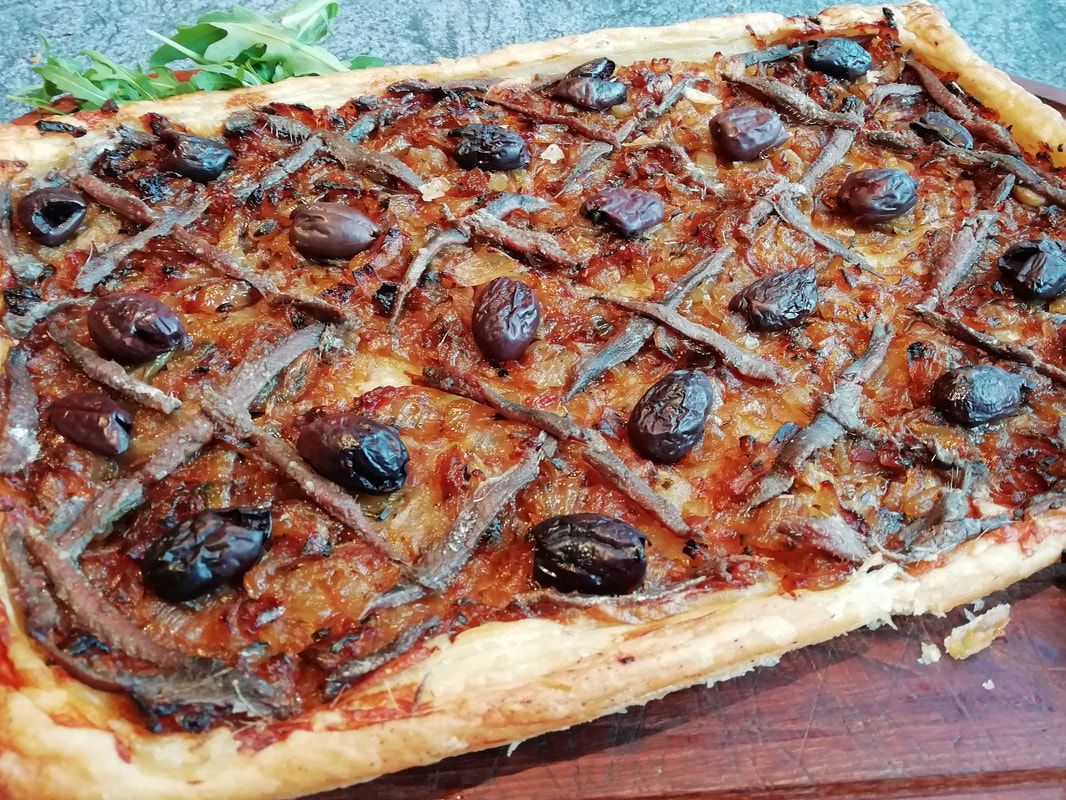 All the flavours of Provence - onions, olives, anchovies, thyme Pissaladiere – caramelised onion and anchovy pastry
Not a tart, no top. Not a pizza, no cheese. Not a quiche, no eggs. “Pissaladiere” is dough topped with caramelised onions, salty anchovies, rich olives and a smidge of mustard, flavoured with thyme. Provence on a plate. Originating somewhere between Nice and Marseille, perhaps even having migrated from Genoa, the recipe uses local specialities to give a true taste of the region. The name comes from “pissalat” – a condiment that’s difficult to find now and is probably related to the Roman “garum” a sort of fermented fish sauce. The “pissalat” consisted of salted anchovies and other small fish left to marinate and liquefy with some woody herbs over several weeks, but you can substitute a good brand of anchovies out of a tin and still get that deep salty flavour. I met it on the streets of Marseille, where the savoury scent wafts from the bakeries in the mornings, although regional purists will probably say that the best examples come from further east along the coast, in Nice. You eat it warm, not hot; munching from your hand as you wander through the markets, rather than formally at a table. The base can be a flaky bread dough or an even flakier pastry. I prefer the pastry version and am not above using ready made puff pastry for an easier life. It’s a great garden party food for summer gatherings. You’ll probably need to offer plates rather than serving it into people’s hands as the flaky pastry can be a bit unstructured and will tend to disintegrate. Serves 8 Timings: 90 minutes to prep and cook, 30 minutes to cool
Fry the onions very gently in a heavy pan in the vegetable oil, stirring all the time, until they soften and caramelise. This takes longer than you think – about 30-40 minutes. Add a little more oil if needed and add the butter after about 10 minutes. Add the dried thyme and some salt and pepper. Skin the tomato (by dunking it in boiling water and then running under the cold tap), discard the seeds, and chop the flesh very finely. Add this to the pan of onions and continue to fry until the tomato pieces disintegrate. Add the chopped parsley and the tablespoon of vinegar. Stir in and let it cook and reduce further – this gives a lovely deep sweetness to the onion mix. Pre heat your oven to 210°C. Roll out the pastry on a metal baking tray, keeping it on its backing paper. Use a sharp knife and score round the edge of the pastry about 1cm inside the edge, but not going through the pastry sheet. This means the edge will rise up slightly above the rest, giving you that flaky crunchy outside. Spread the pastry (not the edge) with a thin layer of mustard. Spread the onion mixture over the pastry (not the edge) evenly. Criss cross the anchovies over the onion mix and dot the olives in between to make an attractive pattern. Brush the edge of the pastry with some of the oil from the anchovies. Bake for 20-25 minutes until the tart looks cooked and the edges are nicely browned. Cool before slicing and eat lukewarm. If you feel the need for green, some rocket leaves scattered on top would go well.  Quiet and delicious. Chilled tomato, bread, and egg soup combine with traditional toppings for an elegant starter. Salmorejo
Cold soups are a Spanish tradition. You might be familiar with Gazpacho, which is a loud, shouty sort of soup, bristling with spicy peppers, a hint of chilli and a good tang of wine vinegar. Salmorejo is Gazpacho’s more reserved little cousin, a strong family resemblance but much quieter. It’s a very simple recipe made from ingredients you might well have in your Spanish village kitchen, combining tomatoes, day old bread, olive oil and a boiled egg. It would also be a great home school day lunch, providing vegetables, calories and protein in one little bowl. I did try making this using either a tin of tomatoes or my own home-made tomato sauce, which I keep in the freezer against all eventualities. On a blind testing, I have to report that it is really much better made with fresh tomatoes, so get the best you can find – the long plum ones are very nice. Your friendly green grocer might be able to give you some that are on the edge of being too ripe for salads but don’t go for anything too squashy. It is often served in a small bowl (because it is rather rich and filling) with a plate of chopped toppings – again making it a great dish to offer to kids who love to choose their own selection. You can provide chopped cured meat – jamon Iberico, smoked tuna cubes, vegetables or diced egg. Spoon a few pieces of something extra on your soup and what more do you need for lunch? Serves 4, small portions Timings: 20 minutes to make, then about 2 hours in the fridge
Toppings: jamon cubes, fresh tuna cubes (could be raw, smoked or lightly cooked), diced hard boiled egg, diced tomatoes or peppers – whatever you’ve got and whatever you fancy. Peel the tomatoes by pouring boiling water over them, leaving for 1 minute, then taking out and running them under cold water. The skin should come off easily. Throw the flesh and seeds together into your blender and blend until smooth. Into the bowl of the blender throw the stale bread and leave it to soften for 5 minutes. Now add the olive oil, vinegar, garlic and hard-boiled egg into the blender too. Blend until finely mixed. You could push the mixture through a sieve after the blend but I don’t think you need to. Chill in the fridge for at least 2 hours to allow the flavours to meld and chill down. Serve in small portions, and with a selection of toppings for people to choose for themselves. Photo credit: I normally take my own photos but this time, my friend Anthony Smith has obliged with this great photo of Salmorejo in decorative coffee cups. Thanks Anthony! 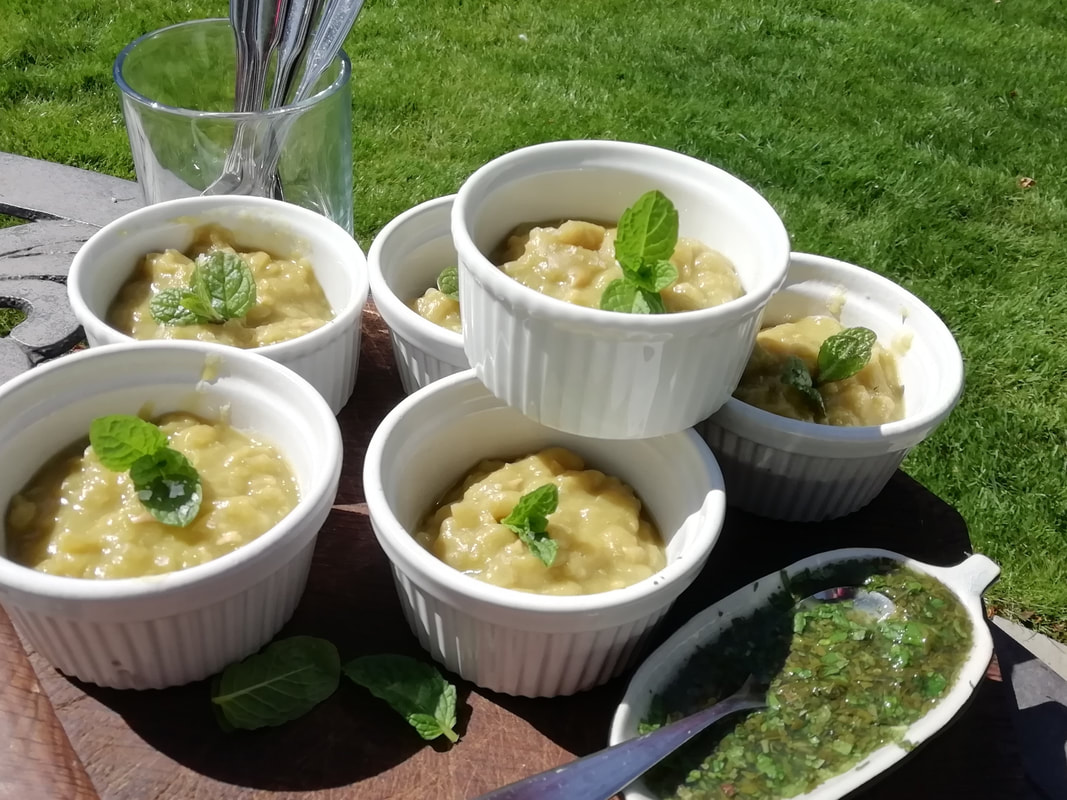 Not just for eating with fish and chips! Mushy peas and mint sauce make a perfect retro starter. Mushy Peas – Nottingham Caviar (vegan)
Long ago, the Goose Fair at Nottingham, held in early October, was the last and the largest of the country-wide fairs in England. Fairs were an important part of the employment market, for hiring new staff for agricultural or construction work. They weren’t originally for entertainment rides or peep shows. Wherever people gather, other people will come; to sell food, side shows, thrills. Men and women seeking work would come to the Goose Fair, stroll the alleys of tents and hustings, maybe buy something to eat. Mushy peas were traditionally served in a paper cone and eaten with a splash of mint sauce. They’re hot, cheap and filling. The sauce adds piquancy and tingle to the salty peas and the mint gives extra digestibility and removes some of the gassy effect of the creamy mash. So they say. Even in the 1980s, when the Goose Fair was about dodgems and whirler rides, you could still buy mushy peas and mint sauce to enjoy among the fairground lights and blaring whistles. The last stall selling Nottingham Peas and Mint Sauce in the city’s old Victoria Market closed down in the Covid crisis. There are hopes it can open again once customers come back, for now, you can make your own. Serves 6-8 Timings: Overnight soak, then 4 hours simmering
For the mint sauce: a good bunch of fresh mint leaves, finely chopped. 1 tablespoon malt vinegar and 1 tablespoon cider vinegar. 2 teaspoons salt, 2 teaspoons sugar. Blend well and adjust the seasonings. Soak the peas overnight in a good amount of water and mix in the bicarbonate of soda. The peas will absorb quite a lot of water so top it up before you go to bed. In the morning, tip the peas into a colander and wash them well. Put them in a pan with the vegetables and fennel seeds and top up with fresh water and bring to the boil. Don’t add salt at this stage or it will harden the peas. As the pan comes to the boil, skim off the foam. Once the pan has come to the boil you can continue the cooking in a slow cooker - on high for 4 hours, or on the hob at a slow simmer, or in the oven in a low heat with the lid on the casserole. You need to check the water level – not too much or too little! In the slow cooker, just have enough liquid to cover the peas. At the end of 4 hours, test them – they should be mushy and starting to fall apart. Check the level of liquid – you want to mash the peas down into the liquid but you want a porridge-texture mash, so you can drain off a little water if you still have too much. Mash the peas with a potato masher and add salt to taste – you will need quite a bit as they have been cooked without. You can keep them in a covered container in the fridge for 2-3 days or freeze them. Serve lukewarm with a good splash of mint sauce. What a smart and retro starter to a meal, and part of all our heritage. 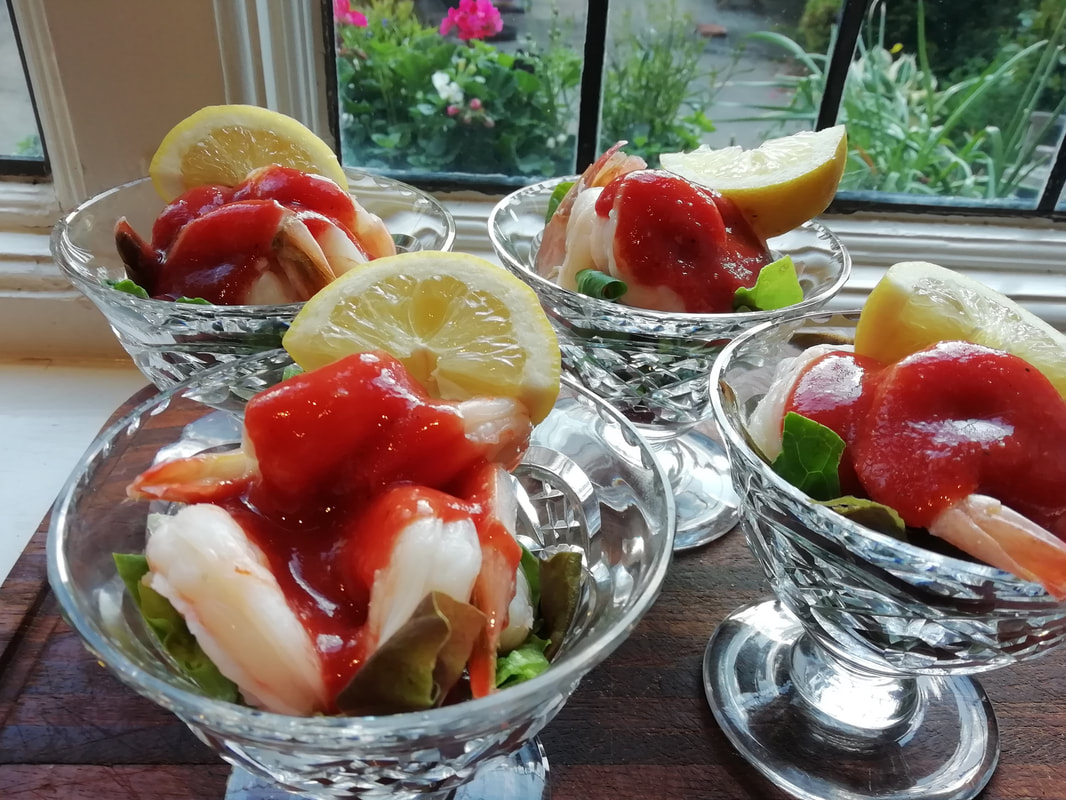 Juicy poached shrimps (or prawns) topped with a tomato based sauce with horseradish and vinegar American Shrimp Cocktail
Travelling in the US, I love to discover foods that sounds the same as English versions but are in fact, quite different. It’s one of those “you’re like me but not like me” moments; a bit of a thrill, taking you out of the familiar. What we know as prawns, the Americans call shrimp. What we call shrimp, (the Morecambe bay tiny brown shrimp that we eat in tubs of brown butter) they probably don’t see as food at all. And if you ask for a shrimp cocktail, expecting a creamy mayonnaise-y Marie Rose sauce, you can get a bit of a shock to find a spicy tomato salsa, hot with horseradish instead. It’s a nice shock; you can repeat it at home easily and watch the surprise on your guests’ faces when you serve it. A lot of American recipes for the spicy shrimp sauce are based on ketchup. I prefer this one, based on a jar of lovely tomatoes in the best juice you can buy – it gives such a sweet depth of flavour. But you could use a really good tin of tomatoes too – the Italian ones are very tasty. If you can lay hands on fresh horseradish, it will blow your mind. The sauce gets hotter and more tingly over a day or so as the horseradish develops its spice, so make it ahead and keep in the fridge. Anyone with an allotment will probably be able to give you a section of horseradish root on a regular basis if you ask them – it grows like a weed and takes over; allotmenteers are always glad to dig up a bit and get rid of it to willing recipients. Some grocers also have “fresh” roots – generally wrapped in plastic like a dirty cucumber. A good jar of cream of horseradish would do fine, but not the ones combined with mayonnaise or cream. Serves 6 Timings: 30 minutes
Drop the prawns into cold water, bring to the boil, simmer for 1 minute and leave for 5 minutes to poach fully before draining and running under cold water to stop cooking. Drain and keep in the fridge until ready to serve. You can add a little extra flavour by adding a glass of white wine, some peppercorns and some herbs to the cooking water, but that’s optional. Make the sauce: blend the tomatoes in their juice with the grated horseradish and the chopped chilli. Push through a sieve to remove the seeds and any stringy bits of root. Stir the sauce and add a generous splash of Worcester sauce, a good squeeze of lemon, the sugar and a couple of pinches of salt and black pepper. Stir, taste and adjust the seasoning – how much salt you need depends on the brand of tomatoes you used. Keep in a jar in the fridge for at least an hour before serving to chill and to develop the flavour. It will keep a couple of weeks in the fridge if you have made a lot and can be added to tomato soup or pasta sauces to give a little extra zing. Arrange the prawns over a little lettuce and spoon the sauce over. Your guests can squeeze a bit more lemon over if liked. A slice of good bread would help mop up the juice. 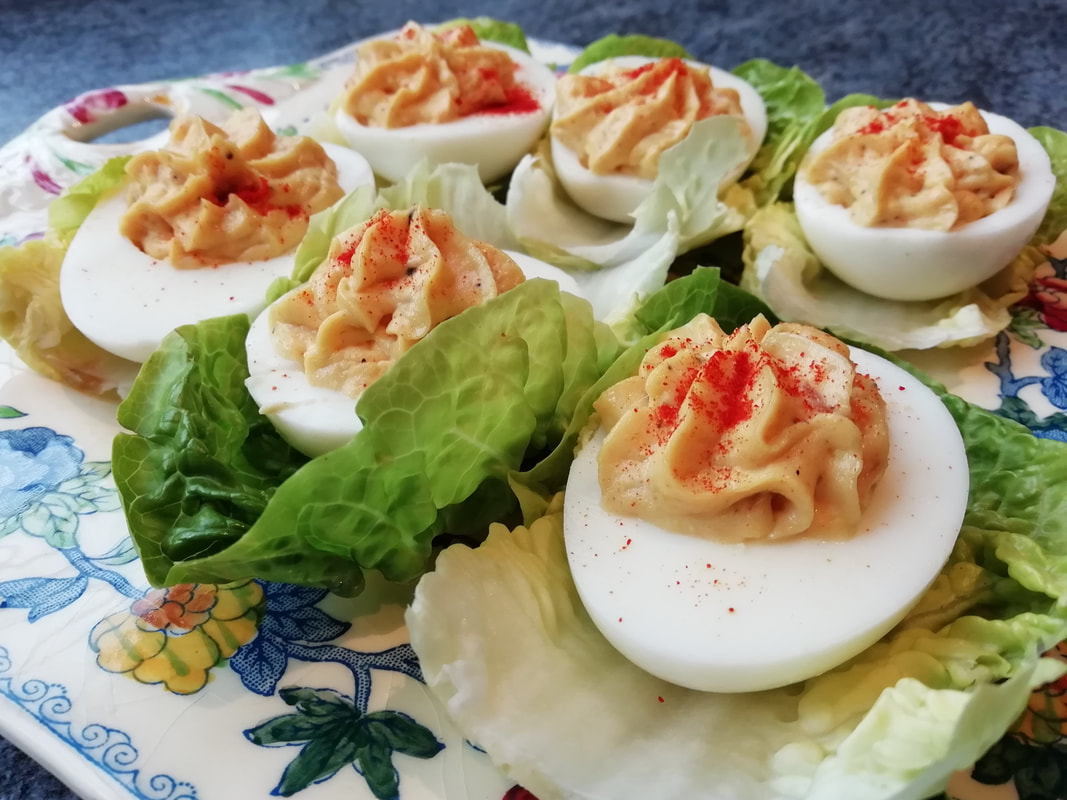 Halved eggs with a spicy filling, sitting on their own lettuce cups. Easy finger food. Devilled Eggs in Lettuce Cups
The perfect finger food, so simple. These are found on all buffet tables in Scandinavia. I generally allow one egg half per person, but you know the hungriness of your own family and friends best. For 6 people I have used 4 eggs in this recipe which gives you some leeway if an egg is a funny shape inside and won’t be stuffed, or to give someone second helpings. Use more eggs if your group of 6 is a hungry bunch and they’ll want two halves each. This recipe is from my Summer of Six menu, from Malmo to Malaga. Head over to the Summer Garden Party menus for lots more ideas what to feed your friends when you hold a party in the garden and you want something more adventurous than a barbeque. Serves 6 Timings: 50 minutes – 10 minutes to boil the eggs, 20 minutes to cool down, 20 minutes preparation
Hard boil your eggs: boil for about 10 minutes and then run them under cold water until they have cooled down a bit. Wash the lettuce and separate the leaves. In a small bowl mash the anchovy fillets with the back of a teaspoon into the mustard – you will get a lumpy creamy texture. Mix in the mayonnaise and add the butter to the bowl. Peel the eggs under running cold water – this helps get the shell off without sticking to the white. Halve the eggs top to bottom, being careful to keep the halved whites whole. To make the whites stand better you can cut a very thin sliver off the underside. Scoop out the yolks with a teaspoon and put them in the bowl with the other ingredients. Mix well. The remaining warmth of the yolks will just melt the butter into everything else and turn it into a creamy paste. Adjust the seasoning if needed, you might want a grind of pepper. Scoop the mixture into a piping bag, using a big star nozzle and fill each egg half with a generous portion. Place each egg half onto its own lettuce leaf cup and sprinkle a tiny dusting of paprika over. They’ll keep in the fridge covered for an hour. Serve as they are on their little lettuce plates. |
Some Changes - April 2022
Thanks to my friends and followers for your patience, and for your encouragement to start blogging again. Archives
April 2022
Categories
All
|
 RSS Feed
