|
Rich Chocolate Birthday Cake
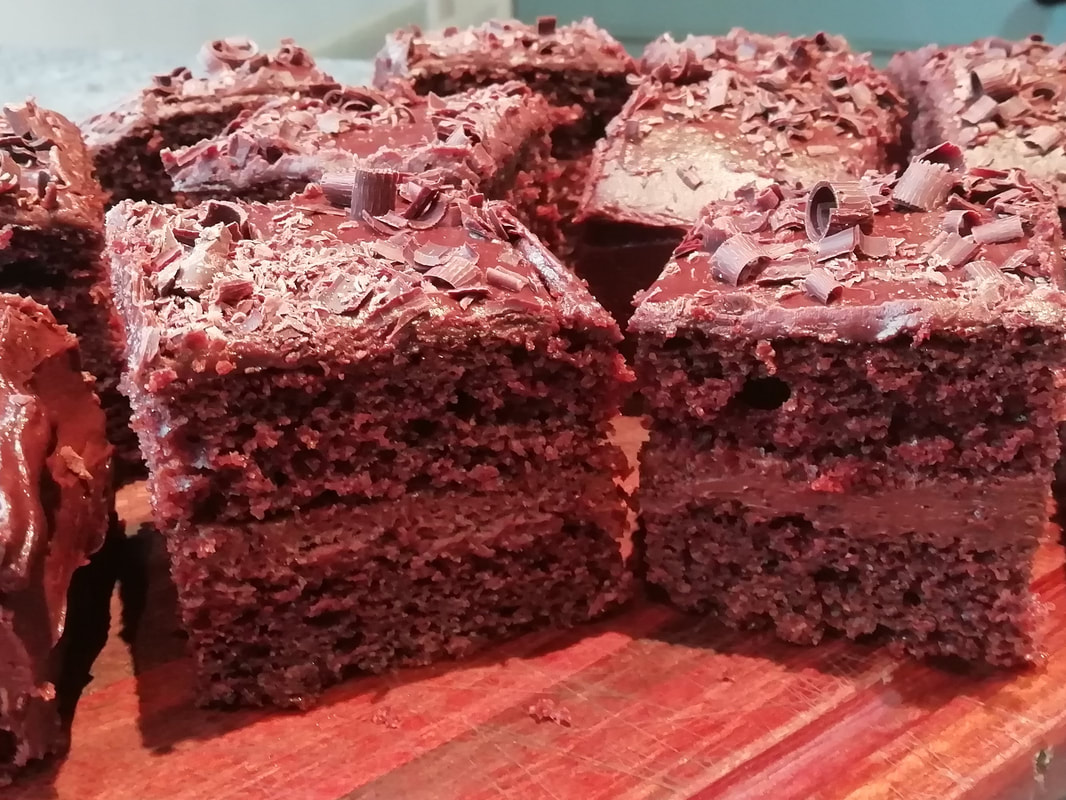
There are occasions in life when only a huge gloopy chocolate cake will do, and a special birthday is one of them. It’s our oldest member’s birthday in the Seniors Lunch Club this weekend, (98) and she is chocolate fiend anyway, so what else could it be? This recipe is again based on Pam Corbin’s Chocolate Cake from the River Cottage Handbook No. 8, Cakes. My Seniors Lunch group in particular owe a lot to Pam Corbin and her infallible recipes, many of which I have cooked several times over. This one is a classic. The addition of the ground almonds and the yoghurt/milk mixture to the usual eggs/butter/flour/sugar just makes it particularly rich and spongy. I iced my cake with a rich buttercream filling – but not the mousse icing recommended as I didn’t want to use uncooked egg yolks for my elderly group. I made a buttercream icing and used some fresh cream and some melted chocolate for extra gloopiness, and it was just right – fluffy and creamy but not too sweet. I kept the top simple with a straightforward water-based chocolate icing – makes it easier to transport around wrapped up in foil packets. As a tribute to our birthday girl we played “This is Your Life.” I had provided all the other members (there are 12 of us on the audio conference call) with a leading question, along with their newsletter, so they could ask her specific questions about her life to which I knew the answers – having consulted her daughter earlier on special events, talents, funny anecdotes and things to be avoided! She was born in 1923 in the North of England, brought up strictly, knew her own mind, trained to be a pediatric nurse, did war work in a Birmingham factory, was a medal-winning talented dancer, learned the piano but gave up the violin, had two daughters, had a brother in the Royal Navy who was sunk twice in the war but survived both. What a life! It’s a privilege to know her, and we’re looking forward to celebrating her next birthday in person round the table in our Neighbourhood Centre where we normally meet. No doubt it will be chocolate cake again next year. Rich Chocolate Cake – makes 16 portions
For the buttercream icing: 200g salted butter, 100g icing sugar, 100g dark chocolate melted, 100ml double cream, 20g cocoa powder, 1 tablespoon Camp Coffee Essence For the water-icing: 200g icing sugar, 20g cocoa powder, 1 tablespoon Camp Coffee Essence Chocolate curls to decorate Preheat the oven to 180°C and grease and line a 22 x22xcm baking tin Whisk the butter until fluffy, adding the sugar as you go. Put the cocoa powder and drinking chocolate powder in a glass and add a tablespoon of boiling water, mix to a paste. Add this to the butter/sugar, with the whisk running. Add the eggs one at a time, and a spoonful of the flour with each, then add the rest of the flour slowly. Beat in the yoghurt/milk with the final spoons of the flour with the whisk running, then add the ground almonds, slowly. Scrape the mixture into the tin and bake 45 minutes, until lightly browned and a skewer comes out clean. Cool in the tin for a few minutes then turn out onto a rack and leave to cool completely before slicing and icing. I just sliced it once through the equator to give two halves, which I sandwiched together with buttercream icing. Buttercream icing: beat the butter until creamy and getting fluffy. Add in the icing sugar (put a tea towel over the mixer as you do this to stop the whole kitchen getting covered in icing sugar wafting out) and the cocoa powder and the coffee essence. Melt the chocolate in a bowl over hot water, pour into the mixture with the whisk running and add the cream in. Keep whisking and you will get a light fluffy mix that holds together quite well. Use this to fill the middle of the cake and smooth it round the outsides too. Water icing: Mix the coffee essence with the icing sugar until you get the right consistency – not too thin. Add a little hot water if you need to. Ice the top of the cake with this and sprinkle with chocolate curls or other decorations of your choice. This cake will keep iced for a couple of days in a cool place. Stick a few candles in (but not 98 unless you want a serious conflagration) and enjoy!
0 Comments
Trio of “Quichelets” with Crunchy Seaweed
In 1991 I entered the Observer cooking competition. As far as I remember you had to generate a three-course menu from a list of provided ingredients and write about it. I was a finalist and along with five others, attended a venue in central London – I think it was Leith’s School of Food and Wine although I don’t remember seeing the famous Prue! We all cooked our meals in the school kitchen and served them to the judges – I’m very sorry, I don’t remember and didn’t record who they were. I was so very frightened, I hardly took anything in. We were given comments on our dishes, and the winner was chosen but the rest of us weren’t ranked - although I strongly suspect I came sixth! However, the experience inspired me to enter other competitions and I also became a finalist in the Sunday Times competition in 1992 which was held at the Turnberry Hotel. This recipe of three little quiches with different fillings accompanied by crispy deep-fried cabbage – otherwise known as seaweed - was my starter offering for the Observer competition. I liked it then and I like it now and quiches are a great and versatile offering for a gathering of friends, especially if they have mixed diets. Anyone but a vegan can eat at least some of these. If you want a vegan alternative, veganhuggs.com (no relation to my site) has some very good vegan pastry and quiche filling recipes. Makes 24 little quiches – 8 servings. Timings 90 minutes. For the pastry:
Fillings:
Egg Filling: 3 eggs beaten, 2 tablespoons double cream, salt & pepper Deep fried crunchy “seaweed”: Use a loose leafed cabbage – one of the spring greens or sweetheart cabbage, not a tight white or red one. Take four big outside leaves and clean them, de-rib them and shred into the thinnest shreds you can make - using a scissors or sharp knife. This will give you about 100g of shredded cabbage which is adequate for 8 portions. Make your pastry and let it chill. Place the flour and butter in your mixer with the pastry paddle, mix for about 1 minute until the texture is like fine breadcrumbs, then lower the speed and break the egg into the mixer. You might want to add another tablespoon of cold water – depends on how thirsty your flour is. If not using a mixer, rub the butter into the flour with your fingertips to the breadcrumb texture, then add the egg and water and mix carefully. Take the pastry out of the bowl, knead briefly to even out the dough, wrap up in beeswax paper (or cling film if you still use it) and keep in the fridge to chill while you make the fillings. Note, if you don’t chill the pastry, it can shrink in the oven – this doesn’t really matter if you expect it and plan for it, so go according to your own timings. Pre heat the oven to 180°C. Roll out the pastry to about the thickness of a 10p piece and cut circles with your pastry cutter to a little larger than the cups in a 12-cup bun tin. Grease the bun tin and place the pastry circles in the cups. If you have baking beans you can use them to keep the bottoms of the quiches from bubbling up. Place the empty pies in the oven for about 8 minutes to cook – this will help to keep the bottoms crisp. Remove the pies from the oven and let them cool. If the pastry has bubbled up, you can push it back flat with the back of a teaspoon. Now fill the cups – I liked to fill one line of 4 with one filling, then the next line of 4 with the next filling and so on, as that keeps it even, and you can make two 12-cup trays with this amount. Filling 1 – fry the bacon until crisp, remove and keep on kitchen paper. Fry the mushrooms in the fat from the bacon until cooked, with a sprinkle of dried thyme. Distribute evenly between the quichelets. Filling 2 – spread the mustard over the bottom of the quichelets, sprinkle grated cheddar, about a teaspoonful, then add 4-5 pieces of cut up sundried tomatoes and a sprinkle of chopped parsley. Filling 3 – fry the finely chopped onions in vegetable oil for about 30 minutes until caramelised (this is why I said start the fillings once you’ve got the pastry chilling) and golden brown. Chop the goat’s cheese slice into little pieces. Spoon a large teaspoon of gloopy onion into each quichelet and top with a couple of pieces of goat’s cheese. Turn up the heat on the oven to 200°C. Now beat up the eggs with the cream, salt and pepper. Using a soup ladle, portion out the eggy filling into each little quiche. You will drip a bit but it doesn’t matter. Bake the trays of quichelets in the oven for 15 minutes until puffed up and starting to go golden brown. Serve at room temperature – and they are best on the day you make them although they do keep in the fridge overnight and warm up quite well too. To fry the “seaweed” – put about 1cm of oil into a frying pan, heat up to sizzling, and put about a handful of shredded cabbage in at a time. The oil will fizz up and settle back – stir around a bit and take out onto kitchen paper after about 90 seconds. You will have crispy shredded seaweed, onto which you can sprinkle a little sea salt. Keep going until you use up all the cabbage you have shredded. Serve one of each type of quichelet on a plate with a small handful of crispy seaweed. They look very sweet and appealing. Chowder
Evocative, creamy – it feels like a holiday in California or Boston just thinking about this substantial seafood soup. There are so many recipes, the New England version which is mainly clams or the Pacific coast version which is more fishy. You can thicken the soup with potatoes or with a flour/milk mixture. I like to cook this soup for an easy weekend lunch – it’s tasty, filling but not too heavy, so you can go for a good walk with the family afterwards or have a board game if the weather’s bad, without your lunch making you drop off to sleep. I’m lucky enough to live near one of the UK’s best fishmongers (thanks, Evans of Didsbury!) so I can take my little containers down to the shop and ask for a handful of clams or mussels and a handful of fish pie mixture and get just what I want. But if you are reliant on a supermarket fish counter, don’t hesitate to ask, and don’t hesitate to substitute some types of fish for the others here. I prefer to save my smoked fish for a kedgeree rather than overpower the delicate fresh flavours but a robust smoked haddock chowder is also a classic so if you try it, let me know the recipe and I’ll use it on this page another time. Serves 4. Timings 30 minutes.
Wash the clams well, scrubbing if they need it. Discard any that are already open. Put them in a pan of cold water to cover them plus a centimetre, and the pinch of saffron. Bring to the boil. The clams will have opened. Strain the liquid into a bowl, through a fine sieve or one you have lined with muslin – you don’t want any of the possible bits of sand in your soup. Take the clams out of their shells, discard the shells. In a heavy pan, big enough for the whole soup (I use a Le Creuset casserole pan) fry the chopped shallots and leek for a few minutes until looking towards transparent and cooked. Add the liquid from the clams, and the potatoes. Simmer for about 15 minutes until the potatoes are starting to go really soft and losing their edges. Add the chopped fish, stir in, and keep at a low simmer for a minute or so as the fish cooks. Add the clams and the scallops if using and cook for another minute to cook the scallops. Season carefully – the liquid from the clams will have been quite salty. Add a good squeeze of lemon. Turn down the heat and add in the cream, stirring carefully and not letting the soup heat up again, you don’t want to curdle. Add the chopped fresh parsley and serve, maybe with another slice of lemon if people want to add their own. Fragrant and fortifying! Lamingtons
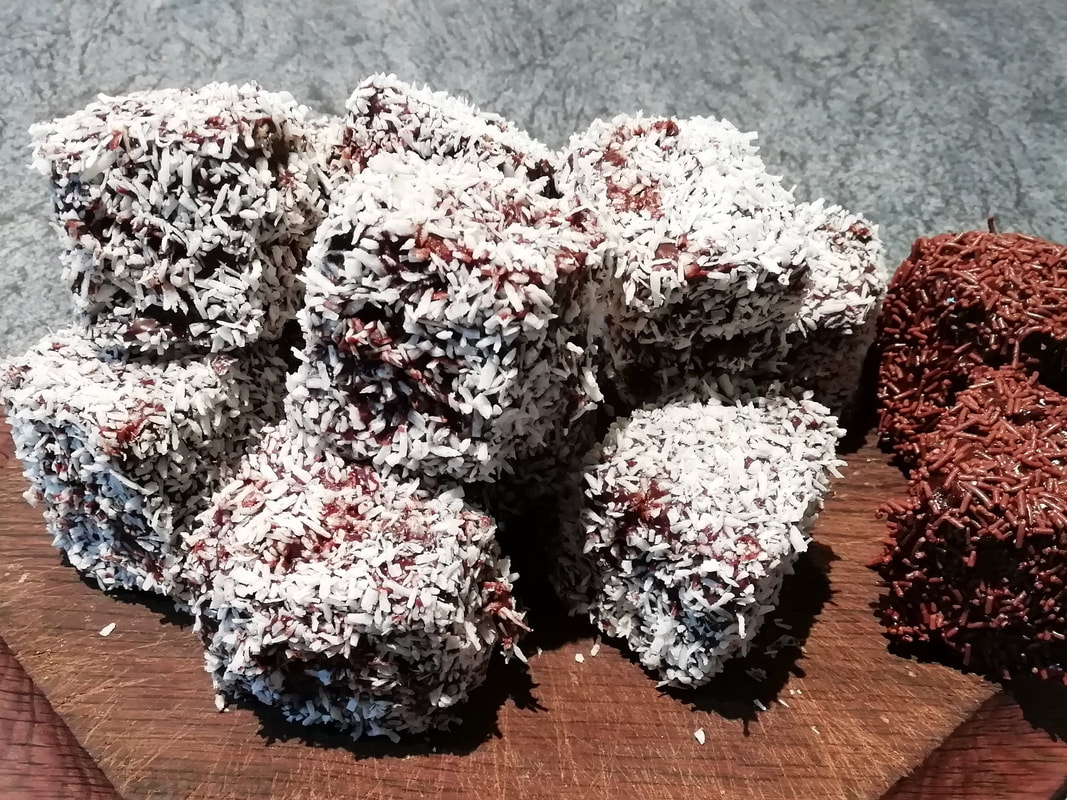
Australia Day! These little cubes of deliciousness are in tribute to our Aussie friends who celebrate their national day on 26th January. They’re named after a former Governor of one of the states, who presumably loved to eat them or maybe invented them. They are rich, chocolately, coconutty and really addictive. I’ve never seen them for sale in the UK but you can buy them in packs in the supermarket in Australia, and most bakeries have their fresh version. Some recipes add raspberry jam in the centre of each cube but it isn’t necessary so keep it simple. I’ve made them before, for my Seniors Lunch Club and have always had a nightmare coating a sponge cake in thick chocolate icing – the cake gets all crumby and starts to disintegrate. This year I used Kate Young’s recipe, from The Little Library Cookbook and adapted it a bit, which uses a much denser sponge that holds together better – Kate is Australian and knows about these things. Thanks, Kate, they came out great! (see Kate's blog on: http://thelittlelibrarycafe.com/) This isn’t a quick operation – the cake needs to cool down overnight (some recipes say freeze it to add to the stability) and it takes a long time to coat in icing and then roll in coconut – but you do get 25 pieces of rich cake and something very impressive and unusual. I made a choice of coatings – either coconut or chocolate sprinkles as there are some people who don’t like the chewy texture of desiccated coconut, or the way it gets in your teeth. We discussed all things Australian in our Seniors conference call, led by our Aussie volunteer. We started by making the Acknowledgement of Country, which pays respect to the original inhabitants, their ownership of the land and their connection to the environment. We asked how many islands there are (many!), about the animal life, we whistled the theme tune to Skippy and sang along to Waltzing Matilda. We listened to Olivia Newton John and Dame Edna. Many of the group have relatives there, making a new life in the sunshine. If we can’t travel these days, this was the next best thing! Sponge Cake: Makes 25 cubes – timings 20 minutes preparation, 1 hour cooking. Then overnight cooling and about 1 hour making the icing and decorating the squares.
For the icing:
Preheat the oven to 180°C and grease a 22x22cm baking tin, line it with greaseproof paper. Melt the butter while you measure out the flour, sugar, vanilla and yoghurt into your mixing bowl. Add the melted butter into the bowl and beat until it turns creamy, then add in the eggs one at a time with a spoonful of flour after each one. Add in the rest of the flour and mix briefly. You will end up with a thick creamy batter rather than a fluffy one. Pour into the tin and cover the top with foil. Bake 40 minutes, remove the foil and bake for another 15 minutes until cooked. It doesn’t rise very much, and it won’t look very brown. Leave to cool completely in the tin, and best if you leave it overnight, covered. For the icing: In a small bowl, add a tablespoon of milk to the cocoa powder, mix to a thick paste, adding more milk if needed. Heat the rest of the milk with the sugar in a pan and add the cocoa paste to it – this stops the cocoa powder clumping and having to be whisked in. Bring to simmering point. Put the solid chocolate in another bowl and pour the hot milk onto it, stirring to melt. You should get a thick gloopy chocolate liquid. It stays quite liquid as long as it is warm – when it starts to cool it will thicken of course, so if the next stage takes a while you can warm up the bowl of icing again with a brief blast in the microwave – only 20 seconds and a good stir will keep it liquid. Now lay out a shallow tray or wide bowl with some coconut in it. At the end of the row, have a wire rack with either paper or another tray under it – the chocolate icing will drip off the cake and there will be quite a mess. Cut the cake using a bread knife into even squares – I got 5 rows across and 5 down so I had 25 squares, of course it depends on what cake tin you use. The squares do not want to be too big, as the cake is rich and so is the icing. Using a fork and spoon, dip a square into the icing and smooth the icing over the sides, not letting too much cling but making sure each surface is covered. Drop the square into the coconut and roll it around to cover all the sides, pressing the desiccated coconut onto the chocolate icing. Then put the square onto the rack at the end. Keep on going – it’s easiest if you have one person doing the dipping and another doing the coconut but you can do it all yourself, it just takes a while. Keep on until all 25 are covered. Leave the squares on the rack to cool down and set – takes an hour or so, then put into a tin. Now impress your friends and relatives! Prairie Breakfast
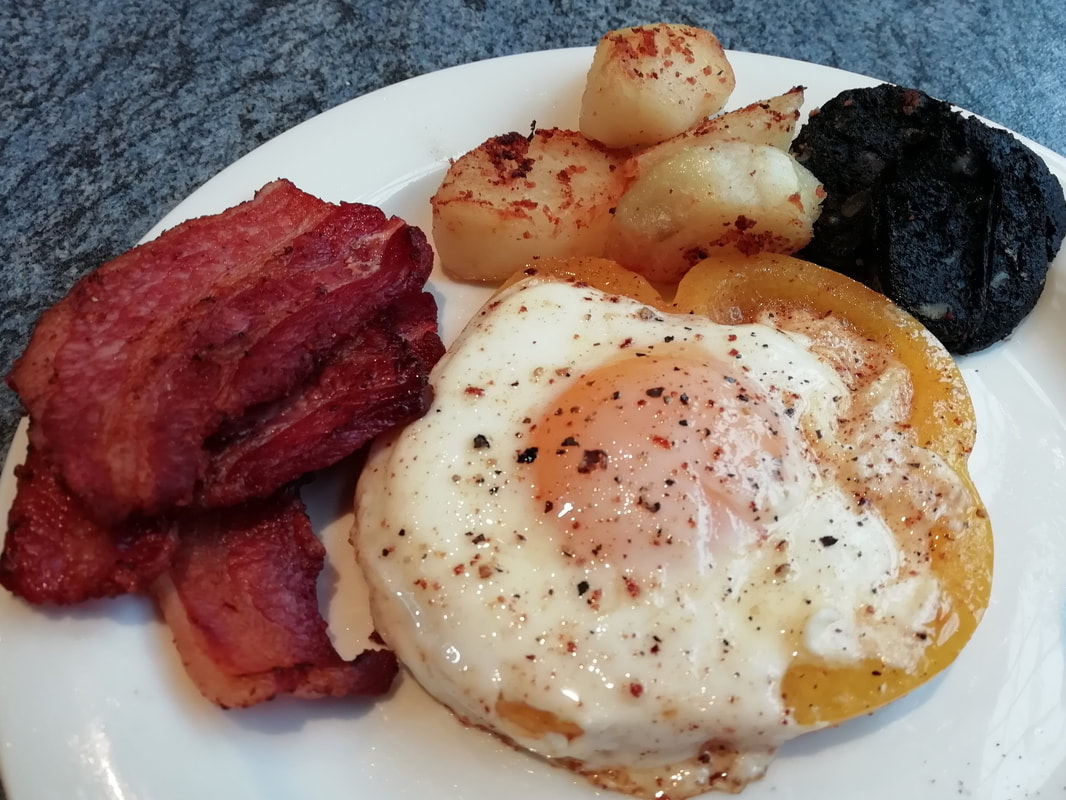
At the other side of the world, on the Sunshine Coast of British Columbia, looking over the sound to Vancouver Island, is the arty little town of Lund. The Lund Seaside Inn perches on an island in the harbour. You can sit on the rocks, the Pacific breathing slow and deep around you, watching seals, herons, gulls, even a whale if you’re lucky. The owners, Gord and MaryAnne, are the perfect hosts, and boy, can they cook! They used to run educational expeditions for youngsters in central Canada and have all sorts of practical tips for cooking great meals under canvas. This recipe moved with them from camping to inn-keeping. Gord’s cooked breakfast is one of the most satisfying culinary experiences I have had in a lifetime of pursuing fabulous food around the world; I learned a lot and would love to go back and follow him around learning even more. This is Gord’s recipe for a Prairie Breakfast by which he means easy to prepare when camping with a group. You can cook the potatoes the night before and then everything is done in one pan, quite quickly. He used a slice of Canadian smoked salmon instead of bacon or black pudding – use whatever you like. Canadian salmon is hot smoked, rather than transparently cold-smoked as we are used to, and it is sweet glazed, so using maple-cured bacon gives a similar sweet taste which complements the peppers. Serves 4 – Timing 10 minutes if you are using cooked potatoes.
Slice the pepper into thin rounds, removing the seeds and membranes but keeping the rounds intact. You need as many rounds as you are cooking eggs. Fry the potatoes in a large frying pan in some bacon fat for a few minutes until crispy and golden, with the bacon and black pudding. When they are all cooked, move them to the side of the pan to make room. Add the pepper slices to the pan and cook until softened, just a few minutes. Break an egg into the centre of each round of pepper and cook for a few minutes until done how you like them – spooning some hot fat over each egg to set the white, leaving the yolk runny. Serve, with some toast if your campfire can run to it. Chinese pancakes with Crispy Mushrooms (vegan)
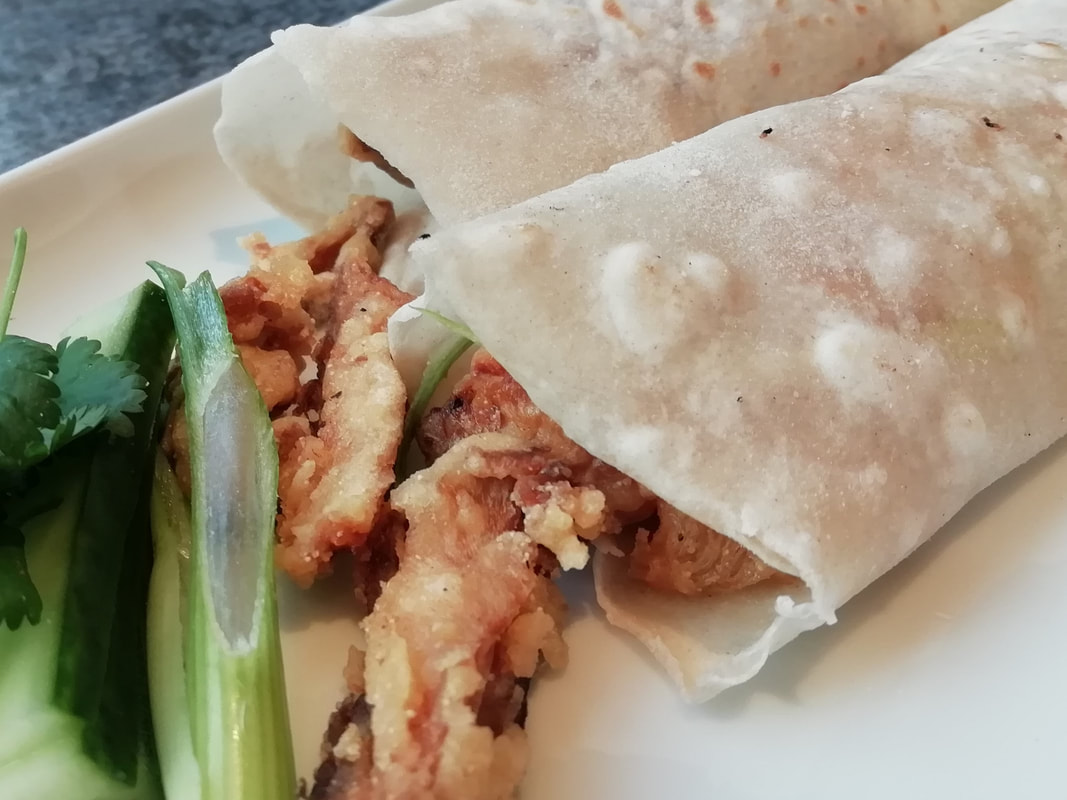
Who doesn’t love pancakes with crispy duck? I recently learned that the Chinese never eat crispy duck at home – it's best done at a restaurant. But they do make the pancakes at home and then stuff them with all sorts of delicious things. They really do make a wonderful lunch, and very attractive to kids and teenagers as they can build their own selection of flavours. The thin wheat pancakes can be used with meat, vegetables, scrambled egg, any sort of stir fry. The best filling is slightly crispy, tangy and salty, to give that burst of flavour as you bite through the soft wrapping. Here I’ve made a deep-fried mushroom filling – which goes perfectly with the traditional accompaniments for the crispy duck, so we can keep it easy – spring onions, cucumber and plum sauce. The pancakes are also a superb way of using up cold leftover meat – either just as it is, cut fine, or covered in a simple batter and fried up. They freeze well too, so it’s easy to make a double batch and use half later for a simple lunch. If you read the recipe and wonder why you make them in pairs: time and effort saving – you roll once for two pancakes, and also by doing this you get a steamed inside for the pocket formed from the two pancakes, which is what cooks the flour. Ingenious. Trying to repeat the delicious pancakes we ate in Hong Kong, I used Maggie’s recipe on omnivorescookbook.com as the basis - the mixture of hot and cold water dough seemed to give a good result. Thanks, Maggie! The only thing is, you do get the kitchen full of hot vapour as the frying pan needs to be quite hot – never mind, it’s nice to be warm while you’re cooking! Thin wheat pancakes Makes about 40 pancakes, which is about 8 servings. Timings – about 90 minutes if you are making the whole batch from scratch.
Pour the boiling water into one bowl and mix thoroughly – you will get a cooked, sticky dough. Turn out onto a work surface. Pour the cold water into the other bowl of flour and mix thoroughly – you will get a much harder dough. Turn the cold water-dough onto the hot-water dough and knead the two together for about 5 minutes – this is really hard work as the dough is tough and springy. Keep going, turning, kneading, pulling – and in about 5 minutes you will have a smooth and elastic dough. Wrap it up and let it rest in the fridge for 30 minutes. In this time, assemble your fillings – chop the vegetables or meat into small pieces, get your spices together, whatever you are doing. Take the dough out and knead again just briefly, put it back in the fridge for another 10 minutes. You could, in this interval, deep fry your mushrooms or pieces of meat and keep them warm in an oven. When ready to cook the pancakes, roll half the dough into a long sausage shape about 40cm long. Keep the other half wrapped in the fridge still. Take a knife and cut your sausage of dough into 20 equal pieces, each will be a squat cylinder. Now work with two at a time, keeping the rest under a tea towel to avoid drying them out. Take a piece of dough and flatten it with your thumb to a disc about 3cm across – brush this with oil. Take the next piece of dough and flatten it into a disc the same size and put both discs together, with the oiled side in between. Keeping the two pieces of dough together, put them on a work surface and use your rolling pin to roll them out to pancake sized flat pieces – about 12cm across if you can. It is quite hard work as the dough is resistant, but it won’t spring back once you’ve got it to the right size. Place your double pancake under a tea towel to keep moist. Keep on doing this until you’ve done all 20 pieces, so you now have 10 double pancakes. Heat a medium sized frying pan without oil - it does need to be quite hot. Place one pancake into the pan and watch as the air between the layers puffs up into bubbles, and you can see how the inside pocket is all steamy. It takes less than a minute and you don’t want the cooked side to be anything more than very lightly brown. Flip the pancake over and cook the other side, you just want the texture to be dried, not griddled. Flip the pancake out of the pan onto a tea towel and peel apart the layers – you need to do this while the pancake is hot and steamy or you won’t get them apart. You should have two circles of thin wheat dough pancakes. Cover them in the tea towel to keep warm and not dry out while you cook the rest of the batch. Once cooked, you can let them cool, wrap them in greaseproof paper and a freezer bag, and pop into the freezer for later – steam to de-frost, they don’t need more cooking. Cooled pancakes can be kept for a couple of days, ready to re-heat. Of course, they are really best eaten fresh, so take them to the table and let the hungry horde assemble their own stuffed rolls. Crispy mushrooms
Clean and slice up the mushrooms. Slide half of the slices into the batter and mix with your fingers while you heat up oil for the frying – you don’t need a deep fryer, just 1cm of oil in a deep frying pan will do. Drop the coated mushrooms into the hot oil and fry until cooked and golden – about 4 minutes, turning now and then. Scoop out that batch onto kitchen paper and cook the remaining half. As with all deep frying, you need to cook in batches to avoid the oil temperature dropping too much when you put it all in, as you’d then get a soggy mess instead of nice crisp batter. Bring the deep-fried crispy mushrooms to the table along with some sliced spring onions, sliced cucumber and some hoi sin and plum sauce. Roll ‘em up and enjoy! Chocolate Cup Cakes
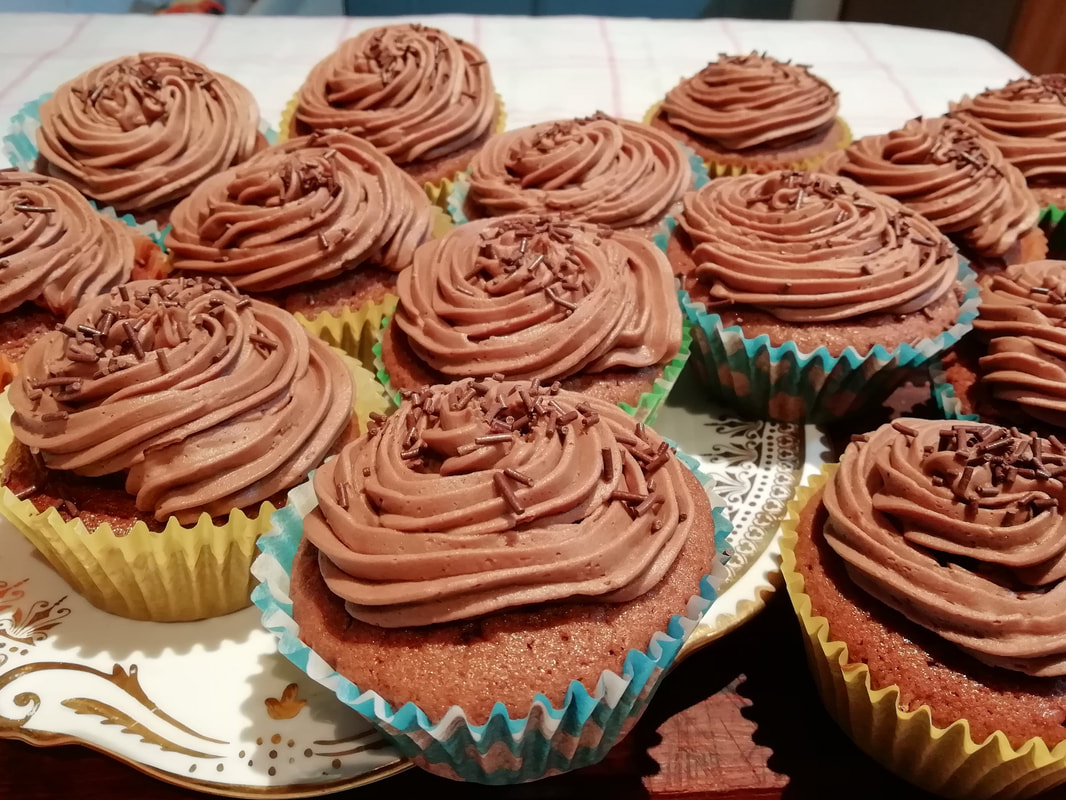
Easy peasy: these are the standard fare of cake sales, cooking lessons, family baking for lunch boxes and for my Seniors Lunch Club group delivery. They’re bouncy, fluffy and portion sized. You can flavour them as you like – vanilla, chocolate, coffee. Watch out if you want citrus flavours – adding lemon juice to the mixture tends to inhibit the rise, so add citrus by using grated rind in the mixture and making the icing with the strongly flavoured juice. You can make them slightly richer by adding buttercream icing, or plainer by using water icing. Decorate with chocolate curls or sprinkles as you desire, let your creativity and imagination run free! In the Seniors Lunch Group, our discussion this week was “What Have I got to be Grateful For?” which was a theme originally chosen by a member who is sadly no longer with us – but who was an example of interest, flair and enjoyment in life right up to her last days in her late 90s. An inspiration. We discussed our gratitude for family, friends and helpers. One member told us a story about adopting her daughter – she was so grateful to the child’s biological mother for being willing to give her up to a better home. We loved remembering dance competitions, valuing your own talent for drawing, being in a choir. The basic blessings which are so often taken for granted – the telephone, modern communications, classical music on the radio, central heating, driving a car. The world of work and study: being trained in a skill, being part of a team, doing a good job and gaining self-respect. Skills and sport – playing tennis and golf, being a soccer referee and working with blind children to help them play using a ball with a bell in it! What a set of varied and valued experiences we had to look back on with thankfulness and joy. Uplifting as ever. Makes 18 cup cakes. Timings – 10 minutes preparation, 20 minutes baking, time to cool down and 20 minutes to ice and decorate.
For the icing: 100g butter, quite soft, 200g icing sugar, sieved, 30g cocoa powder, 2 teaspoons coffee powder mixed with 2 teaspoons warm water, or some coffee essence. Pre heat the oven to 190°C Beat the butter with the sugar until light and fluffy and all beaten in together. Add the eggs one at a time along with a spoonful of the flour each time. Add the rest of the flour and beat in the yoghurt. The yoghurt is not 100% necessary – the buns will be perfectly nice without it – but I find that cupcakes can be a little dry because of their small volume and adding a little yoghurt or cream to the mixture just makes them that little bit softer. Spoon the mixture into cupcake papers and bake for 20 minutes -check after 15 minutes and maybe turn the tray around. I prefer to bake one tray of these at a time to avoid switching levels in the oven, and the mixture won’t hurt to stand while you bake the first batch. Put the cupcakes on a wire rack to cool down before you decorate and ice them. To make the icing, just beat the butter until fluffy (I find a hand mixer is more efficient if you have a choice as the whisk of the big mixer doesn’t get into all the corners of the bowl and you end up with some butter smeared round the edge that hasn’t been reached) and add the icing sugar spoon by spoon and then the coffee essence – this is optional but does give a lovely mild coffee-contrast to the chocolate flavour. Spoon the icing mixture into a piping bag with a large star nozzle and pipe round each bun, sprinkle with chocolate shavings or sprinkles if you like. I couldn’t honestly say the cup cakes are as uplifting as my Seniors group high spirits, but they make you feel good too, in a different way! Enjoy. Marmalade
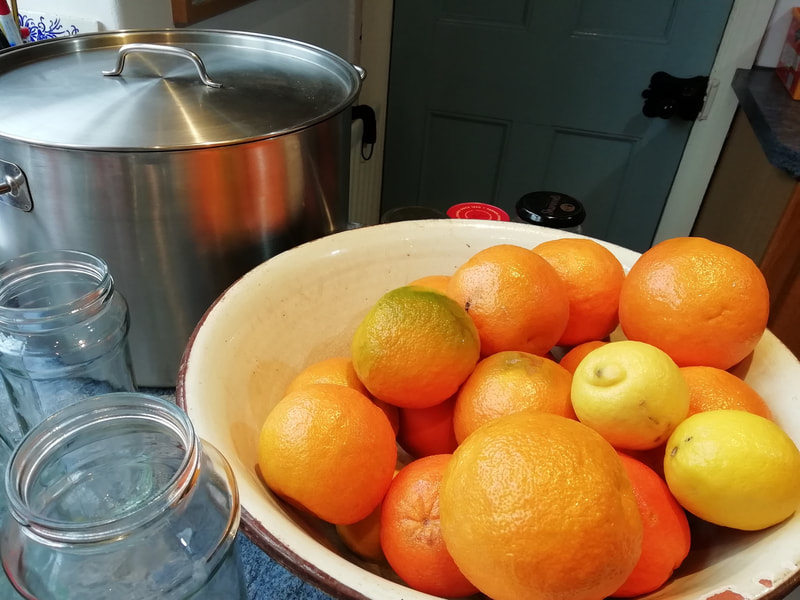
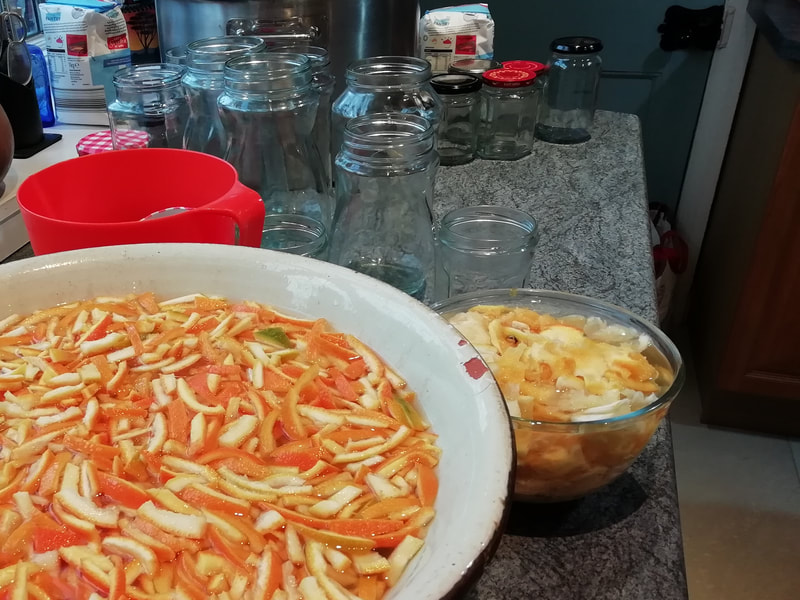
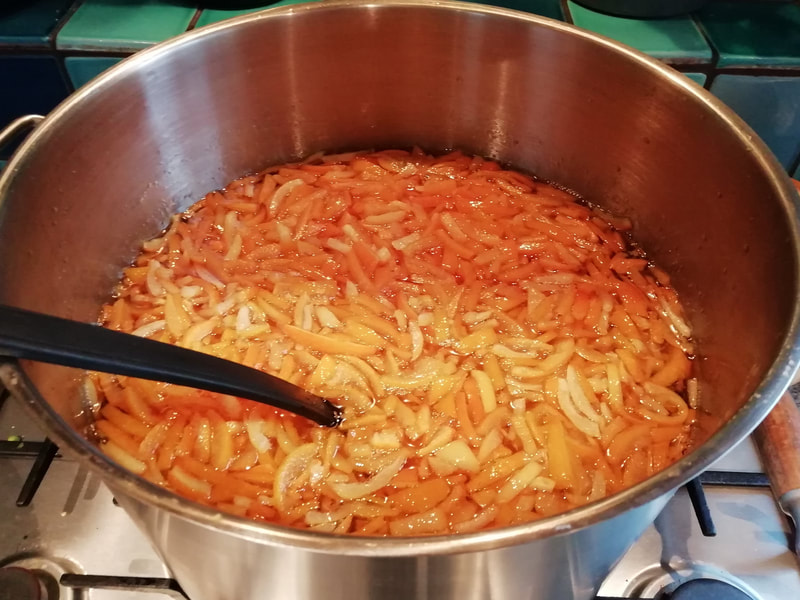
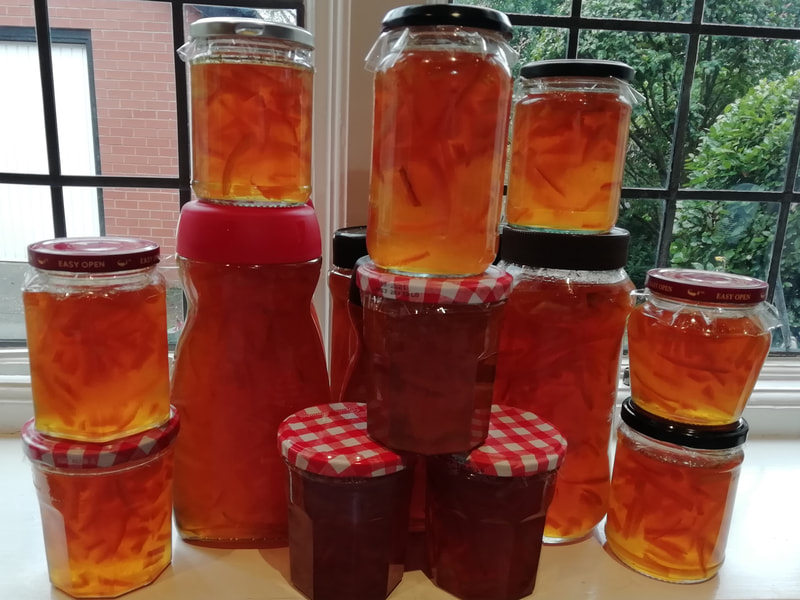
This is a very long post, but I hope you find it worth it - I wanted to give all the details of the method as I know some people find it quite daunting. If you make it, please let me know how it goes. My Mum was a veteran marmalade maker and used the jars of glowing goodness nearly as currency within the family. She’d take a jar or two along to every family occasion as gifts, and you knew how high in her favour you were if you got more than one. She strongly believed in the health properties of marmalade - the bitterness stimulates your guts when eaten first thing in the morning and keeps you regular (is the theory). Of course, marmalade appeals to the thrifty Scot also, being made of the whole fruit, nothing wasted, even the pips. When travelling, she usually took a pot with her, not trusting the little plastic packs you get in hotels, and even when she and my Dad got older and spent more time in hospitals than hotels, they packed the marmalade with them. So for me, this is a real taste of home. She usually made at least two huge batches per year, and January in our house was scented with the bitter tang of boiling Seville oranges. It is more complicated than jam to make, but it is so very worth it. Instead of a recipe with actual weights, I’m giving proportions here – you might be a marmalade fiend and wish to make a whole year’s supply or you might be a marmalade take-it-or-leave-it person but wish to make a few gifts for family and friends. Either way, put a weekend aside in January when the Seville oranges come into the shops and dedicate it, you won’t have much energy for a lot of socialising. And it’s a two day job – about half a day’s work on each day. Your actual production quantity is probably limited by the size of your largest pan – if you don’t have a huge pan, ask around your friends, someone might have a preserves pan – you do need a lot of space for the mixture to boil up. I’m using both metric and imperial measures here, as that’s the way my recipe is written. I don’t think it matters which you use but thinking about pounds and pints brings back my childhood for me. Using the following proportions: 450g (1 lb in my Mum’s recipe) of Seville oranges with 1 sweet orange and 1 lemon. That's picture 1 above. I used about 2.5kg of Seville oranges (11 fruit) with 5 large sweet oranges and 5 lemons and ended up with 4kg fruit. Unwaxed fruit if you can get it, but you can’t always. Weigh the fruit you have and record it. You will later need 1 litre of water per 450g of fruit. This made 6 big coffee jars and 11 smaller jam jars full – and this lasts me at least 2 years with a lot given away as presents. Wash the fruit well, scrubbing with detergent – bio is best! The reason for this is that citrus fruits, along with grapes, are the most sprayed fruits you can buy, so they need to be very well washed, and sometimes there is wax on the skin. Halve the fruits and squeeze out the juice and pips. Keep the pips separate in a bowl along with any pulp that comes out with them. Clean up the fruit halves, scraping out the stringy bits and some of the white pith – you can use a spoon to dig into the skin and tear out the pith. Chop up the fruit skins into whatever size strips of peel you like in your marmalade, I like it quite thin. Takes quite some time but really is best done by hand not in a machine. I tried a food processor one year and got tiny bits of peel that weren’t quite right and a lot of mush. Don’t worry too much about taking away all the white pith, it will turn clear and candied by the final stages. Put some water in the bowl with the pips – it will gel quite quickly due to the pectin in the pips, which is what you want. Add enough water to allow the pips to soak. Add the rest of the water (calculated above as 2 pints per lb of fruit) to the peel and the juice in your largest bowl. Let both bowls soak overnight. Picture 2 above. Next day, boil the stones for an hour – watch that the liquid is not too thick and catches on the pan and starts to burn – add enough water now and then to stop this happening. When boiled, strain the mixture and scrape it through the sieve to get out all the gelling pectin, it will be quite thick and need pressing through the sieve. Boil the peel/juice/water mixture until the peel is soft, about ½ - ¾ hour. You can do this at the same time as boiling the stones. While these are boiling, you can sterilise your jars – I fill them all with boiling water, let it cool a bit, empty out and then keep the jars upside down in a warm oven – this allows them to dry out and keeps them warm so they don’t crack when you fill them with hot marmalade later on. Measure how much liquid you now have. Add the pectin gel from the stone to the rest, and now add 1kg of sugar per litre of liquid (1 lb per pint, for Mum). Bring to a rolling boil and up to setting point. This can take over an hour. You need to keep an eye on it and keep stirring if you don’t have quite a big enough pan to let the sugary mixture rise up with its boil, to stop it boiling over. Picture 3 above. Setting point is best measured with a jam thermometer and when it hits 104.5°C but you can use any other method you find OK. I have found that the cool saucer/wrinkly jam method is not very reliable for a low pectin jam like marmalade and on at least one occasion I have had to de-jar all my marmalade and boil it all again another day after the mixture did not set even when it cooled. Once setting point is reached, let the pan of marmalade cool for at least 15 minutes before jarring – this helps to keep the peel distributed through the jar and stop it all rising to the top. Note, it might take longer to cool to this point if you are making industrial quantities – just keep looking as it cools and when the peel is starting to sink down, then you can start to jar it. That's picture 4 above, my whole production. Put into sterilised jars and use greaseproof paper tops and jam tops under the jar lids to help keep the marmalade from drying out over time. This can keep up to 5 years (from personal experience!) and does get better over the year. Mushrooms a la Grecque (vegan)
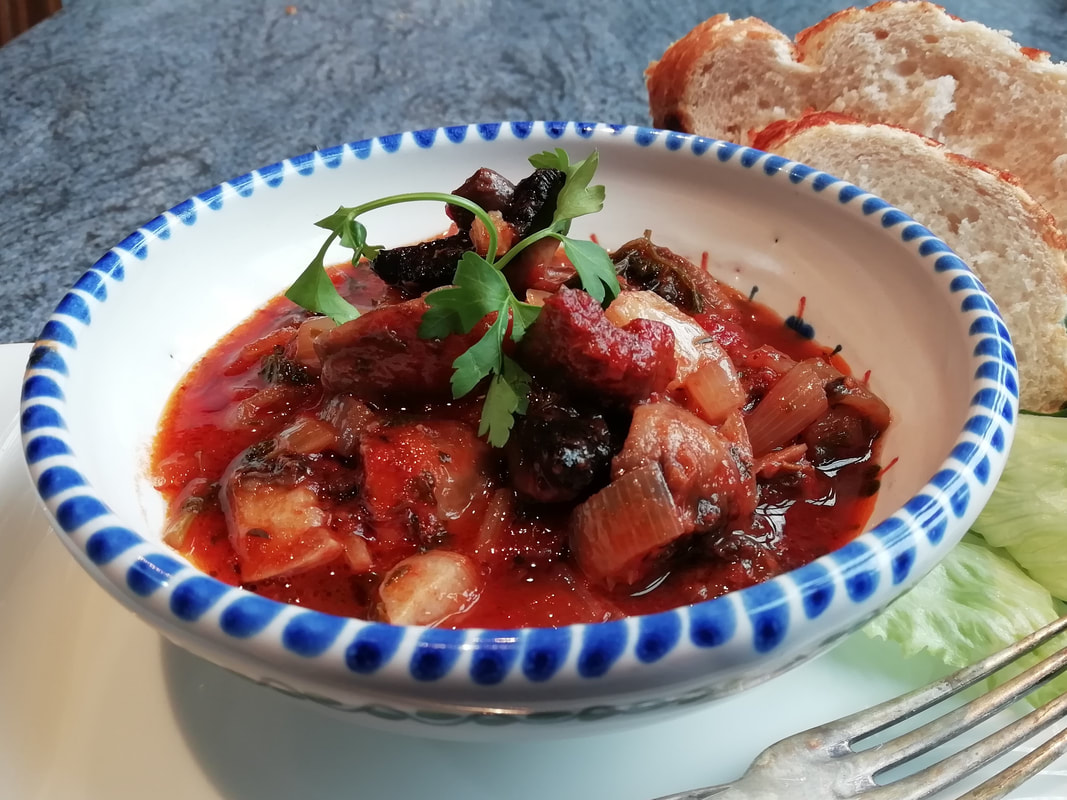
Cold mushrooms? Like those little pots you sometimes get in the deli? A bit suspect? Texture like flannel? Not at all, think again! This is how it goes…. mushrooms in a rich tomato sauce, scented with herbs and garlic; a back-note of spice and salt. Dip your bread into the sauce, oily and fragrant. Take a mushroom on your fork – tender but a subtle hint of resistance, almost meaty as you chew. Take another, easy to eat, heading eagerly down your throat. Oh, they’re all gone…better make a bigger batch for tomorrow. Simple to make ahead, to use as part of a salad spread with some cold meats, green salad, cheese, good bread. I’ve found that even mushroom-suspecting kids like these, given the chance. I think it’s the tomato sauce that does it, slightly sweet, slightly sour, slightly salty. And use small button mushrooms – the bigger open ones just aren’t right. You can also use this as a starter, with good bread and a rocket salad, but if it’s all you’re serving you’d need to be sure you don’t have any outright mushroom-refusers. Serves 6 as part of a mixed salad table, and leftovers can be brought out for another day. Timings – 30 minutes preparation, 30 minutes cooking, then keep cold until using.
Fry the onions gently in the olive oil, not letting them brown. It will take about 15 minutes to get them to the transparent oily stage. Add the chopped garlic and the dried herbs. Peel or clean the mushrooms, and cut up, depending on their size. Keep smaller ones whole, halve larger ones. Add to the onion mixture and stir around, frying gently for 2-3 minutes until coated with oil and turning soft. Add the tomatoes and their juice to the pan, then the red wine and the tomato puree. Stir well and adjust the seasoning. Add the fresh herbs. Cook over a low heat, but keep it bubbling, for about half an hour, until the liquid is markedly reduced. Taste seasoning again, adding more basil at this stage if you like it. Cool and keep in a closed container until needed. The taste is best if you let it warm up to room temperature before serving, so take it out of the fridge half an hour before eating if you can. Genoese Sponge Cake
This is THE classic recipe, if you only make one cake, let this one be it. Forget your (rather stodgy) Victoria Sponge and your (limited appeal) fruit cakes. The Genoese sponge is nearly fatless, light, bouncy, easy and can be flavoured in just about any way. My Mum made one of these about every three days, filled it with raspberry jam, dusted it with icing sugar and served it with a cup of tea when we came home from school. Yes, you can criticise, full of sugar. But have you seen the 1960s cake tins? They are about 1/3 the depth of ours. I suspect Mum’s recipe was 2 eggs, 100g of sugar and flour, and a tiny pat of melted butter – and that made two thin layers, which were sandwiched together with home made jam and lasted 3 days between 3 hungry tea-eaters. It’s not such a sin, is it? For birthdays she’d top it with buttercream icing, and on really special occasions she’d flavour the whole thing with chocolate. Once you’ve made three, you can just about make it in your sleep, it’s so tolerant and easy. I made this example for my Seniors Lunch Club, and I’m afraid it isn’t my most photogenic attempt at cakes. I used yellow colour in the icing to be cheerful and spring like, and it is, isn’t it? If you like your cheerfulness a rather nuclear shade of yellow, this is the icing for you. It’s simply filled with jam and iced with water icing – I felt we needed something quite simple after Christmas. For our first conference call after the break, my Seniors Lunch Club played the game: “Room 101”. Each member chose some items/people/attributes of modern life they wished to consign to oblivion and then defended their choice from the rest of the group. Previously one of our volunteers has consistently done away with coriander – we didn’t allow her to choose that again this time. Other choices of outlawing little dogs or wasps were also dismissed. We had an utterly hilarious discussion and never made it to the quiz, which normally takes us the last 20 minutes of our time together. We banned “inappropriate use of mobile phones” - ie. People talking on their phones while talking to you, or using them in concerts, “queue jumpers”, “covid”, “junk mail”, “really hot curry”, “too small writing on forms you have to fill in” and “music in restaurants”. We allowed a reprieve for Nicola Sturgeon, chicken Korma, DVD catalogues, accents on TV. Next week our theme is “What Have I Got to be Grateful For?” which we usually have the week after a Room 101 session – as a positive antidote to the negative vibes! Genoese Sponge – makes 16 portions. Timings – 15 minutes preparation, 25 minutes cooking, 1 hour to cool down, and 15 minutes to fill and ice.
Pre heat your oven to 180°C. In your mixer, beat the eggs and sugar until fluffy – takes about 5 minutes. At the same time melt the butter in a small pan – then take it off the heat - and weigh out and sieve the flour. Grease and line a cake tin – for this amount I use a 22cm square tin, which makes a cake that is also easy to portion out. When the eggs/sugar mix is beaten up, add the flour gradually, beating on a lower speed. Add the vanilla essence if using that rather than vanilla sugar. Spoon the butter on top and mix up the whole thing gently with a metal spoon – this keeps the air in the mix better than the rather coarser effect of a wooden spoon. Scoop the batter into the cake tin and place in the oven for about 20 minutes until the cake is risen, golden on top and springy to the touch and a skewer comes out clean. Take it out, and leave to cool on a wire rack, then turn it out of the tin, peel off the paper, turn right way up again and leave to cool completely. At this stage, you can wrap it well in greaseproof paper and freeze it if you like. Slice the cake through the equator carefully with a bread knife and fill with jam or with buttercream if you want something richer. Top with plain water icing, or dust with icing sugar. Eat within 2 days. You won’t have a problem with that. |
Some Changes - April 2022
Thanks to my friends and followers for your patience, and for your encouragement to start blogging again. Archives
April 2022
Categories
All
|



 RSS Feed
