|
Lemon Meringue Tartlets
Crisp almondy pastry, oozing lemony filling, soft sweet meringue – these little tarts are really delicious and a superb treat. Easy to make too. Their one disadvantage is that they’re a bit squishy to transport, so less suited to a lunch box than some of the more robust cakes. I made them for my seniors lunch group and had to wrap each one very carefully in silver foil for delivery. They can be eaten cold or warmed up for a real winter evening luxurious pud. This week’s theme with the lunch club group was Advent, but it seems that most families in Britain didn’t really celebrate Advent very much before the 1980s, so there were few reminiscences from their own childhoods. They mainly remember buying advent calendars for their own children and grandchildren. We wondered at what age do you stop buying advent calendars for your adult offspring? One of our volunteers was wrapping up a big advent set, complete with chocolate in small fabric pockets for her 22-year-old daughter living in London. Her mother felt that at this season, any small gesture of family love and unity would be welcome, and I’m sure she’s right. We were united however, in thinking that the advent calendars with wine or beer & scratchings didn’t really reflect the spirit of the season! These little lemon meringue tarts were very popular with the group. Made this way, as individual tartlets rather than one big pie, would be a good way of contributing to a Covid-secure celebration. Makes 24 little tartlets. Timings - 1 hour.
Pre heat the oven to 180°C. In your mixer using the pastry paddle, mix the flour, butter and ground almonds to a breadcrumb texture – or do this in a bowl rubbing in the fat with your fingertips. Mix in the icing sugar and then mix in the whole egg. This should bring the pastry together into a soft ball. If it needs a little water, then use just a teaspoon at a time until you get the right consistency. Roll it into a ball, knead very quickly just to even out the texture, and wrap it in cling film. At this stage you can leave it in the fridge for an hour or so, but you don’t need to chill this pastry before cooking. Grease two 12-cup pie tins, roll out the pastry and cut rounds to fit the pie cups. Place a few baking beans or dried beans in each little pastry round to keep the bottoms flat and bake blind for 15 minutes to give you a very crisp pastry case. While they are baking, make the meringue. In your clean and washed mixer bowl, whisk the egg whites until stiff and then tip in the sugar and keep whisking – you want it forming “stiff peaks.” Scoop it into an icing bag with a wide star nozzle. When the pastry cases are baked, bring them out and carefully remove all the baking beans. (And I do mean carefully, using a teaspoon and checking that you have got them all, they have a tendency to embed slightly in the pastry and it would be a disaster to leave one.) Fill each pastry case with a dessert spoon of lemon curd. Top each one with a swirl of meringue piped generously. I found it used up nearly exactly the amount of meringue but if you have any left over you can always make tiny little meringues just for decoration or treats. Bake in the oven for about 20 minutes but check to see how brown they are getting. If you have both trays in the same oven you might want to change their positions after 10 minutes to get an even brown. Take out of the oven and get the tarts out of their tart tins as quickly as you can, as if you leave them the curd will set like glue and they’ll stick in. Eat within a couple of days, although the pastry does stay nice and crisp.
0 Comments
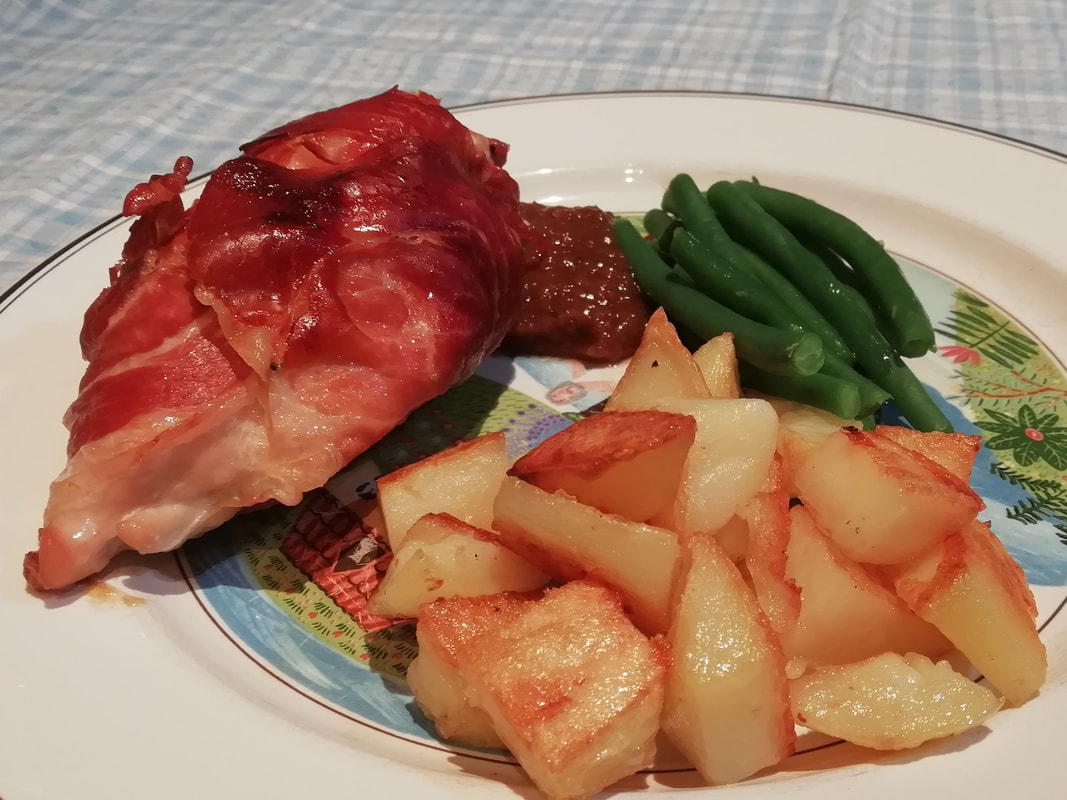
Prosciutto-Wrapped Chicken Breast on a bed of spiced apricots, with Crispy Parmentier Potatoes
This was a competition recipe, a long time ago. I entered the Observer Cookery Competition for which one had to come up with a menu from a list of ingredients. The top six entrants were then invited to come and cook their food at what I believe was the Leith School of Cookery – although merciful forgetfulness has descended and I don’t remember a lot about the whole affair or who came to judge it, probably not the great Prue herself. I think I came last out of the six finalists, although we weren’t given a formal grade. However that may be, this recipe is one that seemed to impress. It’s easy and tasty and goes down well for a relaxed family dinner. You can put the world to rights while it’s cooking itself in the oven. Serves 6 Timings: 20 minutes preparation, 50 minutes in the oven.
Pour the hot black tea onto the apricots and leave to soak while you prepare the other parts of the meal. (You can do this in the morning if you have tea left in the tea pot, they won’t harm if they stand all day in the tea). Pre heat the oven to 210°C and put some fat in a roasting tray in the oven to heat up. Cut up the potatoes into cubes about 1 ½ cm on a side. I prefer to leave the skins on – for the extra texture and for the nutrition, but that does mean they can be a bit uneven – peel them if you want perfection! By the time you’ve cut them up, the fat will be nice and hot, so tip the potatoes into the roasting tin and stir up a bit to avoid sticking. Sprinkle with salt and pepper. Put them back in on the top shelf of the oven. Lay a piece of prosciutto flat on a plate and put a chicken breast on top. Wrap the prosciutto around it and fold it over to make a wrapped parcel. Do the rest of them like that and place them all on a roasting tray. They can now go on the lower shelf of the oven for 40 minutes. The apricots should have plumped up and absorbed all the liquid. Snip them up more if they need it and put them in a small pan with the spices. Cook over a low heat and simmer down into a puree as they absorb the warmth of the spice, about 10 minutes. Taste and adjust the seasoning – you don’t need salt as the point of the dish is the contrast between the salt prosciutto and the sweet apricots but you might need a stronger spice or some pepper. Remove the cardamom pods and puree the fruit using a stick blender to give a smooth velvety fruity cream. Every now and then take the tray of potatoes out of the oven and turn over the cubes with a spatula – at first the wet sides of the potato will stick on the bottom of the tray but soon they will start to crisp up. You don’t need to turn the chicken pieces at all or do much to them, they don’t even need basting. When the potatoes are golden and crunchy and the chicken breasts are done – the meat should be moist but cooked through and the prosciutto will be crisp – serve the breasts on a spoonful of apricot puree with a scoop of potatoes alongside and maybe some simple steamed green beans. If you have some potatoes left over, my son informs me these are the absolute best “breakfast potatoes” – warmed through in a frying pan next morning and served with a fried egg - it might be worth making extra just for that. Jerusalem Artichoke Soup (vegetarian/vegan)
The official start of Autumn. Forget your falling leaves or first frost. Your tastes migrate from fresh salads to warming soups and you know the season has ticked onwards. Jerusalem Artichokes are unfamiliar to many but worth seeking out. They’re a gift to the organic gardener: undemanding friendly sunflowered giants, needing no fertiliser or care other than staking, and delivering a fabulous harvest with a little digging. And what’s more, they make the most incredible creamy velvety textured purees and soups. Yes, you are going to ask, what about the wind? And indeed they do make you a little gassy, if you gorge on them first thing in the season. What you need to do is dilute the effect. Don’t eat them for every meal, and don’t eat a huge roasting pan of them the first time you harvest. I wouldn’t blame you, because they taste so nutty and sweet that way, but give yourself time. Approach them gradually, your gut will get used to them and benefit from the inulin they contain. This soup is a good way to start off - it’s a mixture of vegetables, not too heavy on the artichokes. And for heaven’s sake – a vegetable that grows itself, tastes great, has massively amusing shapes when you dig them up, and makes you fart into the bargain – keeps the children amused for days! Serves 6, 20 minutes preparation, 20 minutes cooking.
Brush the artichokes (they are VERY muddy) and peel them if they need it – I personally prefer to peel them but you don’t have to if you’ve got the smaller fiddly variety. This is the part of the preparation that’s going to take the longest. Slice the onion and begin to fry it in a little oil in a heavy pan. Peel the carrot, slice into small pieces, add to the pan. Clean and slice up the leek, add to the pan. Keep cooking as the vegetables soften – about 5 minutes. Add the stock and the sliced-up artichokes. Cook for about 20 minutes until all the vegetables are soft and cooked. Liquidise and if you like, you can add some cream or milk to the soup to thin the texture. Check and adjust the seasoning. Serve with sourdough croutons or just with fresh bread. Bonfire Parkin
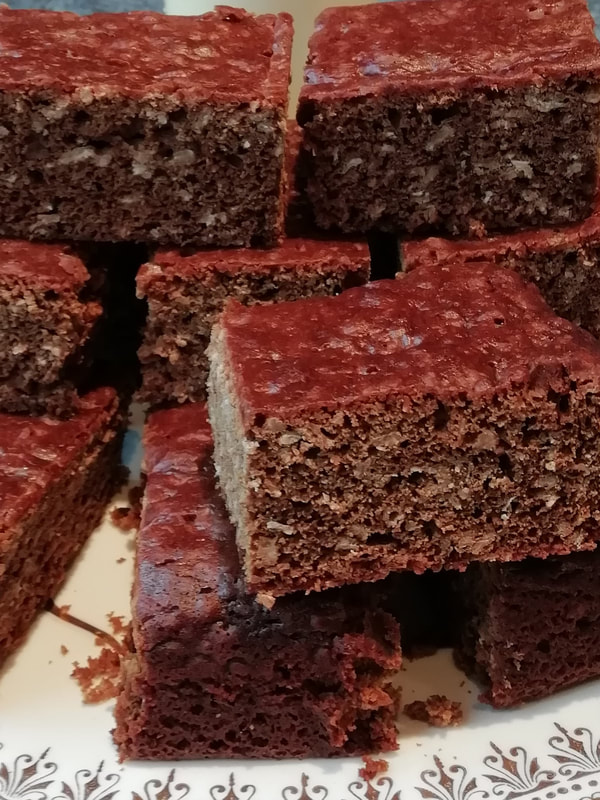
Redolent of smoky misty bonfire night, sometimes rainy, sometimes just thick gunpowder-scented fog making you sneeze. When I asked the Seniors’ Lunch Club session about favourite Bonfire Night food, people varied between baked potatoes, dug out of the ashes, and parkin, doled out by mothers in woolly gloves, after the guy had blazed up. I'm not such a fan of oaty cakes, I must be the only person in the UK not to love a flapjack; but I do appreciate the ginger tang of parkin (not really a hit, not strong enough for that) and the extra texture provided by the oats. Also, the keeping properties are remarkable – the parkin is best made at least a week in advance of eating; and keeps for up to four weeks. It’s ideal for lunch boxes, fishing trips, picnics, and all family outings where a more delicate cake might come to grief. The Seniors’ Lunch Club meeting this week was a merry game of “Have you Ever?” where I gave a list of ten activities one might or might not have done in life (“won a trophy” “kept a reptile as a pet” “been on a water-voyage”) and asked for memories these might have prompted. The activity most people had done and wanted to talk about was “going on a steam train.” One of our ladies had been regularly entrusted to the guard’s van when a child and visiting her grandparents – you couldn’t do that these days! Another remembered how caring the platform guards were for the regular commuters – they used to hold the train up if you were late. This recipe is an adaptation from a book I use constantly when baking for large numbers – River Cottage Handbook no 8, Cakes, by Pam Corbin. She’s utterly reliable in providing recipes that always work, even on the first try, and I’ve cooked nearly everything out of it for my Lunch Club. I hope she doesn’t mind me giving my own slant on it here. Serves 12-16. Timings – 20 minutes preparation, 1 hour baking. Keeps 2-4 weeks wrapped up.
Preheat the oven to 180°C and prepare a 24cm cake tin by greasing it well and lining with greaseproof paper. Put the butter, sugar, syrup and treacle in a small pan and heat to melt and blend. Remove from the heat. Sieve the flour, bicarbonate of soda and spices into a bowl, add the oats. Mix the egg into the butter/treacle mixture and then pour into the bowl of flour. Mix well and add the milk – you might not need it all. You are aiming for a thickish but pouring texture. Scrape the batter into the baking tin and cover with cooking foil. Cook for 35-40 minutes, then remove the foil and bake for another 15 minutes until the smell of warm ginger and the lovely toasted golden colour tells you it’s done. Leave to cool in the tin, then wrap up in greaseproof paper and cooking foil until time to cut it. Cassoulet with Confit Duck
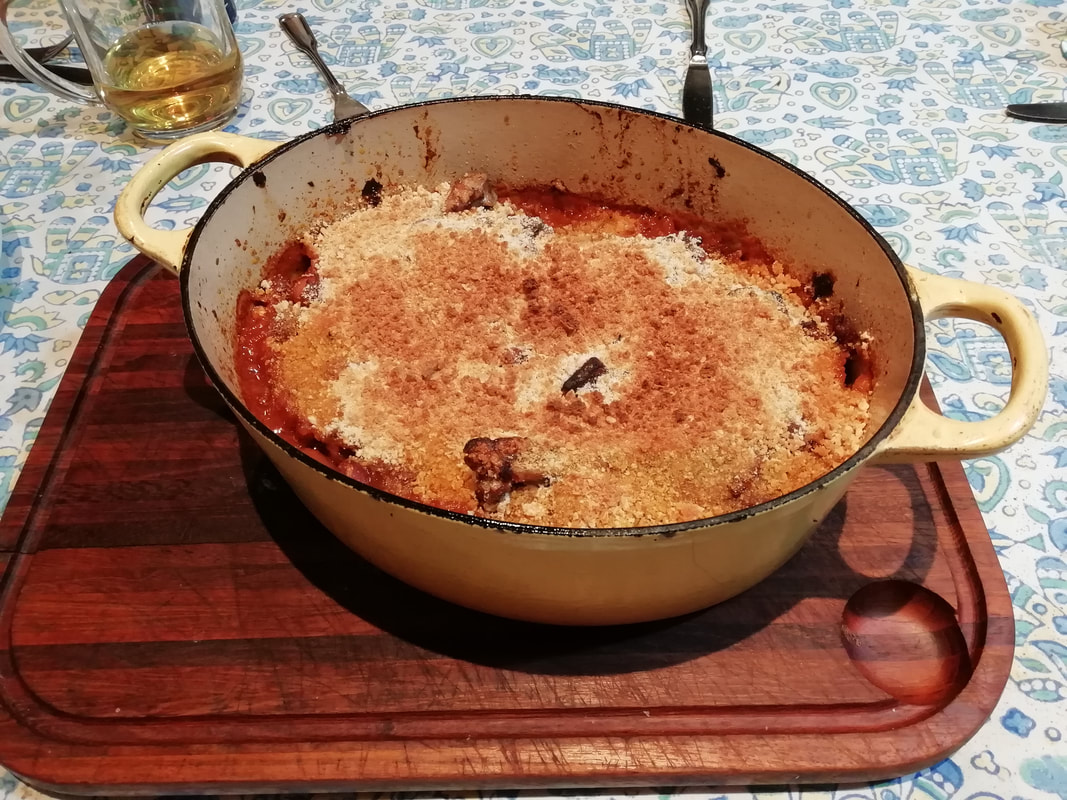
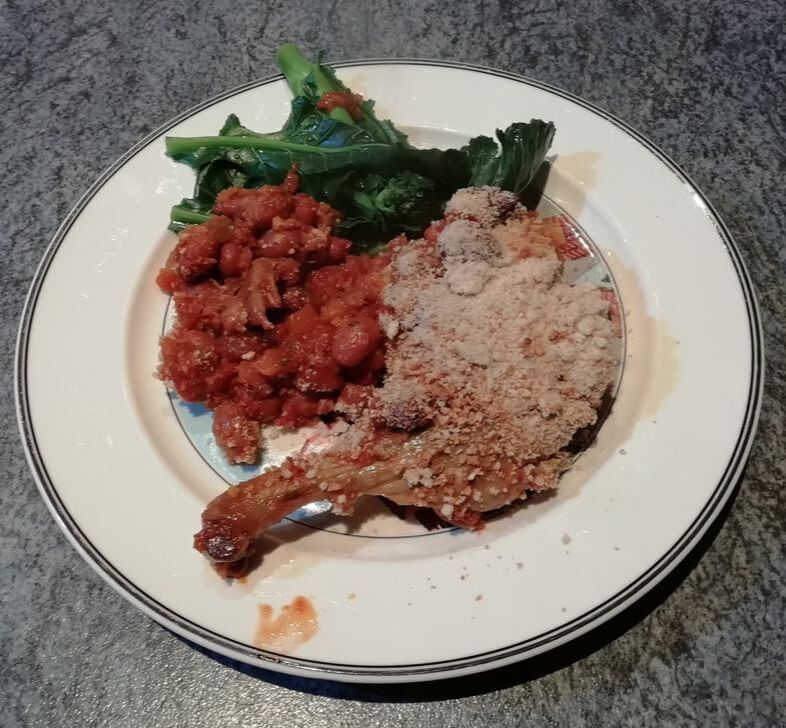
“A car full of young adults, come in, come in!” – a tactful and charming greeting from our hosts in the Dordogne, France. Our teenage sons fell straight in love with the scenery, ancient history, our relaxed but precisely perfect B&B and of course the food. What teen would not adore confit duck – melting flesh, crispy salty skin, always served with chips? Life only got better when they discovered cassoulet – confit duck, and sausage, combined with baked beans? Heaven. This is a time consuming dish, but all the parts can be done well ahead, and also done while you are doing other things – the preparation itself isn’t that onerous, it’s the long slow cooking you have to leave time for. But on a wet weekend in November (having remembered to salt the duck the night before), get out the slow cooker, put the oven on low, challenge the family to a Monopoly afternoon, and let the Cassoulet cook itself, tempting you with friendly scents until you can all sit down together and reward yourselves. You can serve the beans as a cassoulet without the duck and sausages, but with some vegetarian sausage for a vegan version, or just the beans in sauce with breadcrumbs on top. I sometimes do it for parties, in a meat-version and vegan alternative, and it goes down a storm. Serves 6 Confit Duck: Timings - overnight salting, 4 hours slow cooking.
The night before you want to cook the duck, salt it. Just put the legs in a shallow metal dish – a baking tray is ideal, as you can use the same tray all the way through - and rub the salt all over the skin and the flesh. Prick the skin very well using a metal skewer, and rub the salt in. Leave the legs in the fridge overnight to salt, and let the juices run. In the morning, take the legs out, wipe dry with kitchen towel, clean out the baking tray and put the legs back in. Smear the goose fat all over the legs, cover the tray with cooking foil and put into the oven at 130°C for a long time – about 4 hours. You don’t need to pre-heat the oven. The fat will melt, cover the legs, and cook them gently until they are very very tender. Just check every now and then and maybe turn them over if the fat doesn’t completely cover them. Leave to cool in the tray. At this point you can keep the duck in the fridge covered in fat for several days before using. Try to resist picking bits off. (you can’t) When you use the duck, scrape off the fat and keep it for cooking roast potatoes or other frying, it keeps in a pot in the fridge for a couple of weeks at least. Beans in sauce: (vegan option, leave out the bacon and use Henderson’s Relish instead of Worcester sauce). Timings - 30 minutes preparaton, 5-6 hours slow cooking.
Fry the bacon pieces in fat until crispy and brown. Put aside. Fry the celery, onions, and carrots until softened in the same fat – about 5 minutes, stirring to avoid catching. Add the crushed garlic and oregano and stir to cook. Add the can of tomatoes and another half can of water, then add the beans, marmite, and a good dash of Worcester sauce. Season with salt and pepper. Put the lot into the slow cooker on high for about 4 hours, or in the oven on 130°C (can sit alongside the duck) for 5-6 hours. At this stage, the beans can be kept in the fridge for up to 3 days, or frozen. They freeze beautifully and can be used as a vegetable or alongside other meals such as pork chops. They are technically not quite the same as home-made baked beans as they are more tomatoey and less vinegary, but gorgeous, and good for you, nonetheless. To assemble the Cassoulet: Timings - 15 minutes preparation, 50 minutes in the oven
Preheat the oven to 200°C Fry the sausages until browned, set into a large casserole dish. Fry the duck legs on their skin side until the skin is crispy and brown. Fight off the teenagers trying to eat all the skin. Put the duck legs into the casserole dish. Scoop in the beans in sauce to cover the meats – add a little more liquid if you need to, as the beans can absorb some sauce while they sit, if you’ve left them overnight in the fridge before assembly. Top with breadcrumbs and put in the oven covered for about 30 minutes, then remove the cover and brown the breadcrumbs for 20 minutes to give a crunchy crust. The meat is all cooked, so the dish just needs warming through and to allow the flavours a final melding. Serve as it is, giving everyone a sausage and a duck leg and a helping of the fragrant wonderful beans. I wouldn’t serve garlic bread or any other carb alongside, as it is already rich, but a simple lightly dressed green salad maybe with some bitter endive and rocket leaves either as a starter or after would be a suitable nod to the French origins and an enlivening palate cleanser. Family joy! Tikka Mushrooms (vegetarian)
Halfway up the foothills of the Indian Himalayas on the way to Shimla, summer playground of the British Raj, we stopped for lunch at a roadside restaurant. Having struggled through monsoon-destroyed roads, unfinished red-mud roadworks and past accidents caused by drivers unable to wait in queues, we were frazzled and frustrated. Our spirits were revived by a simple and excellent meal, as so often in India. We had butter-naan – now recalled with inappropriate desire, dripping with butter and dough meltingly soft; fragrant makhani dhal - yes, I know the cream content makes it a calorie bomb, who cares? I went on ordering the brown lentil concoction everywhere I could; - and this light and fresh plate of mushroom tikka. I remember the welcome we got in that little restaurant; the concerned waiter rushing to get us a cool drink, the calming view of precipitous green valleys from the back window, the comfortable seat after the sticky jeep. Oddly enough, the rest of the journey was much nicer after our stop – the effect of the food, or just nearer to the vision that is Shimla? I’m sure the genuine recipe is more complex, but here’s my re-creation of that lovely dish, and it is now an easy family lunch favourite. Serves 4. Timings: preparation 10 minutes, an hour marinade, 20 minutes cooking
Mix the yoghurt, tikka paste and lime juice thoroughly – you will get a nice red cool yoghurt slurry. Prepare the mushrooms – I prefer to peel them and take off the ends of the stalks, but if you’d rather just wipe them to remove any dirt from the culture medium, then fine. Add the mushrooms to the marinade, mix well to cover them with the yoghurt and leave for an hour. Take the dog for a walk. Pre heat the oven to 200°C. Take the mushrooms out of the yoghurt and thread them onto metal skewers. Put on a tray in the oven for 20 minutes – turn every now and then to make sure all sides are cooked. Serve either on the skewers or on a plate, with pillowy buttered naan if you don’t care about your waistline and want to remember India again, or maybe a simple green salad. Pineapple Upside Down Cake Retro, amusing, juicy, fragrant: truly a cake to please many people. And easy to make too, what more could you wish for? The cake comes out of the tin with its own decoration so you don’t even need to ice it. You could eat this as a pudding, with cream or yoghurt, but because there’s no pineapple juice in the batter it has quite a firm cake texture and will hold together as a piece of cake. Our Seniors Lunch Group took a quiet moment to commemorate Remembrance Day this week and read out some poems. Several people in the group had fathers or other relatives who fought in the First and Second World Wars, some of whom are buried in France. A common theme is that people who fought generally didn’t do much reminiscing. If they were lucky enough to come home, they kept their memories to themselves, except for the silly things. One friend of a member was a POW – he came home highly proficient at bridge, he’d put his empty hours to good use. He taught all his friends in Manchester to play bridge but he never talked about the camp. We’re never solemn for very long and were soon exchanging encouraging stories about the Service Animals who are also commemorated at this time. Many pigeons have been awarded the Dickin medal for animal bravery, so we felt a little more friendly to the pigeons in our gardens who are raiding the feeders. Serves 12 – 16 (makes 16 portions but you might find some disappear before they get to the tin if you’ve got family around watching you like a hawk) Timings: 20 minutes preparation, 1-hour cooking.
For the cake:
Grease and line a 24cm square cake tin. If you are using a loose-bottom tin, wrap the bottom of the tin in kitchen foil and place the whole thing on a baking tray with a lip – just to stop any juices oozing out and catching on the oven floor. Melt the 50g butter and brown sugar together in a small pan and pour into the bottom of your cake tin. Arrange the pineapple rings artistically in the cake tin and dot the cherries around, in the centre of the pineapple rings or around the edges, as you like. Sieve the flour and baking powder together. (You need the baking powder to encourage the rise, as it can be inhibited by the pineapple so the rising agent in the self-raising needs a bit of extra help). Beat the butter and the sugar together until light and fluffy. Add the eggs one at a time with a spoonful of flour each time, then fold in the rest of the flour with a metal spoon. Scoop the mixture into the cake tin, on top of the pineapple rings and smooth it. Cook for about 1 hour until the top is light brown and a skewer comes out clean. Let it cool for only a short time in the tin (you don’t want the sugary juices to set and start to stick) and then turn it out onto a plate. Turn it out onto the plate you are going to serve it from not onto a rack. This is not a cake you want to keep flipping about as the pineapple rings will fall off. You don’t mind if the cake cools on a plate and not on a rack and therefore is a little moister than a classic Victoria Sponge, that’s part of the point. I cut mine into 16 squares for serving round the Lunch Club group and everyone got a fair share of pineapple and glace cherry. Tagliatelle Gorgonzola (vegetarian)
This is the sort of meal you make when you come home late from a weekend away. I hope you’ve been walking in the Dales, surfing in Cornwall or something else active and wonderful, when we’re allowed again. You’re tired, you still need to unpack and hoover out the car, stuff needs sorting out for the school run tomorrow; but you’ve got to have something warm and soothing in your belly before you can start all that. You can leave the ingredients in the fridge when you go away, knowing they’ll be there waiting for you to rustle this up in an instant. Yes, it’s blue cheese, which isn’t everyone’s cup of tea, but give it a try. Honestly, the blue taste is not at all strong. I won’t lie, it is still there, which gives the dish part of the piquancy. You can adjust the strength of the chilli you use, and of course you can buy different strengths of gorgonzola, so start off with the mildest and work your way up. You could serve this with a simple green salad, and light French dressing, which you have also left in the fridge over the weekend. Serves 4. Timings – 20 minutes.
Put the water for the pasta on as you chop the onion and chilli finely. Using a small heavy pan and a slug of vegetable oil, fry the onion and chilli gently for a few minutes until slightly softened. Cook the pasta for the recommended time. According to Anna del Conte (I think it was her, one of my food heroes), the water for pasta needs not only to be boiling but to be singing Pavarotti, which is a good way of describing that enthusiastic rolling bubbling panful. Add the gorgonzola to the onion and chilli, it will start to melt straight away. Add the cream too. Stir to dissolve it all together and don’t let it boil. Add half the parsley. When the tagliatelle is done, drain. Keep some of the cooking water, and add a tablespoon or so to the sauce, keeping an eye on the texture – you want a creamy coating sauce, like single cream. Adjust the seasoning – you might need a smidgin of salt, depending on how salty the cheese was. Mix the sauce into the pasta and serve, topped with a sprinkle of parsley, a slice or two of fresh chilli and a grinding of black pepper. “Cutlets” – vegan/vegetarian Travelling in India, you see these in a lot of restaurants and easy-food places. We even had them on the train for lunch – a choice of meat or vegetarian. The other passengers questioned us enthusiastically about our origins, travel plans, political opinions, and family aspirations while we tucked into our crunchy cutlets with tangy chutney. I think the veggie cutlets in India were thinner than my recipe, but basically the same idea: a protein (mashed beans), a sticky carbohydrate (mashed potato), a selection of vegetables (whatever you have in the fridge or left over from another meal but something with some crunch and texture is good), a fried juicy combination of onions and spices, and then made into patties and covered in breadcrumbs, and fried. I have a confession: I make these quite often not from a recipe, I just throw them together. So when I came to make them for this blog and the photo, I did my usual. And they fell apart. They went to mush in the frying pan. They still tasted great and my family ate them up but I couldn’t use them to show you. That spurred me to do some experimenting and reading up on what went wrong. I didn’t have enough binding property on that batch of cutlets, the mixture wouldn’t hold when fried. In many recipes, breadcrumbs are added – which absorb moisture and give more texture, so I tried that – it worked. I also tried adding some of the bean-water (known as aquafaba), a magic ingredient in vegan cooking. That worked too, even better than the breadcrumbs. I have read that bean-water should not be used in large quantities – there’s a reason you soak and then cook beans thoroughly and maybe you don’t want to indulge in the waste products of that process, but to use a small amount to give an extra firmness to the patty, I don’t see any harm – especially if you cook the beans yourself from dried rather than using a can. They do freeze well, so I usually make a batch when I have the ingredients to hand and pop a few in the freezer for an easy lunch. Serves 8 (or enough for 4 and then a batch to freeze) for a light meal Timings – if using cooked beans – 30 minutes preparation and then an hour in the fridge to firm up. If using dried beans, you need to soak overnight and boil them for an hour.
Drain the beans and keep the cooking water. Mash the beans roughly with a fork, put into a large bowl. Add the mashed potato. Add the vegetables and then add the spicy onions from the frying pan. Add about 2 dessert spoons of bean water (go easy, texture should be reasonably firm and not sloppy) a squeeze of lemon, a splash of Henderson’s Relish, salt and pepper. Mix up well with your hands and taste a bit. Adjust the seasoning as needed – you want it fairly punchy. If you have them, you can also add chopped fresh herbs: coriander, parsley, chives. Make patties of the mixture – about 1cm thick - and press them into breadcrumbs on a plate. Put them on a baking tray in the fridge covered with silver foil for an hour or so to firm up. At this stage, you can freeze the ones you aren’t using right now – wrap them each in greaseproof paper and slide them into a freezer bag. They will keep for up to 3 months in the freezer. Heat up a large heavy frying pan and use a generous slug of oil. Fry the patties on each side for a few minutes until golden and crispy. Just check the middles are done and give them a minute or two more if needed – everything is cooked already but you want it hot all through. Serve with some mouth-puckering tamarind chutney or lime pickle. Coffee Sponge with Buttercream Filling
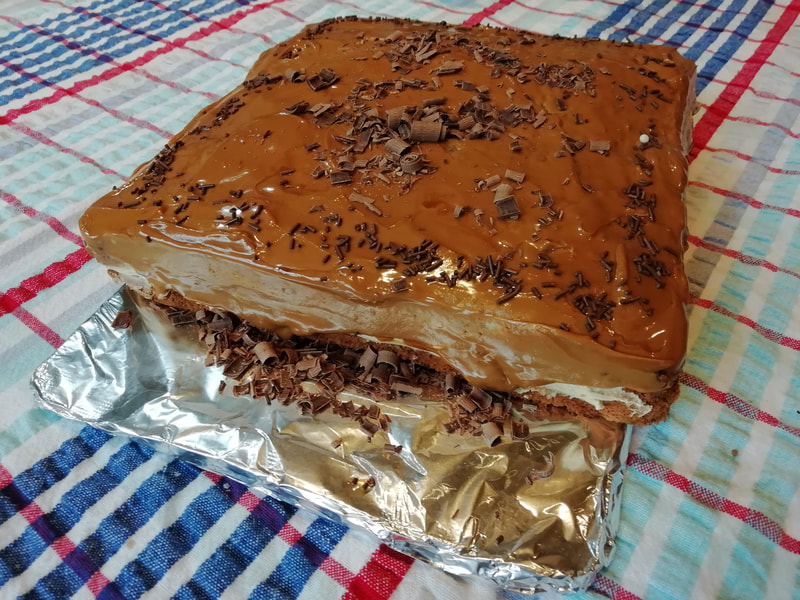
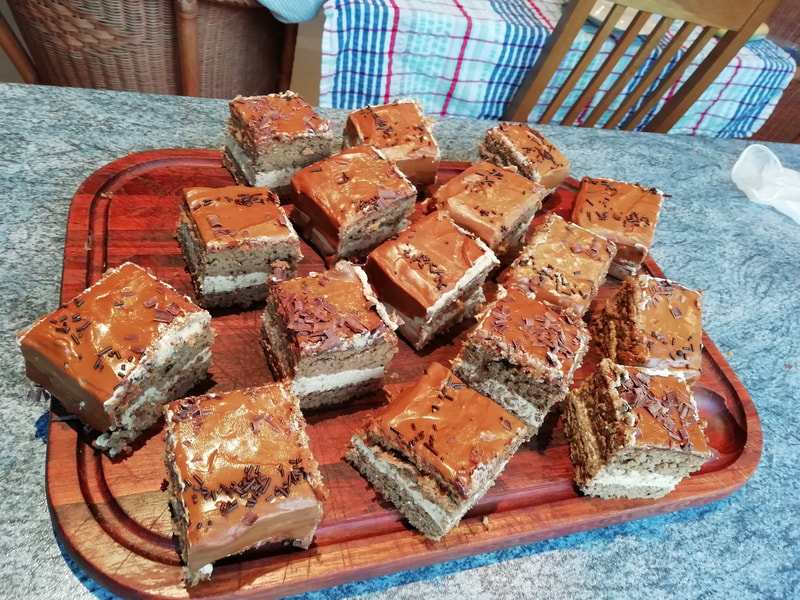
The theme of our seniors Lunch Club group this week was of course Bonfire Night. One or two members had very strict mothers and weren’t allowed out, but most people had very clear and fond memories of community bonfires, roasted potatoes, home made treacle toffee and parkin. We decided our favourite firework is probably a sparkler (I wonder who invented those? Good idea, whoever it was.) although Catherine Wheel came in a close second. I really should have made a parkin for this week, but one of our members isn’t too fond of ginger, so I made a coffee sponge instead. Many recipes of this type tell you to use unsalted butter for the buttercream icing – do as you like, but I really enjoy the very slight tang of salt in the filling against the sweetness of the cake. This cake is so rich you only need a small square of it, but it tastes so good and is such a treat. I have to admit that because my cakes are made to be cut up, pieces wrapped in silver foil and delivered round the neighbourhood, I am not a talented cake decorator. Feel free to improvise and improve on my efforts and send me your photos! Serves 10-12. Timings: 1 hour to prepare and bake the cake, another hour to cool and ice.
Pre-heat the oven to 180°C. Prepare a 24cm square cake tin, grease it and line with baking parchment. Make a simple coffee-flavoured Genoese sponge: whisk the eggs and sugar together either with a mixer or over a bowl of hot water, until you get a thick and creamy texture. This takes only about 3-4 minutes in the mixer. While these are beating up, melt the butter and sieve the flour. Turn the mixer down to low and add the flour to the egg/sugar foam gradually, add the coffee powder. Turn off the mixer and using a metal spoon, stir in the melted butter. Spoon the mixture into the prepared cake tin and bake about 20-25 minutes till golden on top and a skewer comes out clean. Cool 5 minutes in the tin and turn out onto a rack, remove the parchment. Leave to cool. While the cake is cooling, wash up your mixer bowl and beat the butter until light and creamy. Mix in the icing sugar and coffee essence. I put a tea-towel over the mixer while adding in the icing sugar to stop the kitchen getting covered in a thin and attractive layer of airborne sugar. The buttercream will stand ready until the cake is cool. When cool, cut the cake in half through the middle carefully using your biggest breadknife. Spread the buttercream evenly over the bottom half and put the top of the cake on again. Make a simple icing with the icing sugar and coffee essence, and ice the top of the cake. Decorate as you wish, I used some chocolate shavings and chocolate sprinkles. |
Some Changes - April 2022
Thanks to my friends and followers for your patience, and for your encouragement to start blogging again. Archives
April 2022
Categories
All
|







 RSS Feed
