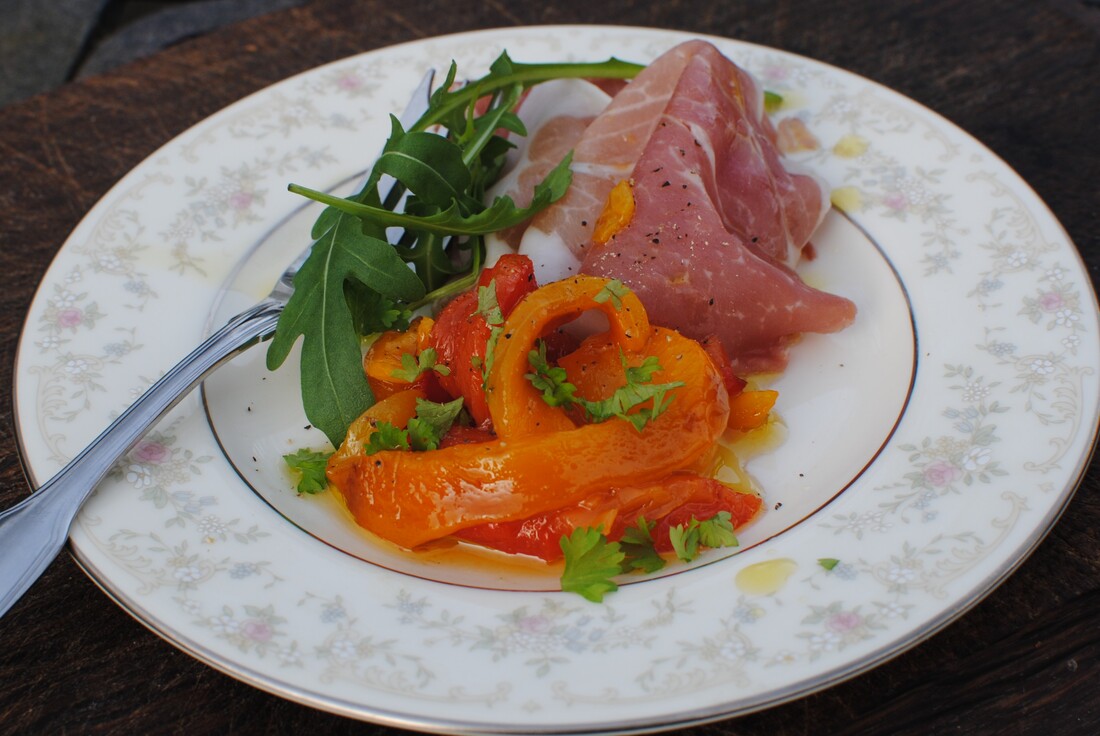
 Simple colourful classic, and so many ways to serve them: grilled peppers, marinated in olive oil and herbs. Grilled Marinated Peppers (vegan, but serving suggestion includes meat)
This is so simple but so delicious. I ate it first at a small French bistro in Canterbury, which has probably long since disappeared but provided straightforward un-faffy cooking that was huge on flavour and love. I like a recipe that I can make ahead and bring out as a home-made treat when needed at this time of year, without having to attend to last minute preparations when you have guests in the house. Have a jar of these grilled peppers ready, and a pack of good Spanish ham, and you have a starter fit for a houseful of princes. They keep for at least a week in the fridge, in a jar with their oil. After you’ve finished the peppers, the oil makes a tasty base for a very tangy flavoured French dressing – use it on crunchy red radicchio or endive, some leaves with a strong flavour of their own, and maybe a few shavings of parmesan on top. Of course, you can also serve these as part of a vegan or vegetarian selection of grilled vegetables, grilled courgette with a sprinkle of lemon juice and some mint in the oil is lovely, and so is grilled aubergine with crushed garlic. Serves 6 Timings: about 30 minutes work, but cooling time needed after the grilling.
Grill the peppers under a hot grill, turning until all sides have been charred and the skin is blackened and blistered. Turn them on their tops to grill their little bottoms too, you want the whole skin area grilled. Put the now burnt-looking peppers into a glass bowl and cover with a plate to let the steam get at them. Not a plastic box as you don’t want hot food touching plastic if you can help it. You can leave them to cool completely while you do something else. Take the peppers out of the bowl, pull out the choke with the seeds and stalk on. Carefully pull off the skin or scrape it away from the soft flesh with a sharp knife. It will come away easily after the grilling and the steaming. Make sure you clean away all the little seeds from the flesh. Cut the flesh into long strips with scissors and place it in a clean jar layering the peppers up with oil. You can add any seasonings you like at this stage – a fresh bay leaf is nice or some lightly bashed coriander seeds or black pepper corns, but you don’t have to add anything. Top up the jar with oil to cover the peppers and leave in the fridge for an hour or until you want to use them. To serve, give everyone a small serving of your best Parma or Serrano ham, a spoonful of peppers and a few leaves of rocket. Done!
0 Comments
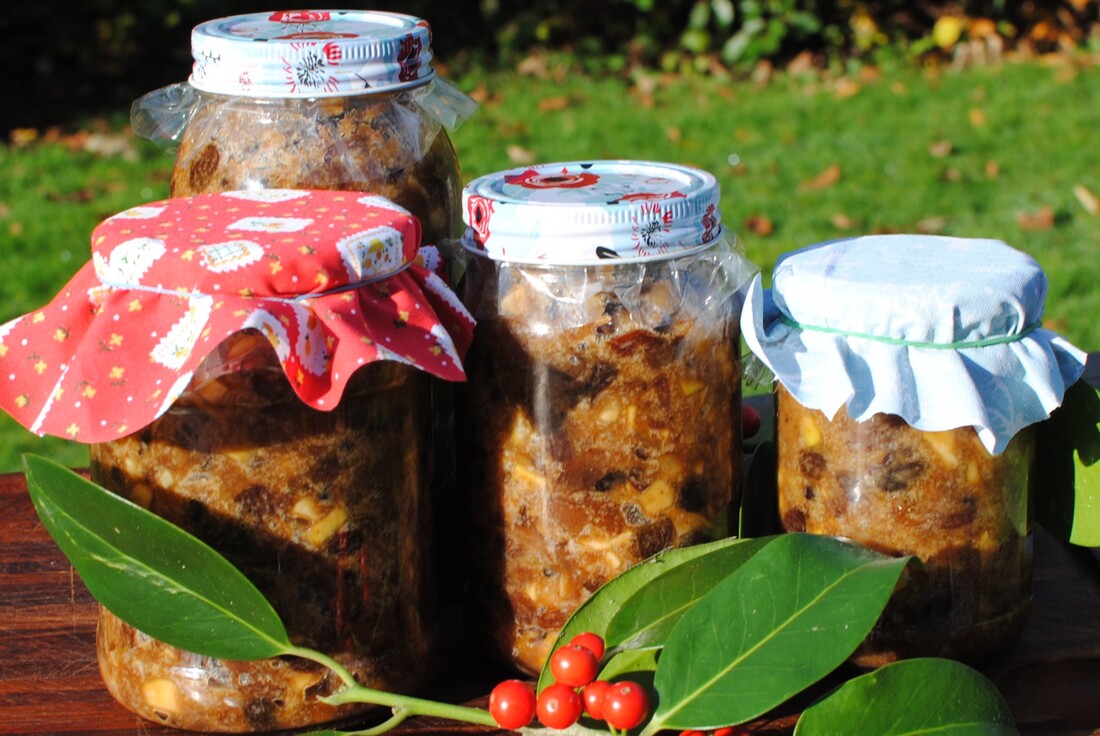 It just says Christmas, doesn't it? Raisins, apples, brandy, spices. All ready for those Mince Pies. Mincemeat You can buy so many versions of mincemeat in jars and most of them are quite good. But once you’ve made your own, you will make it again and again, and then you’ll start giving it to friends as a pre-Christmas present. When you make mince pies with this, people will ask – “are they homemade?” and then they will ask “and did you make the mincemeat too?” if they know what they are tasting. As with all home-made ingredients, one of the best things is to cater exactly to your own tastes. I like the subtle crunch of nuts in mincemeat, so I have more in my recipe than some others, and I also like the fruity appley taste. Too much fresh fruit means it doesn’t keep so well, but I prefer to use my fresh mincemeat up every year and not give it space in the pantry till next Christmas, so I don’t mind if my mincemeat doesn’t keep more than six months. This is loosely based on Delia Smith’s Christmas recipe. I look forward to taking her book from the shelf every year and delving into it. Her tip is that melting the suet through the fruit adds to the keeping quality and is better than just adding it dry to the mixture as you will find in bought jars and some recipes. The melted fat looks quite a lot when you take the dish out of the oven but it coats all the fruit and disappears as the mixture cools. I always use the vegetarian suet you can get at the supermarket. Make your own, try variations of ingredients and flavours, and you’ll end up with something unique to you. You might prefer whisky instead of brandy? You might like more orange flavour or want to add some spoonfuls of marmalade – give it a go! Leave out the peel if you don’t like it and use dried cranberries. Really go wild and add some preserved pineapple and slosh in some rum. Makes about 2kg, 4 medium jars Timings: 1 hour on the first day, overnight soaking then 3 hours slow cook
Chop the apples into small dice and add to a large bowl with all the other ingredients except the brandy. Stir well and leave covered in a cool place overnight for the flavours to mingle and the fruits to absorb the juices. Next day, pre-heat the oven to 120°C and cook the bowl - covered with foil – for about 3 hours until all the suet is melted. Bring it out and let it cool in the kitchen, while you stir it from time to time to keep the fat mixed in. Add the brandy when the mixture is cold. Store in clean jars, tightly sealed. It does keep for a year or more depending on the mixture, but you can surely use it up over this Christmas? Make an extra batch of mince pies and take them round to an elderly neighbour? 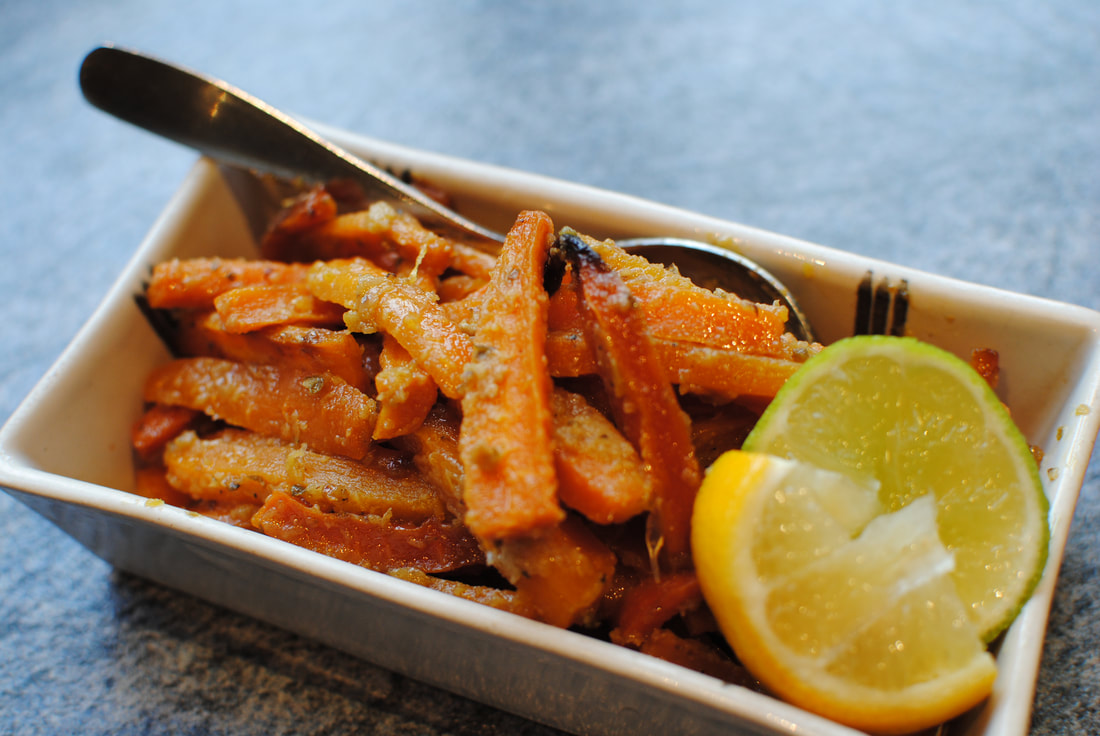 Oven roasted carrots in a citrus glaze Roasted Carrots with Citrus Mojo (vegan)
In the Caribbean, a citrus sauce, or mojo, is used on a lot of vegetables and meats. Plantain is traditional at Christmas, in a citrus mojo. When making up my Christmas in the Caribbean menu, I couldn't easily get plantain in Manchester and thought to try using carrots instead, which are of course traditional in UK at Christmas anyway. Cultural mixing, especially in food, is something I'm very much in favour of. The flavours of orange and carrot match so well. In the Caribbean you would use sour oranges, similar to Seville oranges, which are ripe at Christmas to make the mojo sauce for these carrots. If you can get Seville oranges, use those, but if you can’t, just use normal sweet oranges and add some lemon and lime juices to the mix. Roasted carrots have that lovely slightly burned edge and texture which you don’t get by boiling them, and of course the tray of carrots can go in the oven alongside whatever else you’re cooking for an easy side dish to your roast. Carrots are very tolerant things and you can peel and chop them ahead of time – even the day before you cook if you keep them in a plastic bag in the vegetable drawer of the fridge and also make the mojo ahead of time so you can throw it all together as you need. The only caution I would give is that the carrots cook down to a much smaller portion than you think, so if you have hungry big eaters in your family, add a few more carrots to your bowl! Serves 8 as a side dish Timings: 90 minutes from scratch but preparation can be done ahead
Make the mojo sauce by blending the onion, garlic, spices and juices together until you have a creamy sauce. Mix this with the carrots and spread them out on a metal baking tray. Drizzle lightly with vegetable oil. Pre heat the oven to 180°C. Roast the carrots for 30 minutes, then turn up the temperature to 200°C and roast for another 40 minutes. You need to stir them and turn them every now and then to make sure they roast evenly. Serve them as a side dish to your delicious slow roast jerk pork or to to any other roast meal.  Traditional Caribbean Black Beans - cooked with green peppers and garlic Traditional Caribbean Black Beans - cooked with green peppers and garlic Black Beans with peppers and garlic (vegan) A traditional part of the Caribbean Christmas table, a dish of tasty black beans is also a great vegan offering for a party gathering. They’re even better and deeper flavoured made it ahead of time and they freeze well too. It’s worth using dried black beans rather than a tin, they have a stronger flavour, but you could certainly use a tin or two if you’re short of time. A tin of the little darlings is a great storecupboard standby for a quick dish of beans when unexpected visitors land on you. This recipe is part of my Caribbean Christmas menu, which will be on the website as a full menu from cocktails to Cake de Ron in a couple of weeks. I don’t usually have leftovers from this, but if you do, add them to a ratatouille to change it into a bean stew, with all the goodness and flavour from all those wonderful vegetables. Serves 8 with some leftovers Timings: overnight soaking, 4 hours cooking – can be done ahead of time and warmed up or frozen
Soak the black beans overnight in plenty of water. De-seed and de-stalk the green peppers by cutting round the stalk and pulling out the centre, wash to get rid of the seeds. Peel the garlic cloves and pop them into the green peppers. Place the beans and the garlic filled peppers in a large saucepan and add cold water to cover the beans by about 2cm. Add the bay leaves. Bring the pan to the boil, and simmer over a low heat until the beans are softened – about 3 hours. You could do this in the slow cooker and it would take about 6 hours. While the beans are cooking, grill the red peppers until the skins blister and char all over, then place them in a glass bowl with a plate on top to steam and cool. When cool, you can rub off the skin very easily and remove the centres and seeds. Set aside. When the beans are cooked, let the pan cool for 10 minutes. Take out the green peppers and garlic – the garlic should have stayed inside the peppers but search through the beans to make sure you’ve got them all. Put the green peppers, garlic, half the red peppers and a cupful of beans with their water in a blender with the relish and ground spices and 2 tablespoons of olive oil. Blend up to a thick paste and add back into the pan of beans along with the remaining red peppers, chopped up into small strips. Stir into the beans and taste. Add a slug of olive oil and more lemon juice, more salt if needed and a good grind of black pepper. Traditionally, they shouldn’t be too spicy, just a friendly warmth. Re heat the beans, adjust the seasoning as you like, and then allow to cool a bit before you serve – they will thicken as they cool and you want that slightly thicker texture. They go like a dream with simply steamed white rice and are the perfect side to a slow roast pulled pork.  Creamy, spicy and delicious. A bite of chicken or prawn, a crunch of vegetable and a slippery noodle in every mouthful. Tom Yum Noodle Soup (pescatarian or vegan option)
Maybe this is an odd memory to associate with Dublin. You’d think oysters, Guinness, champ. But I used to catch an early plane to Dublin on a regular basis and meet colleagues in the airport. I’d been up so early, the meal felt like lunch to me and I didn’t fancy bacon and eggs, so we used to gather at the food court, and indulge in a Tom Yum soup. The combination of spice and creamy coconut, Thai red curry and coriander, tender prawns and juicy mushrooms was exactly right to re-set my inner clock and perk me up ready for the afternoon meetings. I still find that a home made version makes an energising and easy lunch, if you keep a few staples around. I like the base made with chicken stock, of which I usually have a plentiful supply in the freezer, but you can make it with vegetable stock and use a stock cube. Infusing the stock with the aromatics is a key part of the recipe but you could do this ahead of time, reduce the stock again and keep it in the fridge to assemble the meal with only a few minutes notice. A combination of prawns and chicken is traditional but you can change around the protein and the vegetables to suit your tastes and what you have in the house. Some chopped mushrooms add that chewy texture and contrast very nicely with the slippery rice noodles, so mushrooms, courgette and spring onion would make a good vegan option, maybe with some sliced baby corn for the protein. Try it and leave me a comment, I’d love to hear other versions. Serves 4 Timings: 1 hour
Heat up your stock and add the infusion ingredients. Let it simmer for a few minutes and then leave to cool down with the spices in the liquid. Strain the stock, discard the spices. As above, you can poach the chicken breast in the stock while you do this. Warm up the stock in your soup pan, add the Thai red curry paste and stir in well. Add the chopped green vegetables, the mushrooms and most of the spring onions, simmer for a few minutes. Add the prawns and the chicken pieces. Add the fish sauce and the lime juice to the soup, bring to a simmer and cook for about 3 minutes. Add the coconut milk to the pan and bring to a slow simmer – do not boil vigorously as this can curdle the milk. Add the rice noodles in, stir and simmer for 2-3 minutes to soften the noodles, they don’t need a lot of cooking. Taste and adjust the seasoning, you might need a touch more lime juice or a little shot of soy. Sprinkle with coriander and the remaining chopped spring onions to serve. 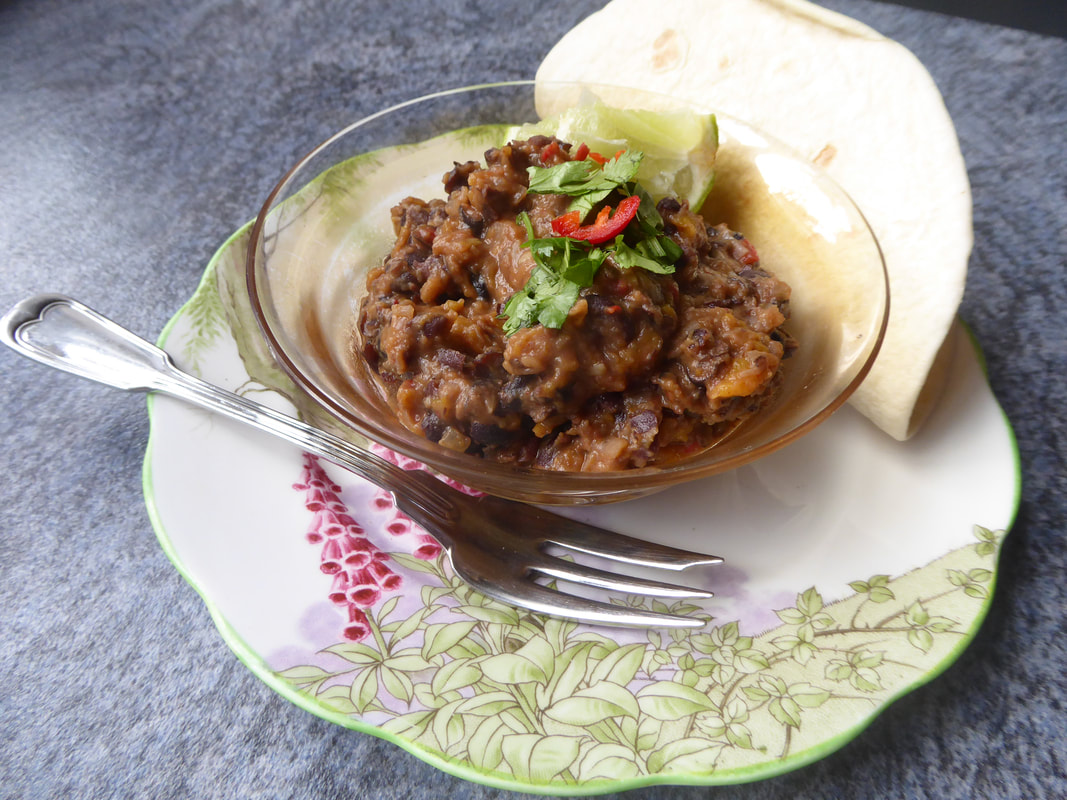 Spicy, satisfying black beans cooked with vegetables and aromatic herbs. Refried Beans (vegan)
If you’re thinking of the Mexican restaurant meal where you don’t eat the refried beans, then think again; you won’t push these to the side of your plate! Home-made refried beans are superb, so much better than the tinned or packet version. They really make a genuine addition to a home cooked Mexican meal, are so easy to make and of course offer a vegan alternative to the meaty filling of tacos so you can cater to all tastes in one meal. Use them as a side dish to your meat meals, or stuff a wrap or a taco with them along with some cheese, or lettuce and a salsa. Great for a light lunch with a friend or for school holiday lunches at home. Serves 6 as a side to a Mexican meal Timings: 30 minutes 1 x medium onion, about 150g, peeled and chopped quite finely ½ yellow pepper, de-seeded and finely chopped 1 x mild jalapeno chilli, chopped finely. 1 x clove garlic, squashed with salt 1 x 400g tin black beans, drained Ground spices: ½ teaspoon cumin, ½ teaspoon garlic powder, ½ teaspoon cayenne pepper, ½ teaspoon mild paprika, ½ teaspoon smoked paprika. Henderson’s Relish and a teaspoon of marmite. Vegetable oil to cook. Juice of ½ lime. Handful fresh herbs chopped – you could use coriander, or parsley or chives. Fry the onion, pepper, chilli and garlic in the vegetable oil for a few minutes until tender. Add the ground spices and fry to release the flavour. Add the black beans and ½ tin of water. Stir up and allow to simmer. Add the Henderson’s Relish and the marmite, stir in and simmer for a few minutes. Using a potato masher, mash the beans into the sauce quite roughly. They will release their starchiness and make a thick puree. Add the lime and adjust the seasoning, you might want a little more salt or some ground pepper. Add the fresh herbs just before you serve. 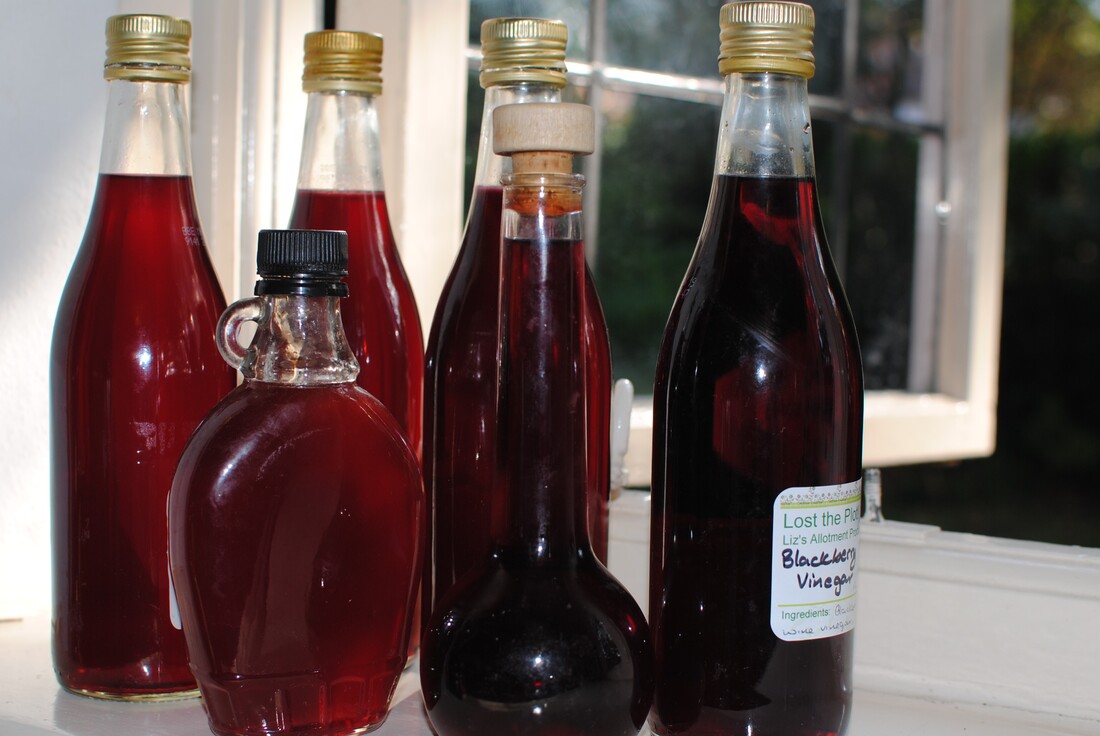 Sweet vinegary nectar - for the very best salad dressings Blackberry Vinegar
I always wonder what to do with all of nature’s bounty, and blackberries are one of the most worrying crops. They fruit so generously, although the plants are perfectly capable of sending out runners and reproducing that way, they don’t really need to make fruits and seeds. But they do, and we benefit, along with all the animals and birds that depend on the fruit and the shelter from the bushes. By the way, don’t worry about taking the fruit, you aren’t depriving the animals, as I’ve sometimes heard people comment when blackberry picking. Like any fruiting plant, the blackberry will make more ripe fruit the more that are picked. If you didn’t pick the first ones, the later berries wouldn’t ripen, so it’s not greedy to make your own harvest and then leave the later ones for nature. When picking, I have two tubs. I separate out the “breakfast quality berries” for us to eat right away and have the larger tub for “processing berries” which go into jams, pies, crumbles and make large quantities of fruit vinegar. Fruit vinegar is an incredible substance. If you haven’t tried it yet in a salad dressing, you will be amazed at the difference it makes. Like balsamic vinegar only more so. It’s sweet, tasty, fruity and irresistible. It enhances your cooking in multiple ways. Every salad dressing is the better for a splash of it; add it to sauces when you’re reducing to add that touch of sweetness and shine; add it to deep flavoured soups to give that extra lift; add it to meat gravy when stirring up the juices from the bottom of the pan; de-glaze a pan of fried mushrooms with it; and you can even drink it diluted with hot water or fizzy water for a healthy and (allegedly) cold-curing cordial. Really, what more could you ask? I think you can tell I’m a convert. You can use other berries and fruits for fruit vinegars, but not the very fleshy ones like plums, as their juice would dilute the vinegar too much and affect the keeping properties. It’s the perfect Christmas gift for cooking-interested friends. You can’t buy fruit vinegars easily in the shops and a homemade present is eagerly received. Do save up some pretty bottles for gifts, the ones that maple syrup comes in are nice, or some swing-top lemonade bottles. I have to thank Pam Corbin and her River Cottage Handbook # 2, Preserves, for the basic recipe, but it also comes from many home cooks and older fashioned collections. The basic proportions can be multiplied many times to use up your harvest. Makes about 3 x 600ml bottles Timings: picking, 3-4 days pickling and then 30 minutes to finish and bottle
Put your berries in a container with a lid. I prefer not to leave food in touch with plastic for long periods, so a large saucepan is ideal if you know you don’t need to use it for some days. Cover the berries with the vinegar and mash them down a bit with a wooden spoon to release the juices. Cover and leave for 3-4 days. If your cover is not tight enough, the fruity vinegar will attract all the fruit flies in the neighbourhood so do make sure it’s well covered. After the 3-4 days, drain the liquid from the berries by placing in a jelly bag overnight. If you don’t have a jelly bag, you can make one from an old teatowel securely tied up into a bag shape with string and then suspend it from a kitchen cabinet handle or some other method of letting the juice drain out into a large bowl. Discard the fruit. Measure your liquid. Place in a large pan and add 450g of sugar to each 600ml of liquid. Bring to a boil, simmer briefly and skim off any scum if it rises. Cool a little and bottle into clean decorative bottles. It keeps for over a year in a cool dark place but you can give most of it away at Christmas with a glow of pride. 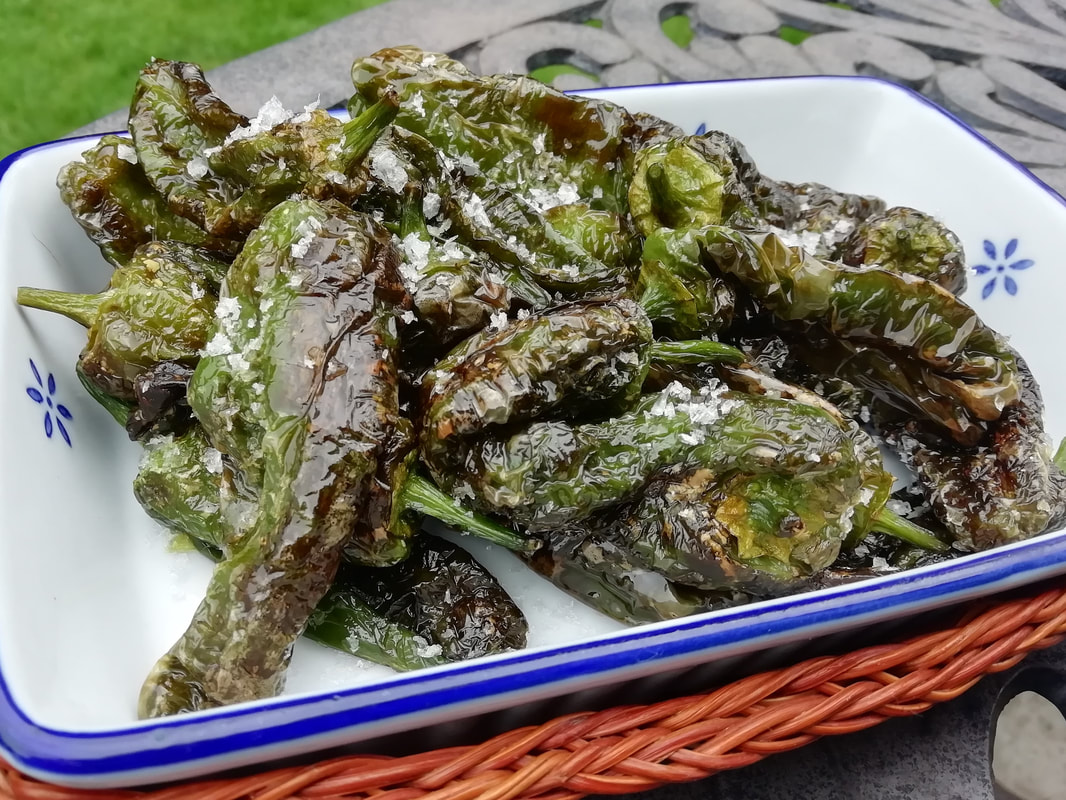 Salty, juicy, padron peppers. Party finger food with a difference - one in ten has a spicy kick..but which one? Padron Peppers
An indispensable part of any tapas selection, and a joyous addition to any party spread, sharing table or al fresco meal. We all love finger food, especially outside with our friends and family, and anything that makes life easier for the cook is a winner with me. The fun thing about these peppers is that although they are mainly mild tasting, one in 10 has a spicy kick to it, and you can’t tell which ones by looking. So you’re adding a little risky gamble to your snacking, which gives you a very pleasant frisson of anticipation. The variety of peppers is so special that it has been awarded a PDO protected status by the EU. I like the feeling of almost eating a national monument – similar to the UK’s Stilton cheese or Italy’s Prosciutto Toscano ham. Serve as part of a sharing table, or as a starter with a glass of Spanish red wine. You could pack them into a sealed container and take them along as a different vegetable for a picnic or put them in a lunchbox for your child to show off at school. Serves 4 as part of a mixed starter Timings: 15 minutes
Make sure the peppers are dry or they’ll spit as they hit the hot oil. Heat the oil in a heavy based frying pan – you are not deep frying but you need more than a slick of oil. Place the peppers in the hot oil and turn them as the skins puff and char. Fry for a few minutes, making sure all sides are cooked. Turn them onto a plate and sprinkle generously with the flaky sea salt. Serve warm or room temperature, and you will need a napkin to wipe your oily hands. 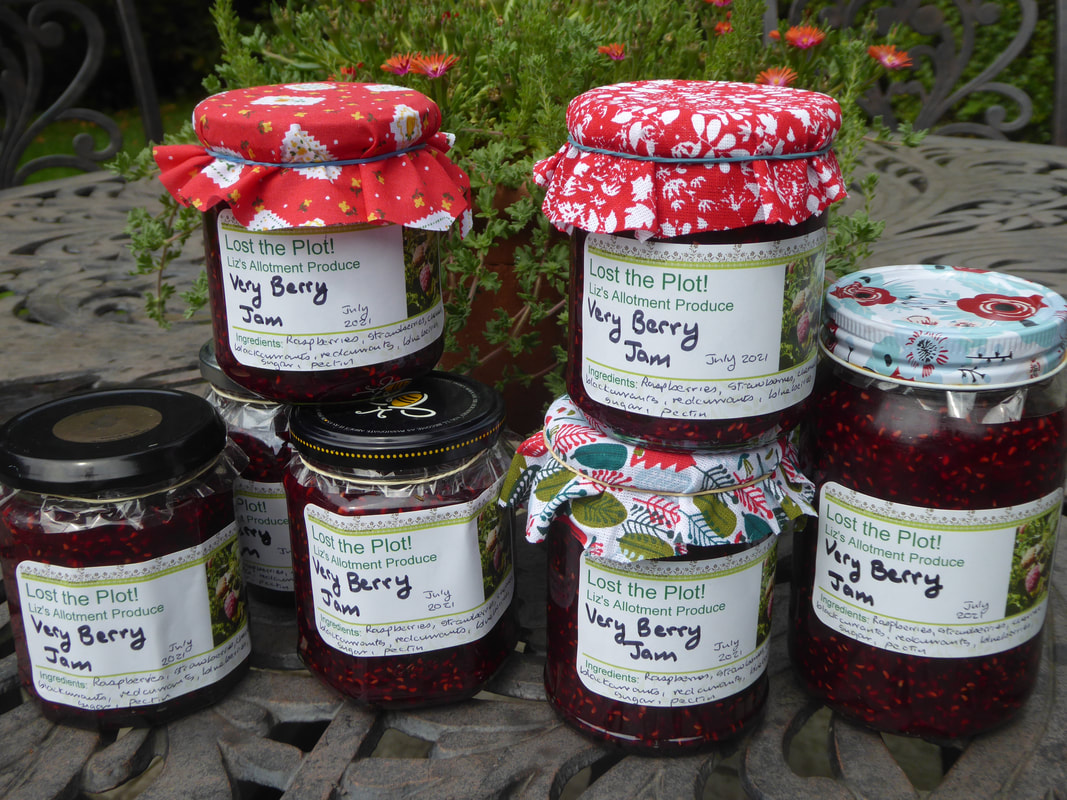 The first batch of mixed berry jam. Ruby red, deep flavoured and delicious. Very Berry Jam
This is the easiest jam I make and also the one that people seem to like the best. I generally give my friends a little hamper at Christmas with allotment produce and I always include a pot of home-made jam. It makes a wonderful take-along present for parties too, a touch more personal and less usual than the bottle of prosecco. Which I am not knocking by the way, a bottle of fizz is always welcome in my house. It’s easy because you use whatever fruit you have to hand; it doesn’t have to be home grown. We often have fruit for breakfast and if there are any manky strawberries or slightly soft blueberries left, I pop them in a freezer bag to save up and use in this mixed berry jam. As it happens, the raspberries in my allotment are producing a bumper crop this year, so this particular batch is raspberry based. I picked cherries, strawberries and black and redcurrants from the allotment and added some blueberries from the fridge that were a bit sad. Later in the season I might add some blackberries or gooseberries or even a fig or two from the tree next door. If you are using a lot of low pectin fruit such as strawberries, you might need to add some pectin, use jam sugar or add in a handful of redcurrants, but the joy of a mixture like this is that all the fruits meld together and make up for each other’s deficiencies while making all their tastes sing in harmony. I had two bags of frozen fruit mixture from the allotment/breakfast leftovers and a big harvest of raspberries, so I had 1.6kg of fruit. The general principles of jam making are:
Makes 8 small jars Timings: about an hour 1.6kg mixed berries, stalks removed 1kg jam sugar and 600g granulated sugar Place the fruit (defrost any you have frozen of course) in a large pan – the jam will rise up when it boils so better use a bigger one than you think. (Much bigger) Simmer for about 10 minutes. Add the sugar. Stir to dissolve and then let it boil merrily. Meanwhile, sterilise your jars. Boil the jam until it reaches 104.5°C on your jam thermometer. Stir it every now and then as it bubbles just to stop anything catching on the bottom of the pan and adding a burned flavour. Switch off the heat and let it cool for about 10 minutes – to under 90°C. Pour or scoop the jam into your jars, cover with a wax disc and the plastic cover held by an elastic band. Put the lids on your jars and screw on tight. When cool, label the jars and store in a cool place until you use the jam. It will keep for at least a year. 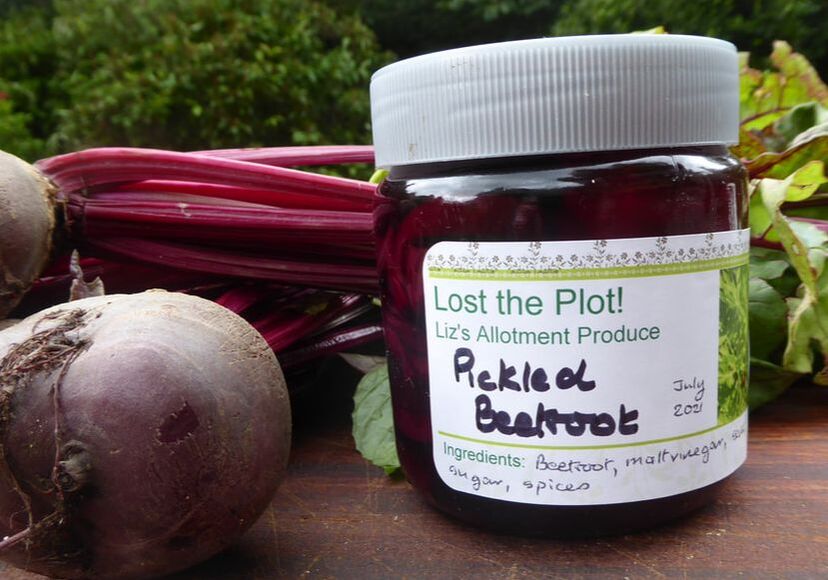 Sweet sour salty tangy pickle with a buttery texture Home Pickled Beetroot
Now we’re coming into preserving season, making jams and savoury jars of loveliness to remind us of Summer sunshine in the depths of Winter and to perk up our tastebuds in the cold weather. Pickled beetroot is the absolute easiest thing to make, requiring no special equipment and tastes so much better than the shop bought jars. You can adjust your seasoning to your own taste and feel so proud when you bring the beautiful jar of deep purple slices out to enhance a meal of cold meat or add to a corned beef or cheddar sandwich. Is that only a Northern tradition? Delicious anyway, if messy. If you don’t grow your own beetroot – which is lovely tolerant vegetable and quite easy to grow if you don’t sow it too early as I always do – then get a pretty bunch of fresh beetroot from your green grocer. If you buy it with the tops on you can see how fresh it is – the leaves are also attractive. Wait till you have the oven on for a roast or something; beetroot doesn’t mind waiting a couple of days in the vegetable drawer. I like to roast my beetroot, partly because I’m lazy and partly because I like the taste better. The taste of beetroot is often described as “earthy” which doesn’t properly catch the sweet autumn smoky depth of this wonder vegetable. It’s supposed to be one of the true “superfoods” having a proven ability to reduce blood pressure. Maybe so, but I’d eat it because it tastes so good and looks so beautiful. The health benefits are a pleasant bonus. I make a batch of pickling vinegar up every now and then, cool it and put it in a clean bottle. It keeps in a cool place for months and means you can just heat it up and pour it over sliced beetroot whenever you have some around. Makes 2 jars Timings: 2 hours roasting and overnight cooling down for cooking the beetroot, 30 minutes for preparing the vinegar and pickling the beetroot but this will give you more vinegar than you need so it will take you less time when you do another batch.
Roast the beets: wrap the beetroot in foil, either individually if they are fist sized or in twos or threes if they are smaller. Seal the parcels well and put on a tray in the oven when you have the oven on for a roast or casserole. Let them cook along with the other dish for about 2 hours, depending on the size and then leave them in the oven when your other dish is done, to cool down with the oven. I find this gives me perfectly cooked tender beetroot. In the morning, take them out of the oven (doesn’t matter if you don’t remember till later) and keep them in the fridge until you use them. They will keep for a couple of days before you have to pickle them. Clean your jars: I like to use peanut butter jars or other jars with pure plastic lids so that the vinegar doesn’t get a chance to corrode the inside but jam jars will do. Fill the jars full of boiling water, then empty and dry. Make the pickling vinegar: put the vinegar into a small pan with all the ingredients, bring to a simmer. Taste and adjust the seasoning – I like it quite sweet so I sometimes add another teaspoon or two of sugar. You could even add honey if you like the additional flavour. Let the pan simmer for a couple of minutes, then let it cool nearly to room temperature to infuse the spices into the vinegar. Strain the vinegar and discard the spices. This is your pickling vinegar now. Bring it back to simmering when you’ve sliced your beetroots. Unwrap your beetroots and just rub the skin off. It will come off easily. Wear gloves if you don’t want stained hands but it’s quite fun to get red fingers. Halve the beetroots if they’re large and slice into very thin slices using a sharp knife. As you slice, feel the texture, it should be a buttery softness. If you get any fibrous bits (which can happen with home grown beetroot if you leave it too long in the ground and it goes woody), cut round them if you can. Place the sliced beetroot into the jars, working like a puzzle master to fit the most slices into the jar that you possibly can. Put them in horizontal layers with some stuffed vertically down the gaps. Fill each jar to within about 1cm of the top. Pour the hot vinegar directly into the jar. Using a knife or skewer, poke down into the jar to release any air pockets – you can see them from the outside. This will help them keep better and let you get a bit more vinegar in. Top up with more vinegar to cover all the beetroot, seal the jars and keep in a cool darkish place. They don’t have to go in the fridge until you open the jar. Keep any un-used pickling vinegar in a clean bottle or jar until you get the next batch of beetroot to process. You'll be surprised how much you get through in a year, once the family get the taste for the home made stuff. |
Some Changes - April 2022
Thanks to my friends and followers for your patience, and for your encouragement to start blogging again. Archives
April 2022
Categories
All
|
 RSS Feed
