|
Chipotle Griddled Corn on the Cob
A juicy spicy accompaniment to a main meal or a lunch time snack in themselves. Kids tend to love this, as with all meals they can eat with their fingers while running round the garden but who can resist getting stuck into a corn cob, getting the bits between your teeth and the butter down your chin? At this time of year you can buy them fresh from the greengrocer, or ready peeled in the supermarket. As with all vegetables, the fresher the better, so if you can get some at your local farmers market or from a farm shop where they grow and pick them, you’ll taste the difference. Amp it up a bit by using a chipotle spicy butter and griddling the cobs to complete the cooking with a delicious charred overtone. You can do these on the barbeque or use a griddle pan with ridges. I’ve not tried them under a normal oven grill and I’m not sure that would work very well as I think you need the contact with the hot grid to get the charred effect. You can use any spice you like in your butter but chipotles have an affinity with the corn – maybe because they’re from the same part of the world originally or just because the smoky spice of the chipotles sets off the sweet corn so well. Serves 4 Timings: 40 minutes
Bring a large pan of water (not salted as that hardens the corn) to the boil and add a teaspoon of sugar. Drop the corn cobs into the pan and simmer for 5-10 minutes depending on how fresh they are. Pre heat your oven to 180°C, and get some kitchen foil ready. While the corn is boiling, blend the butter with the chipotle, sauce and lime juice. A stick blender does this very well. Taste and add pepper and salt if needed. Drain the cobs, run cold water on them and leave them to cool down a bit. Heat up your griddle pan or fire up the barbeque. Rub just a little butter on the cobs and grill them for a few minutes, turning so that the hot grill comes in contact with all sides of the cobs and chars them in attractive stripes. If the barbeque is really hot, this won’t take more than a couple of minutes per side so you have to keep your attention on the grill and keep turning the cobs. When you’ve got the charred stripes, place each piece of corn in a wrap of kitchen foil with a teaspoon of butter on the top of the corn. Wrap up the foil and put the plate of wrapped cobs into the oven for 20 minutes. The corn finishes cooking in the spicy butter and ends up tender, smoky and sweet. Let them cool a little before serving. You’ll need napkins to mop the butter off your chin!
0 Comments
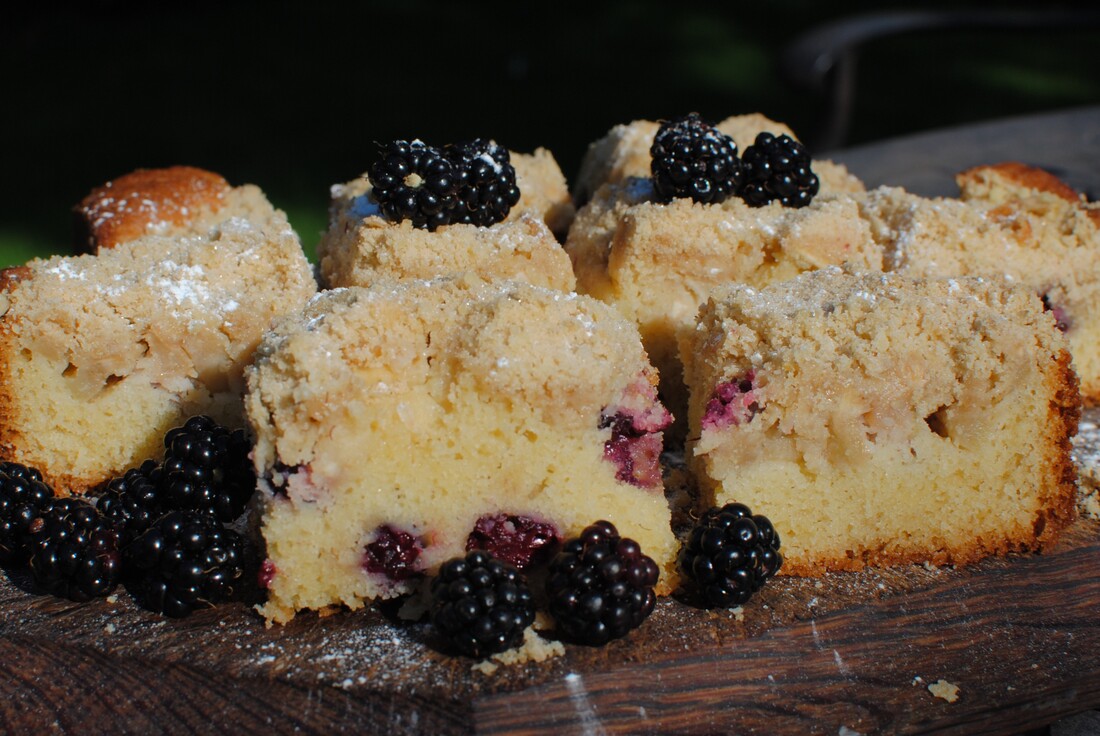
Blackberry and Apple Crumble Cake
The blackberries are ripe, although not so many as last year, and the apples are falling off the trees now, so what better time to make a harvest-flavours crumble cake for my Seniors Lunch Group? The cake is similar to the rhubarb crumble cake and the gooseberry crumble cake I made earlier in the year. The blackberries add a lovely texture and colour and the apple gives a richness and juiciness. A crumble is always a good end to a meal and a crumble cake is convenient to portion up and serve with some whipped cream if you need to take it round to a friend or to a group. Our theme this week was Agatha Christie, everyone’s favourite crime author, and lots to talk about. Our preferred Christie detective was Poirot, with a strong following for Miss Marple too, of course. Our favourite novel was "Death on the Nile", although there are so many to choose from, it’s difficult to select the top. We had a lot of fun, discussing plots, villains, and Christie’s life and works, along with a quiz and a slide show. Makes 12-15 pieces Timings: 80 minutes
For the crumble topping: 150g plain flour, 75g butter, 75g dark brown sugar, a handful of porridge oats Pre heat the oven to 180°C. Grease and line with baking paper a 22cm square loose bottomed cake tin. Make the crumble topping: with the pastry paddle of the mixer or with the tips of your fingers, mix the butter into the plain flour until you get a texture like fine breadcrumbs. Mix through the brown sugar and the handful of oats and set aside. Beat the butter and sugar together until creamy, add the eggs one at a time with a spoonful of flour, then add the rest of the flour. Beat until creamy. Scoop the cake mixture into your tin and smooth it evenly. Sprinkle the blackberries and apple slices on top. Spoon the crumble mixture over the whole cake. Bake for about 40 minutes until brown on top and a skewer comes out clean. Leave to cool in the tin then cool on a wire rack. The centre of the cake retains a pudding like texture as it is quite juicy, so be careful when you get it out of the tin as it might crack. Serve in squares, sprinkled with icing sugar and with a swirl of whipped cream. Keeps in an airtight tin or in the fridge for 2-3 days. Lamb Kofta Kebabs with Tahini Garlic Sauce
Lamb is the traditional meat for Kofta, although inventive people in the on-line cooking community have been doing their own versions. Thanks to #food_obsessed_girl on Instagram for the inspiration, she did a beef kofta in July and it reminded me of lovely holiday food in days gone by, so I re-created a meal I had in Athens a few years ago. Very popular with the men, especially, for some reason. Maybe it’s just my men, but it seems as if they particularly enjoy getting their hands into their food, building their own wrap just as they like it, drizzling over the exact amount of sauce. You could use a mix of beef and lamb mince if you like and you can add different chopped salad accompaniments as you like and according to what you have around. Chopped tomatoes with onion and oregano would go well, as would grilled peppers. I’ve also eaten these with chips instead of bread or rice and with a tangy lemon sauce. They’re so versatile, let loose your imagination! You really can’t go wrong. Serves 4 Timings: 1 hour
For the tahini garlic sauce: 3 tablespoons light tahini, 1 clove garlic, 2 tablespoons lemon juice, 1 tablespoon olive oil, 1 teaspoon ground cumin. To serve with the koftas: flat breads, chopped cucumbers, yoghurt mixed with fresh mint, long peppers in brine, lightly pickled red onions, saffron rice Soak some wooden skewers in water for about 20 minutes as you make the meat mixture. Using a stick blender, blitz up the onion, 2 cloves of garlic, fresh chilli, fresh parsley, and the lemon juice to make a thick paste. It will make your eyes water so try not to breathe! Add the paste to the lamb mince along with the ground spices, oregano, tomato puree and Worcester sauce. Add a good pinch of salt and a grind of pepper. Mix well with your hands. Form into short cylinder shapes about the length of your thumb around the wooden skewers and put into the fridge for 30 minutes to cool and firm up. You can get about 2 koftas on each skewer. While they’re cooling, make the sauce by blitzing all the ingredients together. Taste, adjust seasoning if needed. Get the accompaniments ready – slice cucumbers, pickle sliced red onion in red wine vinegar with a pinch of sugar and salt, mix the mint and yoghurt, warm up the flatbreads and cook a pot of plain rice with a pinch of saffron added. When the kebabs are cool and a bit firmer, grill them under a hot grill for about 4-5 minutes per side until the outside is browned and slightly crisped and the inside is still moist and fragrant. Pile the kebabs up on a platter and let everyone serve themselves as they like. Padron Peppers
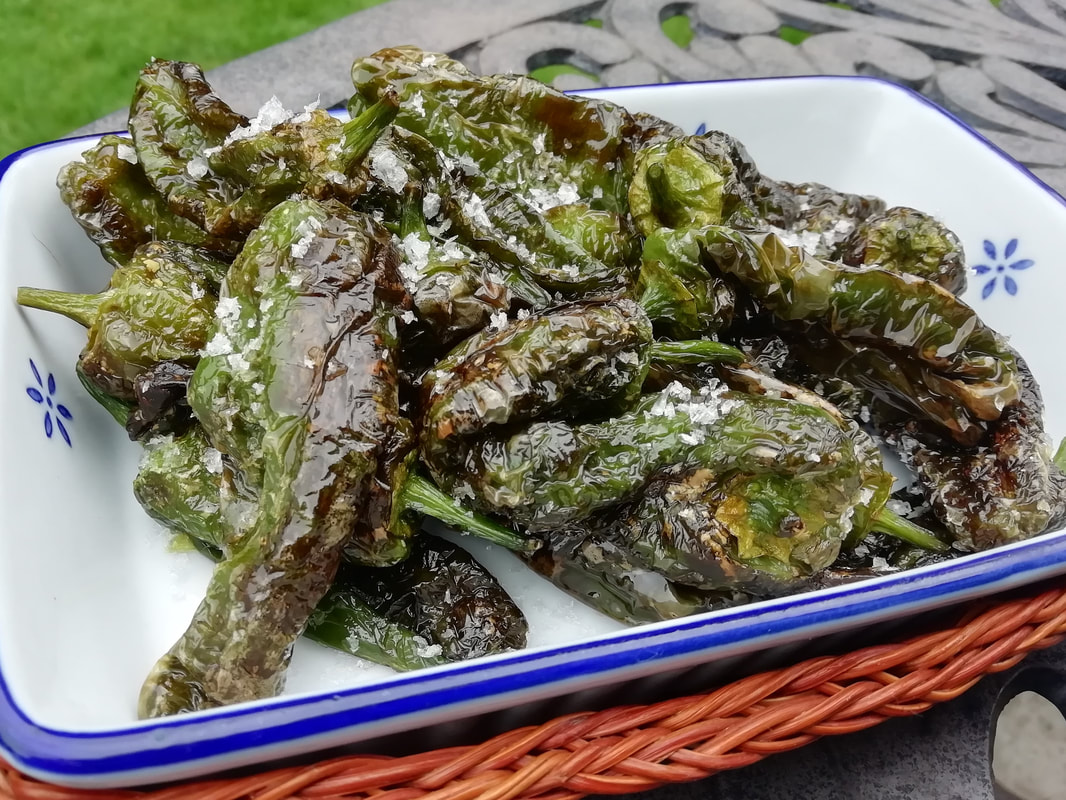
An indispensable part of any tapas selection, and a joyous addition to any party spread, sharing table or al fresco meal. We all love finger food, especially outside with our friends and family, and anything that makes life easier for the cook is a winner with me. The fun thing about these peppers is that although they are mainly mild tasting, one in 10 has a spicy kick to it, and you can’t tell which ones by looking. So you’re adding a little risky gamble to your snacking, which gives you a very pleasant frisson of anticipation. The variety of peppers is so special that it has been awarded a PDO protected status by the EU. I like the feeling of almost eating a national monument – similar to the UK’s Stilton cheese or Italy’s Prosciutto Toscano ham. Serve as part of a sharing table, or as a starter with a glass of Spanish red wine. You could pack them into a sealed container and take them along as a different vegetable for a picnic or put them in a lunchbox for your child to show off at school. Serves 4 as part of a mixed starter Timings: 15 minutes
Make sure the peppers are dry or they’ll spit as they hit the hot oil. Heat the oil in a heavy based frying pan – you are not deep frying but you need more than a slick of oil. Place the peppers in the hot oil and turn them as the skins puff and char. Fry for a few minutes, making sure all sides are cooked. Turn them onto a plate and sprinkle generously with the flaky sea salt. Serve warm or room temperature, and you will need a napkin to wipe your oily hands. Lemon Drizzle Cake
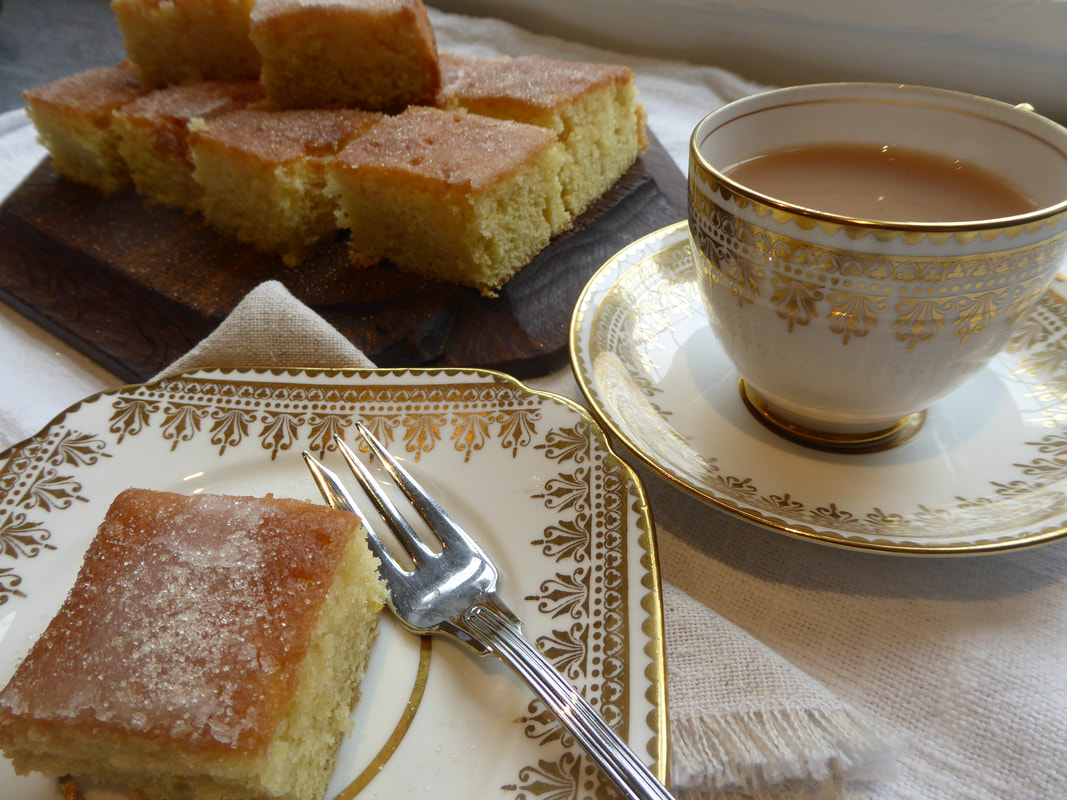
One of the great classics. Soft sponge, tangy lemon, sugary glaze. No squidgy icing to melt all over the place, the perfect cake for picnics, lunchboxes and of course, for cutting up in satisfying chunks for my Seniors Lunch Group. The topic this week, having had a two-week break, was holidays. Specifically, memories of holidays. We had a great range: family holidays in camps all over Britain, hotels in Wales, wet weekends in Blackpool, driving marathons in France, medical emergencies in Portugal and one member told us about turning up at a hotel where their luggage had been delivered the day before, to find that the staff had absconded due to non-payment of wages and left notes telling guests where to find and prepare their own food! Memories of guest houses where hot water was strictly timed or where you had to bring your own sugar and tea; in the early 1950s when rationing was still around you couldn’t expect your host(ess) to provide such things. The lemon drizzle cake was much appreciated. This recipe is another one from Pam Corbin’s River Cottage Handbook No 8, Cakes. It’s infallible in my experience and I turned to it when I needed an easy cake, having returned from holiday a day before the Lunch Club and not a lot in the fridge. Makes 12 generous chunks Timing: 1 hour
Pre heat the oven to 180°C. Grease and line a 20cm square cake tin with baking parchment. Zest the lemons and then squeeze them. Put the flour, baking powder, butter, caster sugar, eggs and lemon zest into a bowl and mix until you get a soft batter – about 5 minutes. Spoon the batter into your baking tin and bake for 35-40 minutes until the cake is cooked, golden on top and a skewer comes out clean. Remove from the oven, leave to cool for 10 minutes in the tin, then remove from the tin and the paper and put the cake on a wire rack. It’s quite a well behaved moist sponge and doesn’t seem to want to crack or fall apart as you do this. Prick the sponge all over the top surface with a skewer, not poking the hole right to the bottom of the cake. Mix the granulated sugar with the lemon juice (sieve to remove pips if there are any) without stirring too much; you don’t want the sugar to dissolve. Spoon this mixture evenly over the cake, letting it dribble down into the sponge leaving the granulated glaze on the top. Let the cake cool completely and put it in an airtight tin to keep. Very Berry Jam
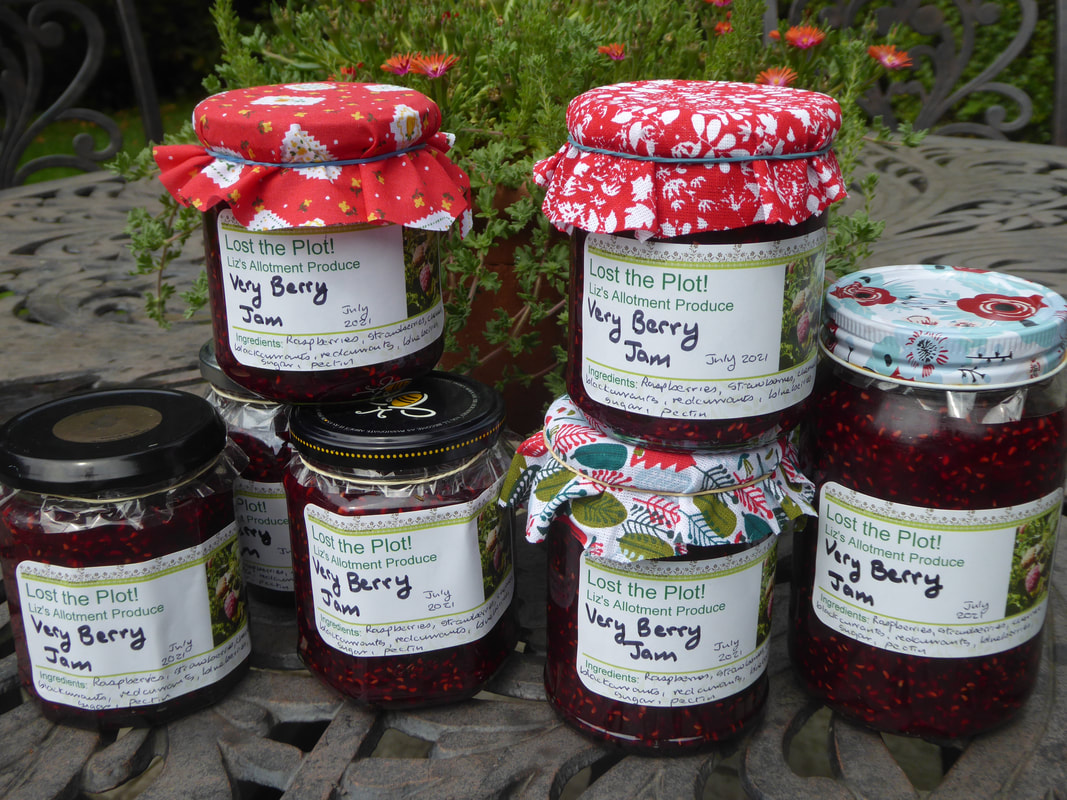
This is the easiest jam I make and also the one that people seem to like the best. I generally give my friends a little hamper at Christmas with allotment produce and I always include a pot of home-made jam. It makes a wonderful take-along present for parties too, a touch more personal and less usual than the bottle of prosecco. Which I am not knocking by the way, a bottle of fizz is always welcome in my house. It’s easy because you use whatever fruit you have to hand; it doesn’t have to be home grown. We often have fruit for breakfast and if there are any manky strawberries or slightly soft blueberries left, I pop them in a freezer bag to save up and use in this mixed berry jam. As it happens, the raspberries in my allotment are producing a bumper crop this year, so this particular batch is raspberry based. I picked cherries, strawberries and black and redcurrants from the allotment and added some blueberries from the fridge that were a bit sad. Later in the season I might add some blackberries or gooseberries or even a fig or two from the tree next door. If you are using a lot of low pectin fruit such as strawberries, you might need to add some pectin, use jam sugar or add in a handful of redcurrants, but the joy of a mixture like this is that all the fruits meld together and make up for each other’s deficiencies while making all their tastes sing in harmony. I had two bags of frozen fruit mixture from the allotment/breakfast leftovers and a big harvest of raspberries, so I had 1.6kg of fruit. The general principles of jam making are:
Makes 8 small jars Timings: about an hour 1.6kg mixed berries, stalks removed 1kg jam sugar and 600g granulated sugar Place the fruit (defrost any you have frozen of course) in a large pan – the jam will rise up when it boils so better use a bigger one than you think. (Much bigger) Simmer for about 10 minutes. Add the sugar. Stir to dissolve and then let it boil merrily. Meanwhile, sterilise your jars. Boil the jam until it reaches 104.5°C on your jam thermometer. Stir it every now and then as it bubbles just to stop anything catching on the bottom of the pan and adding a burned flavour. Switch off the heat and let it cool for about 10 minutes – to under 90°C. Pour or scoop the jam into your jars, cover with a wax disc and the plastic cover held by an elastic band. Put the lids on your jars and screw on tight. When cool, label the jars and store in a cool place until you use the jam. It will keep for at least a year. Grilled Feta Baguettes (vegetarian)
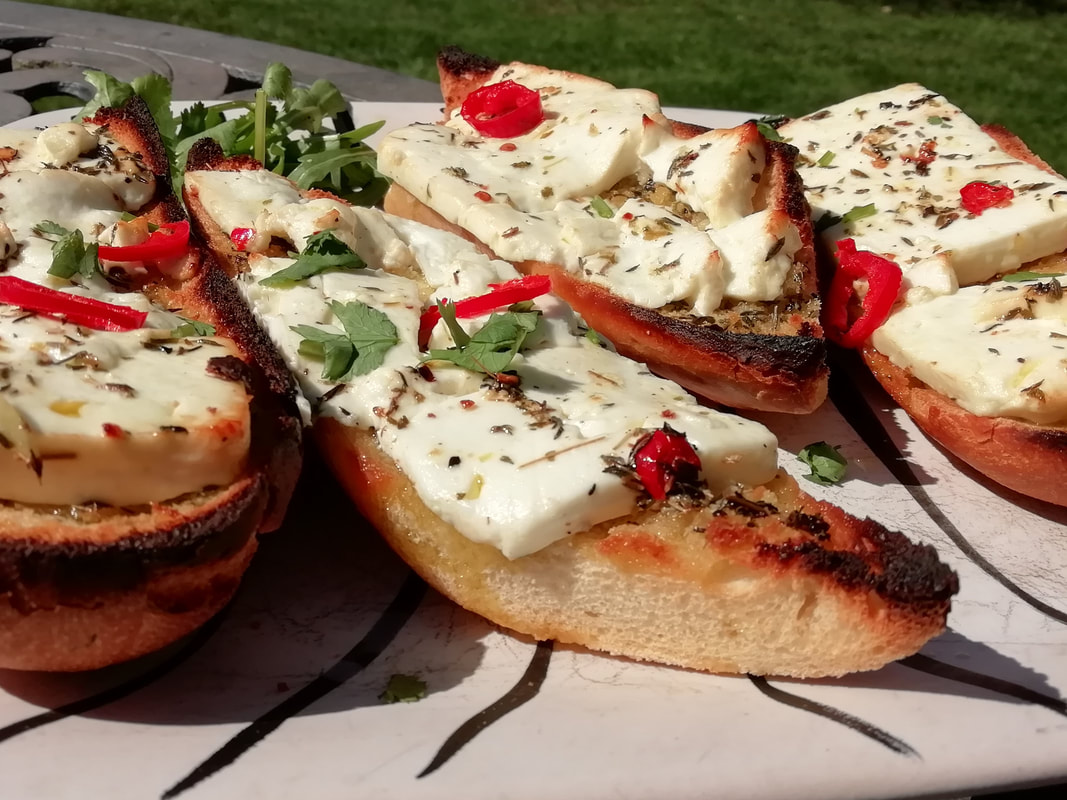
In Cologne Christmas market the spicy, salty smell of the Sheep’s Cheese Baguettes demands your attention. The cheese is marinated in barrels of olive oil with whole cloves of garlic, chillies, herbs and other spices. The vendor hauls dripping chunks out of the barrel, scrapes off the crust of herbs and flaked chillies, smacks it expertly into white shards and throws them on to halved baguettes, which are then flashed under a hot grill until seared and starting to brown. You eagerly, biting through the crust to find the melting garlicky cheese, oozing gently into bread. These slices of goodness are just as at home at a summer garden party and are easy to prepare and serve. They're from my Summer of Six set of recipes, designed for small group outdoor parties, appropriate for this summer and autumn gatherings. Have a look at the pages (link above) for lots of ideas to make your entertaining easy and tasty. They'd be good for a school holiday lunch too. Serves 6 Timings: marinate the feta for at least 2 days; can be much longer. Final preparation, 20 minutes.
Several days before eating, marinate your cheese. Mix the oils with the chilli, garlic, bay, and dried herbs and spices in a leak proof fridge container. Take the cheese out of its packet and cut in half across and then cut each piece across its equator, to make thinner pieces. Put these into the container and turn to cover with oil. Put all the cheese into the container, fix the lid, turn it back and forth a couple of times to distribute the oil and then leave in the fridge for a few days. Turn it again a few times a day, whenever you’ve got the fridge open. Pre-heat your grill to a high setting. Cut the baguette into 3 slices and then halve each piece, so you have 6 long half-pieces. Grill these lightly – 2-3 minutes max - just to toast the top surface. Drizzle some of the oil from the container over the toasts, especially at the edges, and then cover the slices with the cheese pieces. Drizzle a bit more oil over, adding any pieces of marinated chilli you find. Grill for a few minutes until the cheese just starts to brown - it won’t melt like cheddar. To Serve: eat hot, with maybe a few rocket leaves scattered artistically on the cheese, or some chopped chillies and coriander. Chocolate Coconut Jumbles
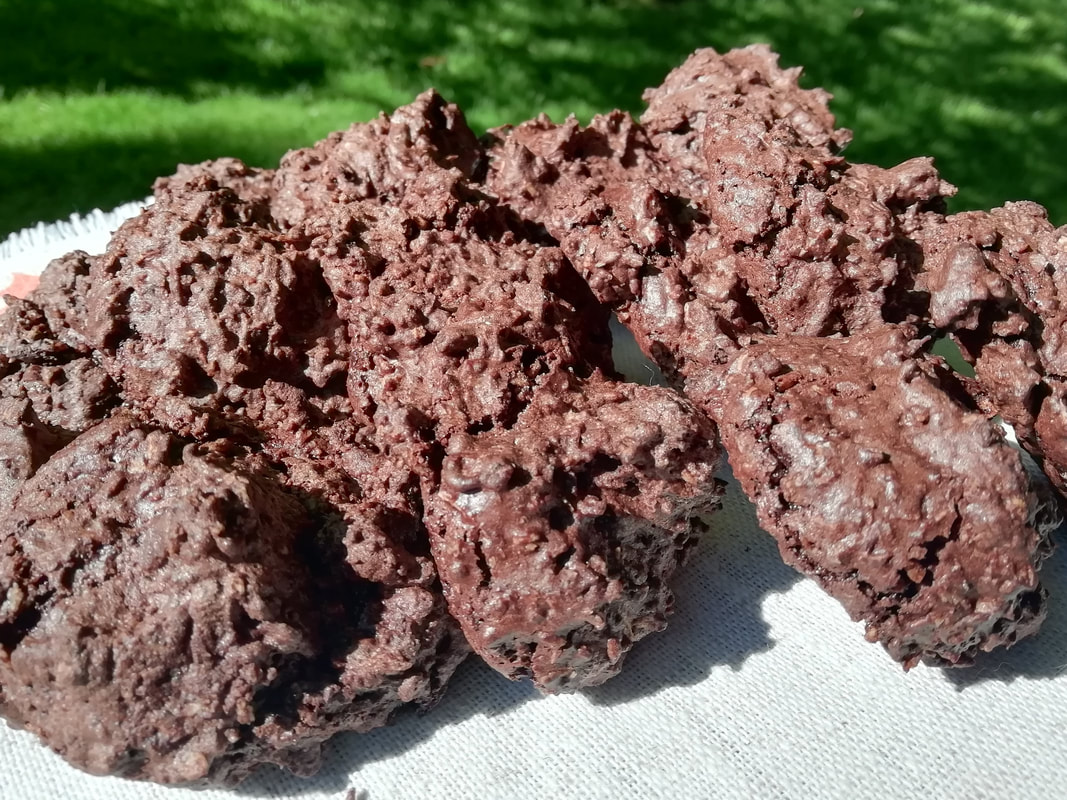
These are sort of like a coconut macaroon but chocolately and chewier. They have a meringue base but aren’t crisp. Easy to make, keep a few days, great for picnics and lunchboxes; who cares if they aren’t that sophisticated or elegant? A classic jumble is an American cake/biscuit cross made from flour, sugar, eggs and spices. In “What Katy Did at School”, (by Susan Coolidge) the half-starved girls at boarding school were sent a parcel from home at Christmas containing home-made jumbles, which seem to have been a bit like our rock cakes, with some dried fruit in there as well. My recipe is a departure from that long ago classic. Anyway, it’s a simple baked sweet creation, so maybe I can use the name for these too as they're a jumbled messy sort of bake. And the boarding school girls would have been pleased to get them. No doubt someone better informed can set me right on the original recipe? Please leave a comment if you can, it would be great to find out more about the original jumbles. Makes 16 medium jumbles Timings: 10 minutes preparation, 30 minutes to set, 30 minutes to bake
Whisk the egg whites until fairly stiff, then add the caster sugar with the motor running. Whisk until glossy and thick – about 3 minutes. Add the coconut, icing sugar and cocoa powder and mix with a metal spoon – you will get a very gloopy mixture. Drop spoonfuls on a greaseproof paper lined flat baking tray and leave for 30 minutes to allow them to set and a crust to form. Bake at 180°C for about 30 minutes until cracked on the outside and still chewy on the inside. Leave to cool on a wire rack. They will keep in a tin for a few days, gradually getting chewier. Home Pickled Beetroot
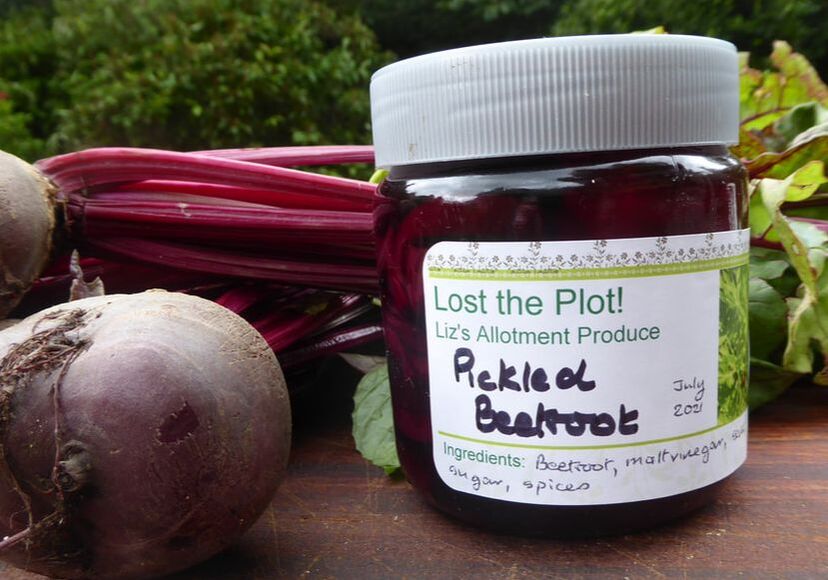
Now we’re coming into preserving season, making jams and savoury jars of loveliness to remind us of Summer sunshine in the depths of Winter and to perk up our tastebuds in the cold weather. Pickled beetroot is the absolute easiest thing to make, requiring no special equipment and tastes so much better than the shop bought jars. You can adjust your seasoning to your own taste and feel so proud when you bring the beautiful jar of deep purple slices out to enhance a meal of cold meat or add to a corned beef or cheddar sandwich. Is that only a Northern tradition? Delicious anyway, if messy. If you don’t grow your own beetroot – which is lovely tolerant vegetable and quite easy to grow if you don’t sow it too early as I always do – then get a pretty bunch of fresh beetroot from your green grocer. If you buy it with the tops on you can see how fresh it is – the leaves are also attractive. Wait till you have the oven on for a roast or something; beetroot doesn’t mind waiting a couple of days in the vegetable drawer. I like to roast my beetroot, partly because I’m lazy and partly because I like the taste better. The taste of beetroot is often described as “earthy” which doesn’t properly catch the sweet autumn smoky depth of this wonder vegetable. It’s supposed to be one of the true “superfoods” having a proven ability to reduce blood pressure. Maybe so, but I’d eat it because it tastes so good and looks so beautiful. The health benefits are a pleasant bonus. I make a batch of pickling vinegar up every now and then, cool it and put it in a clean bottle. It keeps in a cool place for months and means you can just heat it up and pour it over sliced beetroot whenever you have some around. Makes 2 jars Timings: 2 hours roasting and overnight cooling down for cooking the beetroot, 30 minutes for preparing the vinegar and pickling the beetroot but this will give you more vinegar than you need so it will take you less time when you do another batch.
Roast the beets: wrap the beetroot in foil, either individually if they are fist sized or in twos or threes if they are smaller. Seal the parcels well and put on a tray in the oven when you have the oven on for a roast or casserole. Let them cook along with the other dish for about 2 hours, depending on the size and then leave them in the oven when your other dish is done, to cool down with the oven. I find this gives me perfectly cooked tender beetroot. In the morning, take them out of the oven (doesn’t matter if you don’t remember till later) and keep them in the fridge until you use them. They will keep for a couple of days before you have to pickle them. Clean your jars: I like to use peanut butter jars or other jars with pure plastic lids so that the vinegar doesn’t get a chance to corrode the inside but jam jars will do. Fill the jars full of boiling water, then empty and dry. Make the pickling vinegar: put the vinegar into a small pan with all the ingredients, bring to a simmer. Taste and adjust the seasoning – I like it quite sweet so I sometimes add another teaspoon or two of sugar. You could even add honey if you like the additional flavour. Let the pan simmer for a couple of minutes, then let it cool nearly to room temperature to infuse the spices into the vinegar. Strain the vinegar and discard the spices. This is your pickling vinegar now. Bring it back to simmering when you’ve sliced your beetroots. Unwrap your beetroots and just rub the skin off. It will come off easily. Wear gloves if you don’t want stained hands but it’s quite fun to get red fingers. Halve the beetroots if they’re large and slice into very thin slices using a sharp knife. As you slice, feel the texture, it should be a buttery softness. If you get any fibrous bits (which can happen with home grown beetroot if you leave it too long in the ground and it goes woody), cut round them if you can. Place the sliced beetroot into the jars, working like a puzzle master to fit the most slices into the jar that you possibly can. Put them in horizontal layers with some stuffed vertically down the gaps. Fill each jar to within about 1cm of the top. Pour the hot vinegar directly into the jar. Using a knife or skewer, poke down into the jar to release any air pockets – you can see them from the outside. This will help them keep better and let you get a bit more vinegar in. Top up with more vinegar to cover all the beetroot, seal the jars and keep in a cool darkish place. They don’t have to go in the fridge until you open the jar. Keep any un-used pickling vinegar in a clean bottle or jar until you get the next batch of beetroot to process. You'll be surprised how much you get through in a year, once the family get the taste for the home made stuff. Turkey Keema – not just for the kids!
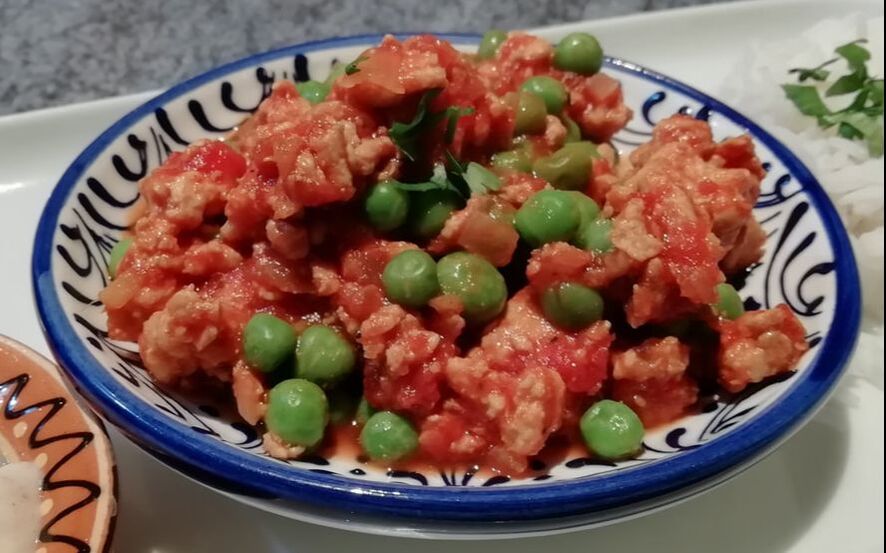
Why do all kids like mince with peas? Big kids too. This is the ideal “kids’ curry”, not too spicy or in-your-face but pleasantly warming and easy to eat. It’s a great mid-week staple, simple to put together, not too high in the calories and hiding some good portions of vegetables within the sauce. Freezes well too, without the peas. Traditional Keema is made with lamb mince, which can be both expensive and rather fatty, although it does have a wonderful flavour. Using turkey mince just lightens up the dish. It’s not authentic, but it’s tasty. You can adjust the heat level by adding more chilli powder for those of more mature tastes. Serves 4 Timings: 30 minutes
Fry the mince gently in a heavy pan for a few minutes with a little splash of oil, turn and bash with a wooden spoon to coat all the mince with the oil. Add the onions and fry for a few minutes, then add the garlic, chilli and ginger. Continue to fry gently until the vegetables are softened and you can see all the mince is cooked. Put all the ground spices in a glass and add a tablespoon of water, mix to a paste and then scrape out into your pan. Stir into the meat as the spices release their aroma. Add the tin of tomatoes, and maybe half a tin of water, the tomato puree, the marmite and the Worcester sauce. Mix well and allow to simmer for 15 minutes. Add the frozen peas into the curry and stir in as they cook for about 2 minutes. Taste and test for seasoning – depending on the curry powder you used you may need to add salt, some pepper and perhaps a squeeze of lemon juice. Serve with plain rice or naan bread and some simple fresh relishes such as chopped tomato and red onion, cucumber with mint and yoghurt or a jar of mango chutney. |
Some Changes - April 2022
Thanks to my friends and followers for your patience, and for your encouragement to start blogging again. Archives
April 2022
Categories
All
|


 RSS Feed
