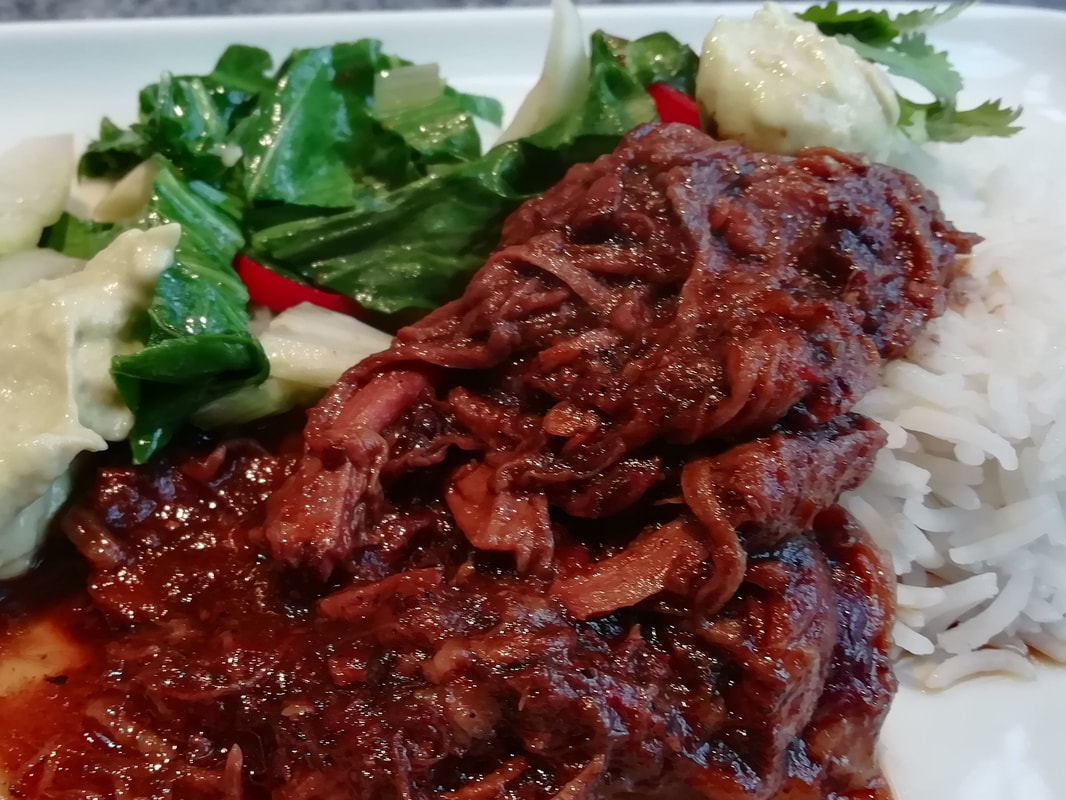
 Slow cooked beef in original barbeque sauce, using chipotles in adobo sauce for that deep spicy punch Barbacoa Beef
It sounds like the word “barbeque” and in fact is the original recipe from which all other barbeques are derived. It’s a Caribbean technique of slow cooking fatty meat with chillies and spices in a rich sauce. The technique made its way to Mexico and picked up additional chillies on the journey. The meat falls off the bone, the bones are discarded and the resulting meaty stew is then eaten with rice, on tacos, or stuffed into wraps of some kind. The genuine flavour is much enhanced if you use genuine ingredients, of which the most important are the chillies. Try to get chipotles in adobo sauce (which are dried jalapeno, smoked then canned in a tomato based sauce) and dried ancho chillies if you possibly can. They are worth it, and the sauce is sensational, so I can promise you will make it again for your family and friends. Serves 8 Timings: 1 hour preparation, 4-5 hours slow cooking, 1 hour final preparation
In a large heavy pan – a cast iron or Le Creuset pan is ideal, dry roast the dried ancho chilli for a few minutes, it will char slightly. Remove it to a small saucepan with the 500ml chicken stock and simmer as you cook the other items. Take off the heat as you start to cook the onions in the list below. If there is a large stalk on your ancho, remove it. The rest of the chilli will have become quite soft with the simmering. In the heavy pan, brown the oxtails in some vegetable oil. Remove from the pan. Brown the pieces of shortrib on all sides, remove from the pan. Add the chopped onions, fresh chilli and garlic to the pan and fry gently to soften – don’t let them brown. Add the dried and powdered spices, stir to release the fragrance. Add the chipotle and sauce and cider vinegar. Stir up and allow to cool slightly before transferring to a blender along with the fish sauce and the ancho chilli and chicken stock. Blend the sauce until smooth. Add the sauce to the meat either in a slow cooker or in a large oven casserole and tuck in the bay leaves. Cook on a low heat for 4-5 hours until the meat is very tender. Allow to cool slightly, remove the meat pieces from the sauce one by one on to a plate. Use two forks to remove all meat from the bones, including the oxtail bones, and tear the meat into strings. Discard the bones. The sauce in the casserole dish should be simmered for some minutes to reduce by half – to leave a thick spicy sauce. Return the meat to the pan, stir and warm through. The meat can be portioned and frozen for later, and once cooked, it keeps a couple of days in the fridge.
0 Comments
 Halved eggs with a spicy filling, sitting on their own lettuce cups. Easy finger food. Devilled Eggs in Lettuce Cups
The perfect finger food, so simple. These are found on all buffet tables in Scandinavia. I generally allow one egg half per person, but you know the hungriness of your own family and friends best. For 6 people I have used 4 eggs in this recipe which gives you some leeway if an egg is a funny shape inside and won’t be stuffed, or to give someone second helpings. Use more eggs if your group of 6 is a hungry bunch and they’ll want two halves each. This recipe is from my Summer of Six menu, from Malmo to Malaga. Head over to the Summer Garden Party menus for lots more ideas what to feed your friends when you hold a party in the garden and you want something more adventurous than a barbeque. Serves 6 Timings: 50 minutes – 10 minutes to boil the eggs, 20 minutes to cool down, 20 minutes preparation
Hard boil your eggs: boil for about 10 minutes and then run them under cold water until they have cooled down a bit. Wash the lettuce and separate the leaves. In a small bowl mash the anchovy fillets with the back of a teaspoon into the mustard – you will get a lumpy creamy texture. Mix in the mayonnaise and add the butter to the bowl. Peel the eggs under running cold water – this helps get the shell off without sticking to the white. Halve the eggs top to bottom, being careful to keep the halved whites whole. To make the whites stand better you can cut a very thin sliver off the underside. Scoop out the yolks with a teaspoon and put them in the bowl with the other ingredients. Mix well. The remaining warmth of the yolks will just melt the butter into everything else and turn it into a creamy paste. Adjust the seasoning if needed, you might want a grind of pepper. Scoop the mixture into a piping bag, using a big star nozzle and fill each egg half with a generous portion. Place each egg half onto its own lettuce leaf cup and sprinkle a tiny dusting of paprika over. They’ll keep in the fridge covered for an hour. Serve as they are on their little lettuce plates.  Light fatless sponge, filled with home made raspberry jam. Perfect for your garden party. Swiss Roll
The simple, elegant, refined Swiss Roll. It’s one of the nicest cakes you can make, and it’s practically a health food as it contains no fat. You can fill it very simply with jam (home made tastes best but I would say that) and dust it with icing sugar, or you can fill it with a mousse and cover with buttercream for a much richer version. (see the December archive of this blog for my Yule Log which is a chocolate roll with a mocha buttercream filling). Our Seniors Lunch Club group started back meeting in person again this week, which is why I wanted a simple easy to handle cake for our first week. We have enough to get used to and be concerned about without having a fussy cake to contend with. We had a welcome-back chat, covering how to be safe when meeting other people and we celebrated Shakespeare’s birthday by reading out famous lines from his work and guessing which play they came from and who said them. One of our members gave a most rousing rendition of Henry’s “Band of Brothers” speech before the Battle of Agincourt from the play Henry V. It was quite a demanding quiz but we battled through in true St. George spirit (it’s amazing how much Shakespeare we remember, seventy years after leaving school) and so much enjoyed being back together. Serves 10 Timings – 10 minutes preparation, 10 minutes in the oven, 5 minutes to fill and roll.
Pre heat the oven to 220°C. Put the eggs and sugar in the mixer and beat vigorously until fluffy and creamy-coloured. While that is going on, you can line your shallow baking tray with greaseproof paper. You need to make a shell of paper for the sponge, so cut the paper a bit bigger than your tray and fold up each side, creasing the folds. Cut each corner at an angle so you can fold the paper over the corners to make a nicely edged shell – it doesn’t have to be exact and you don’t have to pin the corners as I was once taught. Once the egg/sugar mixture is light and creamy, turn the motor of your mixer down low and add in the flour. Remove the whisk from the bowl and add in the hot water. Mix carefully with a metal spoon to keep the air bubbles in, and then scrape the mixture into your prepared paper shell. You will get quite a thin layer – spread it carefully with the back of your metal spoon right into the corners of your paper shape. Place it in the oven and watch as the sponge puffs up and rises. It only takes 7-9 minutes as it is a thin layer of cake. While it’s baking, lay out a clean tea towel on your work surface and sprinkle some caster sugar on it. Also, check the consistency of your jam – if it isn’t quite runny, put it into a small pan and warm gently – this will make it much easier to spread. When the sponge is done – nice and springy to the touch but not burned on the edges yet – turn it out front side down onto the tea towel and peel off the greaseproof paper. Immediately spread the whole exposed surface with a thin layer of warm jam. Keeping it in the tea towel, roll up the cake from the short side – so you get a short fat roll with more layers than if you had rolled from the long side. Keep the cake rolled in the tea towel on a wire rack as it cools and then transfer to a sealed cake tin. Just before you serve, dredge over some caster sugar or icing sugar for effect. The Swiss Roll keeps for about 2 days in the tin, but you can also freeze it and use it for trifles or Tipsy Parson (you can find the recipe for that in the April blog or on the Summer of Six menu, from Mexico to Marseille.)  Deep fried chicken fillets in a spicy Korean Gochujang sauce Korean Spicy Fried Chicken
Tender strips of chicken, coated in seasoned flour which puffs up into a crispy batter when deep fried, then warmed with a spicy Korean chilli and salty sauce – the definition of yummy. The sauce uses gochujang paste, which is a Korean staple of fermented rice, chillies, soybeans and other pungent edibles. It’s lovely and gives the genuine smoky taste and deep fermented flavour. It keeps ages in the fridge and can be used in a lot of recipes. My son gave me a tub of it for Mother’s Day – an unusual but very thoughtful present; also a big hint. I had a good look for recipes and have slightly adapted one from Nicky at Kitchen Sanctuary for this dish, she has some gorgeous, tasty-looking and speedy recipes to offer, thanks Nicky. So, this is what I made for him, street food from Seoul. Serves 4 Timings: 2 hours (or more to marinade), 30 minutes to cook
Mix the marinade ingredients with the cut-up chicken and leave in the fridge for at least 2 hours and up to overnight. Make the sauce by putting all the ingredients in a small pan and warming through, mixing well as the sugar and honey dissolve. Taste and add more soy or orange juice as you like. You are looking for a thin sweet, sour, salty, spicy coating sauce. Let it cool down and leave while the chicken marinates as this will also intensify the garlic and ginger flavours. When you are ready to cook, first heat up your oven to 170°C. Mix the flour and batter ingredients together in a deep dish. Take the strips of chicken out of the marinade and coat well with the flour, putting each strip onto a plate or baking tray when done. I found you have to coat each strip twice as they are quite moist from the buttermilk and the moisture leaks through the first coating quite quickly. It’s the depth of flour on the chicken strip that makes the lovely crispy batter so it’s worth double dipping. Heat up the oil in the deep fryer or pan. Start to warm up the sauce now too in a large pan. Fry the chicken strips in the hot oil for only a few minutes, turning in the pan. Don’t put too many in the pan at once or the oil will cool down too much, so fry a few at a time and keep the completed ones warm in the oven on a baking tray. When they are all done, tip them into the pan with the sauce and stir quickly to coat. Sprinkle with the chopped onions and sesame seeds. Serve with plain rice and maybe spicy pak choi or other oriental vegetable. Credit to Nicky Corbishley at Kitchen Sanctuary.com  Pillowy potato gnocchi, with juicy tomato sauce, family favourites Gnocchi with Tomato Sauce (vegetarian) – Gnocchi Napolitana
Simple, elegant, frugal and comforting. What more do you want? Learn how to make the perfect gnocchi and pair the little nuggets of potatoey goodness with a lovely sauce. So much better than the ones in packets, or god-forbid, frozen. There seems to be some magical thinking going around about the way you have to cook the potatoes for gnocchi. Ignore it. Mashed potato is about the easiest substance in the world to generate. Peel a nice potato (not a new potato or a salad potato, use a King Edward or anything that says “ideal for mashing” and you’ll be fine), boil it, drain it, and mash it. That’s it. Add salt, pepper, a dash of milk and a nobble of butter as you mash. Make mashed potato one day for supper (with sausages? For the top of the fish pie?) and double your usual quantity, so you have some left over. Then you can rustle up the gnocchi in no time next day, cook them, and combine them with a sauce you also made earlier. Apparently it’s also good made with left over baked potato, so if you have the oven on for something the day before, bung a few extra spuds in, and then let them cool and scrape out the fluffy inside to use for the gnocchi. Perfect for after the kids’ swimming lesson when you need something double quick and warming. Make the little darlings dry their hair and lay the table and you’ll be ready when they are. Also a great meal for school holiday lunches or when they’re studying from home. Serves 4. Timings: 1 hour for the sauce, can be made ahead. 30 minutes to boil and mash potatoes, can be done ahead. 20 minutes to make the gnocchi and combine with the sauce. For the gnocchi:
For the tomato sauce:
Make the tomato sauce: fry the onion gently for a few minutes to soften it, add the garlic and the oregano. Fry a few minutes, add the fresh tomatoes chopped up, add the tin of tomatoes. Add a little water if you need it, and the marmite, Henderson’s Relish, salt and pepper. Simmer for about 30 minutes. Cool, blend and sieve. You will get quite a thick tasty tomato sauce with no seeds in it that can be used not only for gnocchi, but as a soup, as a sauce for pasta, etc. It freezes well and keeps in the fridge for a few days, so I often make a big batch when I see tomatoes reduced in price, and freeze portions. Make the gnocchi: combine the mashed potato with the egg yolk, sieve in the flour, leaving the last few tablespoons out until you see what texture you have. You want a smooth, light mixture. Don’t knead the dough but mix it thoroughly, wrap it and put it in the fridge for 10 minutes. While you’re waiting, now get the sauce out of the fridge and warm it in a large pan. Put another large pan of salted water on to heat, you want it boiling to cook the gnocchi. When you bring it out of the fridge, cut the dough into 4 equal parts. Flour your worksurface. Roll each section of dough as if you were making a play-doh snake, into a long thin cylinder. Cut the snake into 2cm sections along the length and then take each piece in your hand and press a fork against one side. This makes those nice parallel lines on one side and a small indentation on the other, which allegedly makes the shape better at holding the sauce. I’m not sure, but it maybe also firms up the dough shape and makes it more likely to hold itself. Drop the gnocchi into the boiling water – do not overcrowd the pan as the water needs to rise to boiling again quite quickly. I was doing about 10 at a time which seemed to work. The gnocchi will drop to the bottom of the pan and as they cook, they will rise up – taking about 3 minutes for a batch. When done, scoop them out and drop the cooked gnocchi into the warm sauce. Keep doing that until you’ve done all your dough. Warm the sauced-up gnocchi’s and serve with some shredded basil on top and some grated cheese. Maybe a side salad would complete the picture?  A crowd-pleasing dessert for your outdoor garden party of 6 Coupe Danemark - Ice cream dessert with hot chocolate sauce
This recipe is from one of my Summer of Six menus - the cold weather option. I give three hot dishes to warm up your guests if you're having a Garden Party for Six and snow is forecast. Have a look at From Cologne to Copenhagen for the full menu. The Tivoli Gardens in Copenhagen are a pleasure at any time of the year, but perhaps most at Christmas. The scent of spices and chocolate warms and entices you. I can’t call Coupe Danemark actually a street food, you can’t eat it with bare hands. But even in cold weather, this ice-and-hot sauce dessert is served to eat at streetside tables. It's called Coupe Danemark in Germany and Switzerland (hence the spelling) and Dame Blanche - or White Queen - in Belgium and Holland, but I'm not sure it's got it's own name in Denmark, so I'm using the German name here. I have cheated and used shop bought vanilla ice-cream but I will have some recipes for home made ice-cream on my blog when the weather is more suitable for thinking about making your own frozen desserts. Serves 6. Timings: 10 minutes
Roast the hazelnuts in a small frying pan for a few minutes and bash them with a potato masher or solid block to get crumbled pieces. Leave on kitchen paper to cool. Put all the sauce ingredients into a microwave bowl and blast for 30 seconds. Stir, blast again for 30 seconds. Check the consistency, if you need more butter, add a little more to keep the sauce glossy and pourable. Spoon a generous helping of ice-cream into each sundae dish. Pipe cream round the outside and spoon hot sauce down the middle, so it hits the ice cream. Pipe a little cream on top and sprinkle over some roast chopped hazelnuts. Serve straightaway with a few chocolate sprinkles or curls on top.  Thick fluffy bread dough topped with infused passata and whatever toppings you like - easy party food Roman Street Pizza (vegetarian optionally)
You’ll also find this recipe on my Summer of Six menu, from Rome to Rouen – have a look at the other recipes on the menu if you’re thinking about entertaining outside. Girls’ trip to Rome – and to the best pizza place in the city. We ate standing up outside; quick fast food, coming out of the kitchen continuously on sizzling trays, cut into slabs, thrown onto paper plates and gobbled at speed. Roman street pizza is different from Napolitan – it’s thicker, fluffy and more bready. Highly satisfying to eat and to make. Perfect food for kids, great for parties, easy for school holiday or working at home lunchtimes. Adaptable for all diets and one of the healthiest fast meals, who doesn’t love a home made pizza? Pizza keeps and re-heats so well that it’s worth making a larger quantity than you need on the day, and somehow dough comes out better done in a bigger batch than tiny ones. Makes 10-12 portions, 2 roasting trays full. Timings: 30 minutes initial preparation, then 90 minutes prove, then 10 minutes work and another 90 minutes prove, then 20 minutes to cook - about 5-6 hours altogether. For the dough:
At least 5 hours before you want to eat, start your dough. Mix all the dough ingredients and turn out onto your worktop to knead. Knead well for about 5 minutes and then leave the dough under a bowl on your worktop for about 10 minutes. Knead again for 5 minutes. You will have a shiny, springy dough which you can already see starting to fluff. Leave to prove covered in a warm place until roughly doubled in size – about 90 minutes to 2 hours depending on the temperature. Prepare your tins – I use metal roasting trays or deep square cake tins to cook this. Grease each tin and line with greaseproof paper on the bottom. Take it out of the bowl, knock it back but don’t knead it much, then put it into your prepared tins, stretching it so that it fills the tin about 2cm deep. Leave covered in a warm place to rise again. I like to put the tins into a big plastic bag which you blow up at the neck and then seal with a clip. This keeps the dough protected from draughts and happy in its work. At this stage, you can play with the timings – if you want to leave it to rise more slowly, just leave it in a cooler place. You should leave it for about another 90 minutes in a warm place at least, and it will again double in size and become very puffed up. About 30 minutes before you are ready to cook, start to heat your oven to 240°C. You need to give it good time to warm up so the whole oven is hot – like a real pizza oven. Of course, if you have a real pizza oven, fire it up! Remove the garlic and the basil from the passata. Get the tins of pizza dough and handle them carefully so as not to depress the dough. Carefully spread the passata all over the top of each pizza dough, right to the edge. Whack them straight into the oven for 10-15 minutes until the passata is starting to crust round the edges. Bring them out, and scatter on your other toppings. I would recommend not too much fresh tomato, as it is quite liquid and you don’t want the dough getting soggy with the juice. These pizzas are not supposed to be too deeply topped, so try not to go overboard. Back in the oven for 10-15 minutes to melt the cheese and crisp the toppings. Bring them out and let them cool for just a few minutes before portioning and serving.  Tangy garlicky buttermilk ranch dressing, wild garlic chicken, crispy bacon and croutons - salad heaven! Buttermilk Ranch Salad with Wild Garlic Chicken, bacon and wild garlic croutons
Wild garlic a-go-go! Using the wild garlic butter you made from your foraged harvest, pan cook a chicken breast which you then slice up on top of a Ranch dressed crisp green salad. Add some wild garlic croutons and crispy bacon – Saturday family lunch time heaven. Buttermilk is not so common in the UK and if you can’t get it, mix a small pot of plain yoghurt with the same volume of milk and whisk well, and you will have the right texture, although not quite the sour-dairy tang. Serves 4 for lunch Timings: 30 minutes, if using already prepared wild garlic butter, and you can roast the chicken ahead and keep cool in the fridge.
First pan roast your chicken meat in the wild garlic butter. Put a good spoonful of butter in a small frying pan over a medium heat and gently fry your chicken, spooning the hot butter over it, and turning it over now and then. A breast will cook in about 8-10 minutes, and a boned thigh will take a little less. The generous butter keeps the meat lovely and moist. Leave the meat to cool and absorb more butter. You can also wrap a piece of chicken in kitchen foil and add some garlic butter to the parcel and just put the parcel in the oven for 20 minutes if you have the oven on for something else. Take it out, let it cool, keep in the fridge until you are ready to use it. Make the croutons – fry the cubes of bread in the frying pan you used for the chicken, adding a bit more wild garlic butter as you go. The leaves of the wild garlic will fry and sizzle and go black but the taste of the croutons is spectacular. They take about 5 minutes, keep moving them around in the pan and then scoop out onto kitchen paper to cool and crisp. Wipe out the frying pan and cook your bacon until crisp, drain on kitchen paper. Make the ranch dressing in your largest salad bowl. Mix the dressing ingredients together well, even whisk with a small whisk if you have one. Taste and adjust the seasoning – you might want a little more salt or a squeeze of lemon juice or a teaspoon of sugar. The dressing should have a nice tang but it doesn’t taste strongly of buttermilk. You can do all the above in advance and keep cool in the fridge for several hours. Wash your lettuce thoroughly and dry or spin. Tip the lettuce into the bowl with the dressing and mix well. (I believe it was Anna del Conte who taught me that a salad should be tossed at least 25 times to coat the leaves properly with the dressing, which is after all, the reason for a salad’s existence.) Top with the sliced chicken, crumbled bacon and crispy croutons.  Soft sponge, boozy fruit, sweet custard and cloudy whipped cream - a Scottish pudding dream! Tipsy Parson
A retro dessert from my Scottish heritage. I discovered this pudding in letters sent from my Mum to my Granny in the 1940s when my Mum was on national service in the WRENS. She was stationed in the south of England and was delighted to be invited for an evening meal by some relatives and offered a familiar dish. She mentioned it in her letter home and I did some research. It’s basically an economical wartime take on the traditional Trifle. It uses up the ends of old sponge cakes, some fruit preserved in liqueur, custard and cream. Anyone with a garden in wartime would have tried to preserve fruit in some way, and they might also have kept hens, so ensuring a plentiful supply of eggs to be made into custard. I have re-created it using my own damson vodka (recipe to come at the appropriate time of year) to marinate the fruit and a bought custard rather than home made. I find making a thin spooning-texture crème anglaise style custard, which is what goes best here, rather difficult. I probably don’t have the patience. So I used a bought chilled custard instead, which worked very well. We didn’t have a Seniors Lunch Club round on Thursday as we are “on holiday”, so I didn’t bake a cake. We did meet on audio conference though, and we talked about what we did at Easter. Members saw their families and grandchildren, went to Church, went out for a drive or a walk and enjoyed the bright but cold weather. I made this dessert for a party of six people in my garden this week. We huddled under rugs and cuddled hot water bottles and feasted and drank with great joy. See my new page, The Summer of Six for suggested menus for outdoor parties for six guests. Serves 6. Timings: 1 hour the day before you serve, 20 minutes on the day you eat. For the Genoese Sponge: (you can use bought sponge, for instance a swiss roll, but I find the bought ones are too sweet and often a bit stodgy. Your own will be light as a feather.)
The day before you eat, make the cake. Preheat your oven to 180°C and grease and line a small cake tin. Melt the butter but don’t let it bubble. Whisk the sugar and eggs together until light and fluffy. Sieve the flour and mix it in one spoonful at a time. Stir in the butter carefully and spoon the mixture into the cake tin. Bake for 20 minutes until golden brown and a skewer comes out clean. Cool on a wire rack and keep in an airtight tin. You can also bake this well ahead and freeze. While that’s baking, stone and clean the fruit you are using and mix it with the liqueur and sugar in a bowl. Stir, cover, and leave in the fridge. On the day of serving, whip the cream – this can be done ahead and kept covered in the fridge for 2 hours. When you are about to eat, place some slices of cake in the bottoms of individual bowls. Spoon over the fruit, being generous with the liqueur. Dollop a large spoon of custard over each bowl and then top with whipped cream. 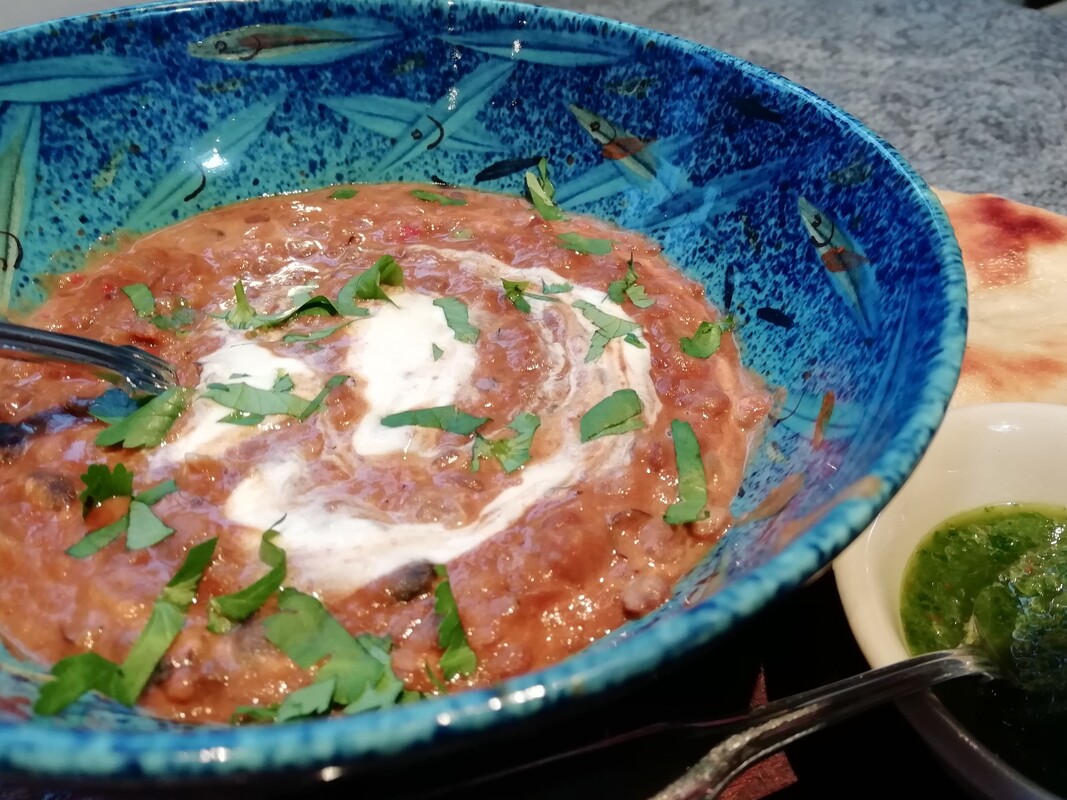 Creamy, dark and delicious, slow cooked Makhani Dhal Makhani Dhal, essentially Indian
Rich black earthy lentils cooked very slowly, mixed with a tomato-based masala sauce, and then served with a swirl of cream. Luxurious, essentially Indian. You get obsessed with Makhani Dhal in India, pursuing the perfect dish from mountaintop restaurant to roadside shack, becoming an expert on the accompanying butter naan and losing your waistline and all perspective in the process. The only answer is to embrace the madness and make it yourself. It’s easy, as most great Indian recipes are; but it takes a long time, as all worthwhile things on Earth also do. This is a special dish, not for everyday. Cooked for weddings, family gatherings and big occasions, so treat it with respect. You can use either a pressure cooker or a slow cooker for the long cooking, as I don’t think you’ll be simmering on the stove for 8 hours. You could also use a tin each of cooked lentils and beans and skip the long cooking. I think there might be a slight price to pay in reduced depth of flavour and creaminess but I expect you could achieve a perfectly respectable result – if you try it, let me know. Serves 4 Timings: overnight soaking, 8 hours simmering (or shorter time if using a pressure cooker) and an hour to finish.
Soak the lentils and beans in cold water overnight, topping up if needed to keep the pulses covered with liquid. In the morning, tip the lot into a pan and bring to a boil, then tip into the slow cooker on high heat. Add the black cardamom, cloves and cassia bark and leave to simmer for about 6 hours. Using a stick blender, make a paste from the chopped white onion, ginger, garlic, and red chilli. About 2 hours before you want to eat, (or earlier, the sauce will stand for hours waiting for you to add the lentils), start the masala. Fry the whole spices in some ghee or vegetable oil until sizzling, then add the sliced red onion. Fry and stir as it turns brown and caramelises – taking about 10 minutes. Add the chopped fresh tomato and the onion/garlic/ginger/chilli paste. Mix and fry together. Add the tomato puree, mix. Put the dry spices into a glass and add a tablespoon of water, mix well and add this to the pan. Mix and fry, stirring, until the fat separates out of the mixture. At this stage, you can leave to cool in the pan until the lentils are done. When the lentils and beans are soft, after the cooking time, transfer them and their liquid to the masala pan. Stir well to mix, and heat gently. Add lemon juice and salt to taste, and simmer for about 45 minutes, stirring occasionally and topping up with water if it looks as if it’s catching on the bottom of the pan. At the last minute stir in the cream and add a handful of chopped fresh coriander. Serve with a butter naan and some homemade chutney – a coriander and chilli chutney, a cooling cucumber and yoghurt raita, or a smooth and smoky aubergine raita. |
Some Changes - April 2022
Thanks to my friends and followers for your patience, and for your encouragement to start blogging again. Archives
April 2022
Categories
All
|
 RSS Feed
