|
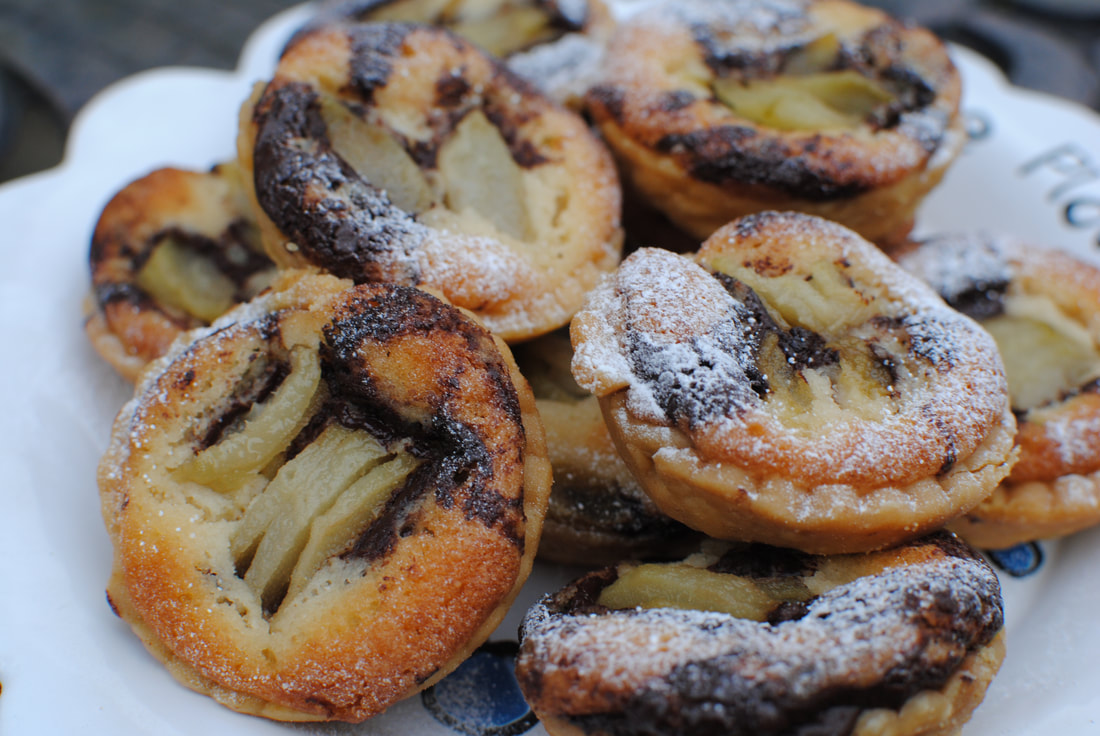
Pear, Chocolate and Frangipane Tarts
Delicious buttery little morsels, very melty. The pear and almondy-frangipane is lovely enough, but with a swirl of chocolate adding that extra level of decadence – just delightful. They’re quite easy to make too, and I’ll certainly do more with home made frangipane now I’ve made it once. It’s simple to make and handles like a dream. And you can freeze it for later, so what a versatile thing to have around. There are three stages to making these, which sounds like a lot but you can make all the stages ahead of time and put them together at the end. I like a recipe you can stop and start and fit round nipping out to have your hair cut or going to the post office. I guess you could use other fruits than pears here, but I love the combination of almonds, chocolate and pears, and they are around at this time of year, so very seasonal and cost effective. If you haven’t got time or don’t want to poach pears, you could use a tin of pears, as they are tender from the processing. Makes 36 tartlets Timings: In stages, but all together, about 2 hours
For the pastry:
First stage: poach your pears. Peel them, quarter then and take out the cores; put them into some water with lemon juice added (to stop them turning brown) and simmer for about 15 minutes, then leave to cool in the pan. This can be done a day or two before you make your tartlets. Stage two: make the pastry and the frangipane and set to rest For the pastry: using either your fingertip or the pastry paddle of your mixer, rub the butter into the flour and icing sugar. Add the egg yolks and start to bring the pastry together. Add one tablespoon of cold water and continue to mix to form a smooth ball. You might not need the second spoon of water. Roll into a disc shape, wrap it up and chill for at least an hour but could be overnight. For the frangipane: Whisk the sugar and butter together until becoming creamier and fluffy. Add the ground almonds, then each egg with a couple of spoons of flour, keep whisking. Add the amaretto or other liquid and the final spoons of flour and whisk again – you will have a delicious light almondy buttery mixture. This can keep in the fridge overnight or even be frozen but should be chilled before using to cook. Stage three: make the tartlets. Pre heat the oven to 200°C. Roll out 1/3 of the pastry on a floured surface and cut rounds for the size of your tin – I used a 12-pan bun tin. Handle each round carefully into its tin and put a few baking beans in the bottom of each. Bake blind for 10-12 minutes until the pastry is cooked but still pale, then remove the baking beans and cook again to firm up the bottoms – about another 5 minutes. Remove from the oven, leave the tartlets in their tins and cool for a few minutes. Turn the oven down to 180°C. Take your pears out of the fridge and cut them finely into slices. Put your chocolate in a small bowl over hot water and melt it. Into each tartlet case, put a spoonful of frangipane and drizzle a little melted chocolate over. Stir it in with a skewer, just to swirl it into the frangipane. Add a few slices of pears to the middle of the tart. Bake the whole tray in the oven for 10-15 minutes until the filling is puffed up around the pears and starting to brown. Remove from the oven and cool on a wire rack. Eat with a little icing sugar sprinkled over or maybe a dollop of whipped cream. You could even stir some amaretto into the whipped cream to tip you over the edge into total pleasure-land.
1 Comment
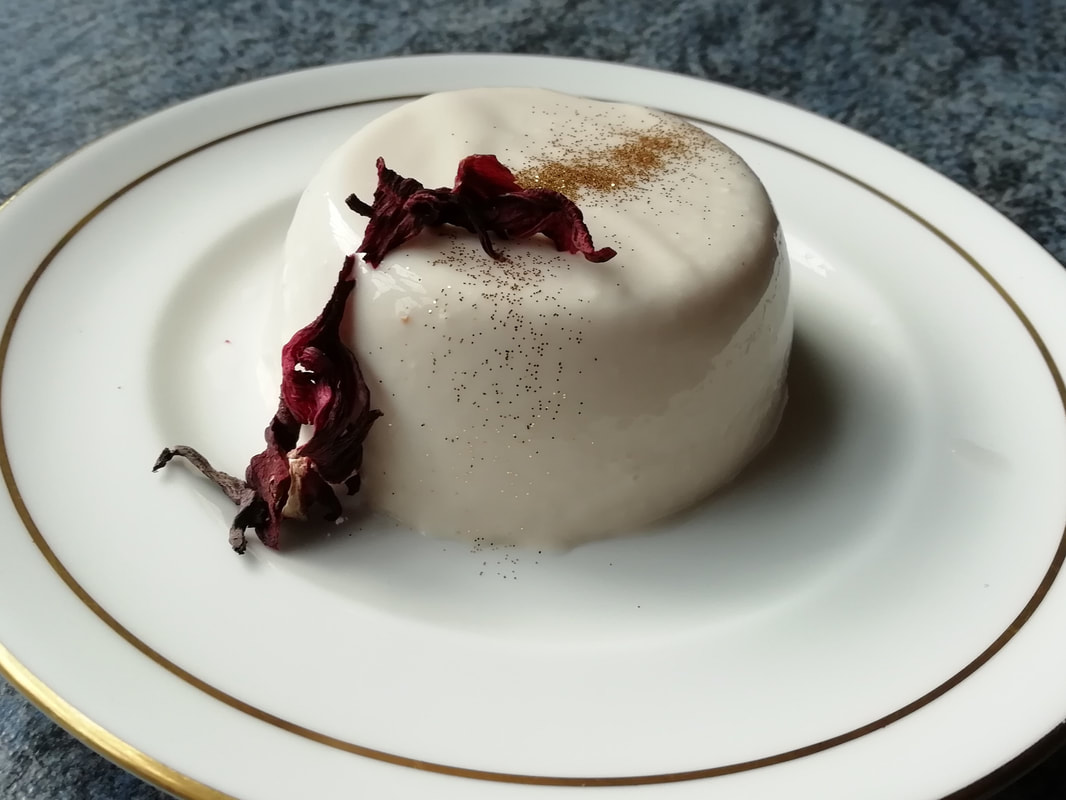
Rose and Hibiscus Pannacotta, the taste of late summer
For those who love the summery taste of roses and the blush pink of hibiscus. Do be careful with the rosewater flavouring, less is certainly more when it comes to floral flavours. I have dressed the finished dessert with some edible gold powder and one or two extra dried hibiscus blooms but some rose petals in season would also be pretty. This is not vegetarian, due to the use of gelatin which is an animal product. I have tried with the vegetarian alternatives and have not yet come up with the right recipe, so far they have all given a much harder set than the perfect wobble. I will keep on trying and post it on the blog when I find the right mix! Or please let me know if you have some hints and tips. Serves 4 Timings: 30 minutes and 3 hours to set
Place the gelatine leaves in cold water for 5 minutes to soften. In a small pan heat the hibiscus flowers, cream, sugar, vanilla and milk to simmering, but don’t boil. Take the gelatine out of the water and slide them into the hot cream, they will dissolve as they go in. Leave the mixture to cool and then add the rosewater and the yoghurt, stirring well, even using a small whisk so it ends up smooth. Strain the mixture into a jug and pour into whatever moulds you are using. Metal moulds are easiest to un-mould but you can also use ramekins or whatever you have. To serve: if you want to unmould, dip your mould in hot water and then upturn over the plate. The pannacotta should plop satisfyingly out. Decorate the pannacotta with some gold glitter and a hibiscus flower or perhaps some fresh rose petals if you have them in your garden from the last flowering before Autumn blows them down. Blackberry and Apple Pies
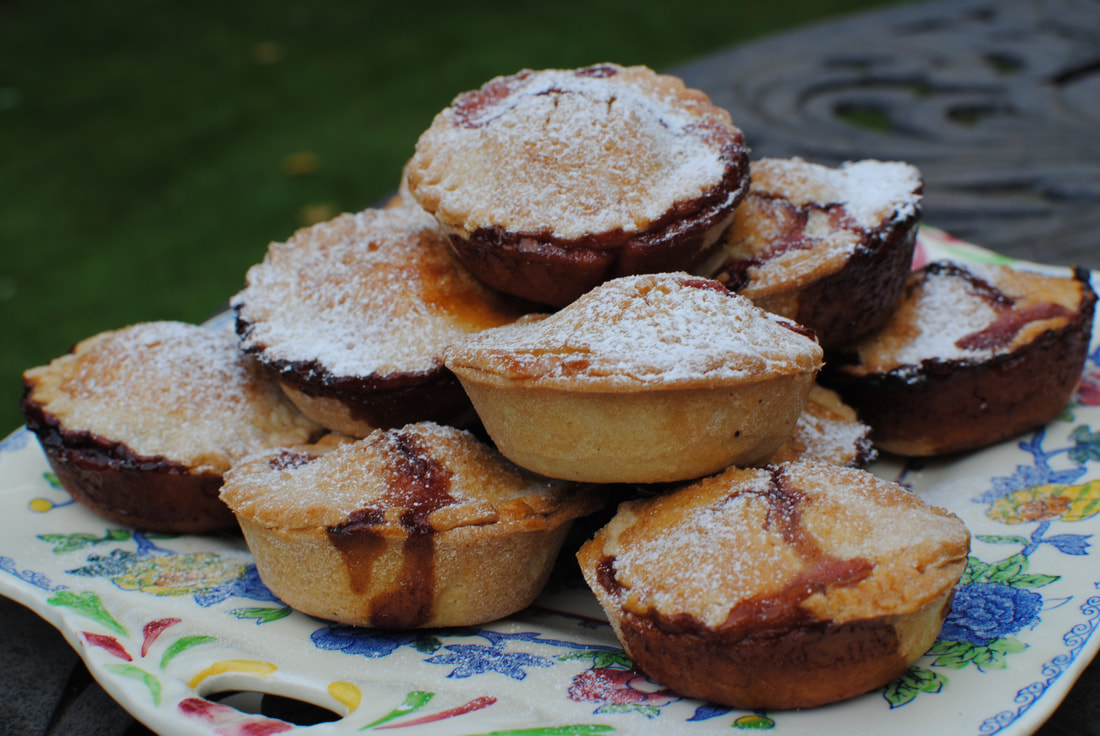
Warm weather, harvest of juicy blackberries and windfall apples. What better than to make pies for the Seniors Lunch Club? Crisp golden pastry, a slightly tart but sweet filling, and easy to pack up and portion out. Great for lunch boxes too or wrapping up in a picnic to make the most of the Autumn sunshine. Our theme this week in the Seniors Lunch Club was “September Memories”. We remembered Autumn pastimes – shuffling through fallen leaves, playing conkers, collecting for Harvest Festival. We loved the smell of bonfires and the bright colours of the Autumn leaves and flowers. The time for going back to school was remembered with surprising fondness – everyone said they’d always enjoyed the start of the new term. Seeing friends again after the summer break, writing your name in a clean new exercise book, meeting your new teachers. And looking forward to the events of the term: Hallowe’en, Bonfire Night, planting hyacinths for the school bulbs competition, and Christmas at the end of it. Makes 12 pies Timings: 1 hour For the pastry:
For the filling:
Make the filling in advance: peel and core the cooking apples. Slice into small pieces and put in a pan with a tiny amount of water, the clean blackberries and the sugar. Bring to a simmer and cook for about 5 minutes until the apples are soft but not disintegrated. Taste and add a little more sugar or a squeeze of lemon juice if needed – you want this slightly tart as the pastry is sweet. Leave to cool. You can eat this just as a compote, lovely with plain yoghurt at breakfast. Pre-heat your oven to 200°C and grease a 12-cup pie tin Mix the flour and butter together in your mixer with the pastry paddle or rub the butter into the flour with your fingertips until it is like fine crumbs. Add the ground almonds and icing sugar and mix lightly. Add one egg and keep mixing slowly. Add cold water a teaspoon at a time until the pastry binds together – don’t make it too dry or it will crack when you roll it out. Knead very quickly to bind the pastry together and then you can wrap it up and keep it in the fridge. You don’t have to chill this, as the pies are too small to shrink much. Beat the second egg in a bowl. Roll out the pastry on a floured surface to 2-3mm thick and cut bottoms and tops – this makes just enough for the 12 pies. Put the bottom parts into the pie tins and brush round with beaten egg. Spoon the blackberry/apple mixture into the pies – a goodly mound of filling is required as it doesn’t rise; put on the tops and press round with a fork to seal. Brush the tops with beaten egg and sprinkle a little bit of demerara sugar on top to give a crunch. Using a knife cut a little slit in each pie top for steam to escape. Bake in the oven for 12-15 minutes until crisp and golden. Cool on a wire rack and keep in an airtight tin for 3-4 days. Serve with a dusting of icing sugar and a swirl of whipped cream. Enjoy the taste of Autumn. Cake de Ron – Cuban Christmas Rum Cake
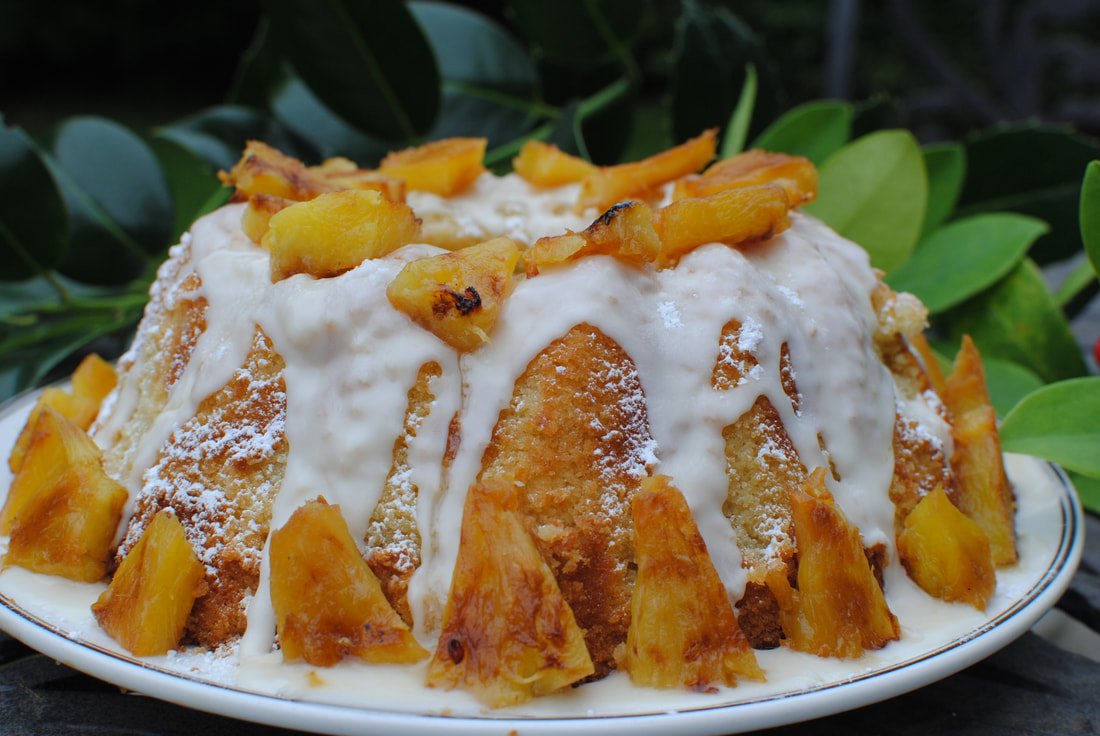
Introducing Christmas in the Caribbean – a new feature I’m working on and hope to publicise soon. I know it’s early to be thinking about such things, but how about making your heart glow with some plans to whisk away loved ones to the sunny beaches and lapping waves of your favourite island? Even if we can’t actually visit in person, you can imagine yourself on the sand, hearing the calypso rhythms and sipping a mojito when you cook up a spicy Caribbean Christmas Feast. Give yourself plenty of time to plan the menus, think about the decorations and you can be relaxed on the day and join in the fun. Christmas is special anywhere – from the snowy Tivoli Gardens in Denmark to the freezing German Christmas markets, warmed up by spiced wine and grilled baguettes with sheep’s cheese topping. But in the Caribbean, as you might expect, they go the extra mile. Every island has its own traditions, because they all have their own special background and mix of history, difficult and joyous. Some islands have parades of supernatural beings, some have reggae carol competitions; all have special food and drink just perfect for sharing and making a party go with a zing. Look out for my recipes on the theme of Caribbean Christmas, but for now, try this Cake de Ron. You do have to get yourself for some proper rum and even some banana liqueur, but you can use those in a Banana Dacquirie (recipe coming soon) as well as the cake, so nothing goes to waste. I’ve not come across a cake recipe with double cream in before, it makes the cake very rich and smooth and helps absorb the alcohol. The rum is cooked out in the oven so the taste is quite subtle; even those who are not big fans of rum won’t find it overpowering. If you wanted a stronger rum taste you could soak the cooked cake in a mixture of rum and sugar rather than the syrup, but in that case take the cake out of the tin first before you drizzle as it would loosen the structure. Makes one 23cm bundt cake, or a normal 25cm cake if you don’t have a bundt mould. Makes 10-12 slices. Timings: 90 minutes and then time to decorate
Grilled pineapple, icing sugar and water icing for decoration Pre heat your oven to 180°C and grease your cake tin. If using a bundt tin, grease especially well as they do tend to stick. Sieve the flour and baking powder. Whisk the butter and sugar together until creamy, add the lemon zest. Add in the eggs one at a time with a spoonful of flour each time. Measure the cream, rum and liqueur into a jug and add this a bit at a time into the mixture along with a spoonful of flour each time. Scrape down the sides of the bowl to make sure it’s all mixed well and beat until you get a creamy, slightly fluffy mixture. Spoon this into your cake tin and bake for 50 minutes to an hour until risen, golden on top and a skewer comes out clean. Meanwhile, make the syrup. Melt the butter in a small pan, add the sugar, rum and liqueur and stir to dissolve. It will bubble up. Cook for a few minutes but don’t let it caramelise. Cool. Griddle your pineapple slices or pieces. Brush the pieces with melted butter and place on your griddle pan to get those charred lines. If you don’t have a griddle pan just fry gently until slightly golden. You want a charred outside but still crisp and juicy inside. Remove the cake from the oven and cool on a wire rack for 10 minutes. Poke holes with a skewer, being careful not to go all the way through the bottom of the cake and drizzle the syrup over. Leave 30 minutes to soak in and turn the cake out onto a plate to cool further. When the cake is cool, make a water icing by mixing icing sugar with a couple of spoonfuls of water (or rum if you want that extra flavour) and drizzle over, letting it drip down the sides. Decorate with the pineapple slices and dust with icing sugar. Whipped cream might complete the decadence. The cake will keep in the fridge for a couple of days but is really designed to be eaten that day or the next at a big noisy party. Barnsley Mess
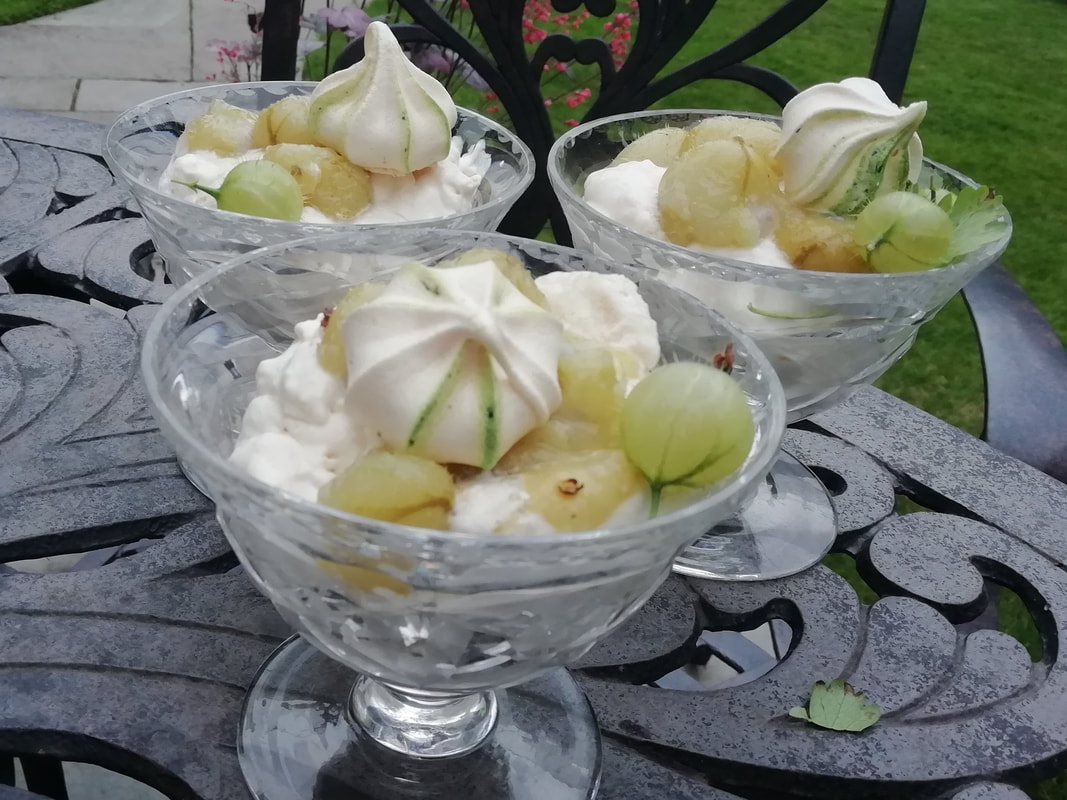
Forget your southern Eton confections! True Northern desserts need true Northern berries, by which I mean gooseberries. Yorkshire Gooseberry growers are a competitive bunch, and have been outdoing each other, and their Cheshire neighbours since the 1700s. I wouldn’t cook with one of the massive show gooseberries but the yearly harvest from my green gooseberry bushes makes the most wonderful sour/sweet fruit puree that just begs to be blended with foamy cream and crushed meringue. I don’t know if anyone from Barnsley ever made this particular combination but I have christened it the Barnsley Mess in honour of those competitive Yorkshire gooseberry enthusiasts. Long live the eccentric hobbies of England! We all know that a gooseberry fool is wondrous and easy dessert; but twist it up a bit with some home made meringue for that sweet/sour, cream/crunch combination that lights up your dinnertime. Serves 6 (with some meringues left over) Timings: About an hour to cook the gooseberries and assemble if using ready made meringues but you can do most of it in advance and just whip the cream and assemble at the last minute.
Make your meringues: whip the egg whites until stiff peaks form, stir in half the sugar, whip a little more and stir in the rest of the sugar. You should have a glossy quite stiff mixture. Place spoonfuls on a lined metal baking sheet and cook at low heat in the oven at 130°C until dry and crumbly – about 90 minutes to 2 hours depending on the size of the spoonful you used. You do want these meringues to be quite dry and not chewy inside so you can crumble them up. Cool on a wire rack and keep in an airtight tin. If you want to make little decorative meringues, fit a piping bag with a wide star nozzle. Use a toothpick to draw a line of food colouring down the inside of the piping bag in 3 lines. Fill some meringue mixture into the bag and dot stars of the mixture onto your lined baking sheet. This amount of meringue mixture will make about 15 little star meringues and about 8 larger ones, so you have plenty. Take about 10 of the largest berries and poach them gently in a little water with a dash of elderflower cordial until soft but still retaining their shape – only about 3 minutes if the berries are just picked. Scoop them out of the liquid and keep cool. Cook the rest of the berries in a dash of elderflower cordial for about 5 minutes until they have cooked down and released their juices. Add the sugar, stir to dissolve and continue to cook until you have a concentrated gooseberry syrup, almost a jam but not quite as thick. Allow to cool. Whip the double cream until soft peaks form. Crumble your large meringues into chunks and smaller bits. Mix the meringue and the gooseberry “jam” into the cream and turn with a spoon a couple of times to give a rough combination. Spoon into individual dishes or a large dish and drizzle the poached gooseberries over the top. Crown with your little stripy meringues. Enjoy your Northern treat and breathe in the clean fresh air from the hills. Postre Principe Alberto (Prince Albert’s dessert)
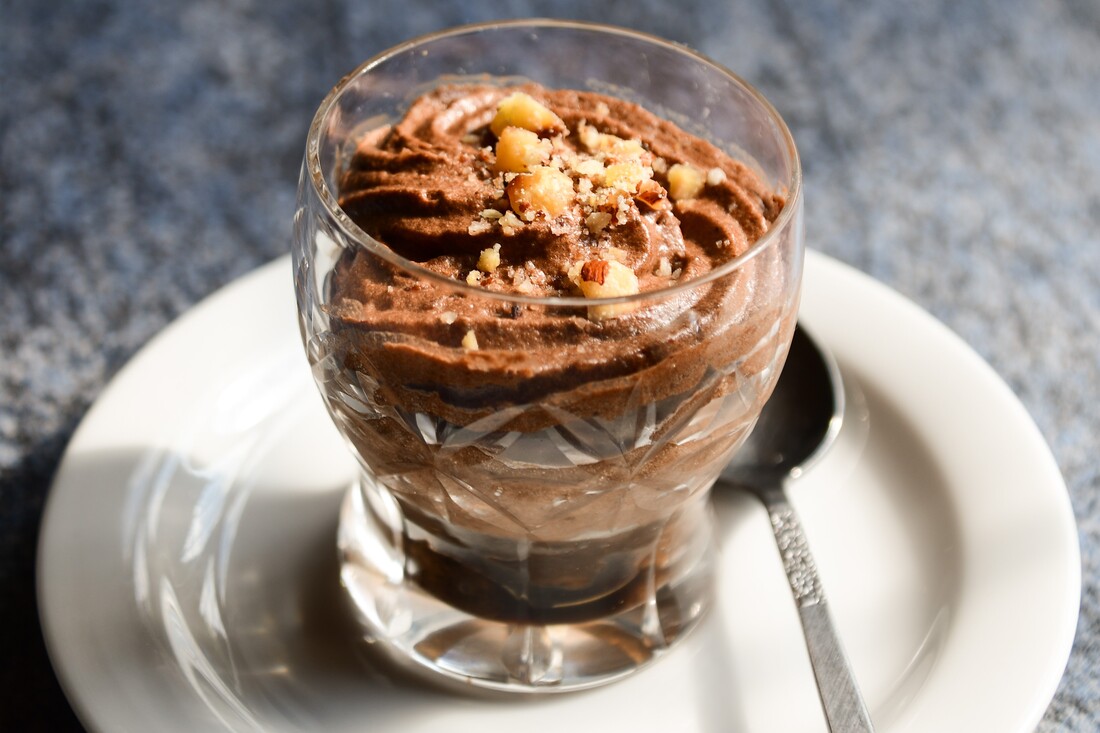
Tiny little pots of delicious nutty chocolate mousse with a surprise at the bottom of the cup. Apparently Prince Albert of Monaco is very fond of chocolate mousse. I mean, who isn’t? This dessert was created in his honour on a visit to the Canary Islands by Dona Matilda Arroyo of La Palma, the islands’ most famous chef and baker. It is served in many restaurants across the archipelago and is a real taste of the Canaries. The Moorish influence on Spanish cuisine is seen in the bitter coffee sponge combined with the smooth sweet mousse – it’s a delightful contrast and very simple to make and serve. You can of course use bought sponge biscuits or cake for the base, but naturally it’s nicest if made yourself. Serves 6 Timings: 90 minutes and 2 hours to cool and set Coffee sponge:
Mousse:
75g hazelnuts 100ml strong coffee, cooled Roast the hazelnuts in a small frying pan until browning but not burned. Let them cool and crush them finely in a spice grinder. You want mostly a fine flour but keep some rougher nubbles aside for topping the mousse. Pre heat the oven to 180°C. Grease and line a flat baking tin – you are making a thin layer of sponge like a swiss roll not a full thick cake. Make the sponge: whisk the eggs and sugar together until creamy and thick – about 5 minutes. Melt the butter and leave to cool a little. Add the flour to the eggs/sugar mixture a spoonful at a time and add in the coffee granules. Spoon the melted butter over the cake batter and mix in gently with a metal spoon. Spread the mixture out on the prepared tin, to only about 1cm thick and bake for about 10 minutes until cooked through. Cool on a wire rack and peel off the backing paper. Make the mousse: whip the egg whites until stiff. Melt the chocolate over hot water while you whisk the egg yolks gently with the caster sugar. Scrape the melted chocolate into the egg yolks, mix well, then scrape the whole liquid mixture into the egg whites. Add the ground hazelnuts to the bowl and mix well with a metal spoon, being careful not to beat the mixture too hard and also being careful to mix in any liquid chocolate lurking at the bottom of the bowl. You will have a rather thick delicious chocolate mousse, with the hazelnuts adding a little firm texture. Cut circles of the coffee sponge and place in the bottom of your crystal glasses or whatever you are serving the dessert in – traditionally a pretty glass to show off the layers. Soak each sponge layer in the strong cooled coffee. Add more rather than less, you want quite a well soaked sponge. Scoop the chocolate mousse into a piping bag and pipe a thick layer of mousse into each glass on top of the coffee sponge. You can spoon it in of course, rather than use a piping bag but piping gives a neater finish. Top each mousse with a sprinkle of roughly chopped hazelnuts. Cool for at least 2 hours before serving. Vanilla Pannacotta & Rhubarb Compote
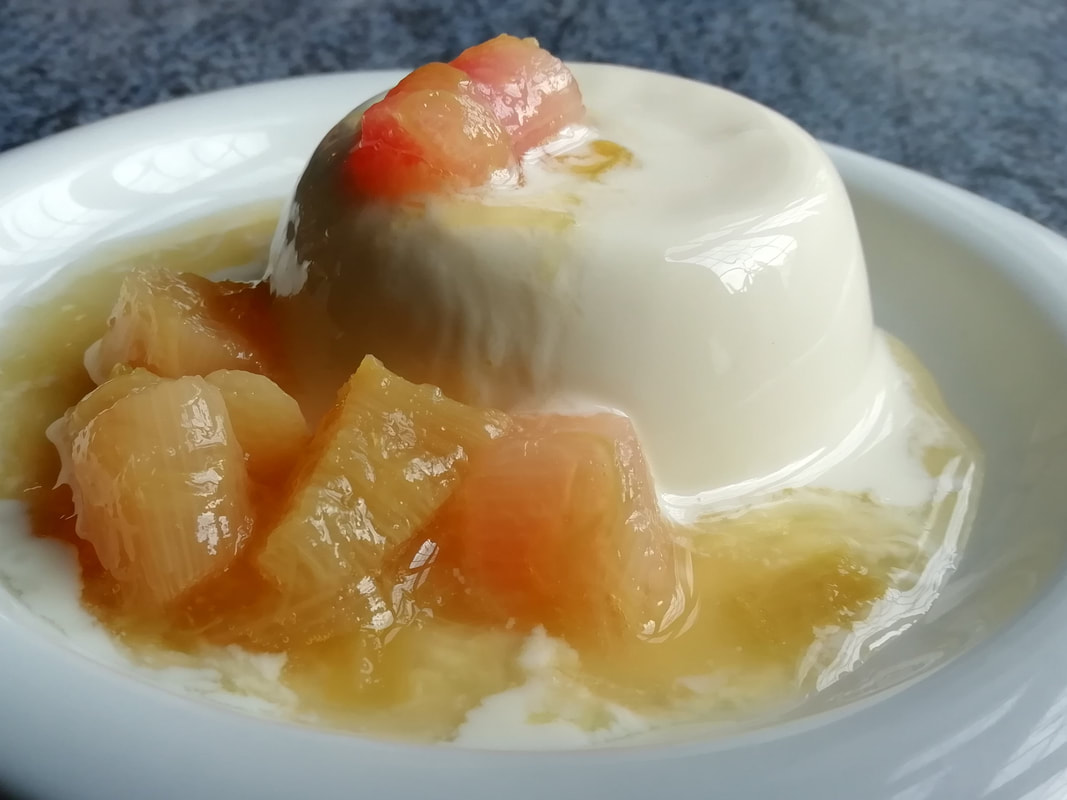
Fresh rhubarb from the allotment, springing up and just asking to be used in all sorts of desserts. never without a bowl of poached ruhubarb in the fridge at this time of year. A lovely easy dessert which can be made ahead and kept in the fridge for at least two days. You can play around with the flavours of the pannacotta and I will give a few different ideas at seasonal times; you can of course pair the vanilla version with just about any tart fruit compote. Gooseberries, damsons, plums would all work well. This is not vegetarian, due to the use of gelatin which is an animal product. I have tried with the vegetarian alternatives and have not yet come up with the right recipe, so far they have all given a much harder set than the perfect wobble. I will keep on trying and post it on the blog when I find the right mix. A vegan version with non-dairy cream/milk/yoghurt is also under investigation. Anyone got any hints or foolproof recipes, please share with me. Serves 4 Timings: 30 minutes and 3 hours to set
Make the rhubarb compote: Peel the rhubarb, cut the sticks into 3cm lengths and put them in a pan with the granulated sugar and a splash of orange juice. Bring to a simmer, simmer for 3 minutes until tender (might be longer depending on how fresh the rhubarb is) and put off the heat. If you don’t stir, the pieces will keep their shapes better, which doesn’t affect the taste but allows you to dress the plate. Leave to cool and keep in a sealed container in the fridge. The compote is great with cream, with custard or yoghurt and will keep for 3-4 days. Make the pannacotta: Place the gelatine leaves in cold water for 5 minutes to soften. In a small pan heat the cream, sugar, vanilla and milk to simmering, but don’t boil. Take the gelatine out of the water and slide them into the hot cream, they will dissolve as they go in. Leave the mixture to cool and then add the yoghurt, stirring well, even using a small whisk so it ends up smooth. Strain the mixture into a jug and pour into whatever moulds you are using. Metal moulds are easiest to un-mould but you can also use ramekins or whatever you have. To serve: if you want to unmould, dip your mould in hot water and then upturn over the plate. The pannacotta should plop satisfyingly out. Dress it up with a spoonful of rhubarb and some parts that have held their shape. Coupe Danemark - Ice cream dessert with hot chocolate sauce
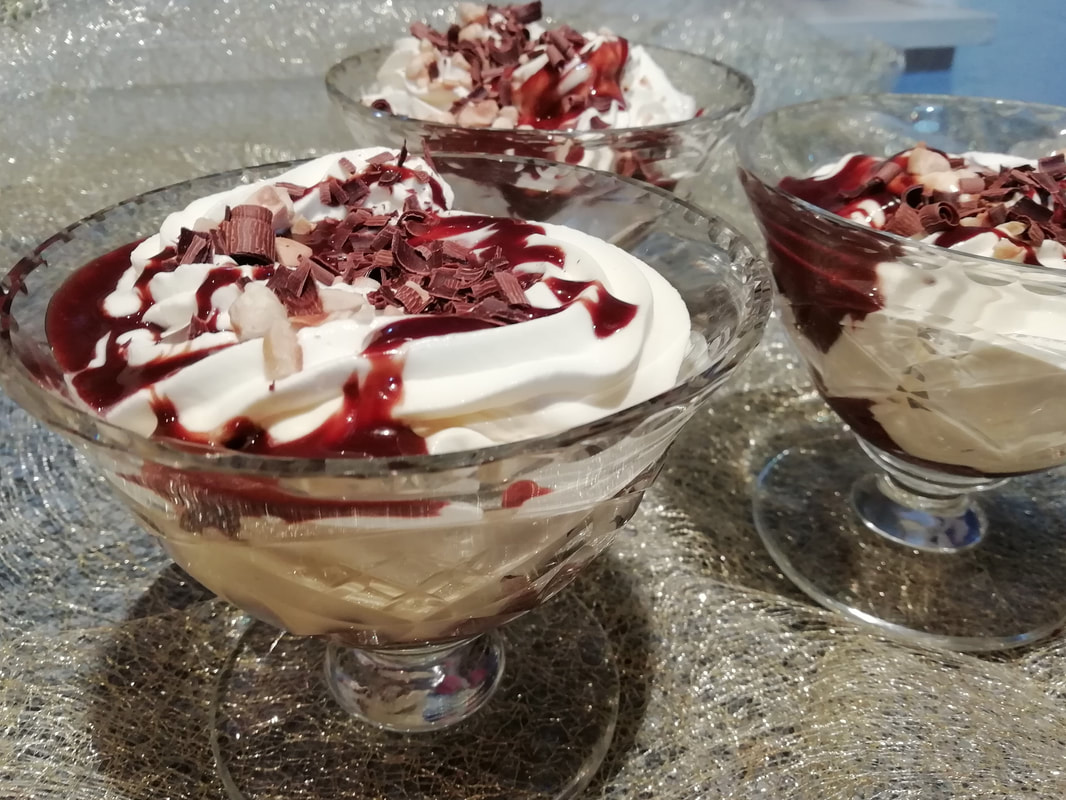
This recipe is from one of my Summer of Six menus - the cold weather option. I give three hot dishes to warm up your guests if you're having a Garden Party for Six and snow is forecast. Have a look at From Cologne to Copenhagen for the full menu. The Tivoli Gardens in Copenhagen are a pleasure at any time of the year, but perhaps most at Christmas. The scent of spices and chocolate warms and entices you. I can’t call Coupe Danemark actually a street food, you can’t eat it with bare hands. But even in cold weather, this ice-and-hot sauce dessert is served to eat at streetside tables. It's called Coupe Danemark in Germany and Switzerland (hence the spelling) and Dame Blanche - or White Queen - in Belgium and Holland, but I'm not sure it's got it's own name in Denmark, so I'm using the German name here. I have cheated and used shop bought vanilla ice-cream but I will have some recipes for home made ice-cream on my blog when the weather is more suitable for thinking about making your own frozen desserts. Serves 6. Timings: 10 minutes
Roast the hazelnuts in a small frying pan for a few minutes and bash them with a potato masher or solid block to get crumbled pieces. Leave on kitchen paper to cool. Put all the sauce ingredients into a microwave bowl and blast for 30 seconds. Stir, blast again for 30 seconds. Check the consistency, if you need more butter, add a little more to keep the sauce glossy and pourable. Spoon a generous helping of ice-cream into each sundae dish. Pipe cream round the outside and spoon hot sauce down the middle, so it hits the ice cream. Pipe a little cream on top and sprinkle over some roast chopped hazelnuts. Serve straightaway with a few chocolate sprinkles or curls on top. Tipsy Parson
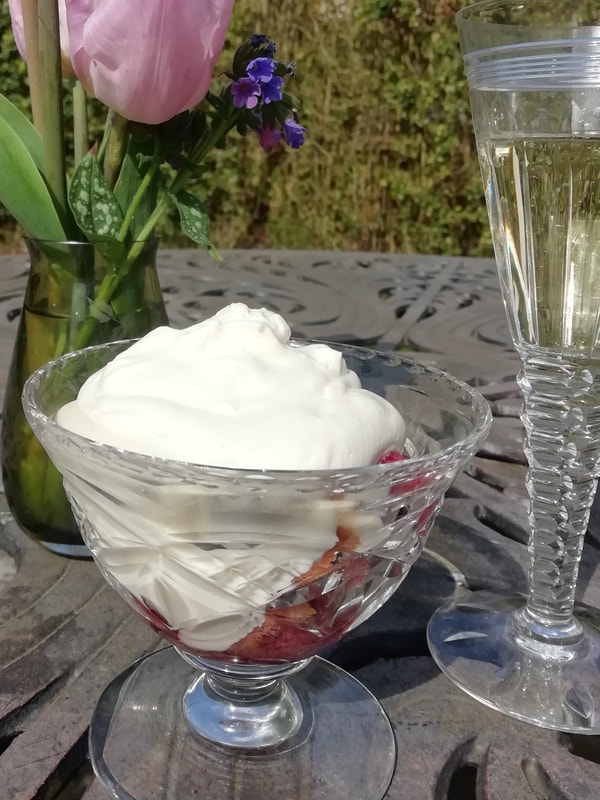
A retro dessert from my Scottish heritage. I discovered this pudding in letters sent from my Mum to my Granny in the 1940s when my Mum was on national service in the WRENS. She was stationed in the south of England and was delighted to be invited for an evening meal by some relatives and offered a familiar dish. She mentioned it in her letter home and I did some research. It’s basically an economical wartime take on the traditional Trifle. It uses up the ends of old sponge cakes, some fruit preserved in liqueur, custard and cream. Anyone with a garden in wartime would have tried to preserve fruit in some way, and they might also have kept hens, so ensuring a plentiful supply of eggs to be made into custard. I have re-created it using my own damson vodka (recipe to come at the appropriate time of year) to marinate the fruit and a bought custard rather than home made. I find making a thin spooning-texture crème anglaise style custard, which is what goes best here, rather difficult. I probably don’t have the patience. So I used a bought chilled custard instead, which worked very well. We didn’t have a Seniors Lunch Club round on Thursday as we are “on holiday”, so I didn’t bake a cake. We did meet on audio conference though, and we talked about what we did at Easter. Members saw their families and grandchildren, went to Church, went out for a drive or a walk and enjoyed the bright but cold weather. I made this dessert for a party of six people in my garden this week. We huddled under rugs and cuddled hot water bottles and feasted and drank with great joy. See my new page, The Summer of Six for suggested menus for outdoor parties for six guests. Serves 6. Timings: 1 hour the day before you serve, 20 minutes on the day you eat. For the Genoese Sponge: (you can use bought sponge, for instance a swiss roll, but I find the bought ones are too sweet and often a bit stodgy. Your own will be light as a feather.)
The day before you eat, make the cake. Preheat your oven to 180°C and grease and line a small cake tin. Melt the butter but don’t let it bubble. Whisk the sugar and eggs together until light and fluffy. Sieve the flour and mix it in one spoonful at a time. Stir in the butter carefully and spoon the mixture into the cake tin. Bake for 20 minutes until golden brown and a skewer comes out clean. Cool on a wire rack and keep in an airtight tin. You can also bake this well ahead and freeze. While that’s baking, stone and clean the fruit you are using and mix it with the liqueur and sugar in a bowl. Stir, cover, and leave in the fridge. On the day of serving, whip the cream – this can be done ahead and kept covered in the fridge for 2 hours. When you are about to eat, place some slices of cake in the bottoms of individual bowls. Spoon over the fruit, being generous with the liqueur. Dollop a large spoon of custard over each bowl and then top with whipped cream. Hawai’ian Banana Bread with Lilikoi Cream
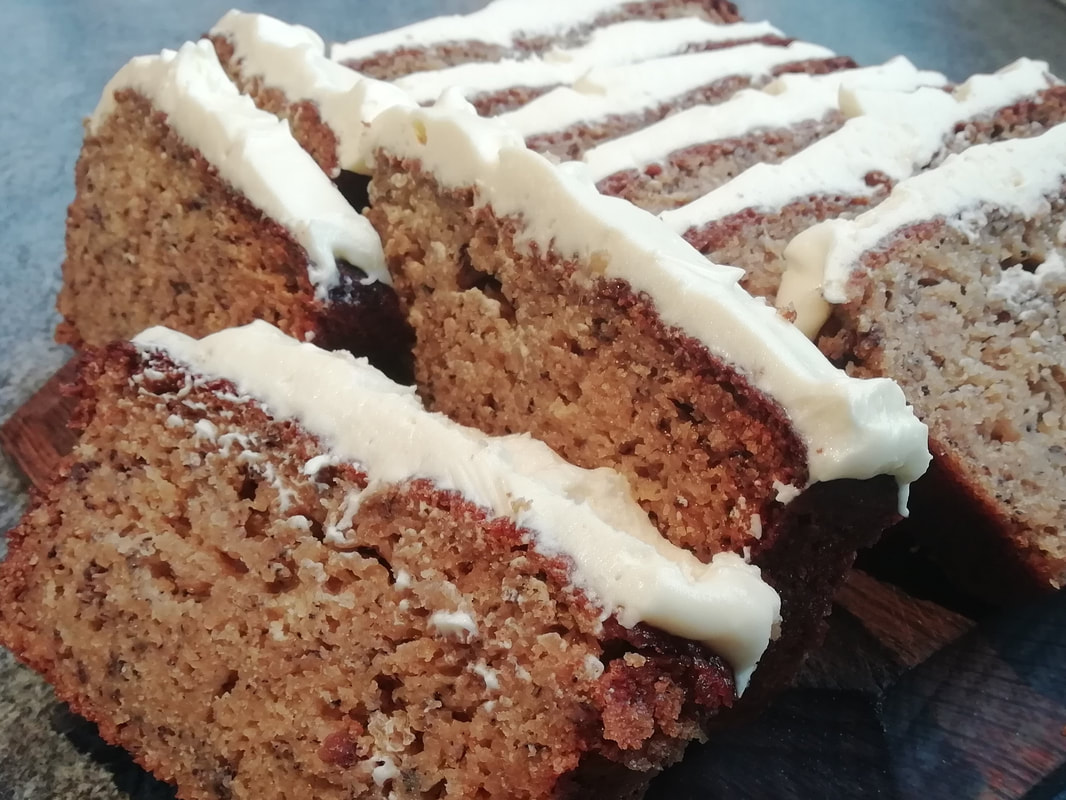
Yes, it’s exotic. We holidayed in Hawai’i when my son graduated from Vancouver. Beautiful isolated islands, tropical climate, incredible scenery, great people. The cuisine is very much centred around fish, fruit and vegetables, local and fresh. We did a dive-day – snorkelling round the island of Lainai’i; food included. We had banana bread for breakfast, accompanied by passionfruit (Lilikoi) cream frosting. It was delicious and gave us so much energy, it set us up perfectly for a demanding day snorkelling in progressively more challenging environments. Our last snorkel was over a very deep ridge, pierced by a huge upswelling rock, which made the current flow up and over, bringing nutrients and fish from deep in the Pacific to our wondering eyes. It was like flying through the roof of a cathedral of light, shoals of fish flickering below. The taste of the moist sugary banana bread, with the icing cut through by the tang of passionfruit, brings back Hawai’i to me. I hope it brings you closer to that tropical paradise, too. Our Seniors’ Lunch Group discussion this week was about Lent – and specifically about what we give up, why, and what we really couldn’t give up. Our chocolate-fiend (98 years old) gives up her daily chocolate, and really looks forward to Easter Saturday when she’s allowed to start again – she lines them up two days in advance to anticipate the taste. Chocolate, sherry, and crisps were the most popular self- denials, but we also had the daily news-fix to be renounced, and “biting my fingernails”. What we couldn’t give up included the telephone, the internet, the Saturday crossword and writing a daily diary – one of our members has written her own diary since the mid-1960s, which would be a fascinating social history if we were ever allowed to read it. Makes 10 slices. 30 minutes preparation, 1 hour cooking, 30 minutes for the Lilikoi Cream
For the lilikoi cream: 90g softened butter, 120g cream cheese, juice of 4 passionfruits, 150g icing sugar Pre heat your oven to 180°C. Grease and line a loaf tin. Beat up the oil, sugar, vanilla essence and eggs in a large bowl until fairly fluffy. In another bowl, mash the bananas with the yoghurt, then add them to the oil/sugar/eggs mixture. Sieve in the flour, baking powder, bicarb and salt, mix well and then mix in the hazelnuts. You will have a gloopy delicious mixture. Do taste it thoroughly at this stage; it’s a cook’s prerogative to enjoy the cake mix. Scoop it into the loaf tin and bake for about 50-55 minutes until brown on top and beautifully spongy. Take out and leave to cool on a wire rack for about 10 minutes, then turn out of the tin and leave to cool fully. You don't have to ice this to enjoy it, it's wonderful as it is. To make the icing: soften the butter well – without melting it, but good and soft. Beat the butter well adding a spoonful of icing sugar at a time. I find a hand-held whisk is better at this than a mixer. When you’ve added half the sugar, start adding the juice and the cheese while whisking all the time and adding the sugar in spoonfuls. You will end up with a soft creamy mixture which tastes of fruit with a sharp edge from the cheese. If you can avoid eating the whole lot out of the bowl, just dollop the icing on top of the loaf. Keep somewhere cool until time to serve. Are you on a beach? Listening to the surf? |
Some Changes - April 2022
Thanks to my friends and followers for your patience, and for your encouragement to start blogging again. Archives
April 2022
Categories
All
|
 RSS Feed
