 Crunchy jammy pastries with googly eyes! Spooky Pastry Mummies
Seniors Lunch Club theme (we meet on audio call just now, so don’t go thinking we’re all together in a room somewhere) this week was of course Hallowe’en, but the usual rich seam of reminiscence was a bit threadbare! No-one over the age of 60 in the UK seems to have ever celebrated Hallowe’en. One lady who had lived in the US once went to work in fancy dress on 31st October but unfortunately she was dressed as a tree, in real leaves, which did what real leaves do and fell off, so she was sent home attired in a leotard and not much else. Apart from the lack of reminiscence, we had lots of fun with our “Supernatural Characters Who Am I?” twenty-questions game. We guessed the Loch Ness Monster easily (lives in water but not the sea was quite a give-away) but were totally stumped by the Unicorn and had to be given a thumping great clue before we guessed it. Much hilarity ensued. We ate Spooky Mummy Pastries – which I delivered earlier - to keep in with the theme. These are very simple and use the meringue-eyes technique I’ve used a lot when making character cakes for kids parties. They are a faff but they look so great! For the meringue eyes: 10 minutes preparation, 60-90 minutes cooking, 10 minutes final decoration.
Beat the egg white until stiff, then stir in the sugar. Put the meringue mixture into a piping bag with the tiniest hole – just a pinprick. Dot little drops of meringue onto a sheet of baking paper on a baking tray – each drop needs to be only about 3mm – the smallest dot you can do. When you’ve made lines of dots all across the baking paper, put another sheet of baking paper over the top and press your finger lightly onto each meringue dot. This will flatten it into a disc. You can make these “eyes” any size you want in case you are doing this for another character type recipe. Place the baking trays in the oven and leave for about an hour, check and see if the meringue is dry and crisp. Slide the baking paper onto a wire rack and leave to cool. Fiddle the meringue discs off their baking paper when cool – don’t leave them too long as they can absorb moisture again and start to stick. Melt the chocolate in a little bowl over hot water, then spoon it into a tiny piping bag – or just use a reasonably strong small plastic bag. Snip a tiny tiny hole in the bottom corner of the bag and dot a teeny spot of chocolate in the centre of each meringue disc to make the eye – I told you it was a faff, but entirely worth it. (note, you can’t really use less than one egg white and that makes a lot more eyes than you need, and they don’t keep well as they absorb moisture and get soggy. Why not make lots of tiny extra meringues with the extra mixture you have in the piping bag? Can’t go wrong with a tin of home-made meringues.) For the mummies: Makes 8-10 mummies. 20 minutes preparation, 15 minutes cooking, some time to cool.
Working fairly quickly or the pastry will get warm and be difficult to use, unroll the packet of pastry, in portrait orientation on your worksurface. Cut into 8 pieces. For each piece, cut the top corners off to make a peak. Then, leaving a central block clear for the jam (the “body” of the mummy), cut strips to each side, for the “bandages”. Cut out the second and fourth strip (this means you get a better lattice effect). Spread jam down the central block of the pastry shape and then cross the “bandage” strips over the body. Press the top corners together to give an oval open face shape at the top, into which the eyes will fit. Use all the pastry squares, then smush the leftover bits together and roll out on a floured surface to give you some more. Make those into mummies too. Brush the mummies with beaten egg and put into the hot oven for about 10-15 minutes. Keep an eye on them, the jam will ooze out and can catch on the baking sheet. Take out when done and get them onto a wire rack to cool down before the jam sets and sticks the pastry to the sheet. Place two of the eyes onto each mummy’s face - they should stick just by the power of the jam. Crunch and enjoy!
0 Comments
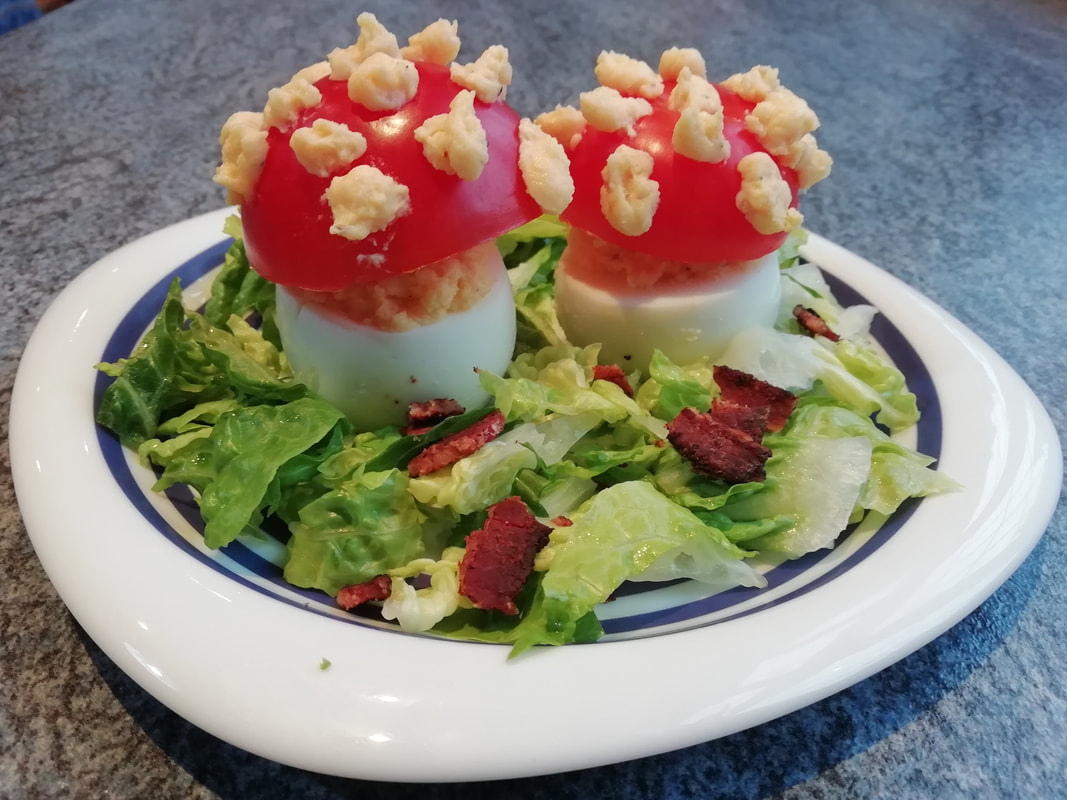 Hallowe’eny (eggy) Toadstools (vegetarian option)
I think this was the very first dish I ever cooked all by myself – seduced by the tempting picture in my “Youngster’s Cookery Book” of these lovely fat toadstools with dotted caps. So that really tells you it’s child’s play – I was about eight when I made these for Sunday high tea. Really nice for half term lunch as well with a Hallowe’en theme. The bacon is optional, but I do love the salty crunch against the sweet tomato and the juicy cheesy egg, and the kids will like it too. Small hands can help with most of this recipe, so get stuck in and make it with them. A meal for messy togetherness. Serves 6, 30 minutes
Put the eggs into a pan of cold water, bring to the boil and simmer for 10 minutes to hard boil them. Have a cup of tea while the children lay the table and get on with the rest. Wash the lettuce, separating the leaves. Keep it in a bowl of cold water to crisp up. Make the salad dressing by shaking all the ingredients together in an empty jar. Fry the bacon until crispy and well cooked, put it onto kitchen towel to cool and crisp further. At this stage, the children are likely to steal all the cooked bacon so be prepared either to fight them off or cook some more. Halve the tomatoes round their equators. Weigh out the butter and cheese into a small bowl over a pan of hot water. Mix them up with a fork. The butter will start to melt quite quickly, that’s fine, take the bowl away from the hot water and just cover it with a plate until you get the egg yolks into it. When the eggs are done, take them out of the boiling water and run them under cold water to stop them cooking and cool them down. Crack the shells and remove the shells and membrane. This is the only tricky bit: cut a small slice off the fat end of the egg so that it can sit stably on that end. Now cut off the pointed end of the egg about 1/3 of the way down. You should expose the yolk. Carefully scoop out the yolk with a teaspoon into the bowl of cheese and butter. Keep on doing that until you have hollowed out all the eggs. If the yolk is too far to one side of an egg, the white can be very thin and can break, leaving an uneven hollow; never mind, the “mushroom” will be slightly wonky, but that’s nature. Mash the mixture in the bowl with a fork, and season with pepper and salt. Using another teaspoon and your fingers, and helped by small hands, stuff the mixture back into the middle of the eggs, saving some back for the dots on the “mushroom” caps. Spin the lettuce to dry and arrange on a platter. Stand the stuffed eggs around within the lettuce. Top each egg with a half tomato and dot some little pieces of egg mixture onto the tomatoes – I have tried both doing this dotting before topping the eggs and after, and it’s easier if you do it after. If you want perfection, you could pipe some mixture onto the tomatoes, and this might be quite fun for a child to do if you have the time and inclination. (You don't need a proper piping bag, a decent plastic bag with a small cut in the corner is fine.) Scatter the crumbled bacon over the lettuce and serve, with salad dressing if liked.  Pancake Soup (meat or vegetarian options)
Pancake and soup – once you get over the shock, what more comforting combination can you possibly imagine? This is a recipe common in the south of Germany called “flaedlesuppe” and you find it in nearly every neighbourhood restaurant. It’s very very easy, and just what you need to warm your insides on a horrible day. It’s a great lunch meal for half term with the kids home - I never met a child who wouldn’t eat a pancake. Or an adult, come to that; it’s difficult to resist eating bits off the edges of the pancakes when they come out of the pan. Serves 4, 20 minutes if using pre-made beef stock.
Put the stock on to warm up while you make the pancakes. In a bowl combine the flour, eggs, milk and beat with a fork to a thinnish batter. Add the chopped herbs and season really well with salt and pepper. Heat up a small frying pan with a small amount of butter or oil, scoop in a ladleful of batter, swirl to make the pancake. Cook on one side for about 2 minutes to brown, then flip over to brown the other side. Continue making a stack of pancakes until all the batter is used up. The pancakes won’t be quite as thin as if you didn’t have the herbs in, don’t worry. Take each pancake and roll it tightly, then slice it into thin strips – I cut it with scissors. Drop all the pancake strips into the simmering stock and warm through for a few minutes. Add another sprinkle of chopped parsley or chives and serve. The soup doesn’t keep very well with the pancakes in, so eat it all in one go. I didn’t really need to say that, there are never any leftovers. Feels a bit sad really. Goodbye to summer, to the warm weather, to working in the allotment in a t-shirt. We ate the last courgette this week and that’s a true sign of approaching Autumn. Considering it’s the end of October, that’s not bad. I’ve been growing Defender (big green normal looking ones, great cropper) and Tondo Chiaro di Nizza (round slightly striped one.) We’ve had a glut, so I have a glut of recipes too, which I will share. You can use courgettes as courgetti/spaghetti or sliced like sheets of lasagne, for a less calorific version of pasta – they don’t taste quite the same, but they are great for a change. Courgette antipasti with oil and lemon. (vegan) Serves 4, about 30 minutes and then time to chill.
In a flattish dish, combine the olive oil, lemon juice, salt and chopped mint leaves. Slice the courgette as thinly as you can. Put a little olive oil on a piece of kitchen paper and wipe the courgette slices with it – you need very little as you are grilling, not frying, you just want to stop them sticking. Lay each piece down on the grill surface and cook for 1-2 minutes each side – you want the courgette tender and browning but not burned. As each is cooked, take it out and lay it down in the olive oil mixture, it will hiss and then start to absorb the dressing. You can only do a few at a time, so it can take a while to do a whole courgette. When you’re all done, mix the dish of slices and oil up again and place in the fridge to chill for at least an hour. Taste, adjust the seasoning and eat as part of an antipasti or a salad buffet, along with lots of crusty bread to mop up the juices. They will keep in the fridge in a sealed container for a couple of days. 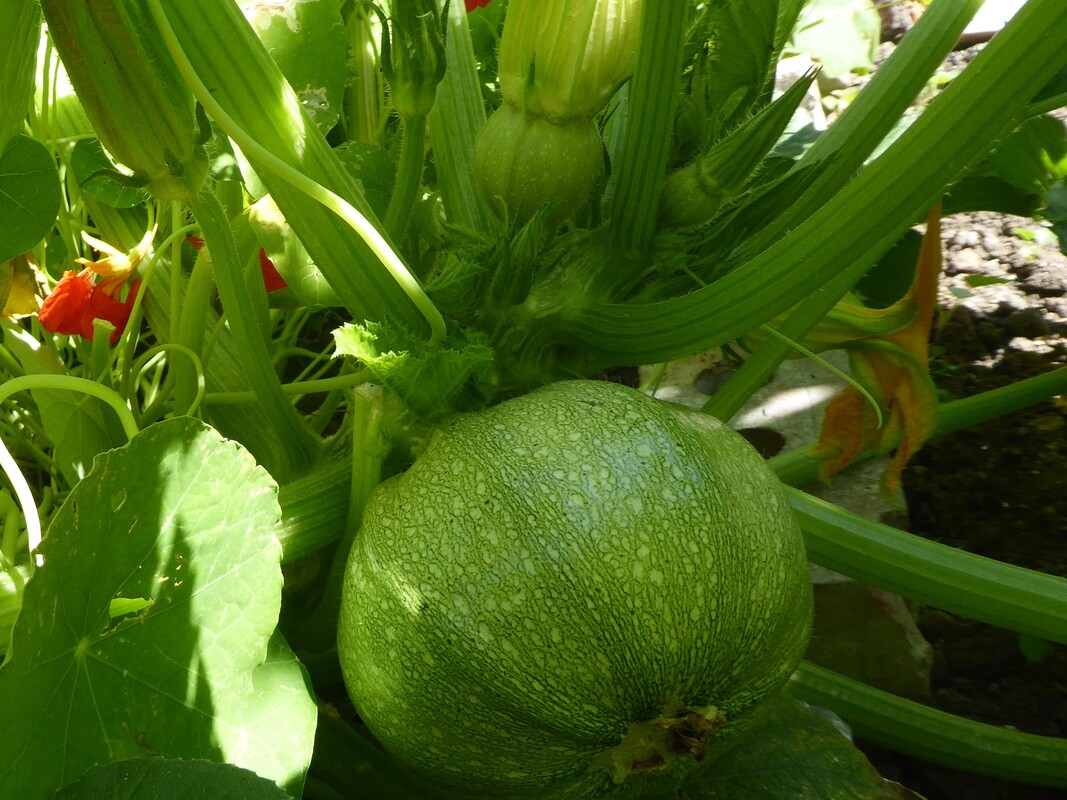 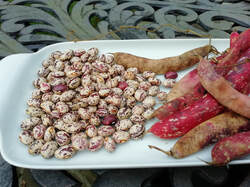 Borlotti beans from my allotment are just drying now, before being stored for the winter. They are so pretty, the ruby speckles on each bean are different and hypnotising if you look at a handful of them for too long. After they're dry, you have to soak them before cooking - overnight is best. Then boil gently for an hour or so - you can add a sprig of rosemary to the cooking water, or some winter savoury if you have it. The savoury adds a complex woody flavour to the beans, and allegedly combats the windy effect beans can have on your gut. (So say the Germans, savoury is called "beanherb" and is sold alongside beans in the markets for that very reason.) After that, the beans are soft and ready to eat - I love to mash them with a little olive oil and salt, for a side dish with grilled lamb chops. Or you can add them to a soup, or use them in a vegetable patty for the protein and that slightly grainy sticky texture.
|
Some Changes - April 2022
Thanks to my friends and followers for your patience, and for your encouragement to start blogging again. Archives
April 2022
Categories
All
|
 RSS Feed
