|
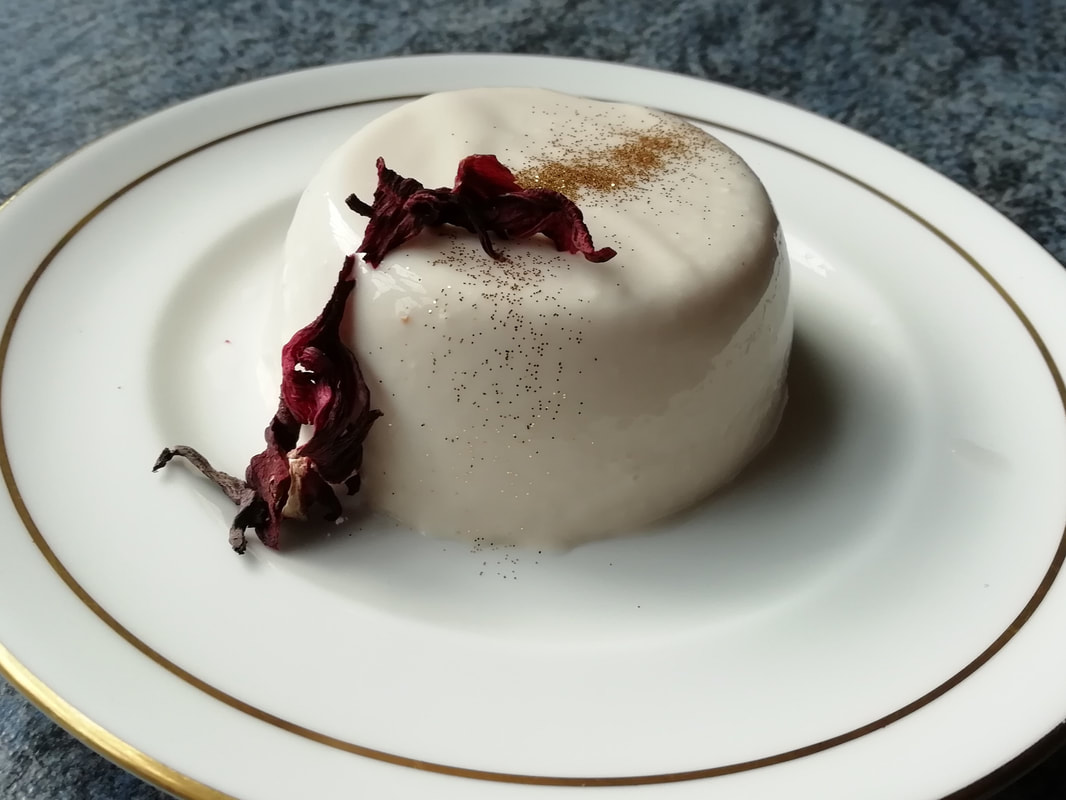
Rose and Hibiscus Pannacotta, the taste of late summer
For those who love the summery taste of roses and the blush pink of hibiscus. Do be careful with the rosewater flavouring, less is certainly more when it comes to floral flavours. I have dressed the finished dessert with some edible gold powder and one or two extra dried hibiscus blooms but some rose petals in season would also be pretty. This is not vegetarian, due to the use of gelatin which is an animal product. I have tried with the vegetarian alternatives and have not yet come up with the right recipe, so far they have all given a much harder set than the perfect wobble. I will keep on trying and post it on the blog when I find the right mix! Or please let me know if you have some hints and tips. Serves 4 Timings: 30 minutes and 3 hours to set
Place the gelatine leaves in cold water for 5 minutes to soften. In a small pan heat the hibiscus flowers, cream, sugar, vanilla and milk to simmering, but don’t boil. Take the gelatine out of the water and slide them into the hot cream, they will dissolve as they go in. Leave the mixture to cool and then add the rosewater and the yoghurt, stirring well, even using a small whisk so it ends up smooth. Strain the mixture into a jug and pour into whatever moulds you are using. Metal moulds are easiest to un-mould but you can also use ramekins or whatever you have. To serve: if you want to unmould, dip your mould in hot water and then upturn over the plate. The pannacotta should plop satisfyingly out. Decorate the pannacotta with some gold glitter and a hibiscus flower or perhaps some fresh rose petals if you have them in your garden from the last flowering before Autumn blows them down.
0 Comments
Caribbean Slow Roasted Jerk Pork
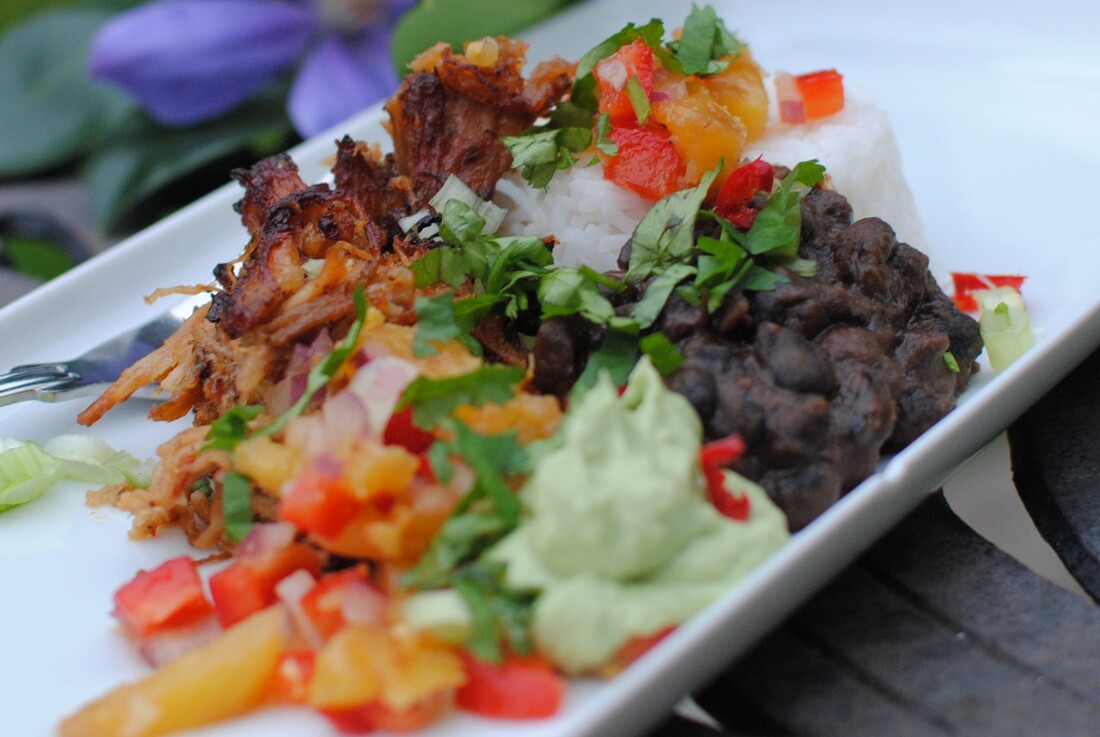
A real party centrepiece and an ideal dish for a celebration! A Caribbean breath of allspice and nutmeg rises from the roasting tin along with the hot tingle of chilli. Guests serve themselves to the tender spicy meat, enjoying the rich aroma. Spoon the meat over freshly cooked rice, add a scoop of black beans, a dollop of charred pineapple salsa and a dab of creamed avocado and you have a meal to please all the crowd. You can make the pork up to two days ahead, warm it up in the oven when you need it. It’s very tolerant of standing for an hour if covered, so there’s no last-minute dash or standing over a hot stove while your guests drink all the Mojitos. This recipe is another one from my Christmas in the Caribbean menu which will be on the website in a couple of weeks as a fully worked out party menu suggestion, from cocktails to Cake de Ron. Serves 10 Timings: Overnight marinade, then 4-5 hours cooking
Put all the marinade ingredients in bowl and blend to a paste. Cover the pork with the paste, massaging into the flesh, and in the gaps of the rind. You might want to wear cooking gloves to do this or be sure to wash your hands extremely well afterwards as you’ll regret touching your eyes with hands that have been peeling Scotch bonnets. Place the pork in a dish (you can cut it in two if it makes it easier) and leave overnight in the fridge, turning occasionally. But you don't have to get up in the night to turn it, just do it before you go to bed. Pre heat the oven to 165°C. Place the pork in a roasting tray, skin upwards, and cover with kitchen foil. Roast for 90 minutes, then turn up the heat to 180°C. Roast for another 2 hours. Every now and then pour off the cooking juices into a jug - there will be quite a lot and it will separate into the fatty part and the meat juices which carry a lot of flavour. Take the cover off the meat and roast for another hour to let the skin start to cook down into the meat. Take the roasting tray out of the oven, drain away the juices and carefully separate the skin away from the pork. Remove the skin and discard. (You can separately sizzle up the crackling later by frying in deep fat if you like.) Pull the bones and any cartilage parts out of the soft and tender meat and tear the meat into shreds with two forks. Place back in the oven while you make the sauce. Separate the meat juices from the fat. Pour the juices into a pan and boil down until reduced by at least half – taste as you go along and experience how the flavour deepens. Add the chilli sauce and sweet chilli sauce and the balsamic vinegar. Continue to simmer for a few minutes. When you have a glossy sharp-smelling sauce, pour it over the meat in the roasting tin and mix well. Roast for a further 30 minutes, turning every now and then so the sauce is absorbed and the meat is starting to char at the edges of the tin. You can add a shake of Tabasco and a sprinkle of salt and pepper before serving if you think it needs extra spice. The meat in its sauce keeps warm in the oven if covered, so you can leave it now until your guests arrive and get on with the other things, or make it a day or so ahead and warm up as needed. 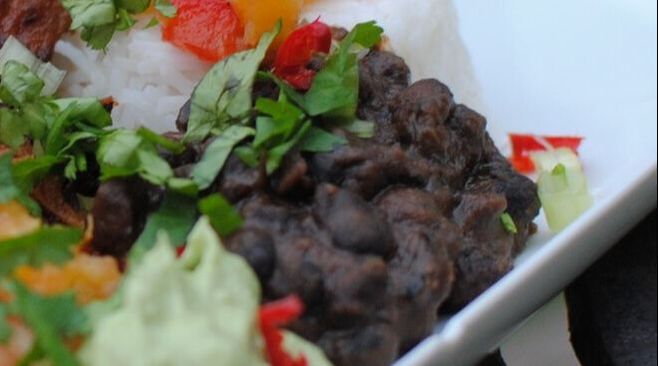 Traditional Caribbean Black Beans - cooked with green peppers and garlic Traditional Caribbean Black Beans - cooked with green peppers and garlic Black Beans with peppers and garlic (vegan) A traditional part of the Caribbean Christmas table, a dish of tasty black beans is also a great vegan offering for a party gathering. They’re even better and deeper flavoured made it ahead of time and they freeze well too. It’s worth using dried black beans rather than a tin, they have a stronger flavour, but you could certainly use a tin or two if you’re short of time. A tin of the little darlings is a great storecupboard standby for a quick dish of beans when unexpected visitors land on you. This recipe is part of my Caribbean Christmas menu, which will be on the website as a full menu from cocktails to Cake de Ron in a couple of weeks. I don’t usually have leftovers from this, but if you do, add them to a ratatouille to change it into a bean stew, with all the goodness and flavour from all those wonderful vegetables. Serves 8 with some leftovers Timings: overnight soaking, 4 hours cooking – can be done ahead of time and warmed up or frozen
Soak the black beans overnight in plenty of water. De-seed and de-stalk the green peppers by cutting round the stalk and pulling out the centre, wash to get rid of the seeds. Peel the garlic cloves and pop them into the green peppers. Place the beans and the garlic filled peppers in a large saucepan and add cold water to cover the beans by about 2cm. Add the bay leaves. Bring the pan to the boil, and simmer over a low heat until the beans are softened – about 3 hours. You could do this in the slow cooker and it would take about 6 hours. While the beans are cooking, grill the red peppers until the skins blister and char all over, then place them in a glass bowl with a plate on top to steam and cool. When cool, you can rub off the skin very easily and remove the centres and seeds. Set aside. When the beans are cooked, let the pan cool for 10 minutes. Take out the green peppers and garlic – the garlic should have stayed inside the peppers but search through the beans to make sure you’ve got them all. Put the green peppers, garlic, half the red peppers and a cupful of beans with their water in a blender with the relish and ground spices and 2 tablespoons of olive oil. Blend up to a thick paste and add back into the pan of beans along with the remaining red peppers, chopped up into small strips. Stir into the beans and taste. Add a slug of olive oil and more lemon juice, more salt if needed and a good grind of black pepper. Traditionally, they shouldn’t be too spicy, just a friendly warmth. Re heat the beans, adjust the seasoning as you like, and then allow to cool a bit before you serve – they will thicken as they cool and you want that slightly thicker texture. They go like a dream with simply steamed white rice and are the perfect side to a slow roast pulled pork. Rustic Chocolate Macaroons
These are clearly macaroons, the slightly raffish Italian older cousin of the sophisticated French macaron. A confection of whipped egg white with sugar and ground nuts has been around for a long time, and the idea was allegedly brought to France with the entourage and cooks of Catherine de Medici in the mid 1500s. In France they refined and formalised the original recipe to produce the riot of coloured macarons you can buy today: smooth and elegant, with various flavours and strong (mainly artificial) colours. A macaroon/macaron is different from the classic meringue in that you leave it for a while after whipping the egg whites and mixing with the sweet stuff, so that it forms a slight crust on the top surface. The crust bakes to a chewy texture, contrasting with the fluffy softness inside. The usual filling is a rich ganache, which seeps into the inner surface of the macaron, adding another even gooey layer. These taste just as good and have that chewy nutty texture but you don’t have to faff around with a piping bag to get the flying saucer perfection. If you want to make French macarons, I will bring some recipes onto the blog well before Christmas, so you can make them as pretty presents. My friend Freddie Sykes is a great baker and made a batch of these for my recent birthday. He based his recipe on the You-Tuber Adam Ragusea’s version, so thanks to both these young men. Makes 10 Timings: 90 minutes
Beat the egg whites until fluffy, then beat in the granulated sugar until the mixture is glossy and you get floppy peaks. Put in the almond flour, powdered sugar, cocoa powder, and half a pinch of salt. Fold the dry ingredients into the eggs until you get a mousse-like consistency. Cover a sheet pan with parchment paper and spoon the batter on in about 20 dollops. Let them sit and dry for a half hour. Heat the oven to 180°C and bake until the meringues start to crack, about 15 minutes. Cool completely before filling. To make the ganache, combine as little as 2 tbsp of cream with an equal quantity of chocolate by volume. Microwave until just bubbling, let it sit for a minute, then stir until smooth. Cool the ganache down to get it to a spreadable consistency. Spread ganache onto the bottom of a macaron, then sandwich it with one of roughly equal size. Mojito
Simple and sophisticated all at once. Mint, rum, limes and sugar, that’s all you need. And ice. To serve a crowd, you will need either a bartender working full speed or make up a whole jug of Mojito ahead of time and have someone ready to stir and pour, although the genuine cocktail is made carefully each in its own glass, taking the time to muddle the mint into the syrup. I quite like to set up a cocktail station and hand the task over to a guest who I know can be a bit shy – giving them something to do and keep their hands busy is a great ice-breaker and there’s the bonus of being extremely popular as people taste the cocktail and shower the creator with compliments. You will also need to assign a “runner” to the cocktail station to fetch more mint or crush more ice on command. This recipe is one from my Caribbean Christmas series which will be on the website as a full menu very shortly. Makes one Mojito. (but you'll want more than one...)
Place the rum, syrup, lime and several sprigs of mint in the bottom of quite a large heavy glass and “muddle” them with a proper muddling tool or with the end of a wooden spoon. You should take your time over the muddling; you aren’t smashing or pureeing it. Add crushed ice to the brim of the glass, then top up with sparkling water. Serve with a straw so your guests can choose how to mix up the layers – strong rummy sweet minty liquid at the bottom or lighter icy sparkle at the top. Garnish with another sprig of mint and maybe a jaunty slice of lime. Leek and Potato Soup – Vichyssoise
The sign of a real classic is how many versions you can find. I’ve eaten so many different takes on what sounds such a simple vegetable soup, and they’re all good. Like a good trench coat, it can be posh, it can be practical, it can be dressed up or slobbed down, treated like a valuable possession or just wheeled out when needed without fanfare to do a job quietly and efficiently. You can:
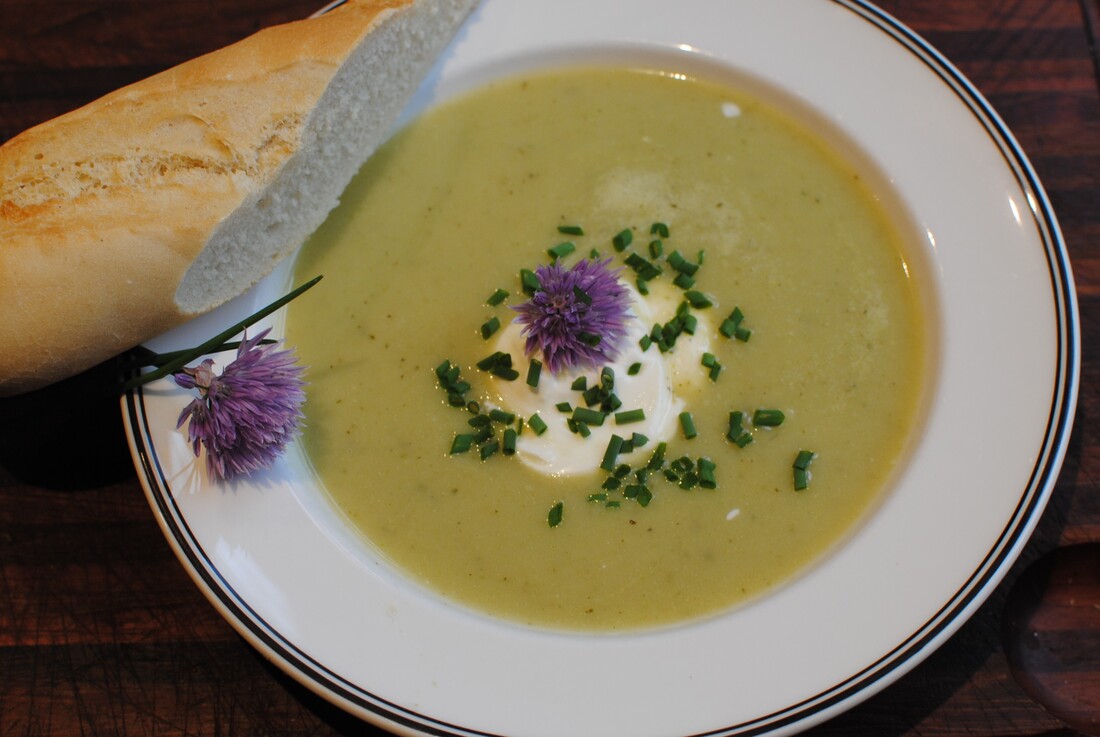
This is what I do for a lunchtime soup beloved by all the family. I like to use a chicken stock as the base but use vegetable stock if you prefer. I use bones from any chicken that we eat (and some fresh vegetables and herbs too, of course) to make a basic stock in the slow cooker so I always have a good chicken stock in the freezer, which adds a richness and fattiness to any mainly vegetable soup. Serves 6 Timings: 1 hour, then time to cool and re-warm
Gently fry the onions in some oil until tender, add the rings of leek and fry again until you can see the green becoming brighter. Add the stock and tip in the potatoes. Bring the soup to a mild simmer and cook for 10 minutes. Leave to cool in the pan as this will finalise the cooking of the potatoes right through. When cold, liquidise, adding the milk or cream. Taste for seasoning and adjust – you will probably need some salt and pepper unless you used a stock cube which is already quite salty. Eat cold if you like, or warm up carefully (don’t boil because of the milk in it) and eat with fresh bread or with your chosen toppings. Anzac Biscuits
These are a bit like the Australian version of scones – not that I mean they’re actually like scones to eat, they’re more like thin flapjacks, but I mean that every family has their own recipe, thinks it’s the best, and the taste is evocative of home, family cooking, Saturday afternoon in the garden, packed lunch boxes and good times. They are also a commemoration of resistance in bad times – traditionally these are the biscuits that were made, packed up and sent off by communities to their troops on the front line in Europe in the First World War, far away from home. They’re sugary, chewy, full of calories and they’re a blend of the taste and texture of the North and the South – oats and coconut. Having no egg, they keep well, as they would have to, being sent half-way across the world, and that makes them ideal for all family occasions – picnics, long walks, movie nights on the sofa. They’re also easy to make, which means children can really let their creative instincts run riot. I’ve seen recipes with added dried fruit, or added chocolate chunks – not part of the classic canon but why not? This recipe is based on the one given by Kate Young in the Little Library Cookbook, with some tweaks suggested by other Australian friends. The magic ingredient is of course golden syrup, which has properties that enhance just about any recipe – it provides that chewy sweetness and binds all the more substantial ingredients together. They don’t rise much but they do spread out in the oven, so give them a bit of space. I made them for the Seniors Lunch Club group and we had a discussion on all things Australian – ranging from the animals to the wine, to the geography, to history. Some of our members have relatives who were deported, some have relatives who have emigrated. Many have visited and have happy memories. One of our volunteers is Australian and loves to make these for the group on Australia Day – coming up in January. Makes about 30 medium sized cookies. Timing 40 minutes.
Pre heat your oven to 180°C and line two baking trays with greaseproof paper. Put the butter, sugars and golden syrup into a small pan and melt over a low heat. Sieve the flour into a large bowl and add the oats and coconut. Mix the bicarbonate of soda and water, add to the pan of butter and stir in, then tip the pan of liquid mixture into the bowl of dry ingredients and mix briefly. Put walnut sized spoonfuls of the mixture on the baking trays. I get about 4 in a row along one of the short sides of a tray. Some recipes say flatten the spoonfuls of mixture to get a more biscuit shaped outcome and some don’t, which gives a more domed outcome, but it’s up to you. I get about 12 on a tray. Put the trays in the oven for 8 minutes and then swop over the position on the shelf – it does make quite a different to this mixture where in the oven they are cooked. Cook for another 5-6 minutes and then take them out when they are still soft and golden brown, not deep brown. They are very soft when taken out, so let them harden on the tray for a couple of minutes before sliding the whole sheet of baking paper onto a rack to cool. Fresh Oysters on their shells, as simple as could be
Yes I know. Not everyone likes them or can be persuaded to try them. But think, what a memorable party it’s going to be! Check with your guests first (they’re quite expensive at £1-£2 per oyster) and throw a packet of crisps at the ones who just won’t try delicious, sustainable, chic, British seafood. There are people who are allergic as well, and we can’t blame them for that. Crisps for them too. You’re lucky if you live near a fishmonger who sells them on ice, maybe tell them of your plans and order in advance. You can also get them online, fresh from Cornwall or Essex. Native oysters and farmed ones spawn at different times, so you can get them most of the year. Serves 6 (three each) Timings: about an hour, but it's all prep, no cooking involved
Slice the shallots and start them pickling. Get some wide flat bowls ready. Open the oysters. You need a firm flat blade, like the widest flat screwdriver you can find, or a short heavy bladed knife. Wrap one hand in a teatowel and hold the oyster – this gives you a better grip and protects your hand from inadvertent stabs. With your knife hand, gently get the tip under the top shell of the oyster near the hinge – you can generally see where the top shell sits inside the lower shell, and twist slightly, moving the knife from side to side and then round the whole shell. You will need to cut the attachment on the top shell. Leave the oyster in its juices on ice and move on to the next. You will get quicker as you go along. Once you’ve taken the top shells off all of them, go back and loosen the oysters from their bottom shells. To Serve: Arrange three oysters per plate on ice. Add a slice of lemon to the side of the plate, a spoonful of shallots in vinegar to one oyster, a shake of Tabasco to another, and serve. Your guests just slide them down their throats. Or you can just make up a big iced platter of oysters and let everyone add their own flavours. Don't forget to keep the shells as garden decorations, they make a great addition to a flower bed and the birds love to turn them over to reveal whatever's taken shelter underneath. Spicy Beany Ratatouille topped with Grilled Halloumi (vegetarian)
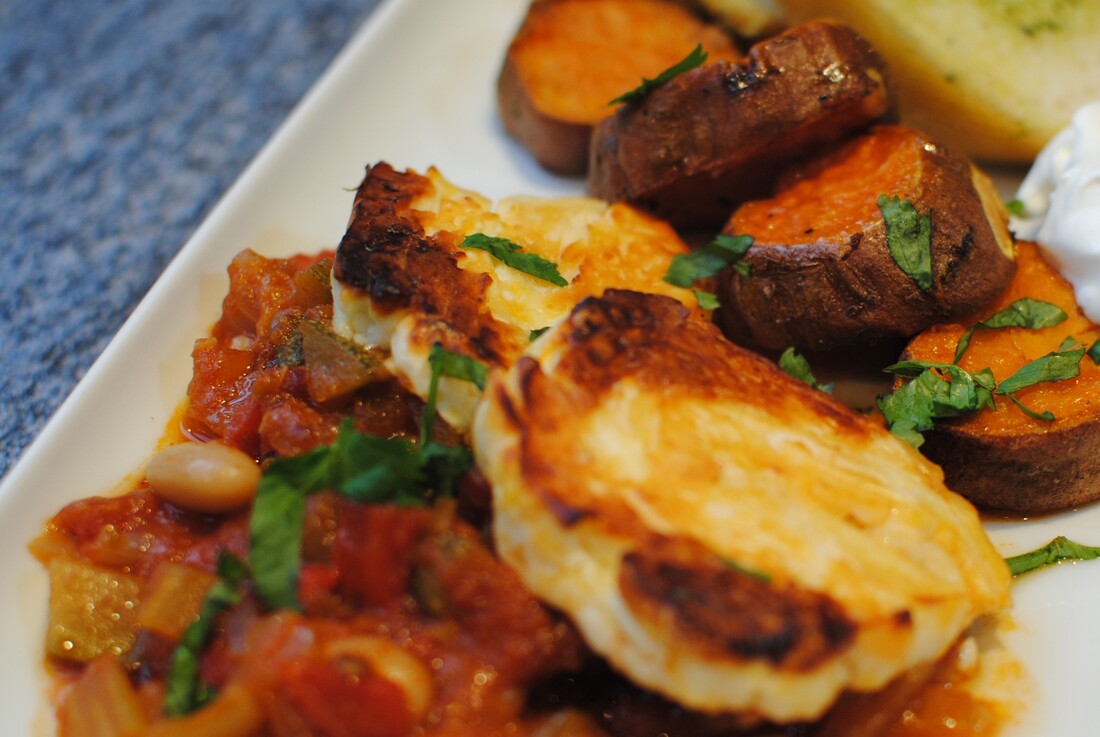
You can top anything with halloumi, more or less. It’s so versatile, and such a friendly cheese. Like an egg, it keeps its shape, but nestles down into the spicy mix you cook it into. This meal is sort of like a shakshuka with halloumi instead of eggs, and with beans. So not very like a shakshuka except that it’s warm, comforting, tasty, spicy, tomatoey and gorgeous. The bean stew is very adaptable according to the ingredients you have in your cupboard or receive in your vegetable box. I think halloumi goes very well in a mix with celery and peppers, but you can add aubergines (I would have, just didn’t have any in the vegetable drawer) or green beans, any firm veg you have around. The spices are important, and a good warm mix of cumin, paprika and some chipotle in adobe gives you a glorious glow. It’s a wonderful dish to have made ahead of time and just pop it in the oven when you get home from parents’ evening to have ready in 40 minutes with no hassle while you unpack the school bags and wash out the lunch boxes. I served it with roasted slices of sweet potato, to make the most of the oven being on, and with a dollop of plain Greek yoghurt sprinkled with fresh coriander and a baton of garlic bread. My friend Louise inspired me to make this when she hosted our Fine Wine and Dine Book Club recently, so thanks to you, Louise for the idea. Serves 4 Timings: 30 minutes initial preparation, then it can be left for a day, and 40 minutes in the oven before you eat.
Extra: About 750g sweet potatoes, sliced into rounds 1cm thick, a tub of plain Greek yoghurt, and a handful of fresh coriander, chopped. 1 baguette of garlic bread. In a heavy pan (I use my Le Creuset), gently fry the onion, pepper and celery in a little vegetable oil until softened. Add the garlic, fresh chilli and the dried oregano. Stir and fry for a minute, then add the ground spices, stir well, and add the tins of beans and tomatoes. Add another half tin of water and the chilli sauce and chopped chipotle, along with the Henderson’s Relish, marmite and bay leaves. Stir well together and simmer for about half an hour to deepen the flavours. Taste, add salt or a little more water if needed. You don’t want too liquid a mix, so don’t add too much water. You will be able to taste the lovely warmth of the herbs and adobo sauce but it shouldn’t blow your head off. At this stage, you can cool down the mixture and keep it in the fridge for up to 2 days. When ready to cook, heat the bean stew gently in a pan and pre heat the oven to 200°C. Prepare your slices of sweet potato – about 1cm thick, and toss them with oil, salt and pepper in a roasting tin. Place the bean stew in a roasting tin that will take the stew about 3cm deep – you might need a smallish square tin rather than the big tin you'd use for roast chicken. Remove the bay leaves. Slice the halloumi into 8 slices and place on top of the bean stew. Put the sweet potato slices in the top of the oven and bean stew on the second shelf for about 40 minutes. Turn the sweet potato slices occasionally. At the end, the halloumi should be lightly browned on top – if not, give it a quick flash under the grill just to get that lovely sticky texture. Serve with a dollop of cool Greek yoghurt and some chopped fresh coriander. Danube Waves Cake (Chocolate and vanilla with fresh cherries and fudge icing)
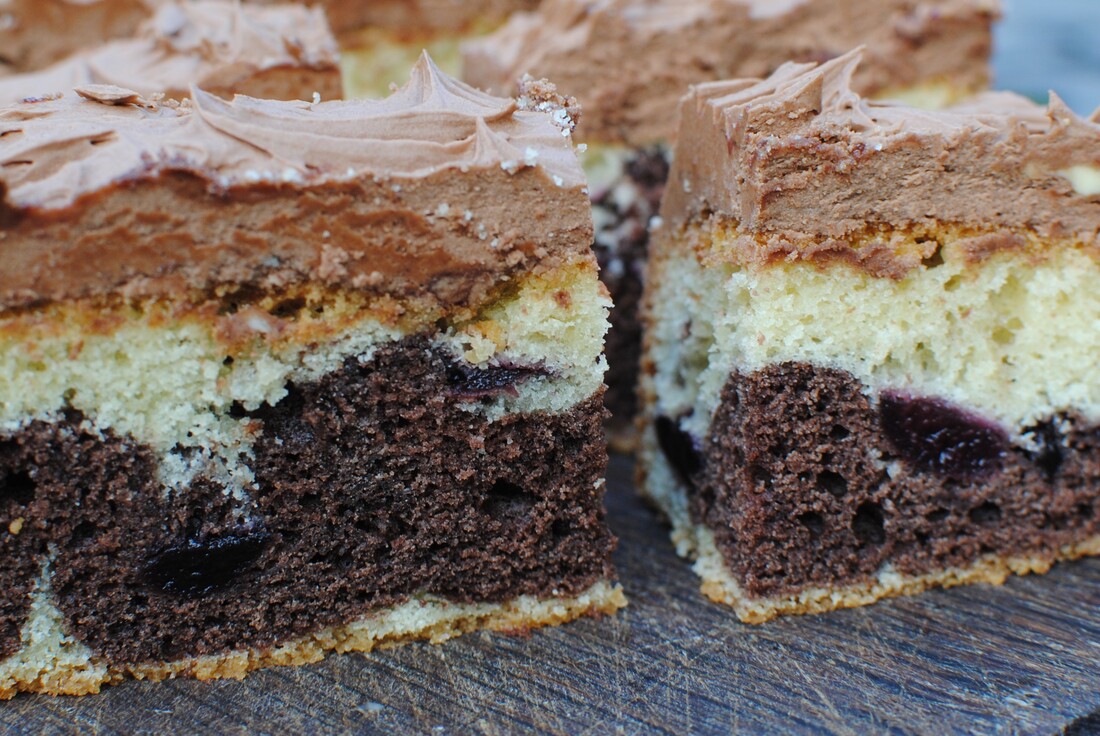
Well, an adaptation of the traditional German “Donauwelle” recipe. The “waves” are the curves made by the vanilla and chocolate cake mixes and the wavy top of the icing. I’m not convinced it looks like the Danube, but it tastes very good, which is the main thing. The combination of boozy cherries and chocolate is a classic, from which the Black Forest Cake also gets its fabulous flavours, so you can hardly go wrong. At Seniors Lunch Club this week we played “What Have I Got to be Grateful For?” - a pretty simple exercise but always brings up surprises. This time, we had a strong theme of Community developing. Many members felt grateful not only for their family but for their community, valuing the feelings of togetherness and friendship. We felt grateful for art and music, local art galleries and for great composers and the joy they have brought to so many. Being able to watch great music and concerts on TV was highly valued. Ballroom dancing was something appreciated and remembered by several; both watching it and taking part. We know we’re lucky to live where we do, in a beautiful suburb of Manchester, we love our homes and our environment. Inspiring as ever, talking to the group. Makes 16-20 pieces Timings: 2 hours
For the icing: 200g softened butter, 250g icing sugar, 75g chocolate, melted (I used a mix of dark and milk), 1 tablespoon of sour cream, 1 tablespoon of Camp Coffee Essence Stone and snip up your cherries and soak them in the liqueur for half an hour. Pre heat the oven to 180°C, and grease and line a 22cm square baking tin. Sieve the flour. Beat the butter and caster sugar and vanilla sugar together until creamy and then add the eggs one at a time alongside a tablespoon of flour each time. Add in the rest of the flour and mix well to a fluffy cake batter. Spoon half of the batter into the prepared tin. Now mix the cocoa powder into the remaining batter and stir again. Blob the chocolate mix over the top of the vanilla cake mix. Drain the cherries (keep the liqueur for a warming nip at dinner time, no sense in wasting good liqueur, especially now it has an extra tang of cherries to it) and drop them over the chocolate part of the batter. Place in the oven and cook for 45-50 minutes until risen, golden and a skewer comes out clean. Leave on a wire rack to cool. For the icing, beat the butter until soft and add the icing sugar a spoonful at a time. Melt the chocolate in a bowl over hot water. Add the sour cream and Camp Coffee essence to the icing and then scrape in the melted chocolate and beat well. You will get a fluffy fudgy mixture. Spoon the icing over the top of the cooled cake and make wavy patterns with a fork. Keep in a cool place until ready to eat. |
Some Changes - April 2022
Thanks to my friends and followers for your patience, and for your encouragement to start blogging again. Archives
April 2022
Categories
All
|




 RSS Feed
