|
Ensaladilla (vegetarian options)
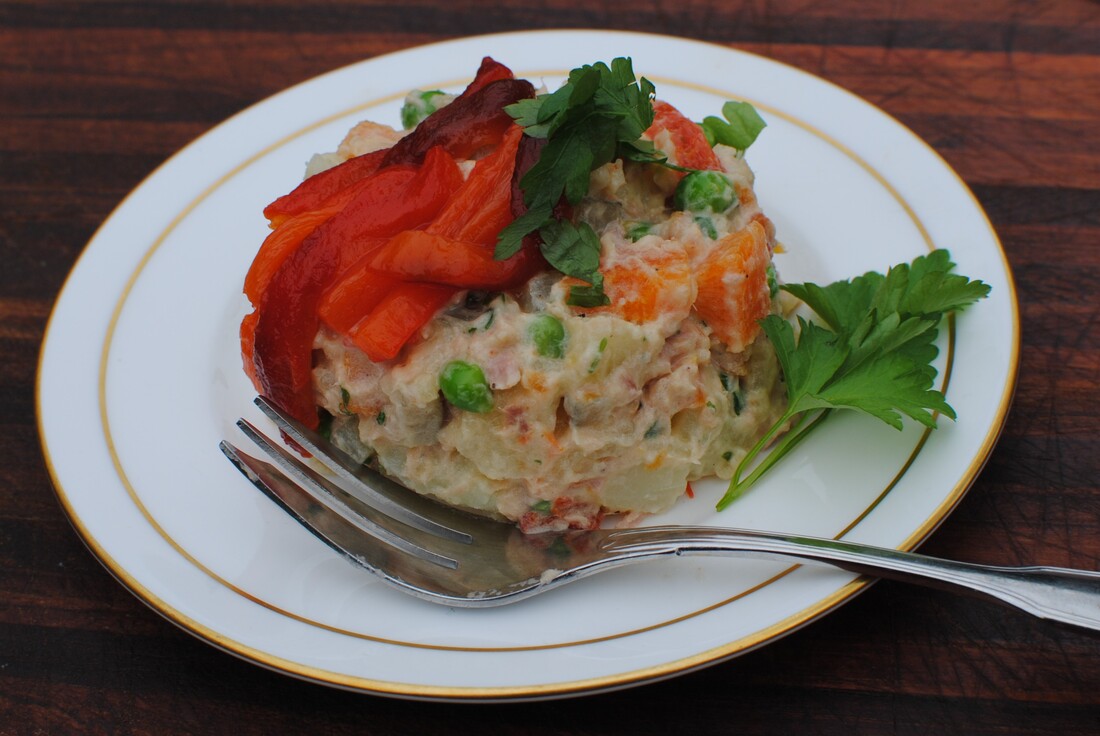
Returning to a much-loved place is a joy. Eating the food you first ate there takes you back. I’ve said in this blog before how much I learned from eating in the Canary Islands. “Gourmet” is not the first thing you think about the Canaries, but these days it should be near the top of the list, along with sun, sand and holiday fun. We all adore sharing a table of tapas with friends or family. Everyone chooses a favourite, but you also get the chance to try new things. In Spain, when you sit down with a drink, the bar will also often serve you a little portion of their chosen “tapas de dias” without extra charge. It’s good marketing, encourages you to sit and drink another round, and lets you try home made small portions of local food. Just what I like to do best. You find “Ensaladilla” on the menu at most tapas bars in the Canaries. The proper name is Ensaladilla Russa, or Russian Salad, but who cares? And is it anyway? A Russian chef, Lucien Olivier, is said to have made the first salad of this type in Moscow in the 1860s, but the same recipe exists all over Europe in various forms and they can be quite different, so I don’t see how anyone can lay claim to the “best”, or the “original” or the “genuine” recipe. I’ve eaten a similar dish in the Balkans with chopped ham in it, they sell pots of it in German supermarkets with sausage pieces, I’ve had a very eggy version somewhere on my travels. The main variation in Spain has tuna, so that’s what I’ve gone with here. The basic recipe is cooked potatoes, carrots and other vegetables, bound together with a mayonnaise dressing, and some herbs. For protein you can add chopped ham or other softish processed meat, or eggs or fish. You can add or leave out: chopped pickled cucumber/gherkins, capers, anchovies, red peppers. Some like chopped dill, others prefer parsley. You can layer it attractively or just mix it up and serve it as a scoop. The dressing is usually freshly home-made mayonnaise, but you can use mayo from a jar and you can lighten it a bit with sour cream or plain yoghurt if full-on mayo isn’t for you. Two big no-no rules: no garlic in the mayo and no tomatoes in the mixture. I tried to re-create our favourite versions from Tenerife, but please let me know if you have any favourite family recipes, or other versions you love and I’ll try those too. 8-10 starter portions 30 minutes preparation
Boil the potatoes with their skins on, leave to cool and then peel and dice quite small. This avoids you cooking small peeled cubes of potato which tend to dissolve into mush. However, best to cook the carrots when already diced up, as they don’t peel well once cooked. Grill the peppers until blackened on all sides, then put them in a glass bowl with a plate on top to steam while they are hot, wait until they are slightly cooled and the skin will come off easily. Remove the seeds, stalks and membranes. Cut the flesh into long thin strips with scissors. Cook the peas. If frozen just pour boiling water over them, leave 2 minutes and drain, which keeps them nice and crunchy. If fresh, boil for 2-3 minutes. Drain under cold water. When all the vegetables are cool, add the potato cubes, carrots, peas and chopped gherkins to a bowl. Chop the fresh parsley and add in, and chop half the red pepper and add in. Break up the tuna, add it to the bowl along with the mayonnaise. Mix well, taste and adjust the seasoning. You might need a little salt, maybe a squeeze of lemon juice and a grinding of black pepper. Chill the mixture in the fridge before serving. You can make a nice shape by spooning the ensaladilla into a ramekin and turning out onto a plate; decorate with a couple of the reserved strips of red pepper and a leaf of parsley.
0 Comments
Fresh Oysters on their shells, as simple as could be
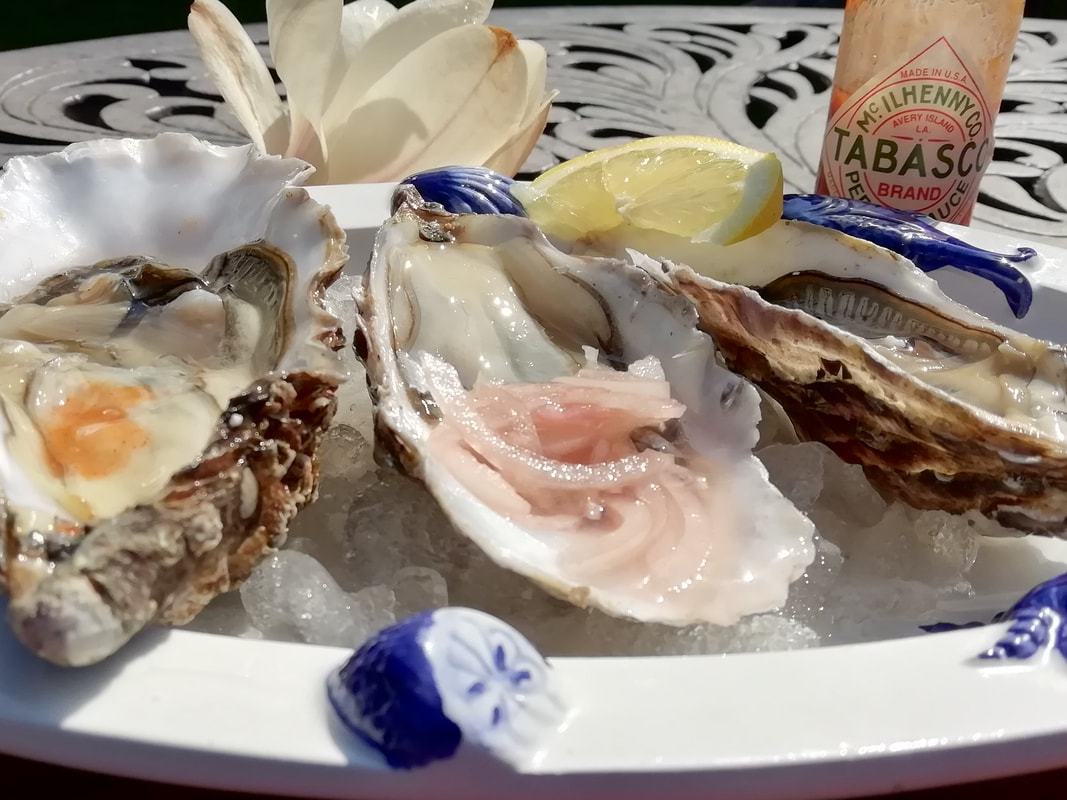
Yes I know. Not everyone likes them or can be persuaded to try them. But think, what a memorable party it’s going to be! Check with your guests first (they’re quite expensive at £1-£2 per oyster) and throw a packet of crisps at the ones who just won’t try delicious, sustainable, chic, British seafood. There are people who are allergic as well, and we can’t blame them for that. Crisps for them too. You’re lucky if you live near a fishmonger who sells them on ice, maybe tell them of your plans and order in advance. You can also get them online, fresh from Cornwall or Essex. Native oysters and farmed ones spawn at different times, so you can get them most of the year. Serves 6 (three each) Timings: about an hour, but it's all prep, no cooking involved
Slice the shallots and start them pickling. Get some wide flat bowls ready. Open the oysters. You need a firm flat blade, like the widest flat screwdriver you can find, or a short heavy bladed knife. Wrap one hand in a teatowel and hold the oyster – this gives you a better grip and protects your hand from inadvertent stabs. With your knife hand, gently get the tip under the top shell of the oyster near the hinge – you can generally see where the top shell sits inside the lower shell, and twist slightly, moving the knife from side to side and then round the whole shell. You will need to cut the attachment on the top shell. Leave the oyster in its juices on ice and move on to the next. You will get quicker as you go along. Once you’ve taken the top shells off all of them, go back and loosen the oysters from their bottom shells. To Serve: Arrange three oysters per plate on ice. Add a slice of lemon to the side of the plate, a spoonful of shallots in vinegar to one oyster, a shake of Tabasco to another, and serve. Your guests just slide them down their throats. Or you can just make up a big iced platter of oysters and let everyone add their own flavours. Don't forget to keep the shells as garden decorations, they make a great addition to a flower bed and the birds love to turn them over to reveal whatever's taken shelter underneath. Swedish Stuffed Eggs
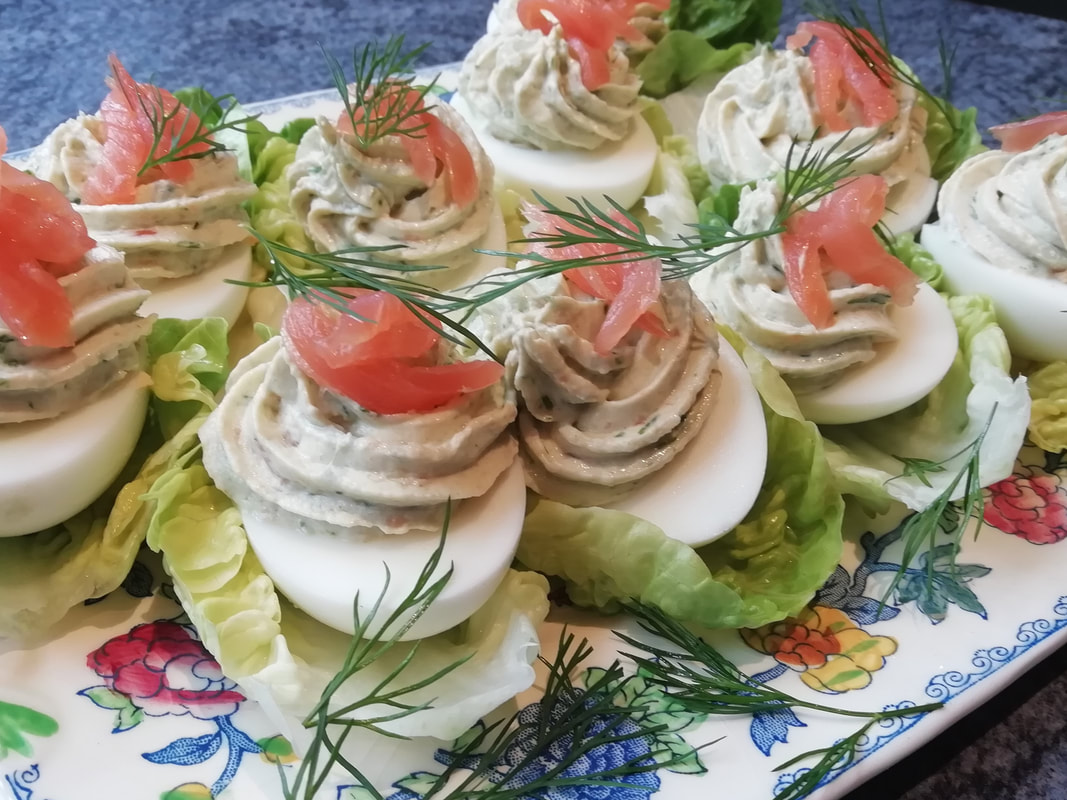
Eggs and fish are a classic Scandinavian combination. Add some fresh herbs and a spritz of lemon or a fizz of horseradish and you have a thing of beauty. Stuffed eggs are a staple of any Scandinavian buffet. They are the perfect party food, easy to prepare ahead, pass round and let your guests eat with their hands as they wander through the garden. Often, in a stuffed eggs recipe (see my own recipe for Devilled Eggs) the yolk of the hard boiled egg is combined with a variety of other ingredients and then used to stuff the egg cavity. In this recipe, the smoked salmon mousse is just piped on top of the whole egg, leaving the yolk in place for an even richer combination. Top with a strip of smoked salmon or even a little sprinkle of salmon roe if the budget runs to it. Serves 6 Timings: 40 minutes
Reserve one slice of smoked salmon for decoration, snip it into lengths and leave aside. Reserve some fronds of dill for decoration too. Wash the lettuce thoroughly, separating the leaves but keeping them whole, and leave in cold water to crisp up. Make the mousse by blending the smoked salmon, cream cheese, chives, dill, sour cream, horseradish and lemon juice. I like to use a hand blender for a smooth result. Taste and adjust the seasoning – you might need a little salt and pepper to bring up the flavours. Scoop the mousse into a piping bag with a wide star nozzle. Halve the eggs, and you might need to take a sliver off the bottom of the white to stabilise them. Pipe the mousse on top of the eggs and chill in the fridge until ready to serve. To serve just place each egg on a lettuce leaf and add a strip of smoked salmon and a frill of dill. Tandoori Prawn and Pineapple Kebabs
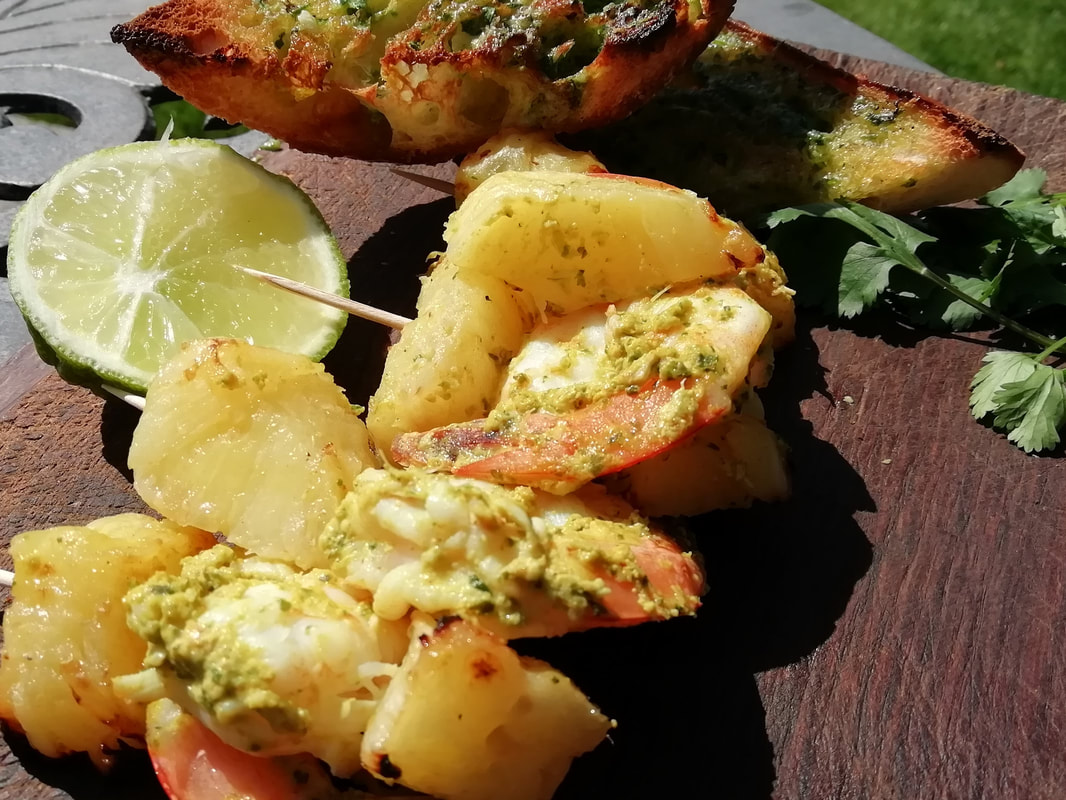
Simple and fresh: straight off the grill! These are everyone’s favourite appetiser. Mildly spiced prawns in a green herby tandoori marinade contrast with the buttery juicy pineapple for an explosion of flavour. Great for parties and for starting off a summer garden celebration or barbeque. Serve with garlic bread, a few bitter salad leaves or just as they are, with lime juice and a sprinkle of chopped coriander. Serves 6 Timings: 30 minutes preparation, 2 hours marinate, 30 minutes to assemble and cook
Marinade:
Mix up the marinade ingredients, stir well and add the prawns. Marinade for at least 2 hours. Heat up the butter in a shallow frying pan and fry the chunks of pineapple for a few minutes to caramelise and release the juices. Keep the chunks cool until ready to assemble the kebabs. Heat up your grill or barbeque. Simply skewer the pineapple chunks and prawns onto wooden sticks (pre soaked) or metal skewers, allowing 2 prawns per skewer and interspersing the pineapple. Grill quickly – about 3 minutes on each side, making sure the prawns are cooked through. Serve straight from the grill, squeezing over a little lime juice as you go. Pissaladiere – caramelised onion and anchovy pastry
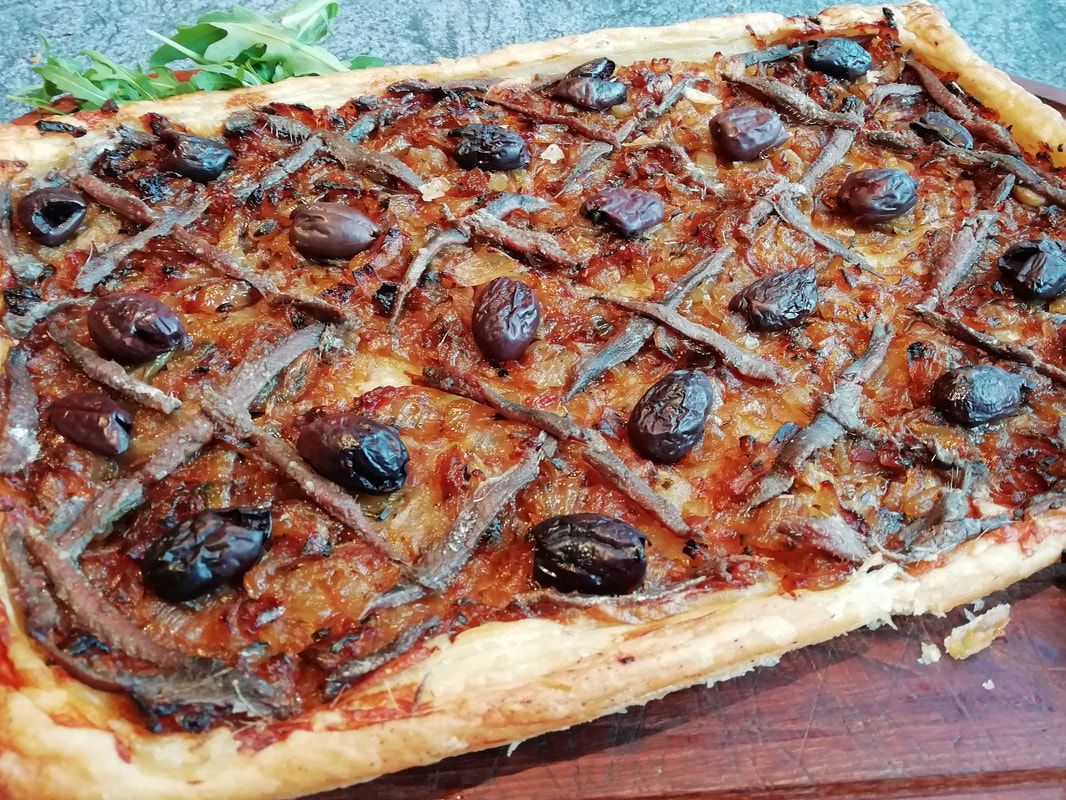
Not a tart, no top. Not a pizza, no cheese. Not a quiche, no eggs. “Pissaladiere” is dough topped with caramelised onions, salty anchovies, rich olives and a smidge of mustard, flavoured with thyme. Provence on a plate. Originating somewhere between Nice and Marseille, perhaps even having migrated from Genoa, the recipe uses local specialities to give a true taste of the region. The name comes from “pissalat” – a condiment that’s difficult to find now and is probably related to the Roman “garum” a sort of fermented fish sauce. The “pissalat” consisted of salted anchovies and other small fish left to marinate and liquefy with some woody herbs over several weeks, but you can substitute a good brand of anchovies out of a tin and still get that deep salty flavour. I met it on the streets of Marseille, where the savoury scent wafts from the bakeries in the mornings, although regional purists will probably say that the best examples come from further east along the coast, in Nice. You eat it warm, not hot; munching from your hand as you wander through the markets, rather than formally at a table. The base can be a flaky bread dough or an even flakier pastry. I prefer the pastry version and am not above using ready made puff pastry for an easier life. It’s a great garden party food for summer gatherings. You’ll probably need to offer plates rather than serving it into people’s hands as the flaky pastry can be a bit unstructured and will tend to disintegrate. Serves 8 Timings: 90 minutes to prep and cook, 30 minutes to cool
Fry the onions very gently in a heavy pan in the vegetable oil, stirring all the time, until they soften and caramelise. This takes longer than you think – about 30-40 minutes. Add a little more oil if needed and add the butter after about 10 minutes. Add the dried thyme and some salt and pepper. Skin the tomato (by dunking it in boiling water and then running under the cold tap), discard the seeds, and chop the flesh very finely. Add this to the pan of onions and continue to fry until the tomato pieces disintegrate. Add the chopped parsley and the tablespoon of vinegar. Stir in and let it cook and reduce further – this gives a lovely deep sweetness to the onion mix. Pre heat your oven to 210°C. Roll out the pastry on a metal baking tray, keeping it on its backing paper. Use a sharp knife and score round the edge of the pastry about 1cm inside the edge, but not going through the pastry sheet. This means the edge will rise up slightly above the rest, giving you that flaky crunchy outside. Spread the pastry (not the edge) with a thin layer of mustard. Spread the onion mixture over the pastry (not the edge) evenly. Criss cross the anchovies over the onion mix and dot the olives in between to make an attractive pattern. Brush the edge of the pastry with some of the oil from the anchovies. Bake for 20-25 minutes until the tart looks cooked and the edges are nicely browned. Cool before slicing and eat lukewarm. If you feel the need for green, some rocket leaves scattered on top would go well. American Shrimp Cocktail
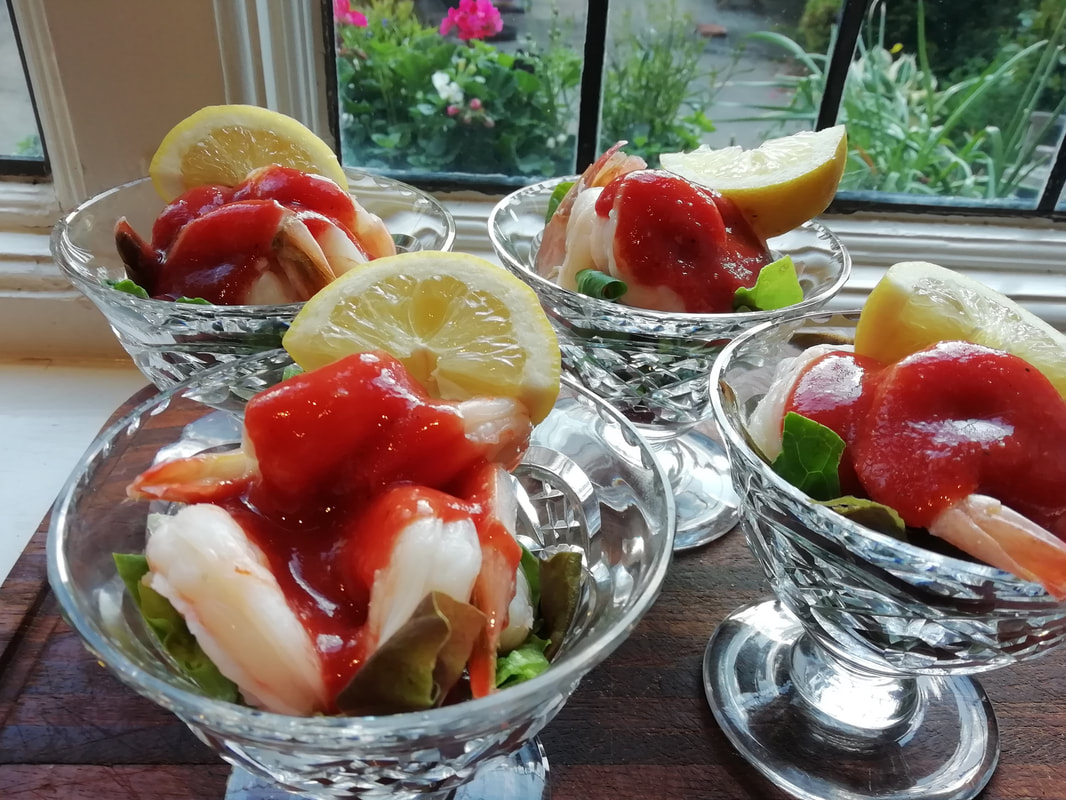
Travelling in the US, I love to discover foods that sounds the same as English versions but are in fact, quite different. It’s one of those “you’re like me but not like me” moments; a bit of a thrill, taking you out of the familiar. What we know as prawns, the Americans call shrimp. What we call shrimp, (the Morecambe bay tiny brown shrimp that we eat in tubs of brown butter) they probably don’t see as food at all. And if you ask for a shrimp cocktail, expecting a creamy mayonnaise-y Marie Rose sauce, you can get a bit of a shock to find a spicy tomato salsa, hot with horseradish instead. It’s a nice shock; you can repeat it at home easily and watch the surprise on your guests’ faces when you serve it. A lot of American recipes for the spicy shrimp sauce are based on ketchup. I prefer this one, based on a jar of lovely tomatoes in the best juice you can buy – it gives such a sweet depth of flavour. But you could use a really good tin of tomatoes too – the Italian ones are very tasty. If you can lay hands on fresh horseradish, it will blow your mind. The sauce gets hotter and more tingly over a day or so as the horseradish develops its spice, so make it ahead and keep in the fridge. Anyone with an allotment will probably be able to give you a section of horseradish root on a regular basis if you ask them – it grows like a weed and takes over; allotmenteers are always glad to dig up a bit and get rid of it to willing recipients. Some grocers also have “fresh” roots – generally wrapped in plastic like a dirty cucumber. A good jar of cream of horseradish would do fine, but not the ones combined with mayonnaise or cream. Serves 6 Timings: 30 minutes
Drop the prawns into cold water, bring to the boil, simmer for 1 minute and leave for 5 minutes to poach fully before draining and running under cold water to stop cooking. Drain and keep in the fridge until ready to serve. You can add a little extra flavour by adding a glass of white wine, some peppercorns and some herbs to the cooking water, but that’s optional. Make the sauce: blend the tomatoes in their juice with the grated horseradish and the chopped chilli. Push through a sieve to remove the seeds and any stringy bits of root. Stir the sauce and add a generous splash of Worcester sauce, a good squeeze of lemon, the sugar and a couple of pinches of salt and black pepper. Stir, taste and adjust the seasoning – how much salt you need depends on the brand of tomatoes you used. Keep in a jar in the fridge for at least an hour before serving to chill and to develop the flavour. It will keep a couple of weeks in the fridge if you have made a lot and can be added to tomato soup or pasta sauces to give a little extra zing. Arrange the prawns over a little lettuce and spoon the sauce over. Your guests can squeeze a bit more lemon over if liked. A slice of good bread would help mop up the juice. Pepper Crusted Tuna Steak & Lemon Butter Sauce
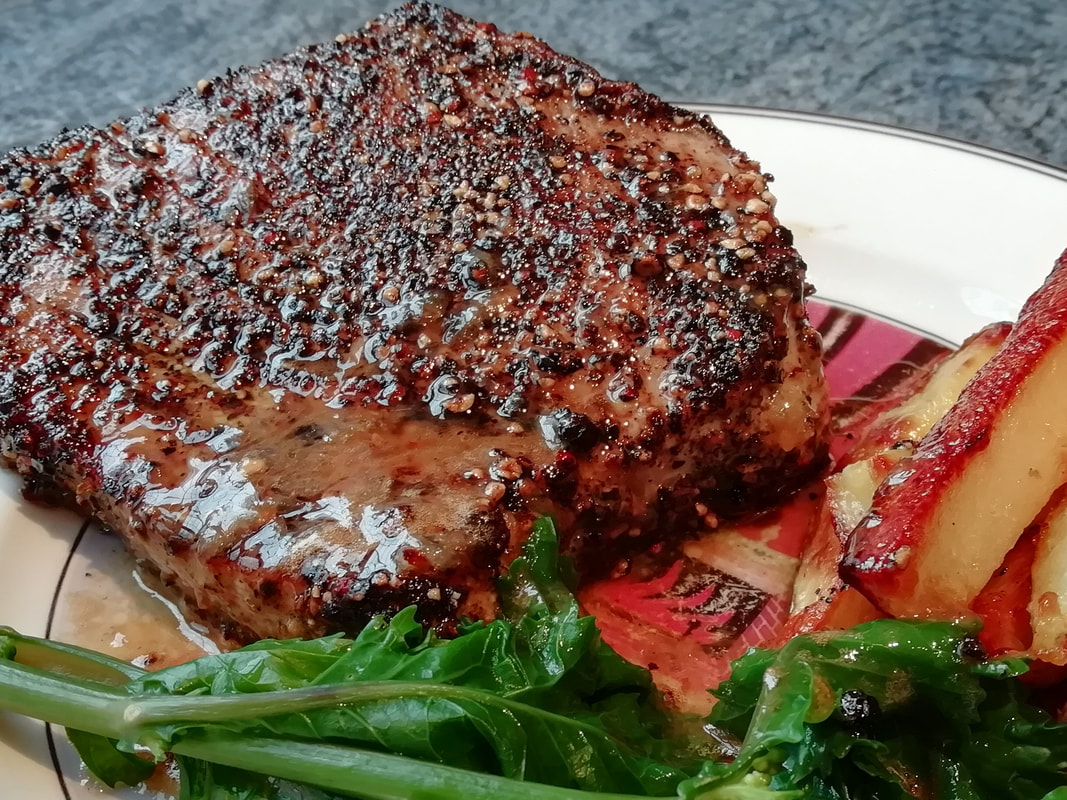
A favourite weeknight treat, quick to get on the table. I usually serve it with oven-cooked thick chips and a simple vegetable such as lightly cooked green beans or sprouting broccoli. The lemon and butter combine with the juices from the meaty tuna to make a lovely tangy sauce, and the peppercorns give a mild warmth, not too hot. Tuna is an expensive food, I know, but there is no waste. If there's any left over, you can use it the next day to top a salad or flake into a sandwich with some mayo. Serves 4 Timings: 30 minutes
Get the tuna out of the fridge about half an hour before cooking. In a pestle and mortar, grind the peppercorns coarsely. You could use a spice grinder but be careful, you are looking for a gritty texture rather than finely ground. Coat the tuna steaks evenly in the ground gritty pepper and leave to set for 10 minutes. Heat your deep frying pan and use a little oil. Fry the tuna steaks for about 5 minutes per side, depending on the thickness and how you like your fish done. You can poke the steaks with a sharp knife to see how done they are – they will cook a little more as you make the sauce so have them a little under rather than a little overdone to keep them juicy. When you are nearly done, add the butter and let it foam up, then add the lemon juice. Swirl the pan to coat the steaks and serve straight away. Goujons of Dover Sole, with Minted Peas and Tartare Sauce
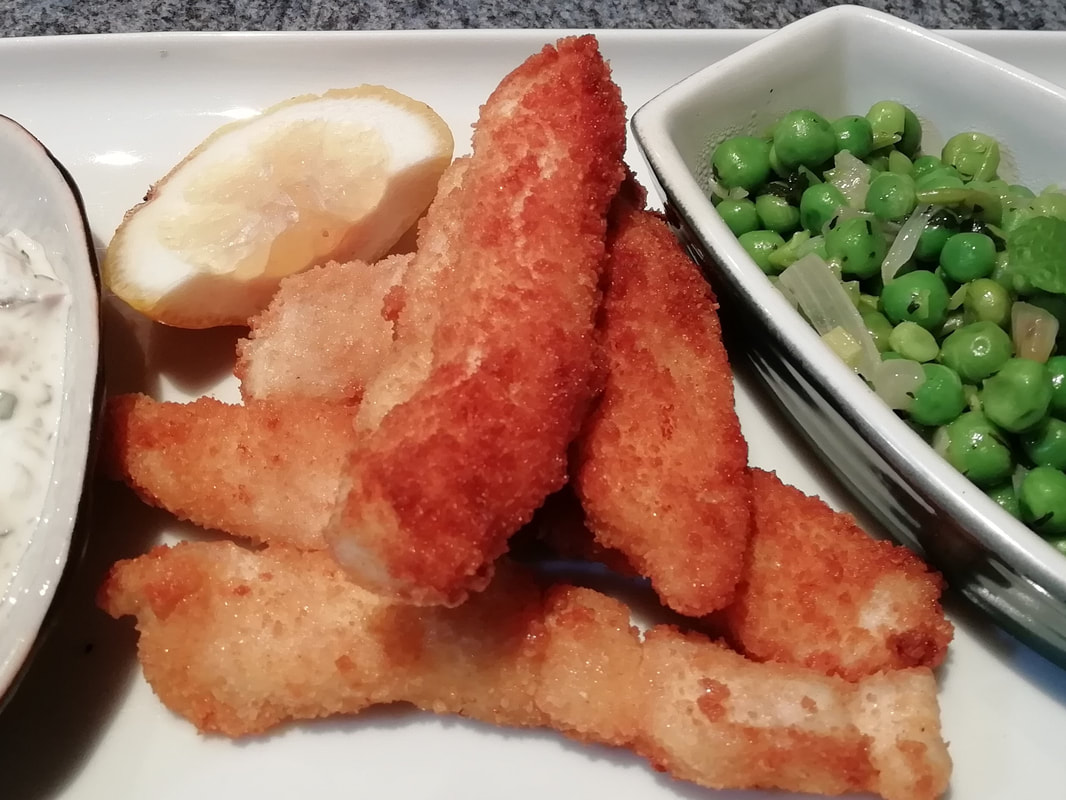
This is so delicious, light and crispy that it will convert even a fish-refuser, but Dover Sole isn’t cheap, so feel free to substitute another delicate white fish, such as lemon sole. One reason Dover Sole is expensive is that it doesn’t have that fishy background some people don’t like, so it can be worth it as a treat, and used in a recipe like this one that makes a medium fish go a long way. Home-made tartare sauce beats the bottled stuff hands down, do give it a go, it isn’t at all difficult and might even reduce the kids’ tomato ketchup consumption slightly! If you don’t like capers generally, leave them out, but you don’t taste them strongly in the sauce, so be brave and try. Some recipes give garlic in the tartare sauce – I think this would overwhelm the delicate fish so I prefer it without, but try it if you think it would suit your more robust tastes. Minted peas are a joy. I’m a fan of frozen peas anyway but jazz them up with some shallots, mint and a bit of a change of texture, and you have something that makes the family go “yum, I’ll have more of these please.” Serves 4 Timings: 30 minutes
Using scissors, cut each fillet into three pieces and then cut thin strips lengthways. Dip each strip into the seasoned flour, then into the egg and then into the breadcrumbs. Put them on a baking tray to firm up while you make the sauce and peas. For the sauce: combine all the ingredients. Check the seasoning, adjust as needed – you might need a bit more lemon juice or a little more mayonnaise depending on the sharpness of the pickled gherkins and capers you are using. For the peas: fry the shallots very gently in a little butter for a few minutes, until transparent - don’t brown them. Add half the peas and mash them in the pan with a fork, breaking up the texture but not making them into a puree. Add the other half of the peas and the teaspoonful of mint sauce, the fresh mint, and warm through over a low heat while you cook the fish. In a deep fryer or large flat frying pan, heat the oil. The goujons are so slender that you can probably fit the whole fish into one large frying pan in one layer, this is your aim. Fry the goujons in bubbling oil for about 2 minutes, turn over and fry the other side. When nicely browned, remove from the pan and drain on kitchen towel. Serve with the peas, the sauce, a slice of lemon and possibly some good chips or fried potatoes. Paddy’s Mussels – Mussels with Wild Garlic
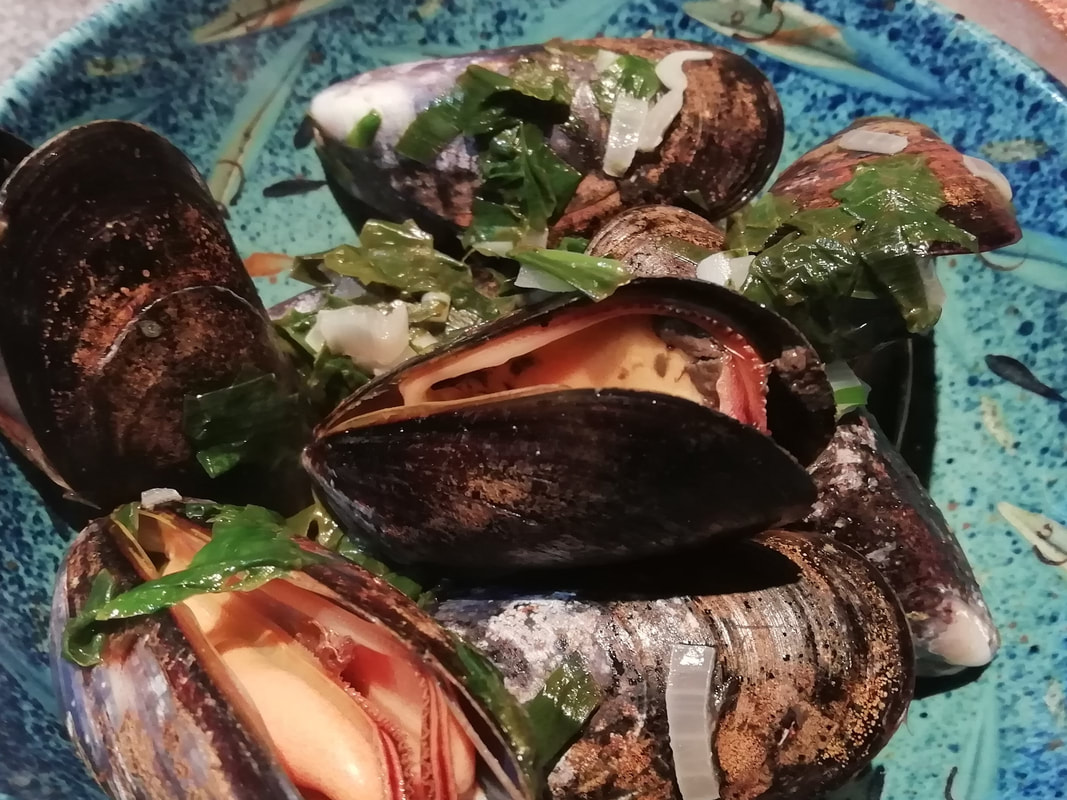
Well, if St. Patrick didn’t eat this, I’d be surprised. Both ingredients are found in abundance in Ireland and it’s a super-delicious combination. The new leaves of wild garlic, or ramsons, are the culinary harbingers of Spring, poking up in the woodland or hedgerows, growing into aromatic clumps with the white drumstick flowers held above. Gorgeous to look at and to eat. Please pick sensibly: from clean patches where dogs don’t squat, and never take all the leaves from one plant or denude an entire patch. Do check you’re picking the right plant – you can’t mistake the garlic scent when a leaf is crushed. I’ve never seen it for sale in the UK, but it’s sold in Europe as “bear-leeks”, and eaten everywhere, in soup, sauces and salads. Don’t be nervous about cooking fresh mussels – they’re as simple as 1,2,3. If you’ve enjoyed them in a restaurant, do try them at home. Oddly, children often like them very much – maybe it’s the messy fun of scooping them from the shells. Or maybe it’s that they go with chips so brilliantly. Marry the light garlic savour with fresh salty mussels in a white wine and shallot broth; scoop up the juices with good bread, serve a plateful of crisp chips on the side and enjoy while you toast St. Patrick’s Day. Serves 4 Timings: 30 minutes
Prepare and clean your mussels. Wash under running cold water – discard any that don’t close when tapped or after handling. Scrub them well and pull out any stringy beardy bits. Leave in a sieve until ready to cook. Fry the shallots gently in a little vegetable oil or butter in a large pan until soft, about 5 minutes. Add the white wine and let it bubble down and cook down to about half the volume, takes only a couple of minutes. Add the wild garlic to the pan, let it cook for only a few seconds and add the mussels. Put the lid on the pan and let the natural juices steam-cook the mussels for 3-4 minutes until they are all open and have absorbed the garlic taste. Scoop into bowls and eat with good tangy sourdough bread or some chips, or both. Crispy Chilli Squid
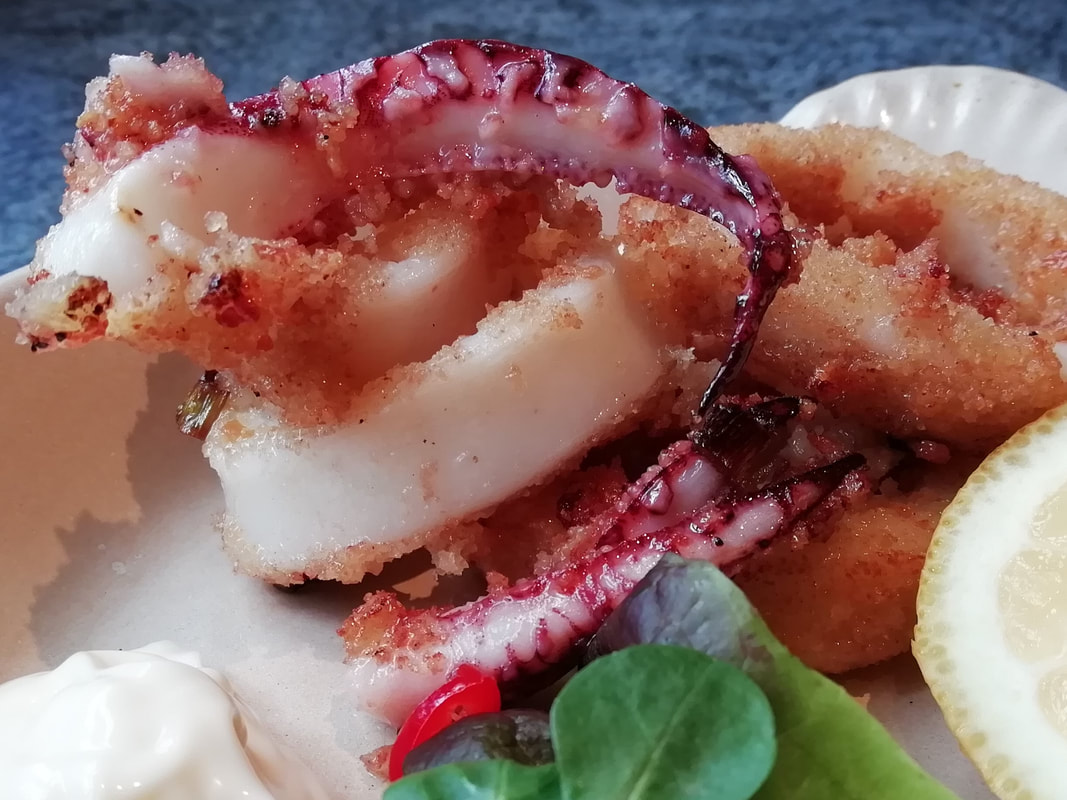
Although happy to eat calamari in a restaurant, we can be wary of cooking squid; it’s unfamiliar and quite expensive. But it is very easy, there are two rules: fast or slow, but nothing in between. If you cook it fast and hot, deep fried, you get that lovely chewy texture with a crisp coating and a subtle flavour. If you have a good fishmonger, you can get fresh Cornish squid, which is sustainable and low environmental impact. Tastes great and good for the planet, how can you get better than that? Just watch out with the frying – the squid can spit in the hot oil, so I use a splatter shield on my frying pan, as I don’t have a deep fat fryer. Serves 2 as a light lunch Timings: 10 minutes preparation, 5 minutes cooking
Clean up the squid, removing any membranes. Dip the squid into the egg and then into the breadcrumbs, patting them on. Place the pieces on a baking tray to dry slightly – they can be left like this for an hour or so. Heat up the oil. I use a deep sided frying pan and have about ½ cm oil in it – you need to get all the pieces of squid in one layer if possible. If you are cooking for more people, then cook in batches and keep the cooked squid in a warm oven until the final batch is done. When the oil is shimmering, add the spring onions and chilli pieces, stir, then add the squid. Add the rings first, give them a minute and turn them over, then add the more tender tentacles. Fry for another 2-3 minutes turning the pieces over and watching out for the spitting oil. Scoop out onto kitchen paper and serve straight away with some nice bread, garlic mayonnaise, a lemon quarter to squeeze over and a simple green salad. |
Some Changes - April 2022
Thanks to my friends and followers for your patience, and for your encouragement to start blogging again. Archives
April 2022
Categories
All
|
 RSS Feed
