|
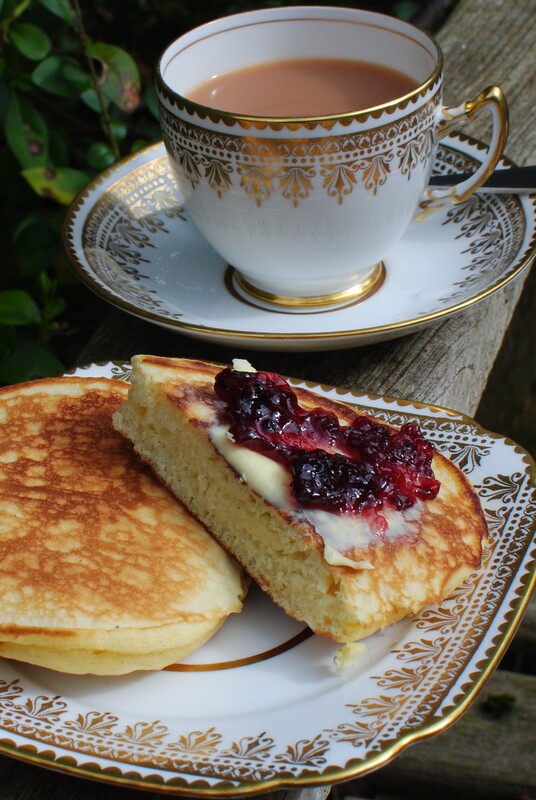
Simply delightful. A sweet, fluffy drop scone with home made jam. Perfection at tea time. Drop Scones A recipe that doesn’t need weighing, can be made literally at the drop of a spoon, can be eaten for breakfast with syrup and bacon or for tea with butter and jam, can be taken on a picnic and eaten with bare hands – really, what a winner! Apparently, the word “scone” might come from the Germanic “Schoone” meaning spoon, as the recipe was part of the “spoonbreads” family of edibles, or it might come from the town of Scone in Scotland, although it isn’t known if they originated there. Drop Scones are part of the family of griddle or girdle scones, which are cooked over the heat rather than in an oven, and therefore simpler. The original raising agents may have been cream of tartar and buttermilk rather than baking powder as we use today. These were, and still are, made throughout Scotland in houses of all income levels and served for tea with home-made jam, straight from the kitchen; still warm, wrapped in a tea towel. They are best eaten on the day they are made although will keep for another day and any leftovers (unlikely) can go in a lunch box. In “The Family Way”, drop scones are the first dish that Jean was allowed to make to be eaten by her employer’s family and their guests. She’s nervous, but her efforts are praised – they are easy to make and you won’t have any problems producing your own batch of Drop Scones. Remember, no weighing. You need a large mug to measure the flour. Serves 8 Timings: about 20 minutes to mix and make a batch
Sieve the flour and baking powder into a bowl. Add the sugar. Break the eggs in and beat in adding milk to the batter. You will probably need about a mug of milk per two mugs of flour but use your judgement. You want a fairly thick batter, not thin enough for pouring. Heat up a heavy iron frying pan to a medium heat and grease very lightly indeed. You are not meaning to fry them but you need some light grease to stop them sticking. Drop soup ladles full of batter into the pan – in my large frying pan I get about three at once. Heat until you see the bubbles of gas rise through the scone and the top looks more set than liquid, then flip over and cook the other side. Just adjust the heat so that the scone cooks through without burning. Take the scones out when done, golden brown on both sides and cooked through. You can keep them warm in a mild oven wrapped in a tea towel as you cook the rest of the batch. Breakfast – serve them with crispy bacon, butter, and maple syrup for the American version. You can also drop blueberries onto the scones once you’ve put them in the pan, and they will cook into the scone and seep their juice through the dough. Turn the scones over as normal to cook the top side, the blueberries will just stay inside the dough. Tea-time/dessert – serve them just as they are, or with butter and jam. Best warm and straight from the pan or oven, but you can also take them on a picnic, buttered and sandwiched with jam. Sophisticated people could also top them with fruit and whipped cream. The truly decadent could serve them warm with ice cream and a fruit syrup.
2 Comments
Christmas Baking for the Seniors Lunch Club
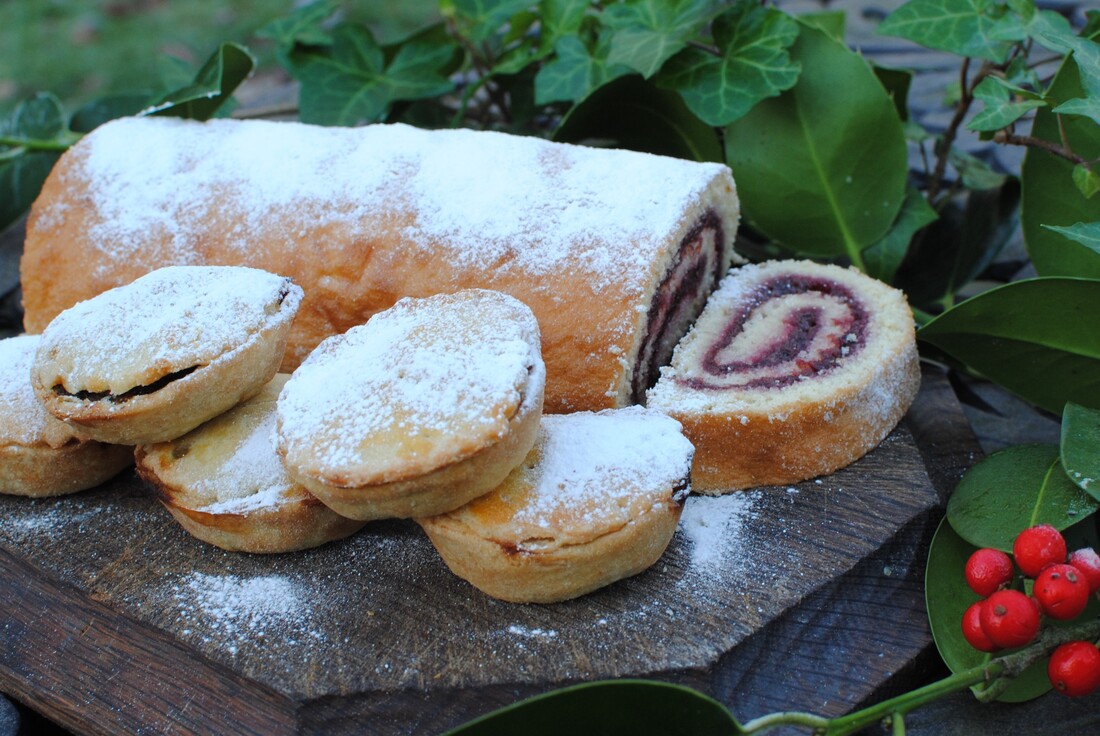
The first batch of mince pies, using home made Mincemeat (vegan) and a Swiss Roll for those who don't like dried fruits. This is what we ate as cake last week, when I also made the Gingerbread Houses as part of the table display for the Lunch Club. Have a look at my recipe for home made mincemeat, November this year, and for mince pies, December last year, if you want to know how to make them. They really are so much nicer than shop bought ones. I made a Chocolate Swiss Roll - sort of a Yule Log - in December last year and a plain Swiss Roll, like this one with home made jam, in April this year, so please have a look in the archive for the recipes if you're inspired. I will make this Swiss Roll again soon to serve as the cake basis for my Christmas Trifle - it seems to work better than making pieces of sponge and spreading them with jam, and does look lovely in a glass bowl. Gingerbread Houses
When I made my German Oktoberfest hearts, I said I would use the construction grade, very hard gingerbread to make the Gingerbread House at Christmas. Have a look at my recipe from 18th September for the details. I used a half quantity of gingerbread dough and rolled it quite thin. I made a cardboard template for the houses first, to check the sizes, and then cut out the gingerbread round the templates. I did three houses, knowing that several pieces would break on the way, and in fact some did but were mendable so I was able to make all three cottages. I let the gingerbread cool, and then made one-egg-white quantity of royal icing and started construction. I began with the chimneys as the smallest and fiddliest bits and let them dry firm. Then I decorated the fronts and backs of the houses as I knew they would be better done when I could lie them flat. As you can see I used candy cane sticks to outline the doorways and iced round the windows. I let it all harden slightly and then began the main construction. The royal icing hardened quite quickly and didn't need much help or holding pieces together. I then stuck the chimneys on the houses and started decorating in earnest. I did another one-egg-white quantity of royal icing and coloured some green, some pink and left some white. I used jelly beans, sprinkles, smarties and coloured popped rice to decorate but you could choose anything you like. The only thing is that you have to get it onto the royal icing quite quickly or the sweets/sprinkles won't stick, so ice a little bit at a time, decorate that, and move on to the next part. You can have quite outrageous fun with the colours and shapes - just do what feels right! The houses are quite sturdy and I wrapped them in clingfilm to take to my Seniors Lunch Club where they were much enjoyed, along with some candles and holly on the table to illustrate our theme of Advent this week. Our memories of advent were varied - some of the group are regular churchgoers and love the candle lit church at this time of year. Others remembered helping with the Christmas baking, and we all remembered the early style of advent calendars, which just had pictures behind the doors and no chocolate. We agreed that the chocolate ones are a big step forward! I think the houses will last until Christmas and beyond as lovely table centrepiece decorations - not sure about eating them but you can always make some stars or little biscuits for eating with the off cuts of gingerbread. Or make some proper Christmas biscuits? Jamaican Rum & Ginger Cake
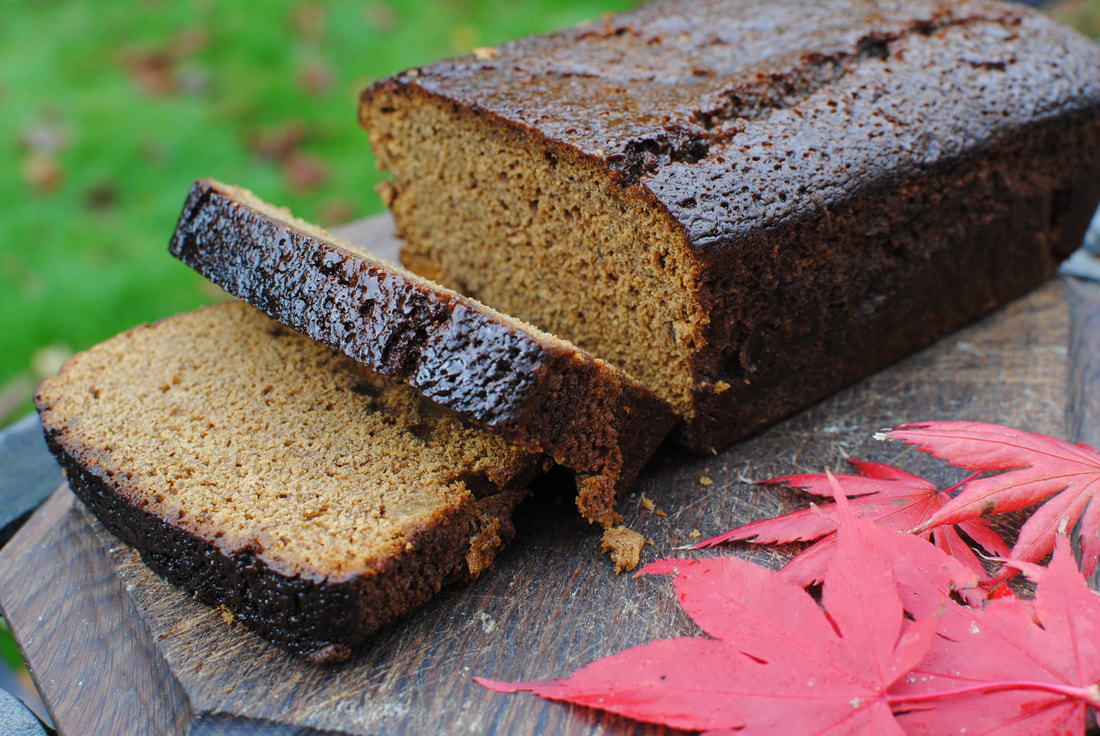
When I was young, my Mum would always welcome us home from school with a cup of tea and a piece of cake as a way of fortifying us to do our homework. She was a big believer in the power of cake, although the slices were small. I’ve got one of her old cake tins in my cupboard – it’s tiny and flat compared to the ones I buy now. She used to make two slim vanilla Genoese sponges and sandwich them together with homemade jam, dust the top with icing sugar and serve us a small slice per day. It was certainly sugary and nutritionally empty but it was hardly over-indulgence, coming at the end of an active school day, before playing outside for an hour and in a household where our usual pudding was stewed rhubarb. Sometimes she varied the cake routine and made a ginger loaf, quite like this one although without the rum. I find this cake so very evocative of autumn, cool afternoons, leaves falling and the anticipation of bonfires. I’ve used inspiration from my Mum and also from Hugh Fearnley-Whittingstall’s recipe in River Cottage Everyday which I do indeed, use pretty much everyday. Thanks Hugh, thanks, Mum. Makes 1 loaf, about 12-14 portions
Grease and line a 1lb loaf tin, and pre heat the oven to 180°C. In a pan melt the butter, treacle, syrup and sugar together, stir well and let it cool a little. Chop the ginger into little dice. Sieve the flour and baking powder into a large bowl. When the butter mixture is OK to dip a finger into, beat in the eggs and add the rum. Pour the whole liquid mixture into the flour, mix well and add the preserved ginger. Scoop the rather runny mixture into the baking tin and bake for about 50 minutes until sticky and brown and a skewer comes out clean. Leave to cool in the tin and brush the top with some of the ginger syrup. Wrap well in kitchen foil when cold and it will keep for several days, if you can resist eating it all at once. It’s easy to make double quantities and give some to a friend who needs cheering up. Pear, Chocolate and Frangipane Tarts
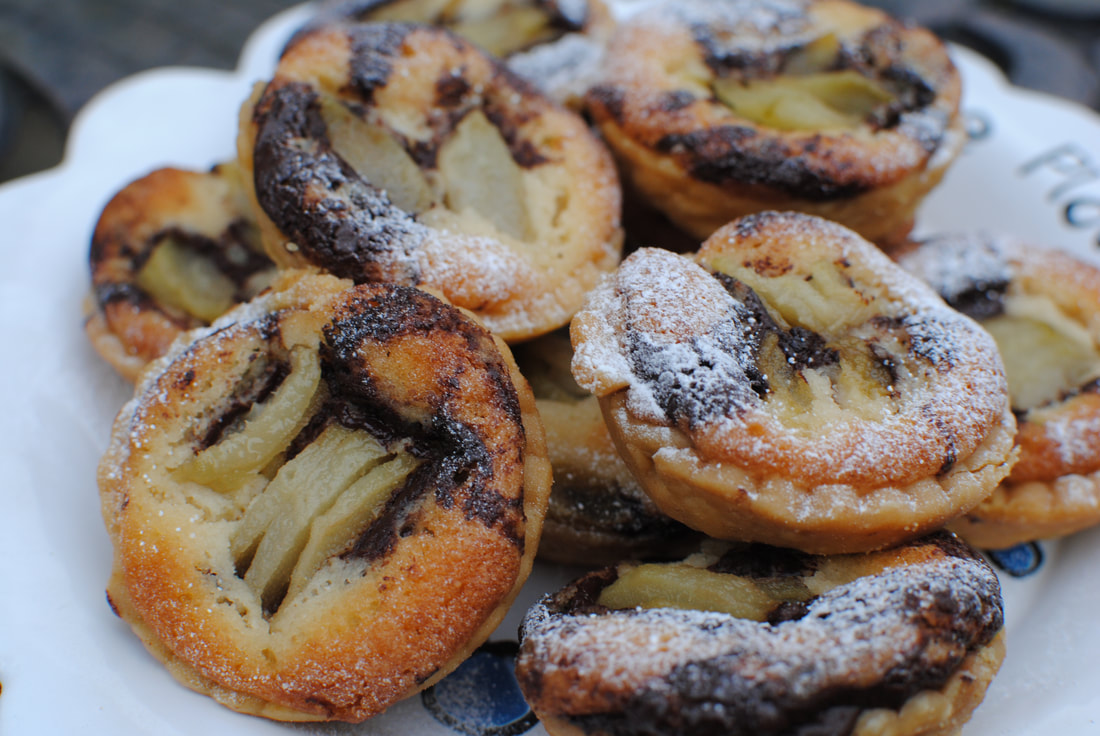
Delicious buttery little morsels, very melty. The pear and almondy-frangipane is lovely enough, but with a swirl of chocolate adding that extra level of decadence – just delightful. They’re quite easy to make too, and I’ll certainly do more with home made frangipane now I’ve made it once. It’s simple to make and handles like a dream. And you can freeze it for later, so what a versatile thing to have around. There are three stages to making these, which sounds like a lot but you can make all the stages ahead of time and put them together at the end. I like a recipe you can stop and start and fit round nipping out to have your hair cut or going to the post office. I guess you could use other fruits than pears here, but I love the combination of almonds, chocolate and pears, and they are around at this time of year, so very seasonal and cost effective. If you haven’t got time or don’t want to poach pears, you could use a tin of pears, as they are tender from the processing. Makes 36 tartlets Timings: In stages, but all together, about 2 hours
For the pastry:
First stage: poach your pears. Peel them, quarter then and take out the cores; put them into some water with lemon juice added (to stop them turning brown) and simmer for about 15 minutes, then leave to cool in the pan. This can be done a day or two before you make your tartlets. Stage two: make the pastry and the frangipane and set to rest For the pastry: using either your fingertip or the pastry paddle of your mixer, rub the butter into the flour and icing sugar. Add the egg yolks and start to bring the pastry together. Add one tablespoon of cold water and continue to mix to form a smooth ball. You might not need the second spoon of water. Roll into a disc shape, wrap it up and chill for at least an hour but could be overnight. For the frangipane: Whisk the sugar and butter together until becoming creamier and fluffy. Add the ground almonds, then each egg with a couple of spoons of flour, keep whisking. Add the amaretto or other liquid and the final spoons of flour and whisk again – you will have a delicious light almondy buttery mixture. This can keep in the fridge overnight or even be frozen but should be chilled before using to cook. Stage three: make the tartlets. Pre heat the oven to 200°C. Roll out 1/3 of the pastry on a floured surface and cut rounds for the size of your tin – I used a 12-pan bun tin. Handle each round carefully into its tin and put a few baking beans in the bottom of each. Bake blind for 10-12 minutes until the pastry is cooked but still pale, then remove the baking beans and cook again to firm up the bottoms – about another 5 minutes. Remove from the oven, leave the tartlets in their tins and cool for a few minutes. Turn the oven down to 180°C. Take your pears out of the fridge and cut them finely into slices. Put your chocolate in a small bowl over hot water and melt it. Into each tartlet case, put a spoonful of frangipane and drizzle a little melted chocolate over. Stir it in with a skewer, just to swirl it into the frangipane. Add a few slices of pears to the middle of the tart. Bake the whole tray in the oven for 10-15 minutes until the filling is puffed up around the pears and starting to brown. Remove from the oven and cool on a wire rack. Eat with a little icing sugar sprinkled over or maybe a dollop of whipped cream. You could even stir some amaretto into the whipped cream to tip you over the edge into total pleasure-land. Rustic Chocolate Macaroons
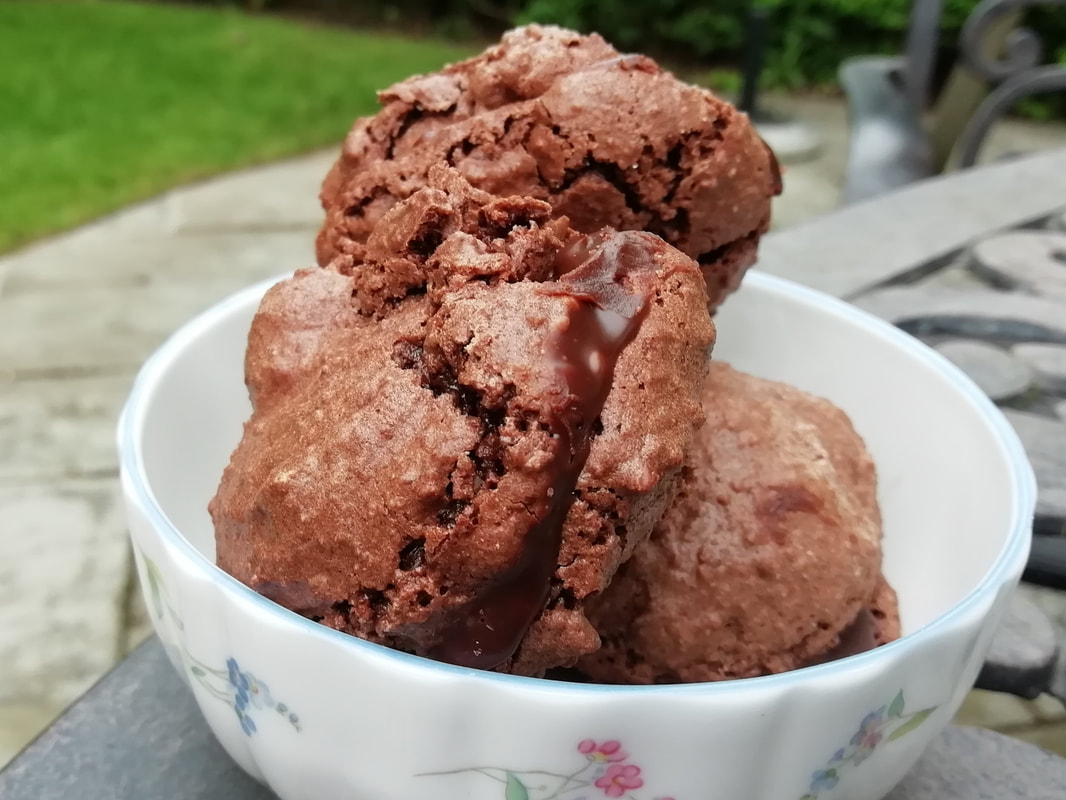
These are clearly macaroons, the slightly raffish Italian older cousin of the sophisticated French macaron. A confection of whipped egg white with sugar and ground nuts has been around for a long time, and the idea was allegedly brought to France with the entourage and cooks of Catherine de Medici in the mid 1500s. In France they refined and formalised the original recipe to produce the riot of coloured macarons you can buy today: smooth and elegant, with various flavours and strong (mainly artificial) colours. A macaroon/macaron is different from the classic meringue in that you leave it for a while after whipping the egg whites and mixing with the sweet stuff, so that it forms a slight crust on the top surface. The crust bakes to a chewy texture, contrasting with the fluffy softness inside. The usual filling is a rich ganache, which seeps into the inner surface of the macaron, adding another even gooey layer. These taste just as good and have that chewy nutty texture but you don’t have to faff around with a piping bag to get the flying saucer perfection. If you want to make French macarons, I will bring some recipes onto the blog well before Christmas, so you can make them as pretty presents. My friend Freddie Sykes is a great baker and made a batch of these for my recent birthday. He based his recipe on the You-Tuber Adam Ragusea’s version, so thanks to both these young men. Makes 10 Timings: 90 minutes
Beat the egg whites until fluffy, then beat in the granulated sugar until the mixture is glossy and you get floppy peaks. Put in the almond flour, powdered sugar, cocoa powder, and half a pinch of salt. Fold the dry ingredients into the eggs until you get a mousse-like consistency. Cover a sheet pan with parchment paper and spoon the batter on in about 20 dollops. Let them sit and dry for a half hour. Heat the oven to 180°C and bake until the meringues start to crack, about 15 minutes. Cool completely before filling. To make the ganache, combine as little as 2 tbsp of cream with an equal quantity of chocolate by volume. Microwave until just bubbling, let it sit for a minute, then stir until smooth. Cool the ganache down to get it to a spreadable consistency. Spread ganache onto the bottom of a macaron, then sandwich it with one of roughly equal size. Anzac Biscuits
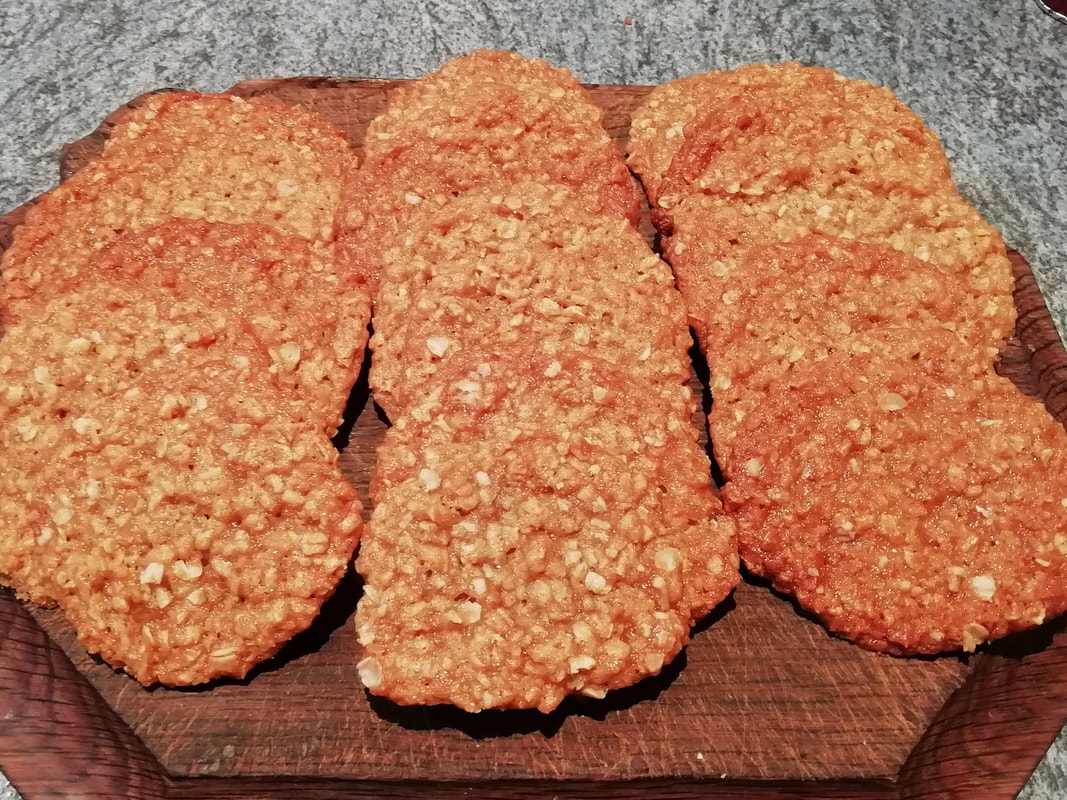
These are a bit like the Australian version of scones – not that I mean they’re actually like scones to eat, they’re more like thin flapjacks, but I mean that every family has their own recipe, thinks it’s the best, and the taste is evocative of home, family cooking, Saturday afternoon in the garden, packed lunch boxes and good times. They are also a commemoration of resistance in bad times – traditionally these are the biscuits that were made, packed up and sent off by communities to their troops on the front line in Europe in the First World War, far away from home. They’re sugary, chewy, full of calories and they’re a blend of the taste and texture of the North and the South – oats and coconut. Having no egg, they keep well, as they would have to, being sent half-way across the world, and that makes them ideal for all family occasions – picnics, long walks, movie nights on the sofa. They’re also easy to make, which means children can really let their creative instincts run riot. I’ve seen recipes with added dried fruit, or added chocolate chunks – not part of the classic canon but why not? This recipe is based on the one given by Kate Young in the Little Library Cookbook, with some tweaks suggested by other Australian friends. The magic ingredient is of course golden syrup, which has properties that enhance just about any recipe – it provides that chewy sweetness and binds all the more substantial ingredients together. They don’t rise much but they do spread out in the oven, so give them a bit of space. I made them for the Seniors Lunch Club group and we had a discussion on all things Australian – ranging from the animals to the wine, to the geography, to history. Some of our members have relatives who were deported, some have relatives who have emigrated. Many have visited and have happy memories. One of our volunteers is Australian and loves to make these for the group on Australia Day – coming up in January. Makes about 30 medium sized cookies. Timing 40 minutes.
Pre heat your oven to 180°C and line two baking trays with greaseproof paper. Put the butter, sugars and golden syrup into a small pan and melt over a low heat. Sieve the flour into a large bowl and add the oats and coconut. Mix the bicarbonate of soda and water, add to the pan of butter and stir in, then tip the pan of liquid mixture into the bowl of dry ingredients and mix briefly. Put walnut sized spoonfuls of the mixture on the baking trays. I get about 4 in a row along one of the short sides of a tray. Some recipes say flatten the spoonfuls of mixture to get a more biscuit shaped outcome and some don’t, which gives a more domed outcome, but it’s up to you. I get about 12 on a tray. Put the trays in the oven for 8 minutes and then swop over the position on the shelf – it does make quite a different to this mixture where in the oven they are cooked. Cook for another 5-6 minutes and then take them out when they are still soft and golden brown, not deep brown. They are very soft when taken out, so let them harden on the tray for a couple of minutes before sliding the whole sheet of baking paper onto a rack to cool. Danube Waves Cake (Chocolate and vanilla with fresh cherries and fudge icing)
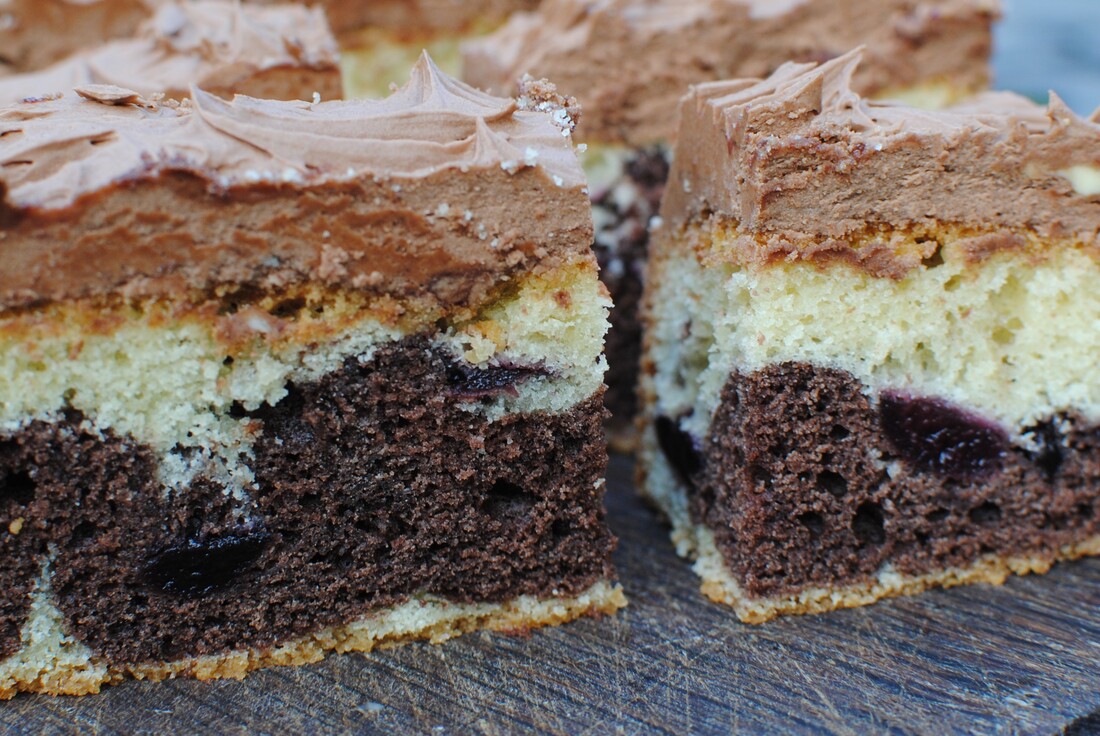
Well, an adaptation of the traditional German “Donauwelle” recipe. The “waves” are the curves made by the vanilla and chocolate cake mixes and the wavy top of the icing. I’m not convinced it looks like the Danube, but it tastes very good, which is the main thing. The combination of boozy cherries and chocolate is a classic, from which the Black Forest Cake also gets its fabulous flavours, so you can hardly go wrong. At Seniors Lunch Club this week we played “What Have I Got to be Grateful For?” - a pretty simple exercise but always brings up surprises. This time, we had a strong theme of Community developing. Many members felt grateful not only for their family but for their community, valuing the feelings of togetherness and friendship. We felt grateful for art and music, local art galleries and for great composers and the joy they have brought to so many. Being able to watch great music and concerts on TV was highly valued. Ballroom dancing was something appreciated and remembered by several; both watching it and taking part. We know we’re lucky to live where we do, in a beautiful suburb of Manchester, we love our homes and our environment. Inspiring as ever, talking to the group. Makes 16-20 pieces Timings: 2 hours
For the icing: 200g softened butter, 250g icing sugar, 75g chocolate, melted (I used a mix of dark and milk), 1 tablespoon of sour cream, 1 tablespoon of Camp Coffee Essence Stone and snip up your cherries and soak them in the liqueur for half an hour. Pre heat the oven to 180°C, and grease and line a 22cm square baking tin. Sieve the flour. Beat the butter and caster sugar and vanilla sugar together until creamy and then add the eggs one at a time alongside a tablespoon of flour each time. Add in the rest of the flour and mix well to a fluffy cake batter. Spoon half of the batter into the prepared tin. Now mix the cocoa powder into the remaining batter and stir again. Blob the chocolate mix over the top of the vanilla cake mix. Drain the cherries (keep the liqueur for a warming nip at dinner time, no sense in wasting good liqueur, especially now it has an extra tang of cherries to it) and drop them over the chocolate part of the batter. Place in the oven and cook for 45-50 minutes until risen, golden and a skewer comes out clean. Leave on a wire rack to cool. For the icing, beat the butter until soft and add the icing sugar a spoonful at a time. Melt the chocolate in a bowl over hot water. Add the sour cream and Camp Coffee essence to the icing and then scrape in the melted chocolate and beat well. You will get a fluffy fudgy mixture. Spoon the icing over the top of the cooled cake and make wavy patterns with a fork. Keep in a cool place until ready to eat. Oktoberfest Gingerbread Hearts
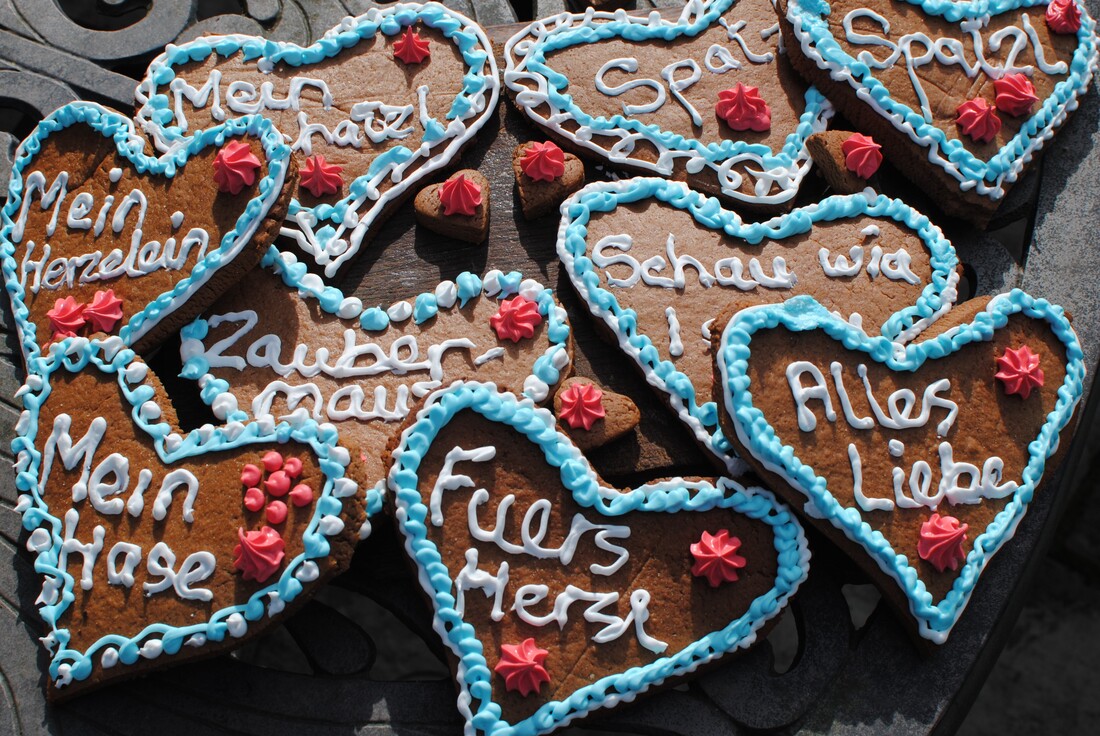
Yes, it’s only September, but the Oktoberfest would normally be starting soon in Munich. It’s the world’s biggest annual fair, with over 6 million visitors normally. As well as beer, which is the central theme of the fair, visitors can indulge in local food, fabulous rides, sports competitions and goggle at the amazing traditional costumes being paraded. This year it’s been cancelled for the second time, so people are looking forward to next year and maybe having their own Oktoberfests in their gardens. We had our Oktoberfest at the Seniors Lunch Club this week and I made these traditional iced gingerbread hearts. We had fun translating the silly endearments and thinking what we’d put on an English version. (cuddly bunny? How’aeer pet?) We ate roasted sausages and German potato salad and tried some German beer and a revolting mixture of cola and orangeade much loved by Germans, called “spezi”. Some regional specialities deserve to be more widely known – such as the potato salad - and some deserve to languish in obscurity, such as spezi, but it’s quite fun to try once! This is a true “construction grade” gingerbread and not really meant to be eaten by those with less than perfect teeth and the ability to crunch. It’s the same recipe I will use for the gingerbread house near to Christmas. The hearts decorate many stalls at the real Oktoberfest, and I’ve never seen one being eaten. They’d keep well at least until Christmas, so long as you don’t get the icing damp. You need to make your own template for the hearts - or whatever shape you are making. I used a cardboard shape cut into a heart shape about 15cm across, about the size of my hand. You need it large in order to ice words onto it! I also made some Bavarian buns so we could actually eat something but everyone got one of these hearts to take home. You can ice whatever you like onto the gingerbread, so you could put names on instead of funny sayings if you were having a party. Makes 24 hearts Timings: 30 minutes preparation, 4 hours resting, then 1 hour to roll and cook, 1 hour to decorate For the hearts:
For the royal icing: 3 egg whites, 600g icing sugar, 1 teaspoon liquid glucose, 1 teaspoon lemon juice, food colouring. Put the butter, honey, sugar, cocoa powder and spices into a small pan and melt over a low heat. Stir well to dissolve the sugar and blend in the spices. Allow to cool a bit. Sieve the flour and baking powder together. Break in the eggs and pour in the cooled mixture. Mix well with a wooden spoon, turn out and knead a few times with your hands to ensure a smooth dough. You aren’t making bread, so don’t stretch and knead the dough but you do want a smooth mixture. Place in a bowl, cover it and leave in the kitchen for at least 4 hours and up to overnight. When ready to cook, pre heat your oven to 180°C and line some flat baking sheets with parchment. Take about 1/3 of the dough and roll it on a sheet of baking paper with another sheet on top – this means you can get it thinner and more even than just rolling it on the worksurface. You want a layer a bit less than 1/2cm thick, and as even as you can get it. Use your template and cut round it with a sharp knife. The heart shape will come out smoothly; place each one onto your prepared baking sheets. Roll up the left over bits and roll them out again. Note, if you want to make a hole to pass a ribbon through, do it at this stage. The hearts are traditionally hung up on ribbons before sale and then hang round your neck at the fair. You can fit the shapes quite close to each other as they hardly spread on the baking sheets. Bake for 12-15 minutes – you might want to change the position of the trays in the oven. I had to cook 2 batches of 3 trays to cook all 24 hearts. They should not be obviously browned when cooked. Take each tray out of the oven and place the hearts on a wire rack to cool and firm up. Keep in an airtight container until you want to ice them. For the royal icing: whisk the egg whites until soft peaks form, then add in the icing sugar with the whisk running. It looks a lot but keep going. Add in the glucose and the lemon juice and beat again until very firm peaks form. Divide the icing into three bowls (or more if you want to use more colours) and cover two of them with cling film – you don’t want the surface to dry out and start to set or it will form hard lumps in the icing bag which will make your life impossible. Colour your bowls of icing as you like. Scoop each colour of icing into a bag in turn and use them to ice the biscuits. I used white for the writing then white, blue and pink for decoration, but knock your socks off and use whatever! If baking for a bonfire party (as I well might) I could use orange, purple and green icing to draw rockets and sparklers and make up some rude firework-based mottoes to pipe on. Leave to set for about 3 hours before placing carefully in an airtight container. Don't store them in the fridge as that will soften the icing. Blackberry and Apple Pies
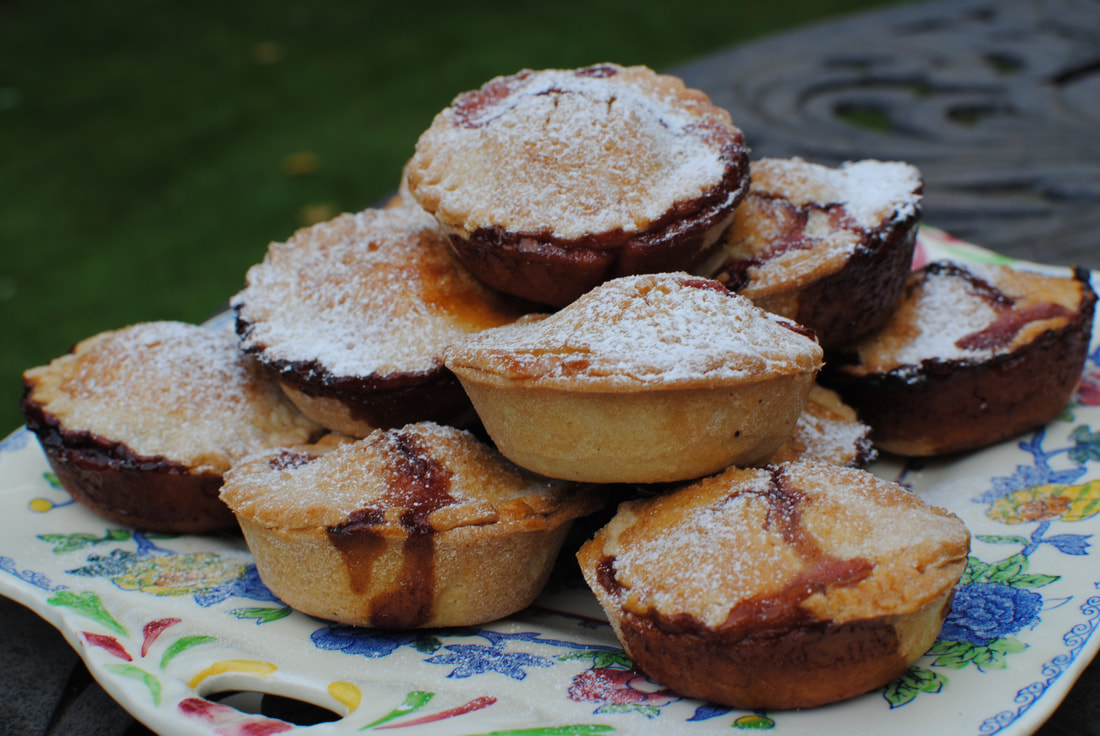
Warm weather, harvest of juicy blackberries and windfall apples. What better than to make pies for the Seniors Lunch Club? Crisp golden pastry, a slightly tart but sweet filling, and easy to pack up and portion out. Great for lunch boxes too or wrapping up in a picnic to make the most of the Autumn sunshine. Our theme this week in the Seniors Lunch Club was “September Memories”. We remembered Autumn pastimes – shuffling through fallen leaves, playing conkers, collecting for Harvest Festival. We loved the smell of bonfires and the bright colours of the Autumn leaves and flowers. The time for going back to school was remembered with surprising fondness – everyone said they’d always enjoyed the start of the new term. Seeing friends again after the summer break, writing your name in a clean new exercise book, meeting your new teachers. And looking forward to the events of the term: Hallowe’en, Bonfire Night, planting hyacinths for the school bulbs competition, and Christmas at the end of it. Makes 12 pies Timings: 1 hour For the pastry:
For the filling:
Make the filling in advance: peel and core the cooking apples. Slice into small pieces and put in a pan with a tiny amount of water, the clean blackberries and the sugar. Bring to a simmer and cook for about 5 minutes until the apples are soft but not disintegrated. Taste and add a little more sugar or a squeeze of lemon juice if needed – you want this slightly tart as the pastry is sweet. Leave to cool. You can eat this just as a compote, lovely with plain yoghurt at breakfast. Pre-heat your oven to 200°C and grease a 12-cup pie tin Mix the flour and butter together in your mixer with the pastry paddle or rub the butter into the flour with your fingertips until it is like fine crumbs. Add the ground almonds and icing sugar and mix lightly. Add one egg and keep mixing slowly. Add cold water a teaspoon at a time until the pastry binds together – don’t make it too dry or it will crack when you roll it out. Knead very quickly to bind the pastry together and then you can wrap it up and keep it in the fridge. You don’t have to chill this, as the pies are too small to shrink much. Beat the second egg in a bowl. Roll out the pastry on a floured surface to 2-3mm thick and cut bottoms and tops – this makes just enough for the 12 pies. Put the bottom parts into the pie tins and brush round with beaten egg. Spoon the blackberry/apple mixture into the pies – a goodly mound of filling is required as it doesn’t rise; put on the tops and press round with a fork to seal. Brush the tops with beaten egg and sprinkle a little bit of demerara sugar on top to give a crunch. Using a knife cut a little slit in each pie top for steam to escape. Bake in the oven for 12-15 minutes until crisp and golden. Cool on a wire rack and keep in an airtight tin for 3-4 days. Serve with a dusting of icing sugar and a swirl of whipped cream. Enjoy the taste of Autumn. |
Some Changes - April 2022
Thanks to my friends and followers for your patience, and for your encouragement to start blogging again. Archives
April 2022
Categories
All
|

 RSS Feed
