|
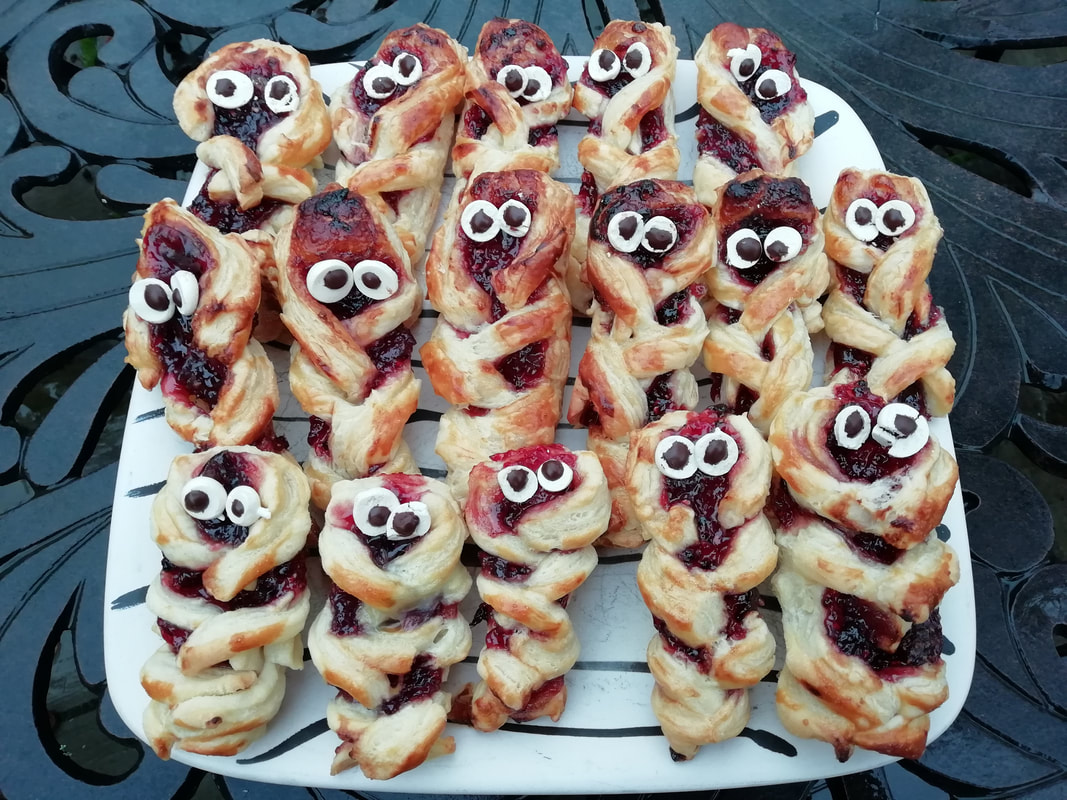
Spooky Pastry Mummies
Seniors Lunch Club theme (we meet on audio call just now, so don’t go thinking we’re all together in a room somewhere) this week was of course Hallowe’en, but the usual rich seam of reminiscence was a bit threadbare! No-one over the age of 60 in the UK seems to have ever celebrated Hallowe’en. One lady who had lived in the US once went to work in fancy dress on 31st October but unfortunately she was dressed as a tree, in real leaves, which did what real leaves do and fell off, so she was sent home attired in a leotard and not much else. Apart from the lack of reminiscence, we had lots of fun with our “Supernatural Characters Who Am I?” twenty-questions game. We guessed the Loch Ness Monster easily (lives in water but not the sea was quite a give-away) but were totally stumped by the Unicorn and had to be given a thumping great clue before we guessed it. Much hilarity ensued. We ate Spooky Mummy Pastries – which I delivered earlier - to keep in with the theme. These are very simple and use the meringue-eyes technique I’ve used a lot when making character cakes for kids parties. They are a faff but they look so great! For the meringue eyes: 10 minutes preparation, 60-90 minutes cooking, 10 minutes final decoration.
Beat the egg white until stiff, then stir in the sugar. Put the meringue mixture into a piping bag with the tiniest hole – just a pinprick. Dot little drops of meringue onto a sheet of baking paper on a baking tray – each drop needs to be only about 3mm – the smallest dot you can do. When you’ve made lines of dots all across the baking paper, put another sheet of baking paper over the top and press your finger lightly onto each meringue dot. This will flatten it into a disc. You can make these “eyes” any size you want in case you are doing this for another character type recipe. Place the baking trays in the oven and leave for about an hour, check and see if the meringue is dry and crisp. Slide the baking paper onto a wire rack and leave to cool. Fiddle the meringue discs off their baking paper when cool – don’t leave them too long as they can absorb moisture again and start to stick. Melt the chocolate in a little bowl over hot water, then spoon it into a tiny piping bag – or just use a reasonably strong small plastic bag. Snip a tiny tiny hole in the bottom corner of the bag and dot a teeny spot of chocolate in the centre of each meringue disc to make the eye – I told you it was a faff, but entirely worth it. (note, you can’t really use less than one egg white and that makes a lot more eyes than you need, and they don’t keep well as they absorb moisture and get soggy. Why not make lots of tiny extra meringues with the extra mixture you have in the piping bag? Can’t go wrong with a tin of home-made meringues.) For the mummies: Makes 8-10 mummies. 20 minutes preparation, 15 minutes cooking, some time to cool.
Working fairly quickly or the pastry will get warm and be difficult to use, unroll the packet of pastry, in portrait orientation on your worksurface. Cut into 8 pieces. For each piece, cut the top corners off to make a peak. Then, leaving a central block clear for the jam (the “body” of the mummy), cut strips to each side, for the “bandages”. Cut out the second and fourth strip (this means you get a better lattice effect). Spread jam down the central block of the pastry shape and then cross the “bandage” strips over the body. Press the top corners together to give an oval open face shape at the top, into which the eyes will fit. Use all the pastry squares, then smush the leftover bits together and roll out on a floured surface to give you some more. Make those into mummies too. Brush the mummies with beaten egg and put into the hot oven for about 10-15 minutes. Keep an eye on them, the jam will ooze out and can catch on the baking sheet. Take out when done and get them onto a wire rack to cool down before the jam sets and sticks the pastry to the sheet. Place two of the eyes onto each mummy’s face - they should stick just by the power of the jam. Crunch and enjoy!
0 Comments
Leave a Reply. |
Some Changes - April 2022
Thanks to my friends and followers for your patience, and for your encouragement to start blogging again. Archives
April 2022
Categories
All
|

 RSS Feed
