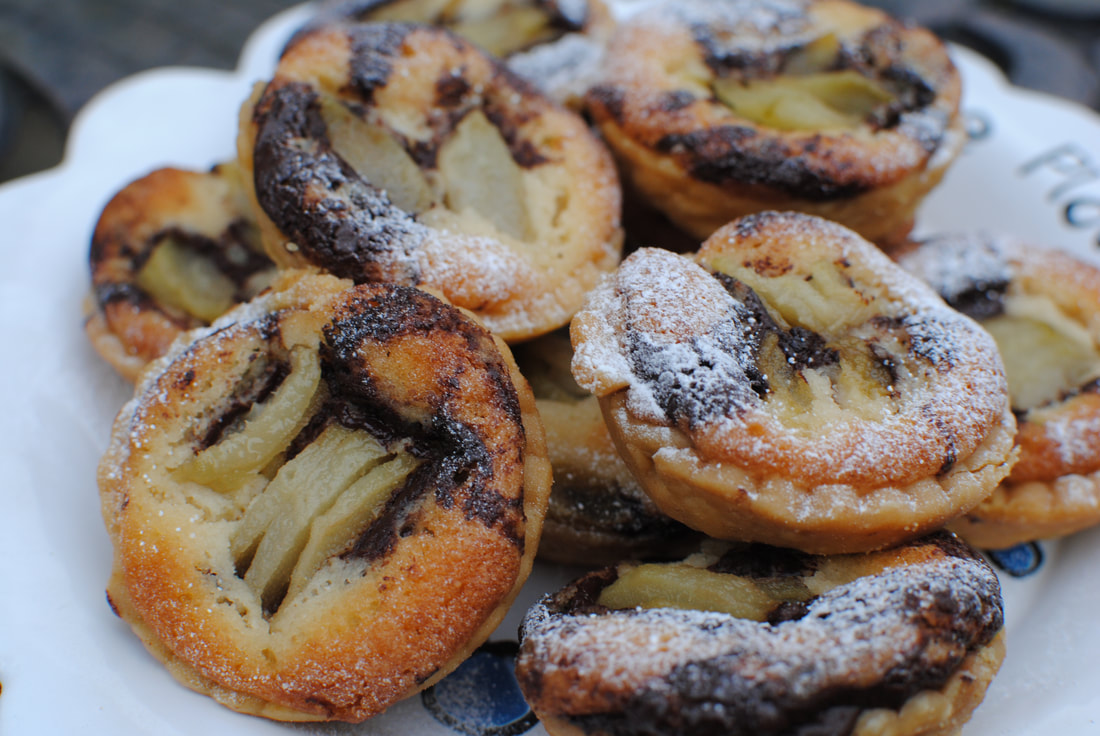
 A match made in heaven, pear, frangipane and melting chocolate. Pear, Chocolate and Frangipane Tarts
Delicious buttery little morsels, very melty. The pear and almondy-frangipane is lovely enough, but with a swirl of chocolate adding that extra level of decadence – just delightful. They’re quite easy to make too, and I’ll certainly do more with home made frangipane now I’ve made it once. It’s simple to make and handles like a dream. And you can freeze it for later, so what a versatile thing to have around. There are three stages to making these, which sounds like a lot but you can make all the stages ahead of time and put them together at the end. I like a recipe you can stop and start and fit round nipping out to have your hair cut or going to the post office. I guess you could use other fruits than pears here, but I love the combination of almonds, chocolate and pears, and they are around at this time of year, so very seasonal and cost effective. If you haven’t got time or don’t want to poach pears, you could use a tin of pears, as they are tender from the processing. Makes 36 tartlets Timings: In stages, but all together, about 2 hours
For the pastry:
First stage: poach your pears. Peel them, quarter then and take out the cores; put them into some water with lemon juice added (to stop them turning brown) and simmer for about 15 minutes, then leave to cool in the pan. This can be done a day or two before you make your tartlets. Stage two: make the pastry and the frangipane and set to rest For the pastry: using either your fingertip or the pastry paddle of your mixer, rub the butter into the flour and icing sugar. Add the egg yolks and start to bring the pastry together. Add one tablespoon of cold water and continue to mix to form a smooth ball. You might not need the second spoon of water. Roll into a disc shape, wrap it up and chill for at least an hour but could be overnight. For the frangipane: Whisk the sugar and butter together until becoming creamier and fluffy. Add the ground almonds, then each egg with a couple of spoons of flour, keep whisking. Add the amaretto or other liquid and the final spoons of flour and whisk again – you will have a delicious light almondy buttery mixture. This can keep in the fridge overnight or even be frozen but should be chilled before using to cook. Stage three: make the tartlets. Pre heat the oven to 200°C. Roll out 1/3 of the pastry on a floured surface and cut rounds for the size of your tin – I used a 12-pan bun tin. Handle each round carefully into its tin and put a few baking beans in the bottom of each. Bake blind for 10-12 minutes until the pastry is cooked but still pale, then remove the baking beans and cook again to firm up the bottoms – about another 5 minutes. Remove from the oven, leave the tartlets in their tins and cool for a few minutes. Turn the oven down to 180°C. Take your pears out of the fridge and cut them finely into slices. Put your chocolate in a small bowl over hot water and melt it. Into each tartlet case, put a spoonful of frangipane and drizzle a little melted chocolate over. Stir it in with a skewer, just to swirl it into the frangipane. Add a few slices of pears to the middle of the tart. Bake the whole tray in the oven for 10-15 minutes until the filling is puffed up around the pears and starting to brown. Remove from the oven and cool on a wire rack. Eat with a little icing sugar sprinkled over or maybe a dollop of whipped cream. You could even stir some amaretto into the whipped cream to tip you over the edge into total pleasure-land.
1 Comment
Leave a Reply. |
Some Changes - April 2022
Thanks to my friends and followers for your patience, and for your encouragement to start blogging again. Archives
April 2022
Categories
All
|
 RSS Feed
