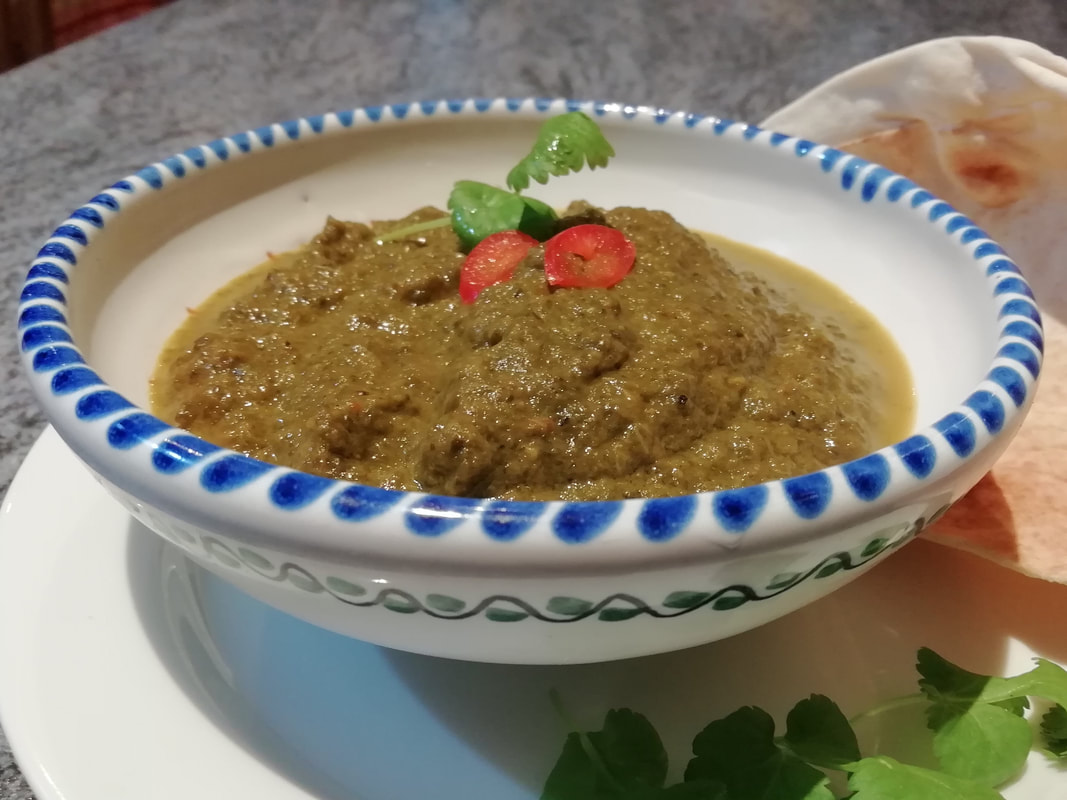
 Yummy, mildly-spiced spinach curry sauce - eat as it is or add chicken or lamb Asha’s North Indian Saag – vegan sauce or main, or use with meat
Asha and her husband are our next-door neighbours. She is a marvellous cook and often shares food with us. During lockdown I did a lot of their shopping and Asha reciprocated by passing delicacies over the garden wall on a regular basis. We call each other up and say “come to the wall” – I pass over bags of shopping and she passes over trays wrapped in kitchen foil. My family always love having something from Asha on our table – the flavours are not strong (they don’t like highly spicy things) but elegant and flexible. This is a perfect example of her food – it’s a spinach curry, which can be eaten just as it is, with rice or naan for a vegan meal, or used as a sauce for meat which is separately cooked. It’s not spicy hot, although there is a warmth to it. It’s a very versatile dish - the original recipe calls for spinach – I used chard leaves from my allotment. I used a leek instead of the kale, and you can include a turnip or not depending on what’s in the shops. Serves 4. Timings 20 minutes preparation (if you have to wash the spinach. If you are using a bag from the supermarket it will take less time!) 40 minutes cooking.
Place all the ingredients except the cumin seeds/lemon juice in a pan with about 1 cup of water – you need about 2cm liquid in the bottom of the pan so it depends on what vegetables you have used. Bring to a boil and simmer for 10 minutes until the vegetables are soft. You can also do this in a pressure cooker – bring up to pressure and cook for 2 minutes at high. Cool and liquidise briefly – not too liquid, you still want some texture not a soupy smooth puree. Taste and add salt/pepper as required. You might want a squeeze of lemon juice or a teaspoon of sugar depending on the sweetness of the tomatoes you used – use your judgement. Put about ½ tablespoon vegetable oil in a pan and cook the cumin seeds briefly until browned. Add the spinach mixture and simmer for 15 minutes. It is quite a thick mixture and will spit and bloop in the pan so you’ll need a lid on and stir it sometimes. You just want it to cook down a bit and let the flavours blend. Eat as it is – easy lunch with naan bread or dipping tortillas or add some grilled meat or halloumi or cubed cooked potatoes for additional protein and texture. It also freezes well as a sauce. Nice to have a lighter vegetarian dish as an alternative to all that Christmas protein!
0 Comments
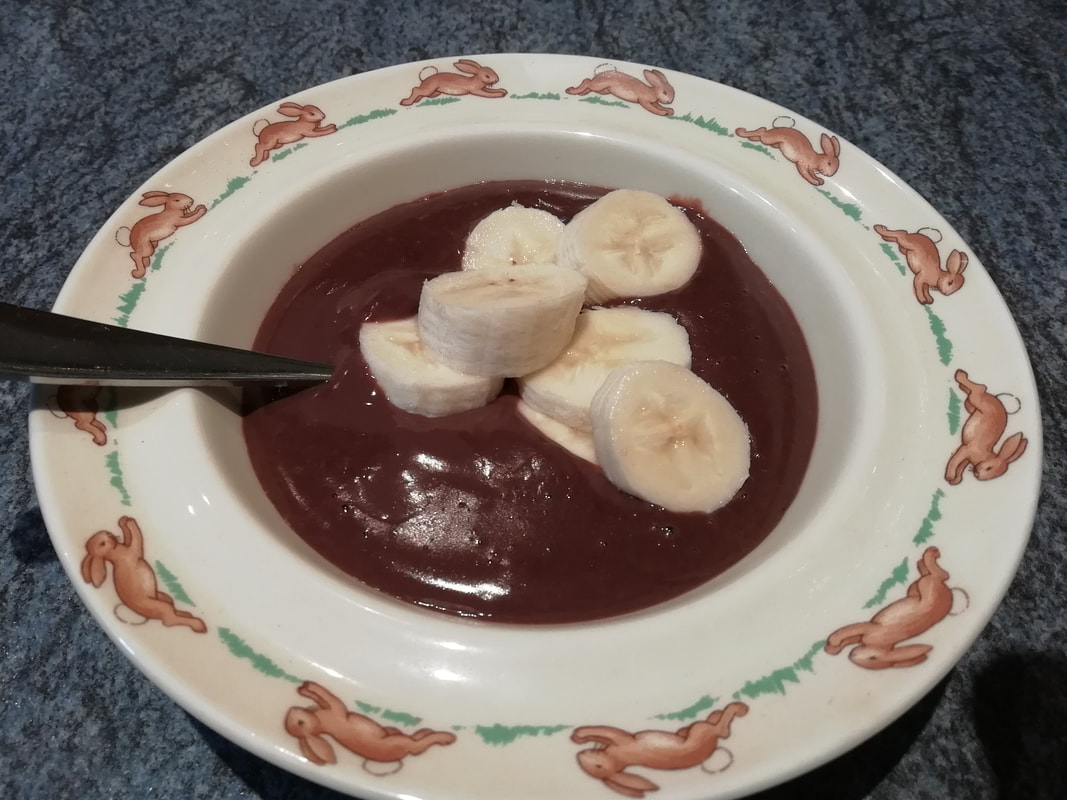 Rich chocolate custard, made in under 10 minutes, ideal for a school holiday lunch for hungry kids! Chocolate Custard – the easy version
You know, like all kids, I didn’t give my Mum much credit for being a good cook. The food appeared; I ate it (being a greedy skinny active child) and ran off to play without thinking about the effort that had gone into the meal. Actually, not much, she liked to keep it simple, especially lunches. This was a dish that we had very often on school holiday lunchtimes – quick to make, easy to eat, non-challenging to the fussy, and made from cheap store-cupboard ingredients. No chemicals, no e-numbers or stabilisers, just cornflour, sugar, milk, eggs and cocoa. Yes, it has sugar, so maybe not the dessert for absolutely every day. Pour it over bananas or poached pears, or grated apple or eat it by itself – we did and called it Chocolate Pudding. It takes 10 minutes to make from scratch and is nice and filling, so feed the little darlings or terrors (whichever mood they are in today) a lunch of baked beans on toast and chocolate custard with bananas and send them out to play in the cold knowing they won’t need a snack before the evening meal – another healthy habit to cultivate while they’re small. It's also comfort food for grown-ups if you need something warm and easy and you can't face another bowl of cornflakes for dinner. Of course, there is a sophisticated version of Chocolate Custard, more suited to the adults and taking more time – I’ll do a recipe for that another day. Serves 4, timing – 10 minutes.
Pour 430ml milk into a pan (use a non-stick if you don’t like washing up) and get it on the heat, reserving the little bit of milk, about 2 tablespoons. Sieve the cornflour and cocoa into a bowl (there are often little gritty bits in the cocoa if it’s a good brand), stir in the sugar, then stir in the egg yolks and the reserved milk. Mix to give a nice thick liquid paste. The milk in the pan should be near to boiling by now. Take it off the heat, pour into the bowl of chocolate paste. Stir well and pour the whole lot back into the pan, scraping out any bits at the bottom of the bowl. Put the pan back on the heat and stir the sauce with a wooden spoon as it thickens – it only takes a couple of minutes. Eat straightaway, poured over whatever fresh or tinned fruit you like or just as it is. Lucky kids! (You can use the egg whites to make meringues or maybe toppings for Little Lemon Meringue Tartlets - see my post from 28th November.)  Juicy marinated mushrooms with a light spice Tikka Mushrooms (vegetarian)
Halfway up the foothills of the Indian Himalayas on the way to Shimla, summer playground of the British Raj, we stopped for lunch at a roadside restaurant. Having struggled through monsoon-destroyed roads, unfinished red-mud roadworks and past accidents caused by drivers unable to wait in queues, we were frazzled and frustrated. Our spirits were revived by a simple and excellent meal, as so often in India. We had butter-naan – now recalled with inappropriate desire, dripping with butter and dough meltingly soft; fragrant makhani dhal - yes, I know the cream content makes it a calorie bomb, who cares? I went on ordering the brown lentil concoction everywhere I could; - and this light and fresh plate of mushroom tikka. I remember the welcome we got in that little restaurant; the concerned waiter rushing to get us a cool drink, the calming view of precipitous green valleys from the back window, the comfortable seat after the sticky jeep. Oddly enough, the rest of the journey was much nicer after our stop – the effect of the food, or just nearer to the vision that is Shimla? I’m sure the genuine recipe is more complex, but here’s my re-creation of that lovely dish, and it is now an easy family lunch favourite. Serves 4. Timings: preparation 10 minutes, an hour marinade, 20 minutes cooking
Mix the yoghurt, tikka paste and lime juice thoroughly – you will get a nice red cool yoghurt slurry. Prepare the mushrooms – I prefer to peel them and take off the ends of the stalks, but if you’d rather just wipe them to remove any dirt from the culture medium, then fine. Add the mushrooms to the marinade, mix well to cover them with the yoghurt and leave for an hour. Take the dog for a walk. Pre heat the oven to 200°C. Take the mushrooms out of the yoghurt and thread them onto metal skewers. Put on a tray in the oven for 20 minutes – turn every now and then to make sure all sides are cooked. Serve either on the skewers or on a plate, with pillowy buttered naan if you don’t care about your waistline and want to remember India again, or maybe a simple green salad. 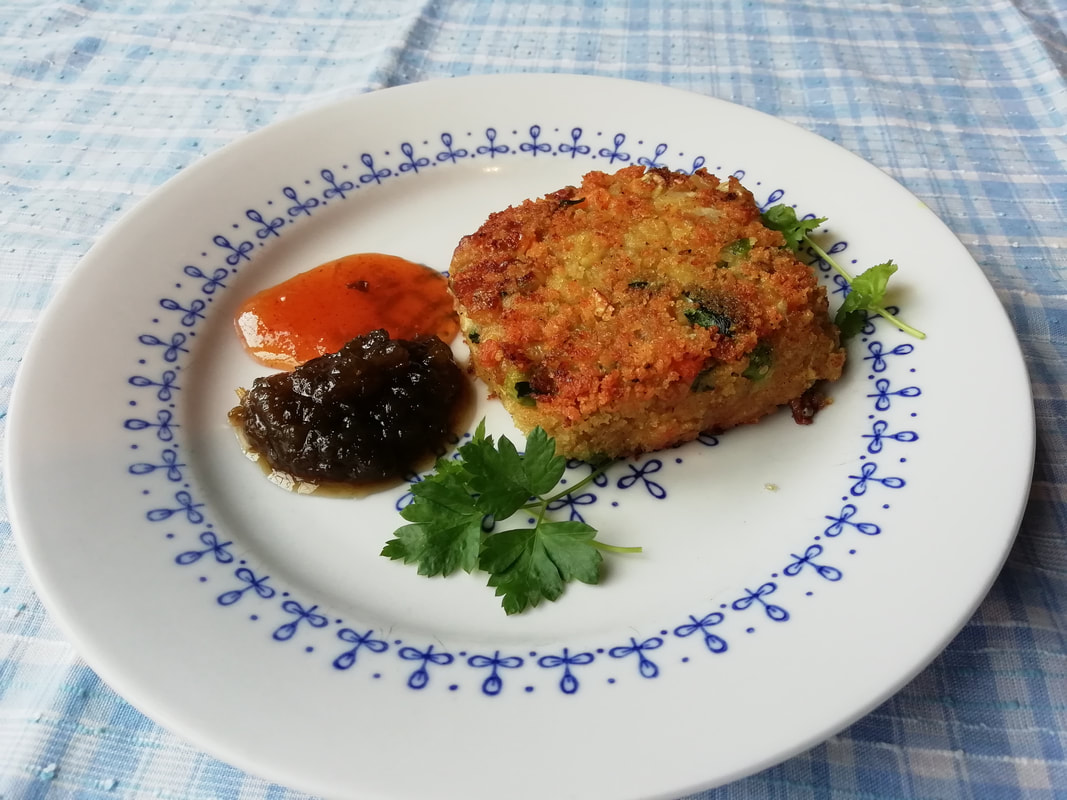 Spicy vegan cutlets served with home made chilli jam and mango chutney “Cutlets” – vegan/vegetarian Travelling in India, you see these in a lot of restaurants and easy-food places. We even had them on the train for lunch – a choice of meat or vegetarian. The other passengers questioned us enthusiastically about our origins, travel plans, political opinions, and family aspirations while we tucked into our crunchy cutlets with tangy chutney. I think the veggie cutlets in India were thinner than my recipe, but basically the same idea: a protein (mashed beans), a sticky carbohydrate (mashed potato), a selection of vegetables (whatever you have in the fridge or left over from another meal but something with some crunch and texture is good), a fried juicy combination of onions and spices, and then made into patties and covered in breadcrumbs, and fried. I have a confession: I make these quite often not from a recipe, I just throw them together. So when I came to make them for this blog and the photo, I did my usual. And they fell apart. They went to mush in the frying pan. They still tasted great and my family ate them up but I couldn’t use them to show you. That spurred me to do some experimenting and reading up on what went wrong. I didn’t have enough binding property on that batch of cutlets, the mixture wouldn’t hold when fried. In many recipes, breadcrumbs are added – which absorb moisture and give more texture, so I tried that – it worked. I also tried adding some of the bean-water (known as aquafaba), a magic ingredient in vegan cooking. That worked too, even better than the breadcrumbs. I have read that bean-water should not be used in large quantities – there’s a reason you soak and then cook beans thoroughly and maybe you don’t want to indulge in the waste products of that process, but to use a small amount to give an extra firmness to the patty, I don’t see any harm – especially if you cook the beans yourself from dried rather than using a can. They do freeze well, so I usually make a batch when I have the ingredients to hand and pop a few in the freezer for an easy lunch. Serves 8 (or enough for 4 and then a batch to freeze) for a light meal Timings – if using cooked beans – 30 minutes preparation and then an hour in the fridge to firm up. If using dried beans, you need to soak overnight and boil them for an hour.
Drain the beans and keep the cooking water. Mash the beans roughly with a fork, put into a large bowl. Add the mashed potato. Add the vegetables and then add the spicy onions from the frying pan. Add about 2 dessert spoons of bean water (go easy, texture should be reasonably firm and not sloppy) a squeeze of lemon, a splash of Henderson’s Relish, salt and pepper. Mix up well with your hands and taste a bit. Adjust the seasoning as needed – you want it fairly punchy. If you have them, you can also add chopped fresh herbs: coriander, parsley, chives. Make patties of the mixture – about 1cm thick - and press them into breadcrumbs on a plate. Put them on a baking tray in the fridge covered with silver foil for an hour or so to firm up. At this stage, you can freeze the ones you aren’t using right now – wrap them each in greaseproof paper and slide them into a freezer bag. They will keep for up to 3 months in the freezer. Heat up a large heavy frying pan and use a generous slug of oil. Fry the patties on each side for a few minutes until golden and crispy. Just check the middles are done and give them a minute or two more if needed – everything is cooked already but you want it hot all through. Serve with some mouth-puckering tamarind chutney or lime pickle. 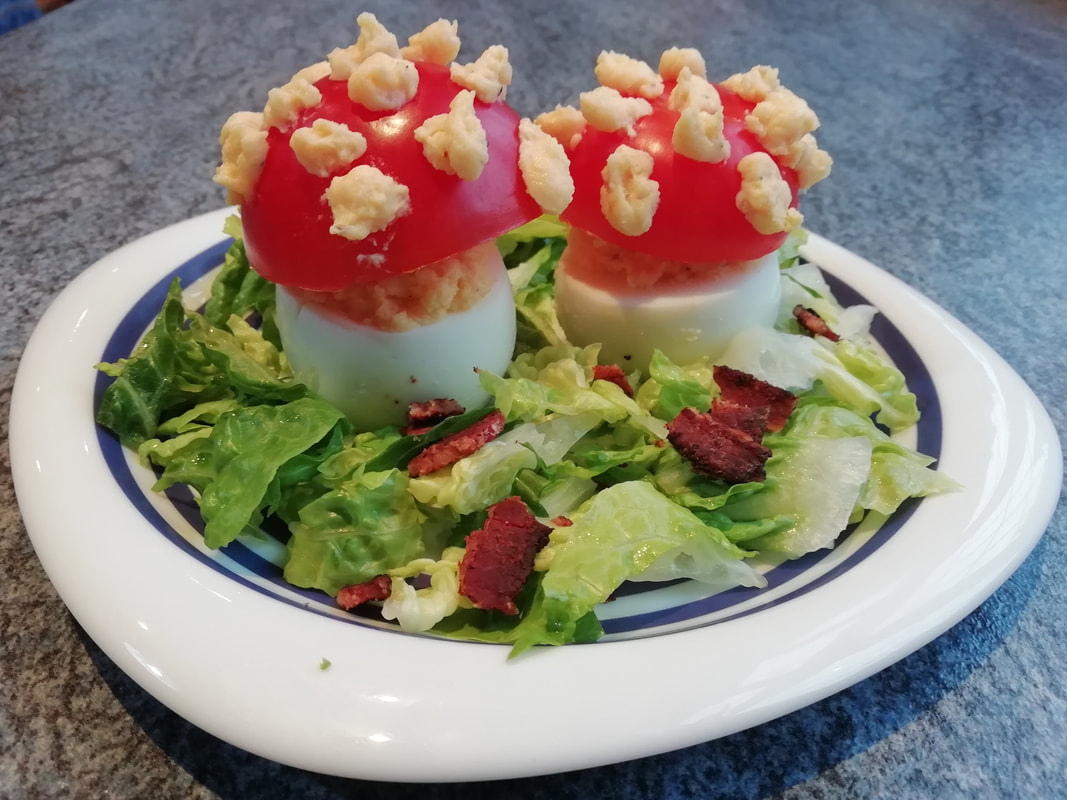 Hallowe’eny (eggy) Toadstools (vegetarian option)
I think this was the very first dish I ever cooked all by myself – seduced by the tempting picture in my “Youngster’s Cookery Book” of these lovely fat toadstools with dotted caps. So that really tells you it’s child’s play – I was about eight when I made these for Sunday high tea. Really nice for half term lunch as well with a Hallowe’en theme. The bacon is optional, but I do love the salty crunch against the sweet tomato and the juicy cheesy egg, and the kids will like it too. Small hands can help with most of this recipe, so get stuck in and make it with them. A meal for messy togetherness. Serves 6, 30 minutes
Put the eggs into a pan of cold water, bring to the boil and simmer for 10 minutes to hard boil them. Have a cup of tea while the children lay the table and get on with the rest. Wash the lettuce, separating the leaves. Keep it in a bowl of cold water to crisp up. Make the salad dressing by shaking all the ingredients together in an empty jar. Fry the bacon until crispy and well cooked, put it onto kitchen towel to cool and crisp further. At this stage, the children are likely to steal all the cooked bacon so be prepared either to fight them off or cook some more. Halve the tomatoes round their equators. Weigh out the butter and cheese into a small bowl over a pan of hot water. Mix them up with a fork. The butter will start to melt quite quickly, that’s fine, take the bowl away from the hot water and just cover it with a plate until you get the egg yolks into it. When the eggs are done, take them out of the boiling water and run them under cold water to stop them cooking and cool them down. Crack the shells and remove the shells and membrane. This is the only tricky bit: cut a small slice off the fat end of the egg so that it can sit stably on that end. Now cut off the pointed end of the egg about 1/3 of the way down. You should expose the yolk. Carefully scoop out the yolk with a teaspoon into the bowl of cheese and butter. Keep on doing that until you have hollowed out all the eggs. If the yolk is too far to one side of an egg, the white can be very thin and can break, leaving an uneven hollow; never mind, the “mushroom” will be slightly wonky, but that’s nature. Mash the mixture in the bowl with a fork, and season with pepper and salt. Using another teaspoon and your fingers, and helped by small hands, stuff the mixture back into the middle of the eggs, saving some back for the dots on the “mushroom” caps. Spin the lettuce to dry and arrange on a platter. Stand the stuffed eggs around within the lettuce. Top each egg with a half tomato and dot some little pieces of egg mixture onto the tomatoes – I have tried both doing this dotting before topping the eggs and after, and it’s easier if you do it after. If you want perfection, you could pipe some mixture onto the tomatoes, and this might be quite fun for a child to do if you have the time and inclination. (You don't need a proper piping bag, a decent plastic bag with a small cut in the corner is fine.) Scatter the crumbled bacon over the lettuce and serve, with salad dressing if liked.  Pancake Soup (meat or vegetarian options)
Pancake and soup – once you get over the shock, what more comforting combination can you possibly imagine? This is a recipe common in the south of Germany called “flaedlesuppe” and you find it in nearly every neighbourhood restaurant. It’s very very easy, and just what you need to warm your insides on a horrible day. It’s a great lunch meal for half term with the kids home - I never met a child who wouldn’t eat a pancake. Or an adult, come to that; it’s difficult to resist eating bits off the edges of the pancakes when they come out of the pan. Serves 4, 20 minutes if using pre-made beef stock.
Put the stock on to warm up while you make the pancakes. In a bowl combine the flour, eggs, milk and beat with a fork to a thinnish batter. Add the chopped herbs and season really well with salt and pepper. Heat up a small frying pan with a small amount of butter or oil, scoop in a ladleful of batter, swirl to make the pancake. Cook on one side for about 2 minutes to brown, then flip over to brown the other side. Continue making a stack of pancakes until all the batter is used up. The pancakes won’t be quite as thin as if you didn’t have the herbs in, don’t worry. Take each pancake and roll it tightly, then slice it into thin strips – I cut it with scissors. Drop all the pancake strips into the simmering stock and warm through for a few minutes. Add another sprinkle of chopped parsley or chives and serve. The soup doesn’t keep very well with the pancakes in, so eat it all in one go. I didn’t really need to say that, there are never any leftovers. |
Some Changes - April 2022
Thanks to my friends and followers for your patience, and for your encouragement to start blogging again. Archives
April 2022
Categories
All
|
 RSS Feed
