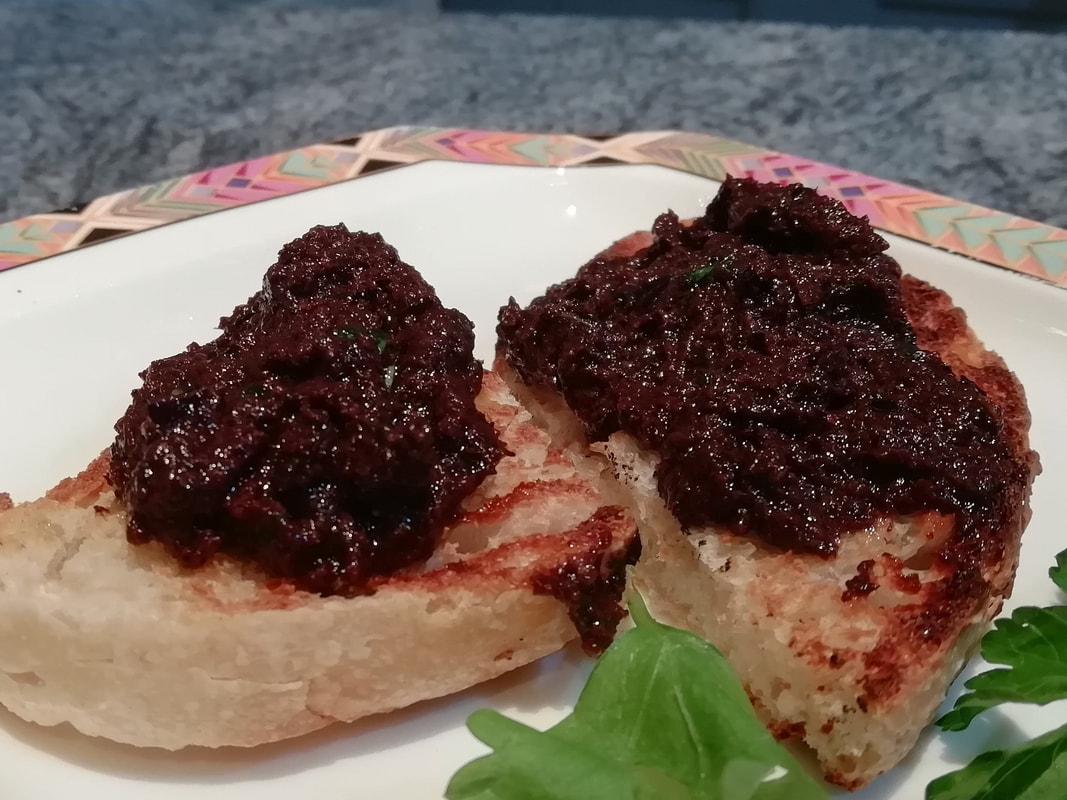
 Dark salty tapenade on sourdough toast Tapenade – dark as Christmas Night (vegan version)
Salty, deep, dark, garlicky, oily, wicked – tapenade tastes like it looks like it sounds. You can buy it ready made in jars, of course you can. But if you make it yourself, firstly it tastes fresh and spicy and wakeful, and secondly, it’s far more cost effective. I quite often get asked for the recipe, which shows that home-made really tastes different from bought. All you need is a stick blender – the bowl of a main mixer is just too big for this and the blades don’t get right into the sides of the paste. It depends how smooth you want it - it’s a personal thing. I like it smooth enough to spoon onto a small cracker or broken shard of toast, and have it stay there by its own willpower, so it needs to be oily and textured enough to stay in a blob. But I still like the slightly rough woolly-blanket-texture of the olives, not a soupy puree. Maybe I’m hard to please, but the point here is don’t over-liquidise. Stop once the mix has turned into a puree, taste, test and liquidise again if you want to. This is perfect party food – adult, sophisticated and tasting very much of the night. Serve it on little crackers slicked with cream cheese, on that French toast you get in packets (which gives you a surprise sweetish tang too, for another adult kick) or on pieces of broken sourdough for a careless, California vibe. Obviously in these post-Covid days, we don’t offer this as a dip, except in individual ramekins with each-to-his-own plates of dippy things. If you make larger quantities, this makes a superb gift, put into little jars to give to people at Christmas; maybe along with a little bag of sweet treats if you want to be really impressive. Serves 6 as a starter along with other nibbles and snacks. Timings – 10 minutes.
Put all the ingredients in a bowl and blend with a stick blender. Test the texture and either add a tiny bit more olive oil and blend a bit more or leave as it is. It keeps very well stored in a jar in the fridge, so you can make this at the start of Christmas and bring it out when the occasion demands.
0 Comments
 Dreamy squash soup with a tang of ginger, some textured squash and crunchy seed topping Squash and Ginger Soup (vegan)
Squash makes the most wonderful soup anyway, and you can hardly go wrong with the simplest of recipes. This recipe is a take on one I ate in Germany in September (at the Krone in Ulm, thank you!) which has a bit more texture than a simple puree of squash and a bite more fresh ginger. The topping of toasted nutty pumpkin seeds and pumpkin oil is luxurious. I am told there are health benefits from pumpkin seed oil, but I cannot vouch personally for them, I just like using a variety of plant oils in my cooking to give me a wide range of nutrients naturally, and it seems fitting to use pumpkin seed oil on a squash soup. The grated squash gives body to the soup, you could eat this as a meal in itself. With a piece of fresh bread you wouldn’t need anything else. Simple, warming, invigorating. Serves 6, timings 1 hour
Chop the onion and leek finely and fry gently in vegetable oil to soften, in quite a large pan. Peel the squash and cut into 1cm cubes. Add to the pan, stir to soften and begin to cook. Peel the ginger and reserve the best, juiciest part – about ¼ of it. Grate the larger part and add to the pan. If there are stringy bits, chop them finely and add them in too – they will be liquidised later. Add the stock to the pan, bring to a simmer and cook for about 15 minutes until the cubes of squash are softened - you can poke a knife through and feel how soft they are. If the squash needs a bit longer (if you bought ready done cubes in a pack they might not be fully fresh and could be a bit hard) then give them a bit more time. While the soup is cooking, toast the pumpkin seeds gently for a few minutes in a small dry frying pan. Careful, they will spit and crackle. Keep moving them about to avoid burning and when light brown, put on kitchen paper to cool. Grate the reserved slice of pumpkin and grate the nice piece of ginger. Don’t be tempted to use the stringy bits of ginger that remain on the outside of the grater – this ginger will be eaten only very lightly cooked and you don’t want stringy bits in your teeth. When the soup is cooked, let it cool a little and then check the seasoning – add salt, pepper and a dash of Henderson’s Relish. Liquidise the soup to a velvety puree and return to the pan. Add the reserved grated squash and ginger. Bring the soup back to a simmer for 5 minutes, then serve with a swirl of pumpkin seed oil on each bowlful and toasty pumpkin seeds on top.  Jerusalem Artichoke Soup (vegetarian/vegan)
The official start of Autumn. Forget your falling leaves or first frost. Your tastes migrate from fresh salads to warming soups and you know the season has ticked onwards. Jerusalem Artichokes are unfamiliar to many but worth seeking out. They’re a gift to the organic gardener: undemanding friendly sunflowered giants, needing no fertiliser or care other than staking, and delivering a fabulous harvest with a little digging. And what’s more, they make the most incredible creamy velvety textured purees and soups. Yes, you are going to ask, what about the wind? And indeed they do make you a little gassy, if you gorge on them first thing in the season. What you need to do is dilute the effect. Don’t eat them for every meal, and don’t eat a huge roasting pan of them the first time you harvest. I wouldn’t blame you, because they taste so nutty and sweet that way, but give yourself time. Approach them gradually, your gut will get used to them and benefit from the inulin they contain. This soup is a good way to start off - it’s a mixture of vegetables, not too heavy on the artichokes. And for heaven’s sake – a vegetable that grows itself, tastes great, has massively amusing shapes when you dig them up, and makes you fart into the bargain – keeps the children amused for days! Serves 6, 20 minutes preparation, 20 minutes cooking.
Brush the artichokes (they are VERY muddy) and peel them if they need it – I personally prefer to peel them but you don’t have to if you’ve got the smaller fiddly variety. This is the part of the preparation that’s going to take the longest. Slice the onion and begin to fry it in a little oil in a heavy pan. Peel the carrot, slice into small pieces, add to the pan. Clean and slice up the leek, add to the pan. Keep cooking as the vegetables soften – about 5 minutes. Add the stock and the sliced-up artichokes. Cook for about 20 minutes until all the vegetables are soft and cooked. Liquidise and if you like, you can add some cream or milk to the soup to thin the texture. Check and adjust the seasoning. Serve with sourdough croutons or just with fresh bread.  Juicy marinated mushrooms with a light spice Tikka Mushrooms (vegetarian)
Halfway up the foothills of the Indian Himalayas on the way to Shimla, summer playground of the British Raj, we stopped for lunch at a roadside restaurant. Having struggled through monsoon-destroyed roads, unfinished red-mud roadworks and past accidents caused by drivers unable to wait in queues, we were frazzled and frustrated. Our spirits were revived by a simple and excellent meal, as so often in India. We had butter-naan – now recalled with inappropriate desire, dripping with butter and dough meltingly soft; fragrant makhani dhal - yes, I know the cream content makes it a calorie bomb, who cares? I went on ordering the brown lentil concoction everywhere I could; - and this light and fresh plate of mushroom tikka. I remember the welcome we got in that little restaurant; the concerned waiter rushing to get us a cool drink, the calming view of precipitous green valleys from the back window, the comfortable seat after the sticky jeep. Oddly enough, the rest of the journey was much nicer after our stop – the effect of the food, or just nearer to the vision that is Shimla? I’m sure the genuine recipe is more complex, but here’s my re-creation of that lovely dish, and it is now an easy family lunch favourite. Serves 4. Timings: preparation 10 minutes, an hour marinade, 20 minutes cooking
Mix the yoghurt, tikka paste and lime juice thoroughly – you will get a nice red cool yoghurt slurry. Prepare the mushrooms – I prefer to peel them and take off the ends of the stalks, but if you’d rather just wipe them to remove any dirt from the culture medium, then fine. Add the mushrooms to the marinade, mix well to cover them with the yoghurt and leave for an hour. Take the dog for a walk. Pre heat the oven to 200°C. Take the mushrooms out of the yoghurt and thread them onto metal skewers. Put on a tray in the oven for 20 minutes – turn every now and then to make sure all sides are cooked. Serve either on the skewers or on a plate, with pillowy buttered naan if you don’t care about your waistline and want to remember India again, or maybe a simple green salad. 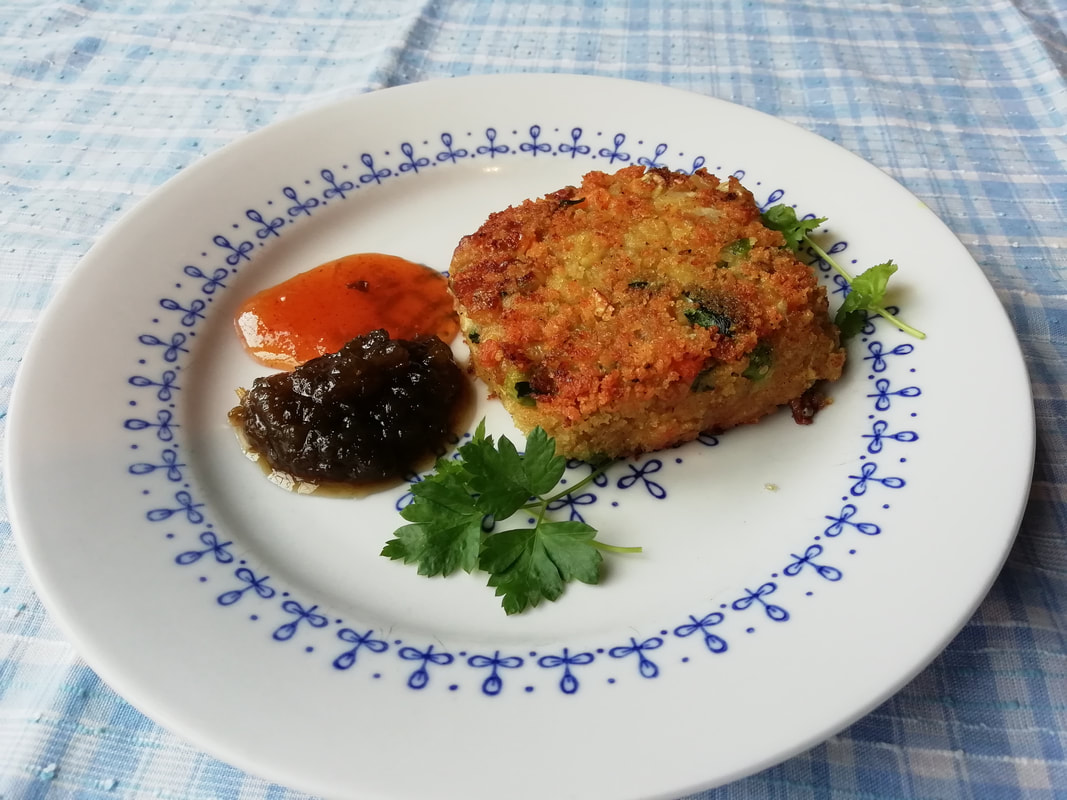 Spicy vegan cutlets served with home made chilli jam and mango chutney “Cutlets” – vegan/vegetarian Travelling in India, you see these in a lot of restaurants and easy-food places. We even had them on the train for lunch – a choice of meat or vegetarian. The other passengers questioned us enthusiastically about our origins, travel plans, political opinions, and family aspirations while we tucked into our crunchy cutlets with tangy chutney. I think the veggie cutlets in India were thinner than my recipe, but basically the same idea: a protein (mashed beans), a sticky carbohydrate (mashed potato), a selection of vegetables (whatever you have in the fridge or left over from another meal but something with some crunch and texture is good), a fried juicy combination of onions and spices, and then made into patties and covered in breadcrumbs, and fried. I have a confession: I make these quite often not from a recipe, I just throw them together. So when I came to make them for this blog and the photo, I did my usual. And they fell apart. They went to mush in the frying pan. They still tasted great and my family ate them up but I couldn’t use them to show you. That spurred me to do some experimenting and reading up on what went wrong. I didn’t have enough binding property on that batch of cutlets, the mixture wouldn’t hold when fried. In many recipes, breadcrumbs are added – which absorb moisture and give more texture, so I tried that – it worked. I also tried adding some of the bean-water (known as aquafaba), a magic ingredient in vegan cooking. That worked too, even better than the breadcrumbs. I have read that bean-water should not be used in large quantities – there’s a reason you soak and then cook beans thoroughly and maybe you don’t want to indulge in the waste products of that process, but to use a small amount to give an extra firmness to the patty, I don’t see any harm – especially if you cook the beans yourself from dried rather than using a can. They do freeze well, so I usually make a batch when I have the ingredients to hand and pop a few in the freezer for an easy lunch. Serves 8 (or enough for 4 and then a batch to freeze) for a light meal Timings – if using cooked beans – 30 minutes preparation and then an hour in the fridge to firm up. If using dried beans, you need to soak overnight and boil them for an hour.
Drain the beans and keep the cooking water. Mash the beans roughly with a fork, put into a large bowl. Add the mashed potato. Add the vegetables and then add the spicy onions from the frying pan. Add about 2 dessert spoons of bean water (go easy, texture should be reasonably firm and not sloppy) a squeeze of lemon, a splash of Henderson’s Relish, salt and pepper. Mix up well with your hands and taste a bit. Adjust the seasoning as needed – you want it fairly punchy. If you have them, you can also add chopped fresh herbs: coriander, parsley, chives. Make patties of the mixture – about 1cm thick - and press them into breadcrumbs on a plate. Put them on a baking tray in the fridge covered with silver foil for an hour or so to firm up. At this stage, you can freeze the ones you aren’t using right now – wrap them each in greaseproof paper and slide them into a freezer bag. They will keep for up to 3 months in the freezer. Heat up a large heavy frying pan and use a generous slug of oil. Fry the patties on each side for a few minutes until golden and crispy. Just check the middles are done and give them a minute or two more if needed – everything is cooked already but you want it hot all through. Serve with some mouth-puckering tamarind chutney or lime pickle. Feels a bit sad really. Goodbye to summer, to the warm weather, to working in the allotment in a t-shirt. We ate the last courgette this week and that’s a true sign of approaching Autumn. Considering it’s the end of October, that’s not bad. I’ve been growing Defender (big green normal looking ones, great cropper) and Tondo Chiaro di Nizza (round slightly striped one.) We’ve had a glut, so I have a glut of recipes too, which I will share. You can use courgettes as courgetti/spaghetti or sliced like sheets of lasagne, for a less calorific version of pasta – they don’t taste quite the same, but they are great for a change. Courgette antipasti with oil and lemon. (vegan) Serves 4, about 30 minutes and then time to chill.
In a flattish dish, combine the olive oil, lemon juice, salt and chopped mint leaves. Slice the courgette as thinly as you can. Put a little olive oil on a piece of kitchen paper and wipe the courgette slices with it – you need very little as you are grilling, not frying, you just want to stop them sticking. Lay each piece down on the grill surface and cook for 1-2 minutes each side – you want the courgette tender and browning but not burned. As each is cooked, take it out and lay it down in the olive oil mixture, it will hiss and then start to absorb the dressing. You can only do a few at a time, so it can take a while to do a whole courgette. When you’re all done, mix the dish of slices and oil up again and place in the fridge to chill for at least an hour. Taste, adjust the seasoning and eat as part of an antipasti or a salad buffet, along with lots of crusty bread to mop up the juices. They will keep in the fridge in a sealed container for a couple of days. 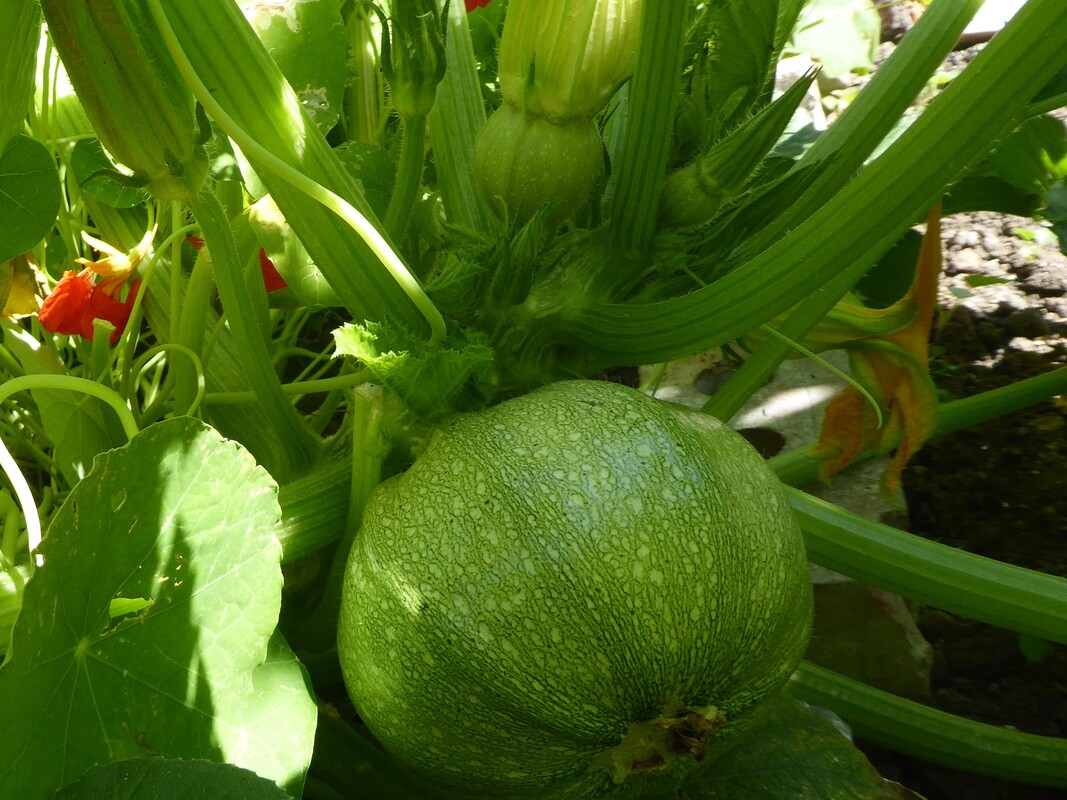  Borlotti beans from my allotment are just drying now, before being stored for the winter. They are so pretty, the ruby speckles on each bean are different and hypnotising if you look at a handful of them for too long. After they're dry, you have to soak them before cooking - overnight is best. Then boil gently for an hour or so - you can add a sprig of rosemary to the cooking water, or some winter savoury if you have it. The savoury adds a complex woody flavour to the beans, and allegedly combats the windy effect beans can have on your gut. (So say the Germans, savoury is called "beanherb" and is sold alongside beans in the markets for that very reason.) After that, the beans are soft and ready to eat - I love to mash them with a little olive oil and salt, for a side dish with grilled lamb chops. Or you can add them to a soup, or use them in a vegetable patty for the protein and that slightly grainy sticky texture.
|
Some Changes - April 2022
Thanks to my friends and followers for your patience, and for your encouragement to start blogging again. Archives
April 2022
Categories
All
|
 RSS Feed
