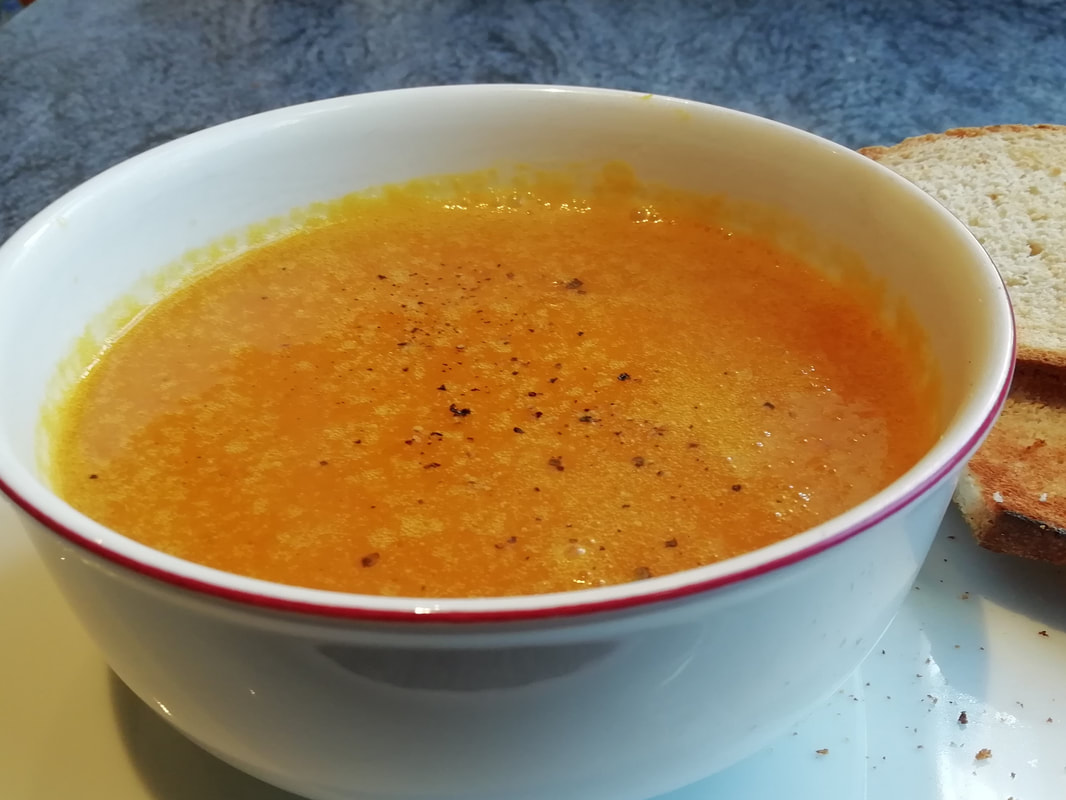
 Balanced and beautiful - fresh celery and squash soup, a light lunch Celery and Squash Soup (vegan)
Sometimes an accidental combination just sings out loud. A few sticks of celery and half a butternut squash are denizens of the Monday fridge, leftovers from the weekend. But rejoice! The lightness and slight bitterness of celery balances the sweetness and creaminess of the squash and the two flavours meld like cheese in an omelette. It’s even good enough to make on purpose. It’s a great lunch time soup with a simple salad and some good bread. Serves 4 Timings: 30 minutes
Gently fry the onion and celery in a little vegetable oil until tender, 5 minutes. Add the cubes of squash and stir around. Add the vegetable stock, relish, and a little grind of pepper. You probably don’t need salt as the stock is salty enough but taste and adjust to your liking. If you have had the oven on and you know you’re going to make this soup, you could also roast the squash cubes for 30 minutes in a medium oven with a little oil, but I wouldn’t put the oven on just for that. Simmer for 20 minutes, then cool and liquidise. You can add the reserved celery leaves before you blend or hold them back for a garnish. Check the seasoning and serve.
0 Comments
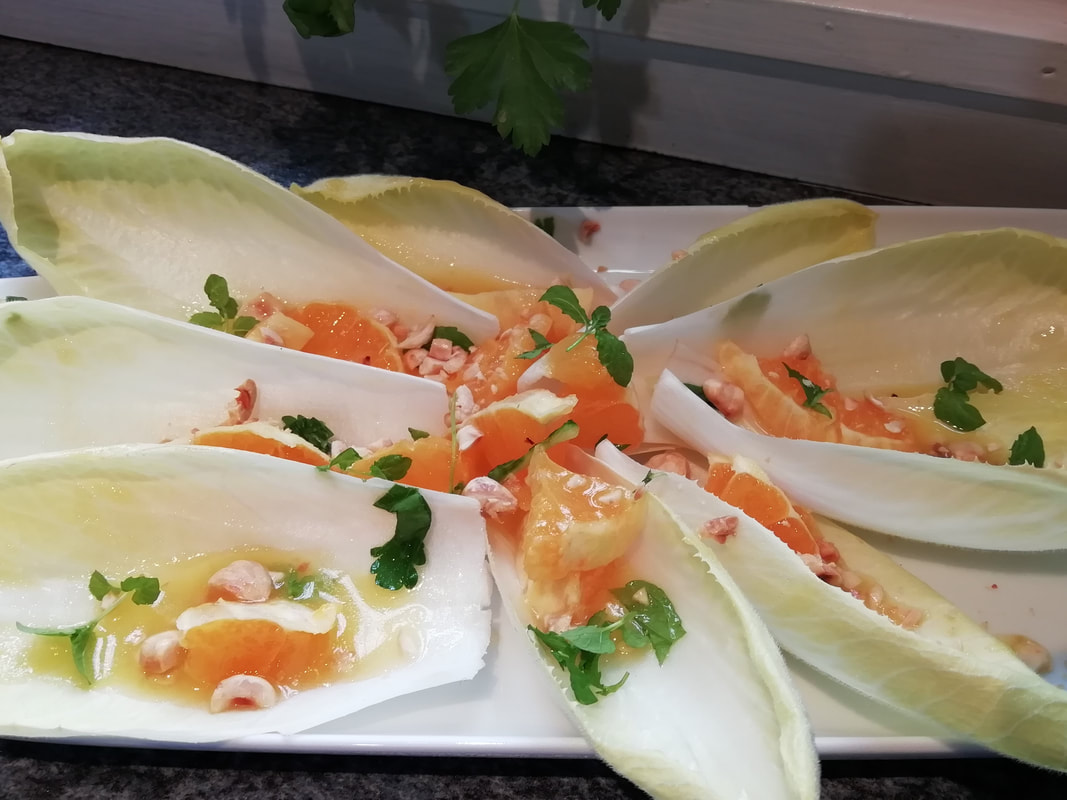 Refreshing and vitalising - salad of chicory, orange and hazelnut, with an olive oil and orange juice dressing Chicory, Orange and Hazelnut Salad (vegan)
This is a lovely light Spring lunch time salad – juicy from the fruit and crunchy from the nuts, with a back note of bitterness from the chicory and tiny sparkles of flavour from the mint. Very refreshing and full of vitamins. If you can’t get chicory, - which is mostly available in shops from January to March - a firm fresh lettuce will do, one of the cos type with strong leaves rather than floppy ones. The dressing makes a full jar but if you have some left over, it goes well on a straightforward green salad too. It’s worth getting a small bottle of walnut oil if you don’t normally keep it in your salad-oils selection. (we all have one of those, don’t we?) It adds a lovely nutty taste to a French dressing and is high in Omega 3, so has health benefits. My sons don’t eat a lot of nuts, so I think that adding a sploosh to every salad dressing is a good way of getting nut oils into them. You can eat this as part of a mixed salad table or by itself as a light lunch with some good bread to mop up the juices. Serves 4 as part of a salad table, timings 20 minutes.
For the dressing:
Roast the hazelnuts by placing them on a tray in the oven at 180°C for 10 minutes. This can be done ahead of time, and the roasted hazelnuts kept in an airtight jar for use in salads, cakes, meringues, snacking. Chop the hazelnuts roughly into smaller pieces but don’t grind them. Peel the orange and try to remove most of the white pith, cut the fruit into small chunks. Do this over a small bowl to catch the juice, but you aren’t squeezing the orange. Separate the leaves of the chicory heads and wash, they’re usually pretty clean but wash them anyway and dry. Put all the ingredients for the dressing in a jar with a tight lid and shake well. Taste and adjust, you might need to add a bit more salt or a bit more sugar, depending on the sweetness of the juice you used. And you will need to shake well to dissolve the honey through the dressing. Arrange the chicory leaves on your plate, strew over the orange chunks and then scatter over the hazelnuts. Drizzle the dressing over everything and add some tiny mint leaves for accent.  Creamy rich sauce with subtle spicing - from a home made Rajasthani recipe Chicken Curry – the Rajasthani Way (vegan/vegetarian option)
In Jaipur I had a cooking lesson from Mrs. Singh of Dera Mandawa, which also offers “homestays” – the Indian equivalent of a cosy bed & breakfast. Cosy isn’t the right word here, Dera Mandewa is a manor house of royalty - a place of huge courtyards, sized for the elephants to come inside and unload their burdens. We talked and talked through the velvety dark evening. She explained to me that girls rarely left the mansion grounds, even for schooling. Rajasthan in the old days was a place of danger and kidnap, as well as beauty and nobility. Girls stayed close to their female relatives and learned the skills they needed in daily life. Counting the whole spices in and out of the curry sauce was key and was how you learned arithmetic – you don’t want to bite on a whole clove if it’s left in the sauce. Mrs. Singh herself was lucky enough to be in the vanguard of female emancipation, she went to school, became a doctor and then a consultant. Now she lives in her old family home, sharing her culture through food. This is the genuine recipe, with only my addition of tomato puree, as I think the little bit of sweetness is very pleasant. The sauce is made before you cook the meat and is itself vegan, so you can instead use vegetables or paneer for the protein to give you a vegan or vegetarian dish. The onion, garlic, chilli and ginger paste can be made in larger quantities and kept in the fridge to be used in different dishes. My friend Mussarrat Butt from Artisan Nutrition in Didsbury (www.artisannutrition.co.uk) recommends doing this if you are going to make a lot of Indian food. She makes the paste from onions, garlic, turmeric root, salt and ginger and uses it in her vegetarian and vegan curries. It keeps for at least a week. Serves 4 Timings – 90 minutes
A paste made from:
To be added later:
Put 4 tablespoons vegetable oil in a heavy pan, heat well. This looks a lot, but you will need it all. Tip in the whole spices – watch out, the bay leaf will spit like fury. Fry for a few seconds, then add the chopped red onion. Fry for about 10 minutes, moving about, until the onion is browning. While that is frying, make the onion paste in the blender/food processor. Add a little more water if you want to, but remember the water has to be fried off in the next stage which will take longer if your paste is too liquid. Mix the powdered spices in a glass with a little water to a loose paste – this is to avoid scorching the powder, which would give the sauce a burned taste. Add this spice paste to the frying pan, stir and fry to release the fragrance. Now add the onion paste from the blender. The onion paste will meld with the hot oil and onions in the pan and make a thick, bloopy sauce – which will spit and bubble. Resign yourself to having to wipe down the hob after the cooking session. Fry the sauce for about 20 minutes, until it is thick and all the ingredients are combined. Stir in the tomato puree and taste the sauce for seasoning – you will need to add some salt. Keep frying and moving the mass around in the pan. At this stage, start to take out the whole spices – and, like Mrs. Singh, be careful that you count out what you counted in! Keep stirring until the sauce is very thick and the oil starts to show when you draw your wooden spoon through it. Let the sauce cool, add the lime juice and adjust the seasoning. If you need to add a teaspoon of sugar, do so. You can leave it at this stage in the fridge for at least a day, and also freeze it for later. Prepare your protein for the curry: if using chicken thighs, just fry the pieces in shallow hot oil until lightly browned and cooked through. Add the chicken to the curry sauce, loosen with some water and stir in the cream. Warm up gently and don’t boil or the cream will split. Serve with chopped fresh coriander, naan bread, plain rice and some simple relishes and chutneys.  Glowing with health and warmth, give yourself a treat with a bowl of beetroot soup Beetroot Soup (vegetarian/vegan)
Sometimes the simple things are the best, especially for lunch. Beetroot soup is sweet, earthy, friendly and really good for you. All sorts of things are said to lower blood pressure, but I understand that beetroot is among the few things to be proved to do so, other than prescribed medicines. A straightforward vegetable soup, it’s easy to make, cheap and cheerful – who can resist eating something of such an amazing colour? Be warned, it can turn your urine pink – nothing to be worried about, just shows you have an efficient set of kidneys doing what they should do and filtering your blood. You can cook your beetroot in a number of ways – wash the roots, remove any fibrous rooty bits and any tops and leaves (you can cook those separately like spinach), and then boil, or microwave. I prefer to roast mine when I have the oven on for something else – just wrap the beetroots individually in kitchen foil, and put them on a small roasting tin in the oven at whatever temperature you are cooking, for about 1 ½ hours, so if you are roasting a chicken, they will take about the same time. If you are making toad in the hole, just leave the beetroot in the oven for a bit after you take out the Yorkshire puds. I leave the beetroot in the oven to cool down after I put the oven off, it just makes sure they are fully cooked through and totally tender. When cool (and you can do this the day or so after) take off the foil, rub off the skin, and then use the cooked beetroot. Serves 6 Timings: 20 minutes if using cooked beetroot.
Fry the onion gently in a little oil until tender – about 5 minutes. Add the garlic and cook for another 5 minutes. Add the beetroot cubes and the stock and simmer for about 5 minutes. Allow to cool slightly and then liquidise. You don’t need to strain through a sieve as there are no fibrous bits in beetroot (unless it's the last harvest from the allotment, in which case do please strain it!). Warm through and adjust the seasoning – you may need to add some salt and pepper. Serve with a swirl of sour cream if you like or plain yoghurt and some good bread. 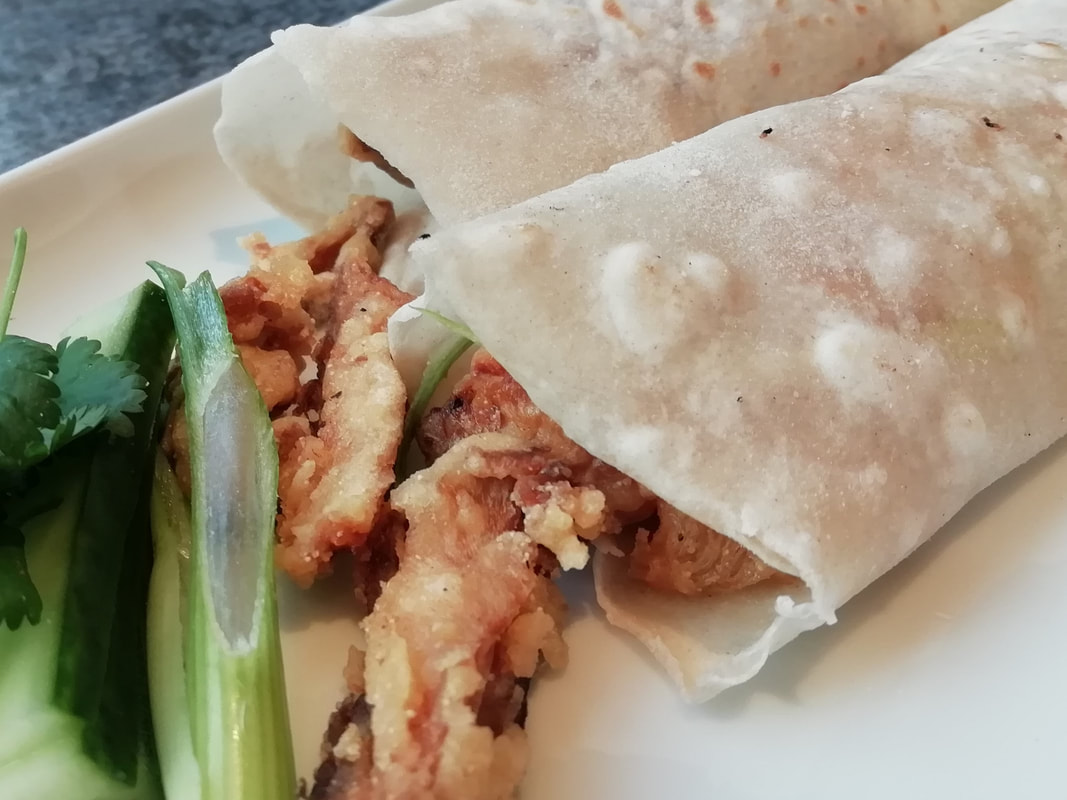 Soft wheat pancakes filled with crispy deep fried mushrooms, vegetables and plum sauce - who needs a duck? Chinese pancakes with Crispy Mushrooms (vegan)
Who doesn’t love pancakes with crispy duck? I recently learned that the Chinese never eat crispy duck at home – it's best done at a restaurant. But they do make the pancakes at home and then stuff them with all sorts of delicious things. They really do make a wonderful lunch, and very attractive to kids and teenagers as they can build their own selection of flavours. The thin wheat pancakes can be used with meat, vegetables, scrambled egg, any sort of stir fry. The best filling is slightly crispy, tangy and salty, to give that burst of flavour as you bite through the soft wrapping. Here I’ve made a deep-fried mushroom filling – which goes perfectly with the traditional accompaniments for the crispy duck, so we can keep it easy – spring onions, cucumber and plum sauce. The pancakes are also a superb way of using up cold leftover meat – either just as it is, cut fine, or covered in a simple batter and fried up. They freeze well too, so it’s easy to make a double batch and use half later for a simple lunch. If you read the recipe and wonder why you make them in pairs: time and effort saving – you roll once for two pancakes, and also by doing this you get a steamed inside for the pocket formed from the two pancakes, which is what cooks the flour. Ingenious. Trying to repeat the delicious pancakes we ate in Hong Kong, I used Maggie’s recipe on omnivorescookbook.com as the basis - the mixture of hot and cold water dough seemed to give a good result. Thanks, Maggie! The only thing is, you do get the kitchen full of hot vapour as the frying pan needs to be quite hot – never mind, it’s nice to be warm while you’re cooking! Thin wheat pancakes Makes about 40 pancakes, which is about 8 servings. Timings – about 90 minutes if you are making the whole batch from scratch.
Pour the boiling water into one bowl and mix thoroughly – you will get a cooked, sticky dough. Turn out onto a work surface. Pour the cold water into the other bowl of flour and mix thoroughly – you will get a much harder dough. Turn the cold water-dough onto the hot-water dough and knead the two together for about 5 minutes – this is really hard work as the dough is tough and springy. Keep going, turning, kneading, pulling – and in about 5 minutes you will have a smooth and elastic dough. Wrap it up and let it rest in the fridge for 30 minutes. In this time, assemble your fillings – chop the vegetables or meat into small pieces, get your spices together, whatever you are doing. Take the dough out and knead again just briefly, put it back in the fridge for another 10 minutes. You could, in this interval, deep fry your mushrooms or pieces of meat and keep them warm in an oven. When ready to cook the pancakes, roll half the dough into a long sausage shape about 40cm long. Keep the other half wrapped in the fridge still. Take a knife and cut your sausage of dough into 20 equal pieces, each will be a squat cylinder. Now work with two at a time, keeping the rest under a tea towel to avoid drying them out. Take a piece of dough and flatten it with your thumb to a disc about 3cm across – brush this with oil. Take the next piece of dough and flatten it into a disc the same size and put both discs together, with the oiled side in between. Keeping the two pieces of dough together, put them on a work surface and use your rolling pin to roll them out to pancake sized flat pieces – about 12cm across if you can. It is quite hard work as the dough is resistant, but it won’t spring back once you’ve got it to the right size. Place your double pancake under a tea towel to keep moist. Keep on doing this until you’ve done all 20 pieces, so you now have 10 double pancakes. Heat a medium sized frying pan without oil - it does need to be quite hot. Place one pancake into the pan and watch as the air between the layers puffs up into bubbles, and you can see how the inside pocket is all steamy. It takes less than a minute and you don’t want the cooked side to be anything more than very lightly brown. Flip the pancake over and cook the other side, you just want the texture to be dried, not griddled. Flip the pancake out of the pan onto a tea towel and peel apart the layers – you need to do this while the pancake is hot and steamy or you won’t get them apart. You should have two circles of thin wheat dough pancakes. Cover them in the tea towel to keep warm and not dry out while you cook the rest of the batch. Once cooked, you can let them cool, wrap them in greaseproof paper and a freezer bag, and pop into the freezer for later – steam to de-frost, they don’t need more cooking. Cooled pancakes can be kept for a couple of days, ready to re-heat. Of course, they are really best eaten fresh, so take them to the table and let the hungry horde assemble their own stuffed rolls. Crispy mushrooms
Clean and slice up the mushrooms. Slide half of the slices into the batter and mix with your fingers while you heat up oil for the frying – you don’t need a deep fryer, just 1cm of oil in a deep frying pan will do. Drop the coated mushrooms into the hot oil and fry until cooked and golden – about 4 minutes, turning now and then. Scoop out that batch onto kitchen paper and cook the remaining half. As with all deep frying, you need to cook in batches to avoid the oil temperature dropping too much when you put it all in, as you’d then get a soggy mess instead of nice crisp batter. Bring the deep-fried crispy mushrooms to the table along with some sliced spring onions, sliced cucumber and some hoi sin and plum sauce. Roll ‘em up and enjoy! Marmalade
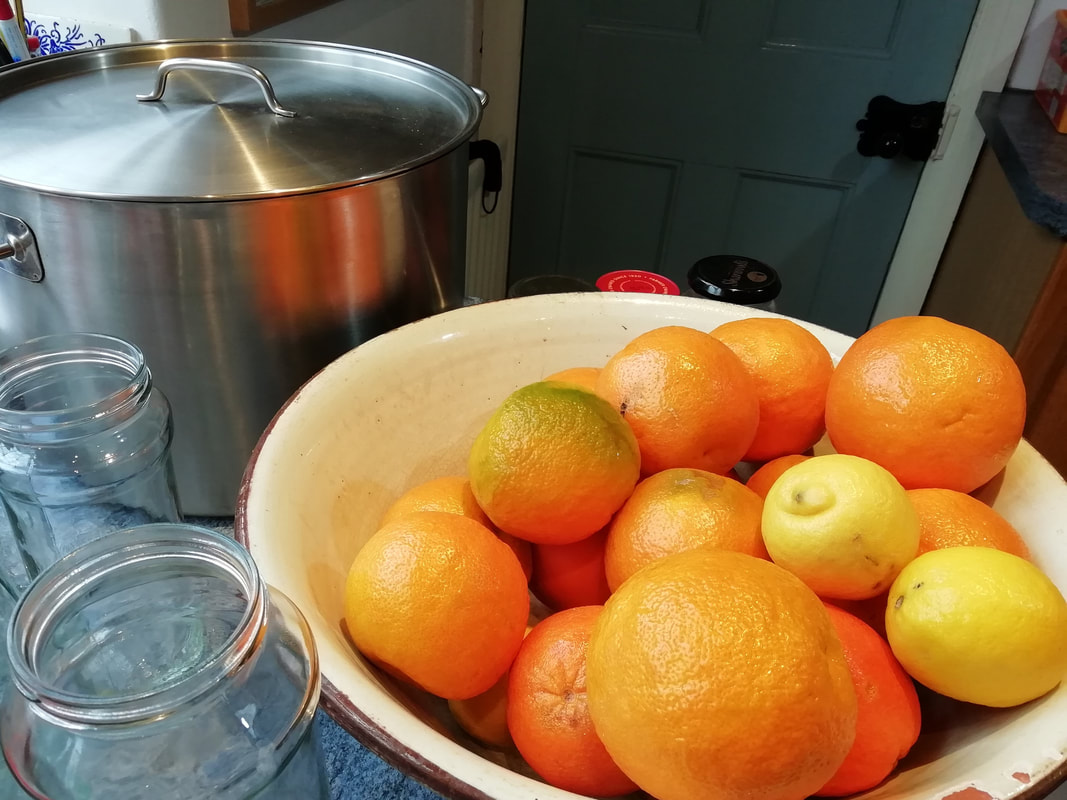
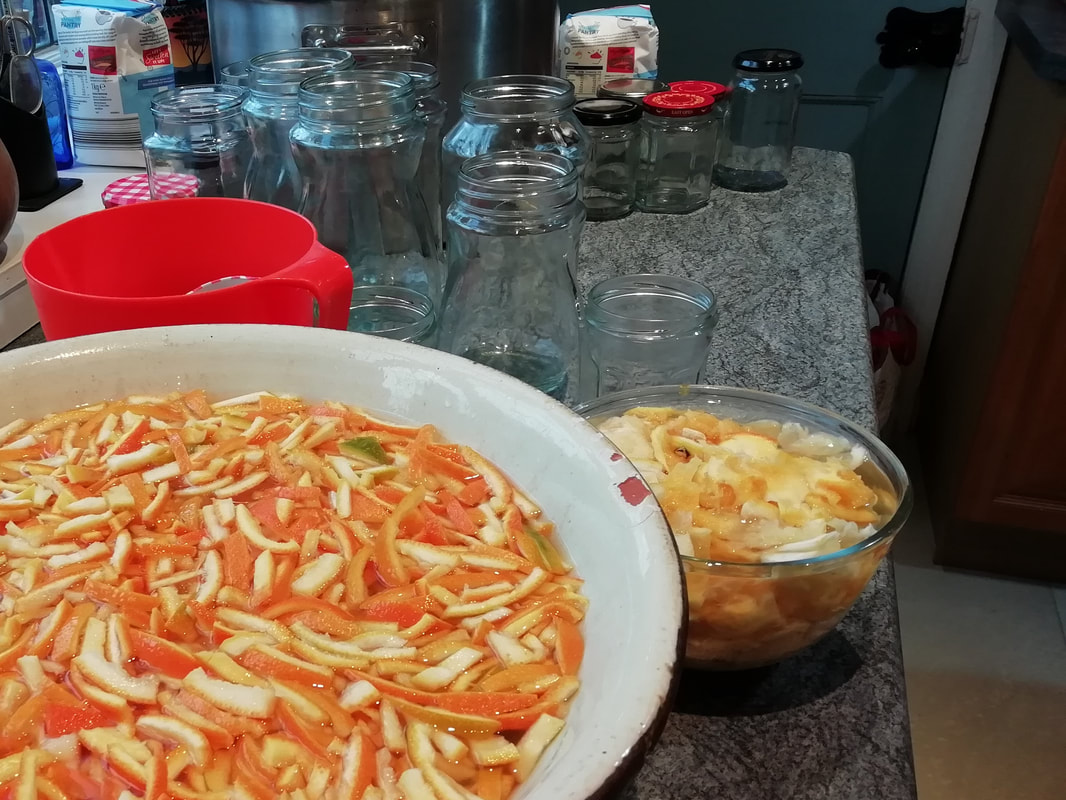
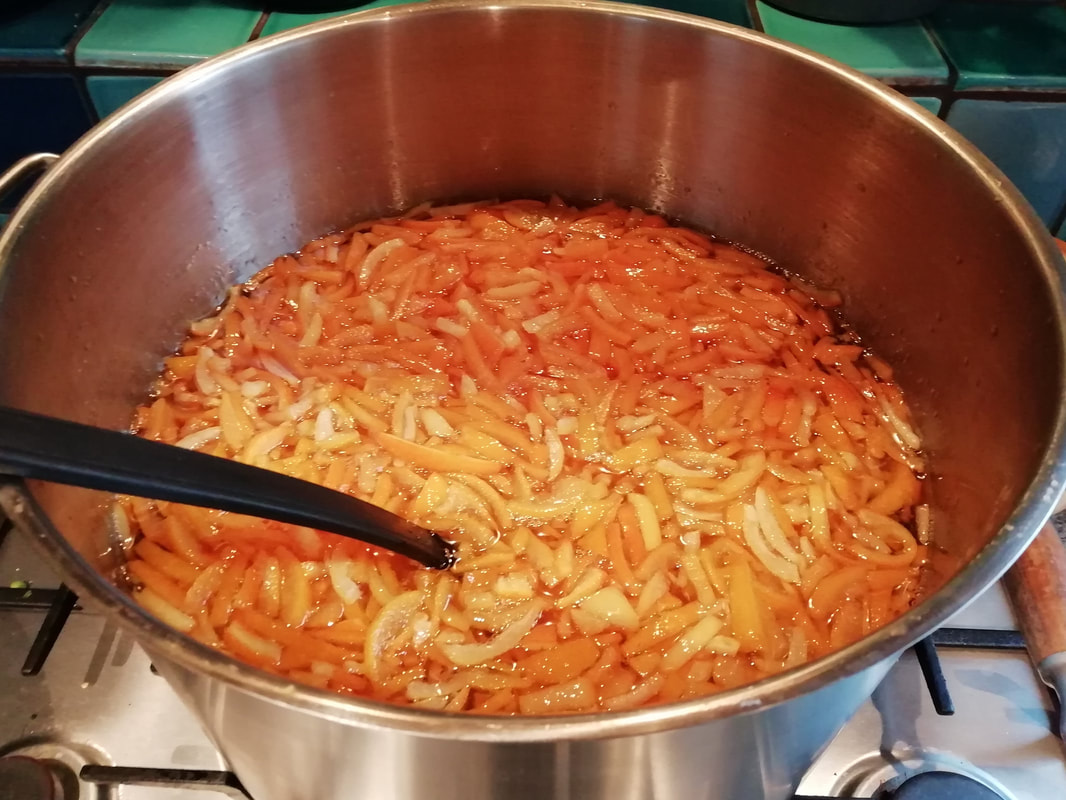
This is a very long post, but I hope you find it worth it - I wanted to give all the details of the method as I know some people find it quite daunting. If you make it, please let me know how it goes. My Mum was a veteran marmalade maker and used the jars of glowing goodness nearly as currency within the family. She’d take a jar or two along to every family occasion as gifts, and you knew how high in her favour you were if you got more than one. She strongly believed in the health properties of marmalade - the bitterness stimulates your guts when eaten first thing in the morning and keeps you regular (is the theory). Of course, marmalade appeals to the thrifty Scot also, being made of the whole fruit, nothing wasted, even the pips. When travelling, she usually took a pot with her, not trusting the little plastic packs you get in hotels, and even when she and my Dad got older and spent more time in hospitals than hotels, they packed the marmalade with them. So for me, this is a real taste of home. She usually made at least two huge batches per year, and January in our house was scented with the bitter tang of boiling Seville oranges. It is more complicated than jam to make, but it is so very worth it. Instead of a recipe with actual weights, I’m giving proportions here – you might be a marmalade fiend and wish to make a whole year’s supply or you might be a marmalade take-it-or-leave-it person but wish to make a few gifts for family and friends. Either way, put a weekend aside in January when the Seville oranges come into the shops and dedicate it, you won’t have much energy for a lot of socialising. And it’s a two day job – about half a day’s work on each day. Your actual production quantity is probably limited by the size of your largest pan – if you don’t have a huge pan, ask around your friends, someone might have a preserves pan – you do need a lot of space for the mixture to boil up. I’m using both metric and imperial measures here, as that’s the way my recipe is written. I don’t think it matters which you use but thinking about pounds and pints brings back my childhood for me. Using the following proportions: 450g (1 lb in my Mum’s recipe) of Seville oranges with 1 sweet orange and 1 lemon. That's picture 1 above. I used about 2.5kg of Seville oranges (11 fruit) with 5 large sweet oranges and 5 lemons and ended up with 4kg fruit. Unwaxed fruit if you can get it, but you can’t always. Weigh the fruit you have and record it. You will later need 1 litre of water per 450g of fruit. This made 6 big coffee jars and 11 smaller jam jars full – and this lasts me at least 2 years with a lot given away as presents. Wash the fruit well, scrubbing with detergent – bio is best! The reason for this is that citrus fruits, along with grapes, are the most sprayed fruits you can buy, so they need to be very well washed, and sometimes there is wax on the skin. Halve the fruits and squeeze out the juice and pips. Keep the pips separate in a bowl along with any pulp that comes out with them. Clean up the fruit halves, scraping out the stringy bits and some of the white pith – you can use a spoon to dig into the skin and tear out the pith. Chop up the fruit skins into whatever size strips of peel you like in your marmalade, I like it quite thin. Takes quite some time but really is best done by hand not in a machine. I tried a food processor one year and got tiny bits of peel that weren’t quite right and a lot of mush. Don’t worry too much about taking away all the white pith, it will turn clear and candied by the final stages. Put some water in the bowl with the pips – it will gel quite quickly due to the pectin in the pips, which is what you want. Add enough water to allow the pips to soak. Add the rest of the water (calculated above as 2 pints per lb of fruit) to the peel and the juice in your largest bowl. Let both bowls soak overnight. Picture 2 above. Next day, boil the stones for an hour – watch that the liquid is not too thick and catches on the pan and starts to burn – add enough water now and then to stop this happening. When boiled, strain the mixture and scrape it through the sieve to get out all the gelling pectin, it will be quite thick and need pressing through the sieve. Boil the peel/juice/water mixture until the peel is soft, about ½ - ¾ hour. You can do this at the same time as boiling the stones. While these are boiling, you can sterilise your jars – I fill them all with boiling water, let it cool a bit, empty out and then keep the jars upside down in a warm oven – this allows them to dry out and keeps them warm so they don’t crack when you fill them with hot marmalade later on. Measure how much liquid you now have. Add the pectin gel from the stone to the rest, and now add 1kg of sugar per litre of liquid (1 lb per pint, for Mum). Bring to a rolling boil and up to setting point. This can take over an hour. You need to keep an eye on it and keep stirring if you don’t have quite a big enough pan to let the sugary mixture rise up with its boil, to stop it boiling over. Picture 3 above. Setting point is best measured with a jam thermometer and when it hits 104.5°C but you can use any other method you find OK. I have found that the cool saucer/wrinkly jam method is not very reliable for a low pectin jam like marmalade and on at least one occasion I have had to de-jar all my marmalade and boil it all again another day after the mixture did not set even when it cooled. Once setting point is reached, let the pan of marmalade cool for at least 15 minutes before jarring – this helps to keep the peel distributed through the jar and stop it all rising to the top. Note, it might take longer to cool to this point if you are making industrial quantities – just keep looking as it cools and when the peel is starting to sink down, then you can start to jar it. That's picture 4 above, my whole production. Put into sterilised jars and use greaseproof paper tops and jam tops under the jar lids to help keep the marmalade from drying out over time. This can keep up to 5 years (from personal experience!) and does get better over the year. 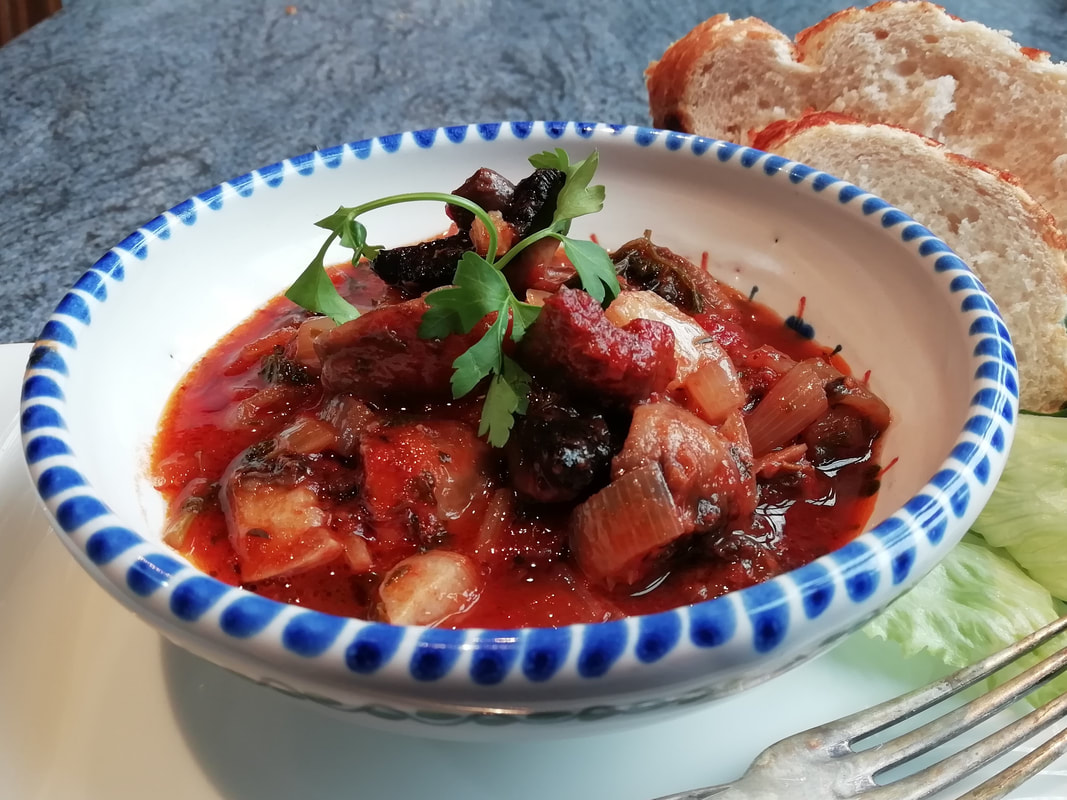 Mushrooms in a herby tomato sauce - rich and delicious Mushrooms a la Grecque (vegan)
Cold mushrooms? Like those little pots you sometimes get in the deli? A bit suspect? Texture like flannel? Not at all, think again! This is how it goes…. mushrooms in a rich tomato sauce, scented with herbs and garlic; a back-note of spice and salt. Dip your bread into the sauce, oily and fragrant. Take a mushroom on your fork – tender but a subtle hint of resistance, almost meaty as you chew. Take another, easy to eat, heading eagerly down your throat. Oh, they’re all gone…better make a bigger batch for tomorrow. Simple to make ahead, to use as part of a salad spread with some cold meats, green salad, cheese, good bread. I’ve found that even mushroom-suspecting kids like these, given the chance. I think it’s the tomato sauce that does it, slightly sweet, slightly sour, slightly salty. And use small button mushrooms – the bigger open ones just aren’t right. You can also use this as a starter, with good bread and a rocket salad, but if it’s all you’re serving you’d need to be sure you don’t have any outright mushroom-refusers. Serves 6 as part of a mixed salad table, and leftovers can be brought out for another day. Timings – 30 minutes preparation, 30 minutes cooking, then keep cold until using.
Fry the onions gently in the olive oil, not letting them brown. It will take about 15 minutes to get them to the transparent oily stage. Add the chopped garlic and the dried herbs. Peel or clean the mushrooms, and cut up, depending on their size. Keep smaller ones whole, halve larger ones. Add to the onion mixture and stir around, frying gently for 2-3 minutes until coated with oil and turning soft. Add the tomatoes and their juice to the pan, then the red wine and the tomato puree. Stir well and adjust the seasoning. Add the fresh herbs. Cook over a low heat, but keep it bubbling, for about half an hour, until the liquid is markedly reduced. Taste seasoning again, adding more basil at this stage if you like it. Cool and keep in a closed container until needed. The taste is best if you let it warm up to room temperature before serving, so take it out of the fridge half an hour before eating if you can.  Lentil and vegetable soup - all you need for lunch Lentil Soup (vegan)
This is one of my personal standbys. It’s like a warm old woolly jersey. It doesn’t knock your socks off, but it’s delicious, smooth and full of veg. It’s also easy and quick to make from store cupboard staples and vegetables you are likely to have around. On that note, feel free to switch around the veg for whatever you have – add a leek, add the leftover cooked broccoli from yesterday, or a couple of Jerusalem artichokes. None of the quantities is exact, I just use a few vegetables and a handful of lentils per portion. Eaten for lunch with a piece of toast, it gently hits the spot, or rather strokes it. In our first lockdown, to give my Lunch Club seniors a change from cake, sometimes I took round a portion of soup (in sealed clean jam jars which they solemnly handed back to me the following week), and this was one of them. Several people asked for the recipe, which I took to mean it had gone down well. It also freezes perfectly, so you can make larger quantities and have it to hand when a bowl of soup is all that you want. You can, of course, zing it up a bit. Add some chillies – fresh or dried – or some garlic, add some fresh herbs, add lemon, or add tomatoes – not all at once, I’d say, but try what you like. You can even add some curry powder with the frying vegetables if you like your life spicy. Serves 6 Timings – 10 minutes preparation, 15 minutes cooking
Heat a little oil in a heavy saucepan and cook the onion, celery and carrots for a few minutes until they begin to soften and cook. Add the lentils and stir for one minute. Pour in the stock, bring to simmering, add the marmite and the Henderson’s Relish. Simmer for about 10 minutes, taste and adjust the seasoning, adding salt and pepper and any handfuls of fresh herbs you might have around. Cook for another 5 minutes – the lentils should be very soft and mushy by now and the vegetables are well cooked. Leave to cool, then puree. When you re-heat you might want to add a little bit more liquid as it does tend to thicken up, but you can freeze without doing this, to better use the freezer space. Serve with a salad and fresh bread, or with garlic croutons. 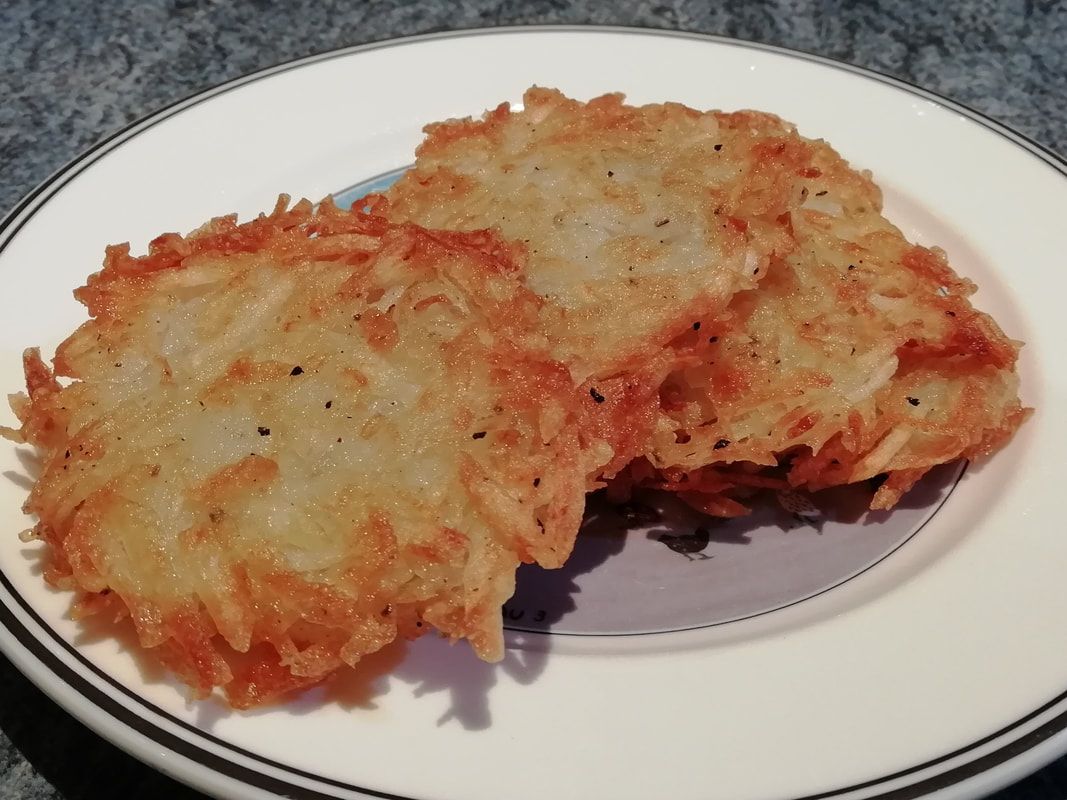 Rosti potato cakes, golden & crisp: ideal for school holiday lunches Rӧsti (Potato Cakes) (vegan, depending on the trimmings)
A favourite lunch for hungry youngsters – either half-way down a ski slope, if you’re lucky enough to get to Switzerland at half term (we can dream?) or more prosaically, at home in your own kitchen. Rӧsti are very versatile, nearly as much so as pancakes, and are available as light, substantial, sweet or savoury options. They are also cost effective, crunchy and friendly to eat, so what’s not to like? Serve with a fried egg, some crispy bacon, left over cold meat, apple puree and cinnamon sugar – whatever takes your fancy. The only real downside is that you have to cook them in very hot fat, so small or even medium sized children won’t be able to make them for themselves. This also means you have to cook them in batches, unless you have an industrial sized fryer. I think batch cooking for school holiday lunch time is quite a practical idea. You can get the whole squabbling lot of children in the kitchen waiting eagerly for their meal and you can check on their homework progress/music practice/time on the Playstation/mood/nits/whatever as you cook and serve. There’s quite a bit of grating needed if you’ve got a gang of kids to feed, so either get them involved too, or use a machine. Serves 4 Timings 30 minutes
Peel the potatoes and drop them into cold water. Grate them into a bowl. And it doesn’t matter if they go brown. Add 2 teaspoons of fine salt (although I bow to no-one in my adoration of Maldon Sea Salt flakes, fine salt is better here, as you want to get it all over the potato surface) and mix with your hands. Leave for 5 minutes and then squeeze the water out of the potatoes. I find the best way to do this is to scoop them all into a tea towel and squeeze this over the sink. You do need to be quite firm about this, as if you leave too much water in the potato, the rӧsti will be mushy and not crisp. Prepare whatever accompaniment you are having with the rӧsti, unless it’s fried eggs which you will want to do at the last minute. Warm up your oven unless you are serving in batches. In a large pan, heat a generous level of oil until quite hot – at least 1cm deep. Drop a small handful of potato into the oil – I can get about 4 of these into my largest frying pan. Squash the potato down with a spatula to level it out and fry for several minutes - they will sizzle vigorously. Flip over with the spatula and fry on the other side for a few minutes – about 5-6 minutes altogether. Drain on kitchen paper and best to serve straightaway, although you can keep them warm in a hot oven on a metal tray for a few minutes if you want to serve everyone together and give you time to cook the second batch. You will need to keep an eye on the level of oil in the pan and top up if needed – if you cook them in too little oil you will get scorched potato rather than deep fried, which is less appealing. Channel your inner ski-enthusiast, and enjoy! 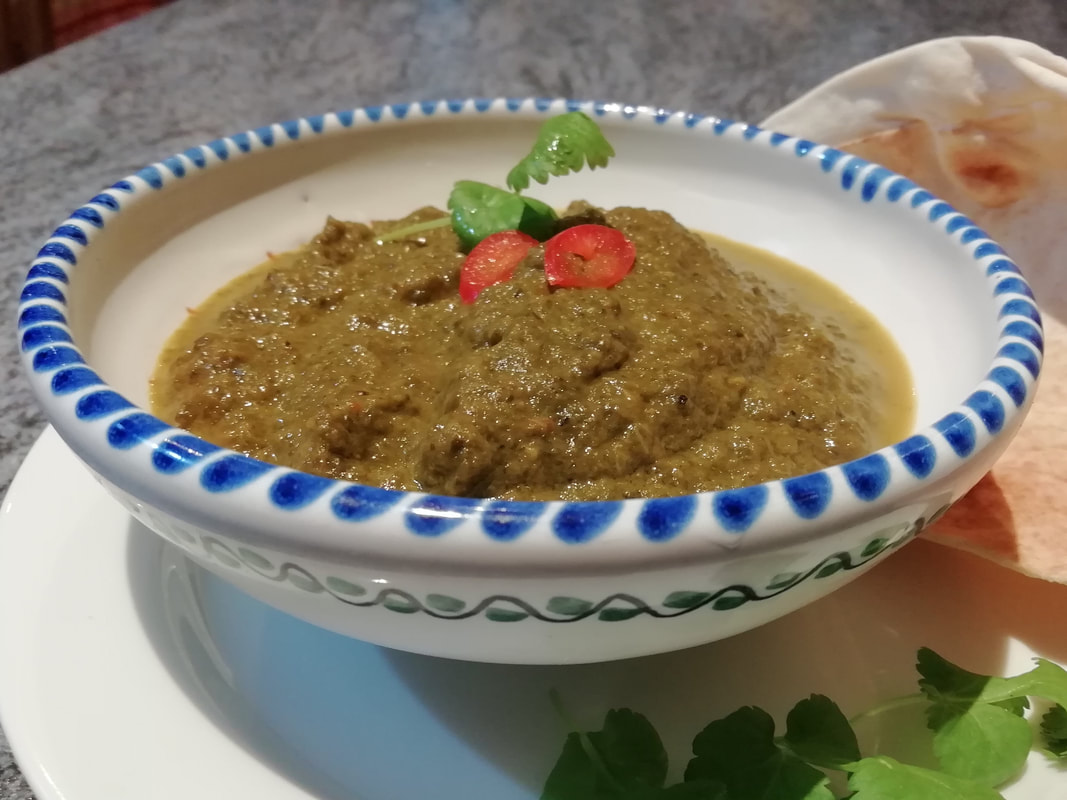 Yummy, mildly-spiced spinach curry sauce - eat as it is or add chicken or lamb Asha’s North Indian Saag – vegan sauce or main, or use with meat
Asha and her husband are our next-door neighbours. She is a marvellous cook and often shares food with us. During lockdown I did a lot of their shopping and Asha reciprocated by passing delicacies over the garden wall on a regular basis. We call each other up and say “come to the wall” – I pass over bags of shopping and she passes over trays wrapped in kitchen foil. My family always love having something from Asha on our table – the flavours are not strong (they don’t like highly spicy things) but elegant and flexible. This is a perfect example of her food – it’s a spinach curry, which can be eaten just as it is, with rice or naan for a vegan meal, or used as a sauce for meat which is separately cooked. It’s not spicy hot, although there is a warmth to it. It’s a very versatile dish - the original recipe calls for spinach – I used chard leaves from my allotment. I used a leek instead of the kale, and you can include a turnip or not depending on what’s in the shops. Serves 4. Timings 20 minutes preparation (if you have to wash the spinach. If you are using a bag from the supermarket it will take less time!) 40 minutes cooking.
Place all the ingredients except the cumin seeds/lemon juice in a pan with about 1 cup of water – you need about 2cm liquid in the bottom of the pan so it depends on what vegetables you have used. Bring to a boil and simmer for 10 minutes until the vegetables are soft. You can also do this in a pressure cooker – bring up to pressure and cook for 2 minutes at high. Cool and liquidise briefly – not too liquid, you still want some texture not a soupy smooth puree. Taste and add salt/pepper as required. You might want a squeeze of lemon juice or a teaspoon of sugar depending on the sweetness of the tomatoes you used – use your judgement. Put about ½ tablespoon vegetable oil in a pan and cook the cumin seeds briefly until browned. Add the spinach mixture and simmer for 15 minutes. It is quite a thick mixture and will spit and bloop in the pan so you’ll need a lid on and stir it sometimes. You just want it to cook down a bit and let the flavours blend. Eat as it is – easy lunch with naan bread or dipping tortillas or add some grilled meat or halloumi or cubed cooked potatoes for additional protein and texture. It also freezes well as a sauce. Nice to have a lighter vegetarian dish as an alternative to all that Christmas protein! |
Some Changes - April 2022
Thanks to my friends and followers for your patience, and for your encouragement to start blogging again. Archives
April 2022
Categories
All
|

 RSS Feed
