 Sparkling rhubarb Bellini, the cocktail of Spring Rhubarb Bellini Cocktail – a reason to celebrate!
Another way to use the delicious spring rhubarb and a wonderfully simple and slightly unusual cocktail to offer to your friends at your Summer Garden Party. Hop over to my Summer of Six pages for some Street Food recipes to provide at the same time. The original Bellini was invented by Giuseppe Cipriani of Harry’s Bar in Venice in the late 1930s, so it’s not from the deep mists of time like the G&T. It was first made with a puree of white peaches which had been marinated in sweet wine, topped up with prosecco. Nowadays, any sweet fruit puree mixed with prosecco can be called a Bellini, and it’s very pleasant to make seasonal and local variations, sweet white peaches being in short supply in Manchester in May. Use the Rhubarb Cordial for which I gave the recipe for earlier this month (search for May recipes or Treat recipes on the index for the blog recipes) and some rhubarb puree. Cook cleaned rhubarb chunks with sugar and only a tablespoon of water for 10 minutes and puree in a blender until smooth. If you have more puree than you need for your cocktails then it is also delicious with plain yoghurt or mixed up with whipped cream for a rhubarb fool. There is no end to the uses of rhubarb. You can make the mix up in advance and keep it cool in the fridge, awaiting your guests. The mixture does tend to separate so you’ll need to stir it up again before serving. If you’ve made too much Bellini, you can always freeze the cordial/puree mixture for another time. You could dress the glass with a frozen raspberry or something but it looks so pretty as it is, why bother? Use your time to make another instead. Serves 6 Timings: 1 hour, if using cordial you made ahead and are keeping in the cupboard against just this eventuality.
Either make up a jug of bellini mixture – 2/3 puree to 1/3 cordial or use 2 teaspoons puree and 1 teaspoon cordial in a glass or flute and top up with prosecco.
0 Comments
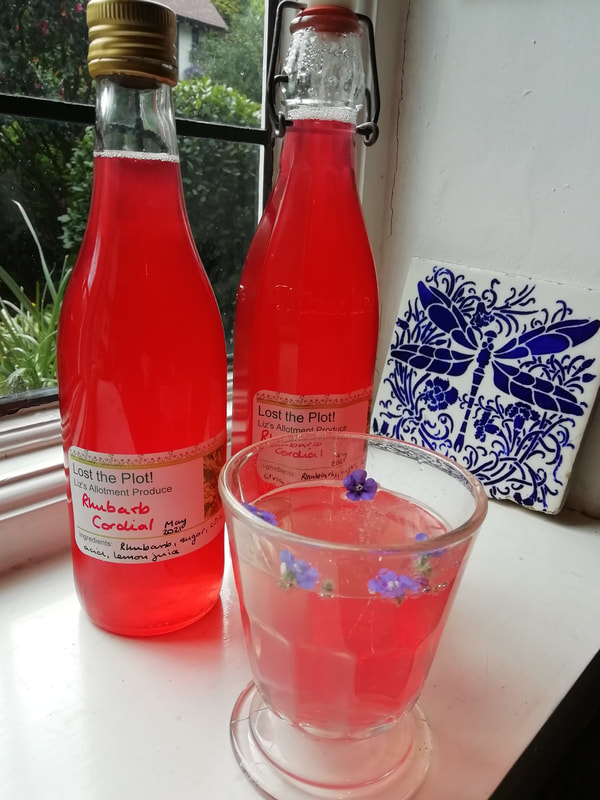 Rhubarb cordial - sweet, pink and rhubarby. Perfect for summer fizz and cocktails. Rhubarb Cordial
Once you’ve made your own fruit cordials, your family will beg you to continue and you won’t look back. You'll start collecting bottles like a mad thing. You can make them out of pretty much any fruit you can lay your hands on. I know that rhubarb isn’t a fruit, but we eat it as such, and you can make the prettiest cordial out of it with an unusual but wonderful flavour. I got the idea for this recipe from Fern Verrow – an inspirational book about a farm run on organic and biodynamic principles and using seasonal produce for sensational taste. Anyone with a garden patch of rhubarb or an allotment will know that it’s difficult to keep rhubarb under control once it gets going. This year, with the rains in January – which turned into a full-on flood in my allotment as the Mersey overflowed – the ground was saturated. Rhubarb loves that; you even need to water rhubarb when it’s raining, it’s that thirsty. This spring, it’s so happy, you can nearly hear it singing as it grows. Once you’ve made enough crumble, cakes, and pies to keep you going, give this cordial a go as well. I use a jelly bag which I hang from a wooden spoon handle put through two cupboard doors in the kitchen, but you can line a sieve with cheesecloth and let it drip through that also. As with all preserving, sterilise your bottles, funnel, jugs, and spoons well to help the cordial keep without spoiling. Makes about 1 litre Timings: 1 hour work with overnight straining
Clean your rhubarb but don’t peel it as if you were making a compote. You want as much of the pink outside string bits as possible for the colour. Cut it into 2cm chunks and put it in a large pan with the water over medium heat. Bring to a simmer and let it cook for about 30 minutes until it is really soft. Spoon the liquid and pulp into a jelly bag and let it drip through into a bowl overnight. Don’t squeeze the bag as you want the juice to be clear. Measure your juice and put it in a large pan. I had 1 litre of juice from this much rhubarb but you might have more or less depending on your type and juiciness of stalks. For every 1 litre of juice add 600g sugar, the juice of 2 lemons and a teaspoon of citric acid. The citric acid helps the cordial keep longer but you can leave it out if you don’t have it – you just need to keep the cordial in the fridge or freezer if you aren’t going to use it in a couple of weeks. Bring to the boil, stirring to dissolve the sugar and then bottle into sterilised bottles. Add sparkling water and a few blue flowers for a perfect summer drink or make a cocktail for something a bit different for your garden party. 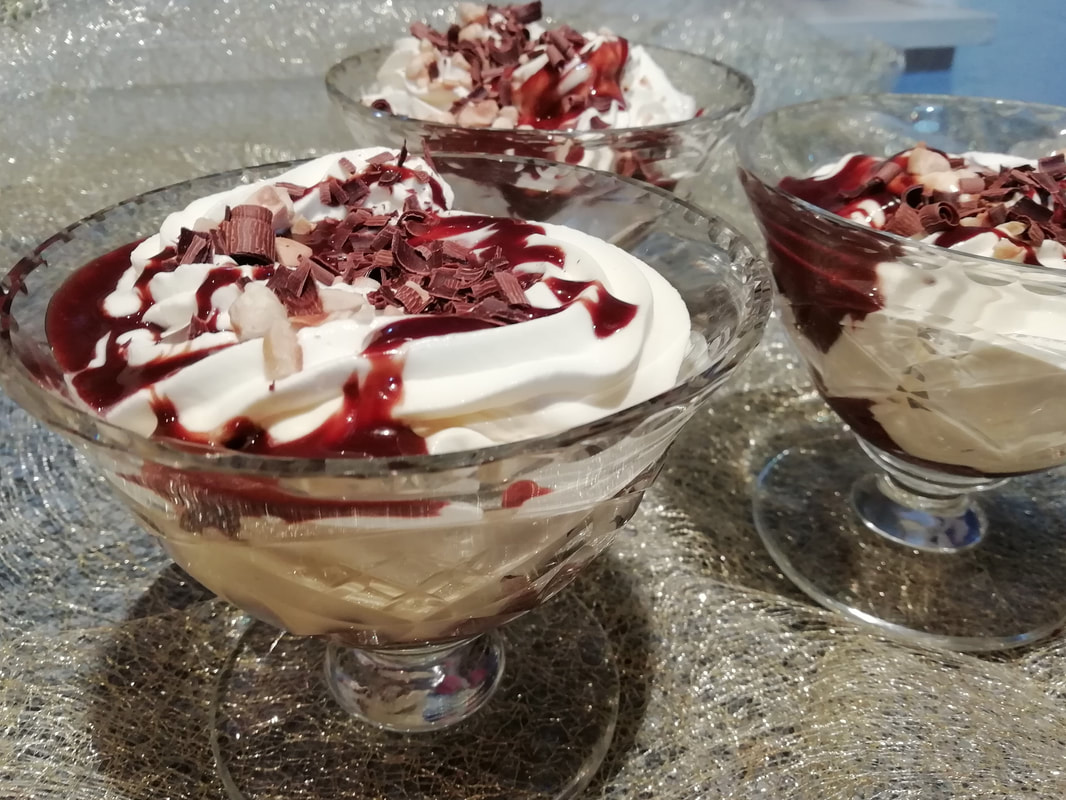 A crowd-pleasing dessert for your outdoor garden party of 6 Coupe Danemark - Ice cream dessert with hot chocolate sauce
This recipe is from one of my Summer of Six menus - the cold weather option. I give three hot dishes to warm up your guests if you're having a Garden Party for Six and snow is forecast. Have a look at From Cologne to Copenhagen for the full menu. The Tivoli Gardens in Copenhagen are a pleasure at any time of the year, but perhaps most at Christmas. The scent of spices and chocolate warms and entices you. I can’t call Coupe Danemark actually a street food, you can’t eat it with bare hands. But even in cold weather, this ice-and-hot sauce dessert is served to eat at streetside tables. It's called Coupe Danemark in Germany and Switzerland (hence the spelling) and Dame Blanche - or White Queen - in Belgium and Holland, but I'm not sure it's got it's own name in Denmark, so I'm using the German name here. I have cheated and used shop bought vanilla ice-cream but I will have some recipes for home made ice-cream on my blog when the weather is more suitable for thinking about making your own frozen desserts. Serves 6. Timings: 10 minutes
Roast the hazelnuts in a small frying pan for a few minutes and bash them with a potato masher or solid block to get crumbled pieces. Leave on kitchen paper to cool. Put all the sauce ingredients into a microwave bowl and blast for 30 seconds. Stir, blast again for 30 seconds. Check the consistency, if you need more butter, add a little more to keep the sauce glossy and pourable. Spoon a generous helping of ice-cream into each sundae dish. Pipe cream round the outside and spoon hot sauce down the middle, so it hits the ice cream. Pipe a little cream on top and sprinkle over some roast chopped hazelnuts. Serve straightaway with a few chocolate sprinkles or curls on top. 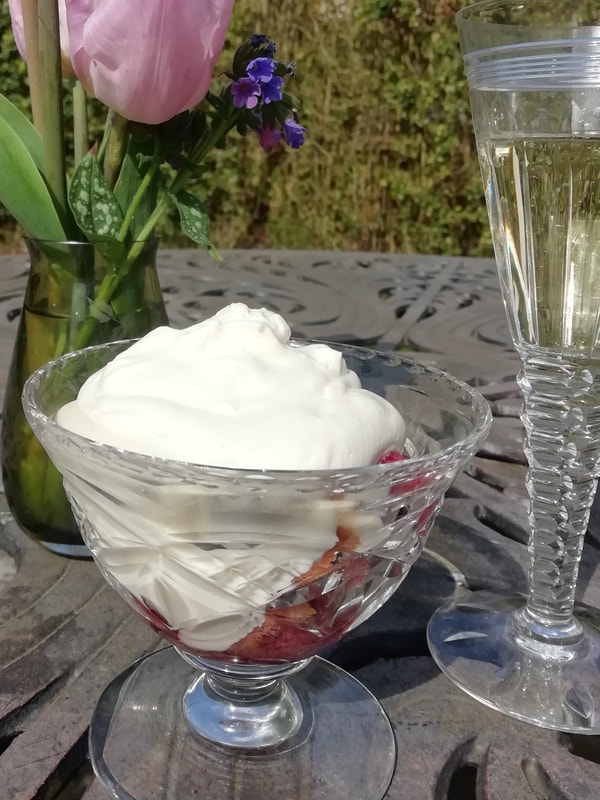 Soft sponge, boozy fruit, sweet custard and cloudy whipped cream - a Scottish pudding dream! Tipsy Parson
A retro dessert from my Scottish heritage. I discovered this pudding in letters sent from my Mum to my Granny in the 1940s when my Mum was on national service in the WRENS. She was stationed in the south of England and was delighted to be invited for an evening meal by some relatives and offered a familiar dish. She mentioned it in her letter home and I did some research. It’s basically an economical wartime take on the traditional Trifle. It uses up the ends of old sponge cakes, some fruit preserved in liqueur, custard and cream. Anyone with a garden in wartime would have tried to preserve fruit in some way, and they might also have kept hens, so ensuring a plentiful supply of eggs to be made into custard. I have re-created it using my own damson vodka (recipe to come at the appropriate time of year) to marinate the fruit and a bought custard rather than home made. I find making a thin spooning-texture crème anglaise style custard, which is what goes best here, rather difficult. I probably don’t have the patience. So I used a bought chilled custard instead, which worked very well. We didn’t have a Seniors Lunch Club round on Thursday as we are “on holiday”, so I didn’t bake a cake. We did meet on audio conference though, and we talked about what we did at Easter. Members saw their families and grandchildren, went to Church, went out for a drive or a walk and enjoyed the bright but cold weather. I made this dessert for a party of six people in my garden this week. We huddled under rugs and cuddled hot water bottles and feasted and drank with great joy. See my new page, The Summer of Six for suggested menus for outdoor parties for six guests. Serves 6. Timings: 1 hour the day before you serve, 20 minutes on the day you eat. For the Genoese Sponge: (you can use bought sponge, for instance a swiss roll, but I find the bought ones are too sweet and often a bit stodgy. Your own will be light as a feather.)
The day before you eat, make the cake. Preheat your oven to 180°C and grease and line a small cake tin. Melt the butter but don’t let it bubble. Whisk the sugar and eggs together until light and fluffy. Sieve the flour and mix it in one spoonful at a time. Stir in the butter carefully and spoon the mixture into the cake tin. Bake for 20 minutes until golden brown and a skewer comes out clean. Cool on a wire rack and keep in an airtight tin. You can also bake this well ahead and freeze. While that’s baking, stone and clean the fruit you are using and mix it with the liqueur and sugar in a bowl. Stir, cover, and leave in the fridge. On the day of serving, whip the cream – this can be done ahead and kept covered in the fridge for 2 hours. When you are about to eat, place some slices of cake in the bottoms of individual bowls. Spoon over the fruit, being generous with the liqueur. Dollop a large spoon of custard over each bowl and then top with whipped cream. 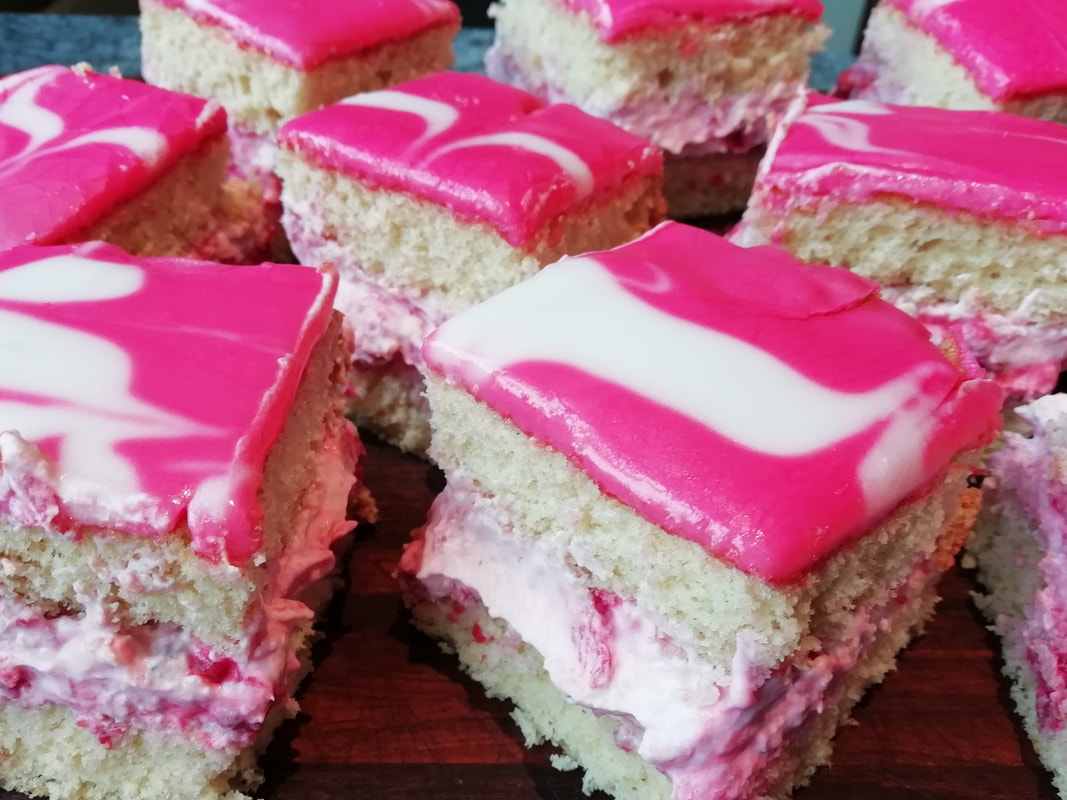 Colourful and creamy - sponge cake with raspberry cream filling March Cake – Raspberry Cream Sponge
I just made this up. So far as I know, nowhere in the Northern Hemisphere is March peak time for raspberries. I could have made Welsh Cakes for my Seniors Lunch Club group as our theme for this week was Wales and St. David but some of our members aren’t too keen on raisins. It was my Mum’s birthday in March, and she always had pink icing on her cake, so I thought I’d do something like that. Then pink icing made me think of raspberries, and there you are. I’m sorry about the food miles, but you could make this with European frozen raspberries, so salve your conscience and do that. This is based on the Genoese sponge that is the One True Cake – the only recipe you really need to know. I made the simplest version possible, flavoured with vanilla – which was the one my Mum always made anyway, so it’s very fitting. I just iced it with pink and white water-icing, and then filled it with whipped cream stirred up with crushed raspberries and caster sugar. Our Seniors Lunch Club discussion was about Wales, and our memories of Wales. As we are based in Manchester and only a few miles from North Wales, we had a lot of holiday reminiscences – beaches, rain, fog, castles, mountains. We’ve loved the scenery, the history, the food, steam railways and climbing Snowdon. Holiday camps, beachside caravans and boarding houses were happy memories – not many of us had the budget to stay in hotels! We disagreed on our memories of the weather. For some, it was only sunshine in byegone Wales, but for others bad weather was to be expected and planned for – cars were packed with books, wellingtons, board games and rainy day projects. Makes 16 squares. Timings: 1 hour to prepare and bake the cake, another hour to cool and ice.
For the water icing: 200g icing sugar, red food colouring Pre-heat the oven to 180°C. Prepare a 24cm square cake tin, grease it and line with baking parchment. Make a simple Genoese sponge: whisk the eggs and sugar together either with a mixer or over a bowl of hot water, until thick and creamy texture. This takes only about 3-4 minutes in the mixer. While these are beating up, melt the butter and sieve the flour. Turn the mixer down to low and add the flour to the egg/sugar foam gradually, adding the vanilla essence at the same time if using. Turn off the mixer and using a metal spoon, stir in the melted butter. Spoon the mixture into the prepared cake tin and bake about 30 minutes till golden on top and a skewer comes out clean. Cool 5 minutes in the tin and turn out onto a rack, remove the parchment. Leave to cool. When cool, cut the cake in half through the middle carefully using your biggest breadknife. The cake will keep fresh in a sealed tin for at least a day at this stage. It also freezes very well wrapped up in cling film, so it can be made well ahead of time. Ice the top of the cake with water icing. Make the pink icing with most of the icing sugar and a little water and the food colouring and make up a white icing in a small bowl with the rest of the sugar. Ice the cake with the pink icing and then drizzle lines of white icing vertically across the pink. Use a skewer to drag the white icing attractively through the pink and leave to set. Just when you are ready to eat the cake, mush up the raspberries with the caster sugar. Whip the cream until fairly stiff and then mix the raspberry slump into the cream. Spread this through the middle of the cake and put the top back on. Keep in the fridge if you aren’t eating it immediately and eat within 1 day of making.  Chewy, crunchy, sweet and satisfying, Millionaire's Shortbread Millionaire’s Shortbread
Yes, I know it’s got about a million calories per piece – which is why it’s called millionaire’s shortbread, yeh? but it is totally delicious, and you can always eat just a small piece, can’t you? As a treat? And then don’t have any more. Until the tin is empty. It’s a bit of a stop-start to make as you have to make the three layers in sequence, so you need to be around and in the kitchen for a few hours off and on but each layer doesn’t take very long so you can do other things in between. I researched a bit before finalising this recipe and I based it mainly on Jane’s Patisserie – Jane has a lovely baking site, so if you want further inspiration, head over to Janespatisserie.com for lots of lovely cakes and sweet things. Our Seniors Lunch Club discussion this week was about Garden Birds. Our favourite birds were blackbirds and robins because of their songs, but there was strong support for starlings due to their cheeky nature and their amazing flocking murmurations. One of our members has a tame blackbird who comes to the back door for his food, but the robin used to steal the worms she fed to her pond-living frogs, so she wasn’t so keen on him. Makes 16 small squares Timings: about 3 hours but with rest/cooling periods in between phases For the shortbread:
For the caramel:
300g chocolate for the topping Pre heat your oven to 180°C. Line and grease a 22cm square cake tin, quite deep. You can use any shape tin you like of course, but to cut even squares, a square tin is best. Make the shortbread: Cream the butter and sugar together, either by hand or in a mixer with the paddle. Add the flour little by little until you have a crumbly dough. Knead very quickly just to bring it together and then press the dough into the bottom of the cake tin. Bake for about 25-30 minutes (depends on the size and depth of your tin) until light brown. Watch out, shortbread can turn from just right to overcooked quite quickly, so be careful. Take it out of the oven, put the tin on a rack and let it cool down. Make the caramel: Put all the ingredients into a heavy bottomed pan – one of those cast iron/enamel pans is good. Stir over a low heat very slowly until the sugar is properly dissolved – you must keep the heat low until the grittiness of sugar is gone. This stage takes a good ten minutes. Now turn the heat up a little and move the pan onto the smallest burner – this is to stop the mixture burning in the corners of the pan. Constant stirring – use a wooden spatula with a flat end to scoop the mixture off the bottom of the pan. Cook and stir for about 7-10 minutes until the mixture has changed to a golden caramel colour, and when you move the spatula through the mixture you can see the bottom of the pan for a second – it’s really getting thicker. Watch out for splashes and bubbles, the boiling sugar mixture is hot. Pour the caramel onto the top of your shortbread and smooth out. Let the tin cool on the worktop and then place it in the fridge to cool down a bit further. Melt the chocolate in a bowl over hot water until smooth, then pour over the top of your set caramel. Leave to cool. If you’re cleverer than I am, melt two colours of chocolate in separate bowls and stir them on top of the caramel – I put them both in the same bowl so there weren’t any swirls of white chocolate in among the dark! Never mind, it tasted great and I’ll know for next time. 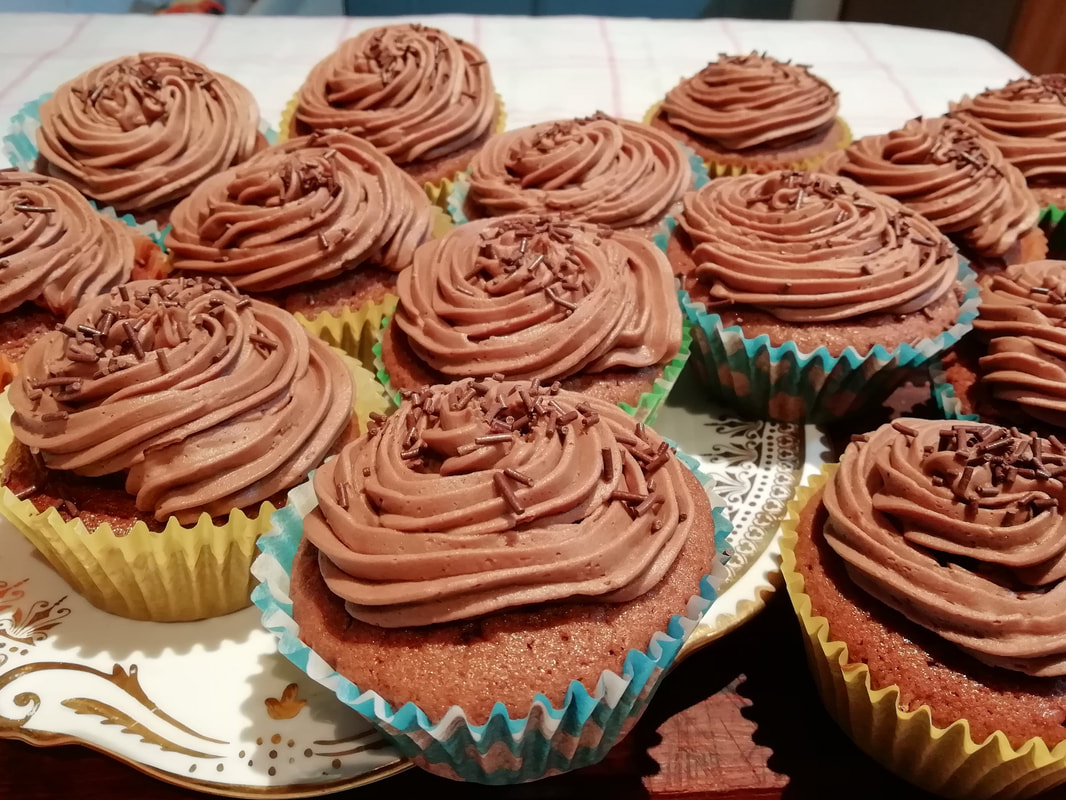 Chocolate Cup Cakes with buttercream icing - indulgent portion-sized treats Chocolate Cup Cakes
Easy peasy: these are the standard fare of cake sales, cooking lessons, family baking for lunch boxes and for my Seniors Lunch Club group delivery. They’re bouncy, fluffy and portion sized. You can flavour them as you like – vanilla, chocolate, coffee. Watch out if you want citrus flavours – adding lemon juice to the mixture tends to inhibit the rise, so add citrus by using grated rind in the mixture and making the icing with the strongly flavoured juice. You can make them slightly richer by adding buttercream icing, or plainer by using water icing. Decorate with chocolate curls or sprinkles as you desire, let your creativity and imagination run free! In the Seniors Lunch Group, our discussion this week was “What Have I got to be Grateful For?” which was a theme originally chosen by a member who is sadly no longer with us – but who was an example of interest, flair and enjoyment in life right up to her last days in her late 90s. An inspiration. We discussed our gratitude for family, friends and helpers. One member told us a story about adopting her daughter – she was so grateful to the child’s biological mother for being willing to give her up to a better home. We loved remembering dance competitions, valuing your own talent for drawing, being in a choir. The basic blessings which are so often taken for granted – the telephone, modern communications, classical music on the radio, central heating, driving a car. The world of work and study: being trained in a skill, being part of a team, doing a good job and gaining self-respect. Skills and sport – playing tennis and golf, being a soccer referee and working with blind children to help them play using a ball with a bell in it! What a set of varied and valued experiences we had to look back on with thankfulness and joy. Uplifting as ever. Makes 18 cup cakes. Timings – 10 minutes preparation, 20 minutes baking, time to cool down and 20 minutes to ice and decorate.
For the icing: 100g butter, quite soft, 200g icing sugar, sieved, 30g cocoa powder, 2 teaspoons coffee powder mixed with 2 teaspoons warm water, or some coffee essence. Pre heat the oven to 190°C Beat the butter with the sugar until light and fluffy and all beaten in together. Add the eggs one at a time along with a spoonful of the flour each time. Add the rest of the flour and beat in the yoghurt. The yoghurt is not 100% necessary – the buns will be perfectly nice without it – but I find that cupcakes can be a little dry because of their small volume and adding a little yoghurt or cream to the mixture just makes them that little bit softer. Spoon the mixture into cupcake papers and bake for 20 minutes -check after 15 minutes and maybe turn the tray around. I prefer to bake one tray of these at a time to avoid switching levels in the oven, and the mixture won’t hurt to stand while you bake the first batch. Put the cupcakes on a wire rack to cool down before you decorate and ice them. To make the icing, just beat the butter until fluffy (I find a hand mixer is more efficient if you have a choice as the whisk of the big mixer doesn’t get into all the corners of the bowl and you end up with some butter smeared round the edge that hasn’t been reached) and add the icing sugar spoon by spoon and then the coffee essence – this is optional but does give a lovely mild coffee-contrast to the chocolate flavour. Spoon the icing mixture into a piping bag with a large star nozzle and pipe round each bun, sprinkle with chocolate shavings or sprinkles if you like. I couldn’t honestly say the cup cakes are as uplifting as my Seniors group high spirits, but they make you feel good too, in a different way! Enjoy. Marmalade
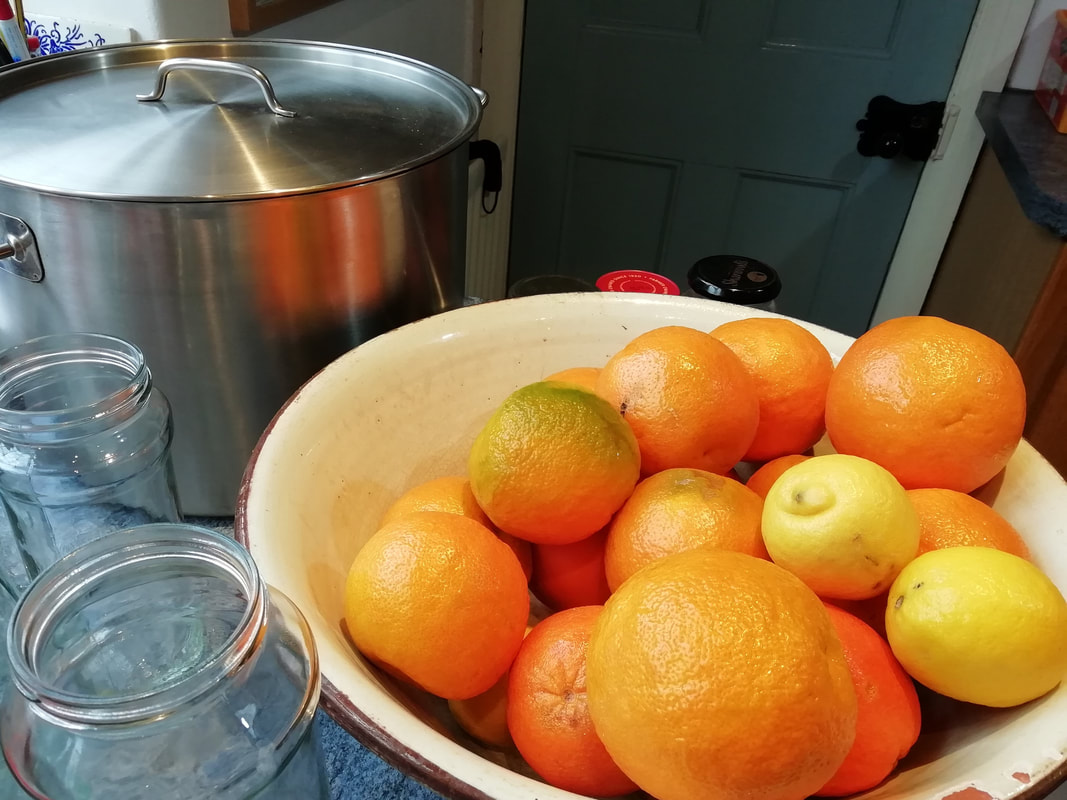
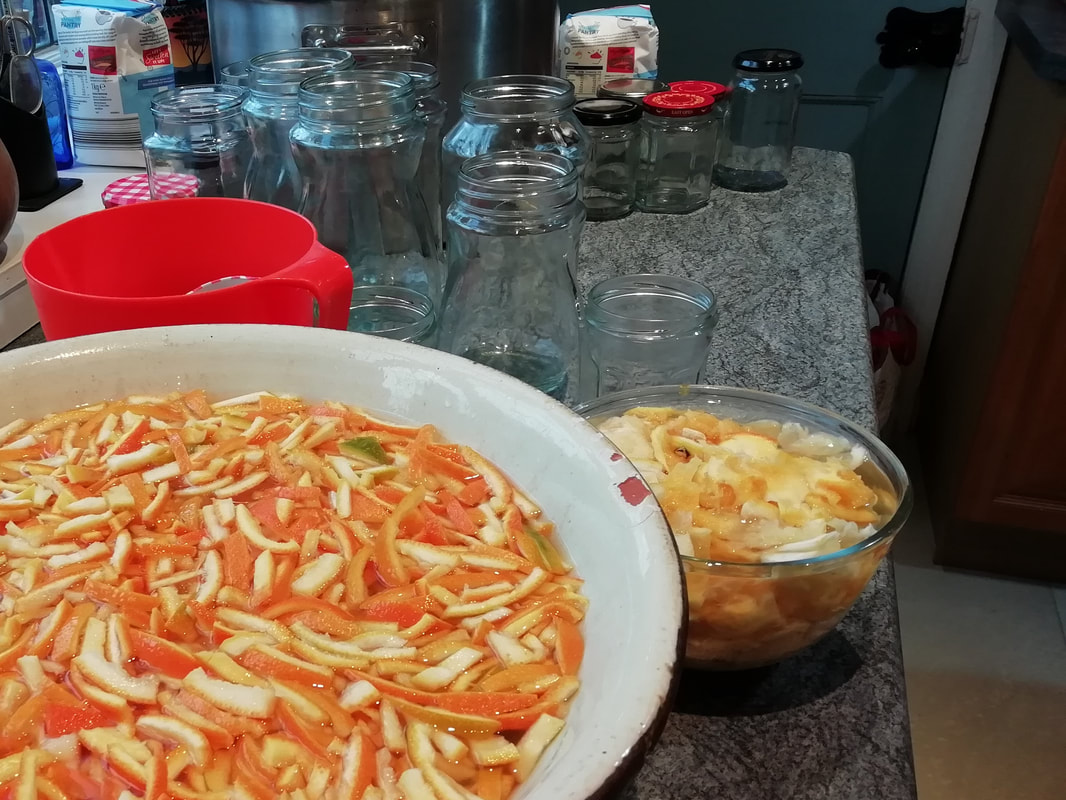
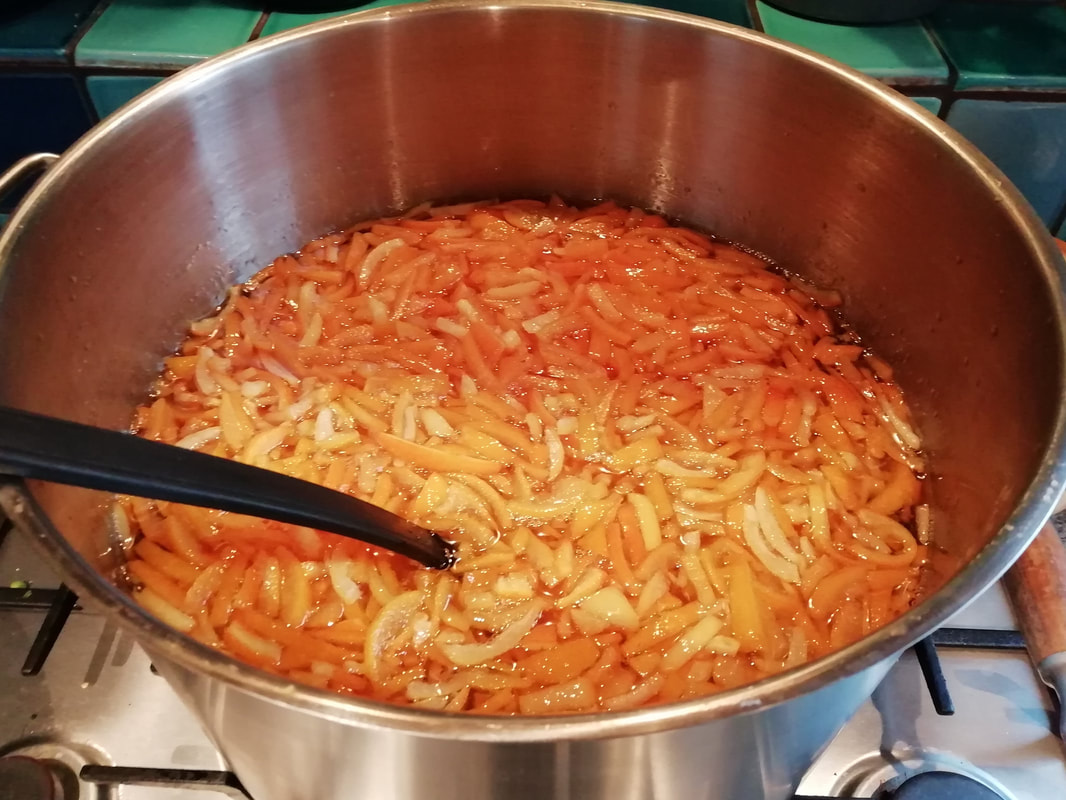
This is a very long post, but I hope you find it worth it - I wanted to give all the details of the method as I know some people find it quite daunting. If you make it, please let me know how it goes. My Mum was a veteran marmalade maker and used the jars of glowing goodness nearly as currency within the family. She’d take a jar or two along to every family occasion as gifts, and you knew how high in her favour you were if you got more than one. She strongly believed in the health properties of marmalade - the bitterness stimulates your guts when eaten first thing in the morning and keeps you regular (is the theory). Of course, marmalade appeals to the thrifty Scot also, being made of the whole fruit, nothing wasted, even the pips. When travelling, she usually took a pot with her, not trusting the little plastic packs you get in hotels, and even when she and my Dad got older and spent more time in hospitals than hotels, they packed the marmalade with them. So for me, this is a real taste of home. She usually made at least two huge batches per year, and January in our house was scented with the bitter tang of boiling Seville oranges. It is more complicated than jam to make, but it is so very worth it. Instead of a recipe with actual weights, I’m giving proportions here – you might be a marmalade fiend and wish to make a whole year’s supply or you might be a marmalade take-it-or-leave-it person but wish to make a few gifts for family and friends. Either way, put a weekend aside in January when the Seville oranges come into the shops and dedicate it, you won’t have much energy for a lot of socialising. And it’s a two day job – about half a day’s work on each day. Your actual production quantity is probably limited by the size of your largest pan – if you don’t have a huge pan, ask around your friends, someone might have a preserves pan – you do need a lot of space for the mixture to boil up. I’m using both metric and imperial measures here, as that’s the way my recipe is written. I don’t think it matters which you use but thinking about pounds and pints brings back my childhood for me. Using the following proportions: 450g (1 lb in my Mum’s recipe) of Seville oranges with 1 sweet orange and 1 lemon. That's picture 1 above. I used about 2.5kg of Seville oranges (11 fruit) with 5 large sweet oranges and 5 lemons and ended up with 4kg fruit. Unwaxed fruit if you can get it, but you can’t always. Weigh the fruit you have and record it. You will later need 1 litre of water per 450g of fruit. This made 6 big coffee jars and 11 smaller jam jars full – and this lasts me at least 2 years with a lot given away as presents. Wash the fruit well, scrubbing with detergent – bio is best! The reason for this is that citrus fruits, along with grapes, are the most sprayed fruits you can buy, so they need to be very well washed, and sometimes there is wax on the skin. Halve the fruits and squeeze out the juice and pips. Keep the pips separate in a bowl along with any pulp that comes out with them. Clean up the fruit halves, scraping out the stringy bits and some of the white pith – you can use a spoon to dig into the skin and tear out the pith. Chop up the fruit skins into whatever size strips of peel you like in your marmalade, I like it quite thin. Takes quite some time but really is best done by hand not in a machine. I tried a food processor one year and got tiny bits of peel that weren’t quite right and a lot of mush. Don’t worry too much about taking away all the white pith, it will turn clear and candied by the final stages. Put some water in the bowl with the pips – it will gel quite quickly due to the pectin in the pips, which is what you want. Add enough water to allow the pips to soak. Add the rest of the water (calculated above as 2 pints per lb of fruit) to the peel and the juice in your largest bowl. Let both bowls soak overnight. Picture 2 above. Next day, boil the stones for an hour – watch that the liquid is not too thick and catches on the pan and starts to burn – add enough water now and then to stop this happening. When boiled, strain the mixture and scrape it through the sieve to get out all the gelling pectin, it will be quite thick and need pressing through the sieve. Boil the peel/juice/water mixture until the peel is soft, about ½ - ¾ hour. You can do this at the same time as boiling the stones. While these are boiling, you can sterilise your jars – I fill them all with boiling water, let it cool a bit, empty out and then keep the jars upside down in a warm oven – this allows them to dry out and keeps them warm so they don’t crack when you fill them with hot marmalade later on. Measure how much liquid you now have. Add the pectin gel from the stone to the rest, and now add 1kg of sugar per litre of liquid (1 lb per pint, for Mum). Bring to a rolling boil and up to setting point. This can take over an hour. You need to keep an eye on it and keep stirring if you don’t have quite a big enough pan to let the sugary mixture rise up with its boil, to stop it boiling over. Picture 3 above. Setting point is best measured with a jam thermometer and when it hits 104.5°C but you can use any other method you find OK. I have found that the cool saucer/wrinkly jam method is not very reliable for a low pectin jam like marmalade and on at least one occasion I have had to de-jar all my marmalade and boil it all again another day after the mixture did not set even when it cooled. Once setting point is reached, let the pan of marmalade cool for at least 15 minutes before jarring – this helps to keep the peel distributed through the jar and stop it all rising to the top. Note, it might take longer to cool to this point if you are making industrial quantities – just keep looking as it cools and when the peel is starting to sink down, then you can start to jar it. That's picture 4 above, my whole production. Put into sterilised jars and use greaseproof paper tops and jam tops under the jar lids to help keep the marmalade from drying out over time. This can keep up to 5 years (from personal experience!) and does get better over the year. 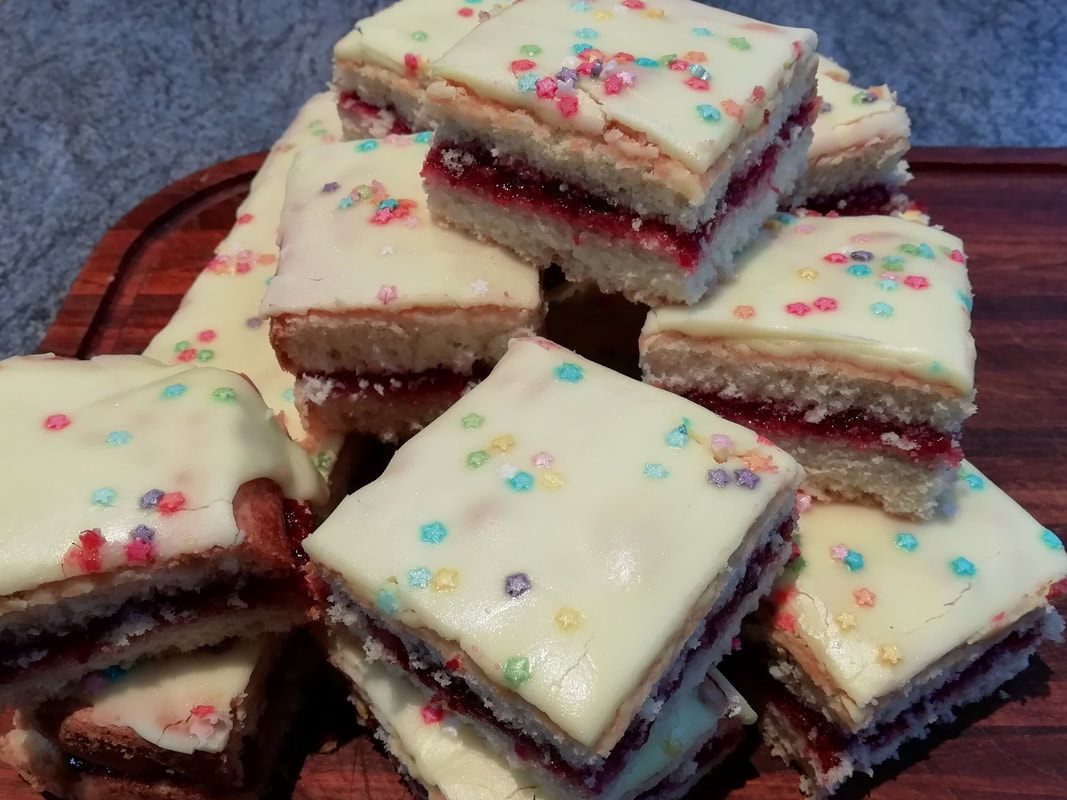 Light sponge, flavoured with vanilla, simply filled with raspberry jam Genoese Sponge Cake
This is THE classic recipe, if you only make one cake, let this one be it. Forget your (rather stodgy) Victoria Sponge and your (limited appeal) fruit cakes. The Genoese sponge is nearly fatless, light, bouncy, easy and can be flavoured in just about any way. My Mum made one of these about every three days, filled it with raspberry jam, dusted it with icing sugar and served it with a cup of tea when we came home from school. Yes, you can criticise, full of sugar. But have you seen the 1960s cake tins? They are about 1/3 the depth of ours. I suspect Mum’s recipe was 2 eggs, 100g of sugar and flour, and a tiny pat of melted butter – and that made two thin layers, which were sandwiched together with home made jam and lasted 3 days between 3 hungry tea-eaters. It’s not such a sin, is it? For birthdays she’d top it with buttercream icing, and on really special occasions she’d flavour the whole thing with chocolate. Once you’ve made three, you can just about make it in your sleep, it’s so tolerant and easy. I made this example for my Seniors Lunch Club, and I’m afraid it isn’t my most photogenic attempt at cakes. I used yellow colour in the icing to be cheerful and spring like, and it is, isn’t it? If you like your cheerfulness a rather nuclear shade of yellow, this is the icing for you. It’s simply filled with jam and iced with water icing – I felt we needed something quite simple after Christmas. For our first conference call after the break, my Seniors Lunch Club played the game: “Room 101”. Each member chose some items/people/attributes of modern life they wished to consign to oblivion and then defended their choice from the rest of the group. Previously one of our volunteers has consistently done away with coriander – we didn’t allow her to choose that again this time. Other choices of outlawing little dogs or wasps were also dismissed. We had an utterly hilarious discussion and never made it to the quiz, which normally takes us the last 20 minutes of our time together. We banned “inappropriate use of mobile phones” - ie. People talking on their phones while talking to you, or using them in concerts, “queue jumpers”, “covid”, “junk mail”, “really hot curry”, “too small writing on forms you have to fill in” and “music in restaurants”. We allowed a reprieve for Nicola Sturgeon, chicken Korma, DVD catalogues, accents on TV. Next week our theme is “What Have I Got to be Grateful For?” which we usually have the week after a Room 101 session – as a positive antidote to the negative vibes! Genoese Sponge – makes 16 portions. Timings – 15 minutes preparation, 25 minutes cooking, 1 hour to cool down, and 15 minutes to fill and ice.
Pre heat your oven to 180°C. In your mixer, beat the eggs and sugar until fluffy – takes about 5 minutes. At the same time melt the butter in a small pan – then take it off the heat - and weigh out and sieve the flour. Grease and line a cake tin – for this amount I use a 22cm square tin, which makes a cake that is also easy to portion out. When the eggs/sugar mix is beaten up, add the flour gradually, beating on a lower speed. Add the vanilla essence if using that rather than vanilla sugar. Spoon the butter on top and mix up the whole thing gently with a metal spoon – this keeps the air in the mix better than the rather coarser effect of a wooden spoon. Scoop the batter into the cake tin and place in the oven for about 20 minutes until the cake is risen, golden on top and springy to the touch and a skewer comes out clean. Take it out, and leave to cool on a wire rack, then turn it out of the tin, peel off the paper, turn right way up again and leave to cool completely. At this stage, you can wrap it well in greaseproof paper and freeze it if you like. Slice the cake through the equator carefully with a bread knife and fill with jam or with buttercream if you want something richer. Top with plain water icing, or dust with icing sugar. Eat within 2 days. You won’t have a problem with that.  Sweet, delicate, crispy custard tarts - couldn't be more tempting! Pastel de Nata – Portuguese Custard Tarts
As explained to me on a lively on-line cooking course, these little items of rich sweet deliciousness are more than Portuguese, they are fully international. Chef João Batalha from the Lisbon Pastelaria Batalha taught us that the Portuguese sailors and explorers took the recipe with them and versions are now found throughout China, South America and Europe. The difference to the custard tarts of English heritage is the flavouring – these use lemon and cinnamon instead of vanilla. Chef João Batalha, being a proper cook, made his puff pastry from scratch. Me, being an imperfect cook, used the bought rolled puff pastry, and they turned out great nevertheless. I have João’s permission to use his recipe – many thanks for sharing, João! I’m sure everyone will appreciate how easy these are and how super tasty. They are eaten for breakfast with a cup of strong coffee, as a snack or for dessert. They do use a LOT of eggs, but you can always use up the whites in meringue, add to a quiche filling or fluff up an omelet with them. I took these round my Senior’s Lunch Club group, along with mince pies for the Christmas treat, as we do have some dried-fruit dislikers in the group. We had a lovely Christmas Party audio conference call, discussing what we were looking forward to at Christmas – mainly it was seeing what relatives we’re allowed to meet. Anticipating the crispy fluffy roast potatoes and the boozy trifle was also a popular theme. It seems you don’t lose your zest for festive meals in your 90s! We wore home-made paper hats, shouted “BANG!” in chorus, groaned at some truly dreadful cracker-jokes and played a few rounds of Christmas-character Who Am I? Frosty the Snowman was quite easy, but Rudolph defeated our guessing capability. Makes 15 tarts. Timings - 30 minutes preparation, 15 minutes cooking, then cooling time.
Take the pastry out of the fridge, remove it from its cardboard wrapper and the plastic wrapper and leave it on the worktop, still in its greaseproof paper wrap, to warm a little bit while you start the custard. Put the milk in a pan. Add the cinnamon stick/cassia bark and the piece of fresh lemon peel. Heat the pan strongly to bring the milk to the boil. Sieve the flour and sugar into a bowl. When the milk is heated, just before boiling, take it off the heat and add in the flour/sugar, a little bit at a time and whisking to avoid lumps. Put the pan back on the heat and cook until the mixture is getting thick, stirring all the time. It doesn’t take long to reach a texture like cream. Take the pan off the heat and leave it to cool. It needs to be about body heat before you mix in the eggs. Now deal with the pastry. A key feature of Pastel de Nata is the puff pastry laminations can be seen on the bottom of the tart like the rings in a tree trunk – they run in concentric circles. This is partly why the tarts are so crispy, so it’s important to get right. Unroll the pastry to a flat rectangle – keeping it on its own greaseproof paper square. Taking the long side, start to roll it very tightly into a long sausage shape. You might need to really pinch the first roll or two to make sure there are no air spaces trapped inside the roll. Roll up the whole thing quite tightly, wrap it back up in the greaseproof paper it comes in and put it back in the fridge to chill. Heat the oven to quite high – you need a good hot air circulation to encourage the pastry to rise up and crisp and the custard to puff up, so if you have both fan and top/bottom heating, use both, and take it to 240°C. Get the oven good and warm, let it reach temperature fully and give it another few minutes. Take the pastry out of the fridge and cut the sausage shape as equally as you can into 15 little roll-shaped sections. Take a section of pastry and put it cut side down in the tart tin. You can use special individual Pastel de Nata tins, which are non-stick, and have a slightly flared shape. If you use a 12-cup bun tin, you will need to be quite agile with the forming of the pastry, but it can be done. Have a bowl of cold water to hand. Dip your thumb into the water and then press it into the middle of the pastry section, squashing down the pastry to the bottom of the little tin. Using your thumb, and turning the tin as you go, squish the pastry up the sides of the tin, until it comes up over the edge. You need it higher than the edge, to hold in the filling. And you are fine if it’s quite thin on the base, as that will make it crispier. Keep on doing this until all your tins are filled with pastry. Now add the egg yolks to the cooled milk/flour mixture and remove the lemon peel and the cinnamon/cassia. You will notice that the flavouring has entered the custard and is very delicate. (well, you will if you’re like me and can’t resist licking the custard off the cassia piece.) Fill each pastry case with the custard mixture to about 1/2cm below the rim. Put into the oven for about 6 minutes, then turn the tray round to cook the tarts evenly and cook for another 5-6 minutes, keeping an eye on them. You want the custard to cook on the top and form those lovely caramelised light burn marks but you don’t want it to catch and go darker brown. Take out of the oven when the custard has only the slightest wobble. Leave in the tins to cool down, then put on a wire rack to cool fully. They are utterly delicious eaten luke-warm – but you’ll burn your mouth on the hot sugary custard if you don’t leave them a while – they hold the heat a long time! You can sprinkle them with a very light dusting of cinnamon sugar if you like but they really need nothing more than a good cup of coffee. |
Some Changes - April 2022
Thanks to my friends and followers for your patience, and for your encouragement to start blogging again. Archives
April 2022
Categories
All
|

 RSS Feed
