 Punchy tangy tingly gazpacho, full of vegetables to make you smile Gazpacho (vegan)
Packs a punch, Gazpacho does. It doesn’t leave you in the dark as to its intentions. It wants to jump up and shout, and make you do the same. It’s a cold soup, made from raw vegetables, and you can feel it doing you good, as well as waking up your tastebuds. I used to make this quite often in the summer and take it to work in a chilled thermos flask for my lunch. Apart from the aroma of garlic making it obvious what I was eating, the little moans of pleasure from my desk caused much merriment in the office. Never mind, anything that makes you feel that good at work should be encouraged. Do make it a day ahead so the flavours can meld, and serve it as chilled as you can, as that suits it. You can adjust the proportions to your own tastes – I quite like the sharp vinegary tang, but you can reduce the amount of vinegar if you want a gentler approach. If you have fresh parsley to hand, it’s lovely to add some towards the end of the blend so you get it rather roughly chopped, but it’s not part of the classic recipe. For a dinner party, you can serve little chopped vegetables as a topping and let everyone choose their own, but it’s not necessary for a family lunch. Serves 4 Timings: 30 minutes and then at least 2 hours to chill
Put the whole lot into the bowl of your blender and add about 200ml cold water, some salt and pepper. Blend until fairly smooth. Add the parsley at this time if using. Blend again, and taste for seasoning and acidity. You can add a teaspoon of sugar to balance the acidity, a little more salt or a little more oil. Blend and chill until needed. The soup will keep at least 2 days in the fridge.
0 Comments
 Al dente brown lentils, mixed with fresh chopped vegetables in a herby dressing. Spanish Lentil Salad (vegan option)
The Spanish are so good at meals for hot weather, they have to be. When we’re in a heatwave here in Blighty, we crave cooling but nourishing dishes, and can do no better than to take a lesson from our Spanish cousins. Lentil salad is a quiet classic. Easy to make, keeps in the fridge for days, goes with just about anything, and you can eat it on its own or put a boiled egg on top for an extra bit of excitement. Perfect for lunchboxes and relaxed lunches alike. This salad has the taste of Spain in a subtle way – the dressing contains pimento pepper, which is like paprika, and cumin for that very slightly Arabic edge. It’s not spicy, but if you want to spice it up a bit you could certainly add some sliced chilli to the vegetables or a teaspoon of chilli to the dressing. I adapted the recipe from SpanishSabores.com who have a whole host of inspiring Spanish recipes on line but I was really trying to re-create the dish I had at Finca el Cerillo in the hills above Malaga and I think I’ve got the essence of it here. You could add some feta cheese, or some other herbs. If you add tomatoes, then it won’t keep as long because of the additional juice, but they are very pleasant in the salad too. Serves 8 as part of a selection of salads Timings: 1 hour
Put the lentils and the lentil vegetables on to boil in a large pan – about 2cm of water covering the top of the lentils. Bring to the boil and simmer while you grill the peppers. Simmer the lentils for about 15 minutes, then check – they should be just done, with a bit of texture to them. Test them and give them another 5 minutes if you think they aren’t done enough but be careful, you don’t want to overcook. When they’re done, drain in a sieve and leave to cool down. Remove the vegetables that were boiled with the lentils. While the lentil simmer, put the peppers on a tray under a hot grill and keep turning them as the skin blisters and blackens. When they are blackened on all sides, put them straight into a glass bowl with a plate on top. (Much better than the old method of putting grilled peppers in a plastic bag – we now know that we’d rather not have plastic touching hot food.) Give them 10 minutes to collapse and cool down while you make the dressing. To make the dressing: shake all the ingredients together in a jar, and taste. Adjust the seasoning, you might need more salt or lemon juice or honey. Go back to the peppers and now you can peel them easily, scraping away the skin from the flesh and discarding the insides and the seeds. Chop the flesh of the peppers into small dice. Clean and chop the other fresh vegetables and then mix everything together. Chill in the fridge for at least an hour or better 3 hours before serving. Keeps for several days in a sealed container in the fridge.  Add some glowing red sauerkraut to your salad or your sandwich! Ruby Sauerkraut (vegan)
OK, so there are as many recipes for Sauerkraut as there are German grandmothers in the world, and every single one of them believes their way is best. Never mind, unless you are in possession of a German grandmother, then you need a recipe. The basics of sauerkraut are simple – cut some firm cabbage up very finely, massage it with salt until the juices run, pack it into a jar so that it ferments and burps away happily, and when that’s over, you have sauerkraut. Most grandmothers add a couple of teaspoons of caraway seeds and no other seasoning. Teeming with beneficial microbes and packed full of cabbagey nutrition, this is a genuine home-made superfood. Fermented foods are proven to improve your gut microbiome. A healthy gut not only means you digest your food comfortably and thoroughly; it has effects on mental wellbeing. I’m not big on making or believing nutritional claims for any one sort of food; I believe in a good mixed diet and no supplements or pills for most of us. But in this case, I do believe the evidence – some sort of fermented food really does do you a lot of good. And of course, home made is the best way. It’s extremely cost effective and means you can get the end result you want. I love making ruby sauerkraut with red cabbage instead of white, just for the beauty of it. I add some spices, turmeric and ginger for the tingle; if you’re being healthy you might as well go the whole hog. But please play around with the basic recipe and let me know if you come up with some delicious variations. The only other thing to get right is the size of your jars. To keep the cabbage below the surface of the liquid, you need to press it down. I have a fermenting jar with a valve in the lid and quite a wide mouth. A standard jam jar fits inside this so when I screw the lid down, the jam jar presses inside on the cabbage. You can keep a whole cabbage leaf aside, to put under the little jar to hold the mixture down more efficiently. You don’t have to use a fermenting jar, it just helps to avoid accidents if you forget to check on your bubbling cabbage and the gas builds up, but you do need a fairly wide glass jar for the fermentation and another smaller one to fit inside. Play around with them before you start, as its quite annoying to have your salted cabbage ready to be packed away and you’re still fitting jars inside each other like a toddler in kindergarten. Might give rise to a toddler style tantrum and that would never do. Makes 2 medium jars Timings: About an hour preparation, 30 minutes mixing and then 1 week fermenting.
Very finely chop the cabbage – as thin slivers as you can get. This does take quite a while but put the radio on and keep going. Grate the carrot and add that in, along with all the rest of the ingredients. Sprinkle the salt over the mix. With your hands, not a spoon (but you can wear plastic gloves if you have to) knead and massage the salt into the mixture for about 10 minutes. In this time you should see the liquid start to come out of the vegetables. Keep going and add a bit more salt if you think it needs it – the amount does depend on the firmness of the cabbage so it can be variable. Let it rest for 10 minutes and then knead/massage again for another 10 minutes. Clean your jars thoroughly with boiling water – the only microbes you want in this mixture are the ones already in the cabbage that can live through all that salting – those are the ones that will ferment and preserve the vegetables. Pack the mixture into your fermentation jar, firming it down with a spoon. The liquid should be visible and will rise up over the next couple of days. If it doesn’t, you can top up the jar with some brine made from mixing water and salt together. Press the cabbage down using your jar and inside-jar arrangement and leave the whole apparatus in the kitchen for a day or two to remind you to loosen the lid every now and then, and to check on the liquid level. You will see bubbles of carbon dioxide starting to form inside the cabbage mixture and a delightful smell of fermenting sauerkraut will start to fill your kitchen. If you don’t like the smell, put the jar somewhere cool but not cold and let it get on with it. Check on it and let the gas out every day or so. After about a week you should have good tasty fermentation going on. At this stage you can choose how strong the taste should be: you can now jar it up into smaller pots and keep it in the fridge (or give it to your friends) for eating. Fridge temperatures will stop the fermentation. If you want it stronger, leave it for another few days – up to another week - out of the fridge, tasting every now and then until it reaches the desired level of pungency. Jars keep about 1 month in the fridge. You can also freeze it, although I’ve never tried. In the old days, apparently sauerkraut was frozen through the winter by packing it into wooden barrels and burying them in the ground so they froze solid and could be thawed and eaten in the spring. The bacteria survive and will regenerate when de-frosted. Eat it, just picking it out of the jar to put into sandwiches, or onto hot dogs. Mix it with mayonnaise for a fantastic sandwich/hot dog relish, have a little bowl of it with salads. It goes specially well with anything meaty or cheesy, but if you like with fish, then indulge yourself. Warm it up with apples and onions to go with sausages, add it to a pasta and ham casserole, have it as a side vegetable with a pork chop. Endless possibilities….  Not just for eating with fish and chips! Mushy peas and mint sauce make a perfect retro starter. Mushy Peas – Nottingham Caviar (vegan)
Long ago, the Goose Fair at Nottingham, held in early October, was the last and the largest of the country-wide fairs in England. Fairs were an important part of the employment market, for hiring new staff for agricultural or construction work. They weren’t originally for entertainment rides or peep shows. Wherever people gather, other people will come; to sell food, side shows, thrills. Men and women seeking work would come to the Goose Fair, stroll the alleys of tents and hustings, maybe buy something to eat. Mushy peas were traditionally served in a paper cone and eaten with a splash of mint sauce. They’re hot, cheap and filling. The sauce adds piquancy and tingle to the salty peas and the mint gives extra digestibility and removes some of the gassy effect of the creamy mash. So they say. Even in the 1980s, when the Goose Fair was about dodgems and whirler rides, you could still buy mushy peas and mint sauce to enjoy among the fairground lights and blaring whistles. The last stall selling Nottingham Peas and Mint Sauce in the city’s old Victoria Market closed down in the Covid crisis. There are hopes it can open again once customers come back, for now, you can make your own. Serves 6-8 Timings: Overnight soak, then 4 hours simmering
For the mint sauce: a good bunch of fresh mint leaves, finely chopped. 1 tablespoon malt vinegar and 1 tablespoon cider vinegar. 2 teaspoons salt, 2 teaspoons sugar. Blend well and adjust the seasonings. Soak the peas overnight in a good amount of water and mix in the bicarbonate of soda. The peas will absorb quite a lot of water so top it up before you go to bed. In the morning, tip the peas into a colander and wash them well. Put them in a pan with the vegetables and fennel seeds and top up with fresh water and bring to the boil. Don’t add salt at this stage or it will harden the peas. As the pan comes to the boil, skim off the foam. Once the pan has come to the boil you can continue the cooking in a slow cooker - on high for 4 hours, or on the hob at a slow simmer, or in the oven in a low heat with the lid on the casserole. You need to check the water level – not too much or too little! In the slow cooker, just have enough liquid to cover the peas. At the end of 4 hours, test them – they should be mushy and starting to fall apart. Check the level of liquid – you want to mash the peas down into the liquid but you want a porridge-texture mash, so you can drain off a little water if you still have too much. Mash the peas with a potato masher and add salt to taste – you will need quite a bit as they have been cooked without. You can keep them in a covered container in the fridge for 2-3 days or freeze them. Serve lukewarm with a good splash of mint sauce. What a smart and retro starter to a meal, and part of all our heritage. 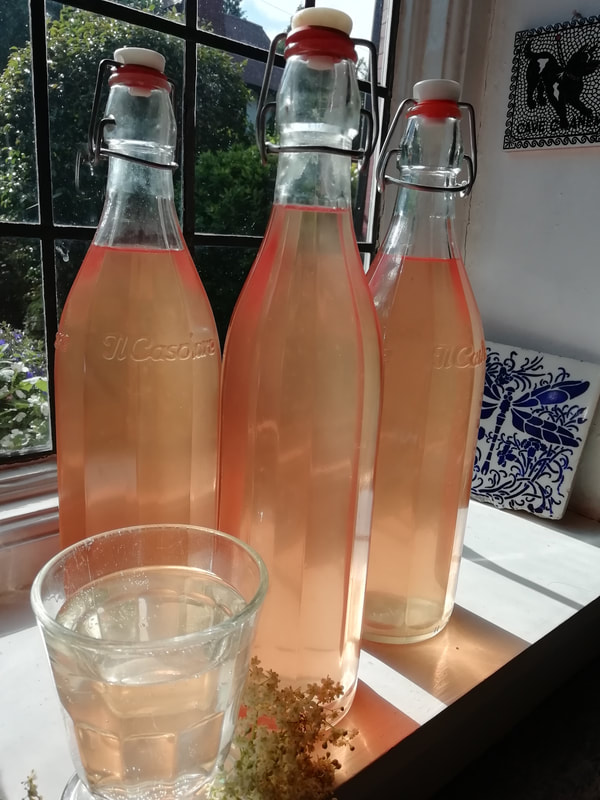 Simple, lovely, fresh. Tasting of flowers and summer. Elderflower cordial - mix with water, sparkling water, or prosecco! Elderflower Cordial
Simple, beautiful and fresh. I have come to the conclusion that complicated recipes are not for me. Pick your elderflowers from a tree that isn’t too close to a road or a dusty path. I think that some trees have a different complex of aromas in their pollens from others – so it’s interesting over time to make batches of cordial from different trees and see if you can taste any variation. I also think that cordial made with flowers early in the season when they start to open tastes more floral than cordial made with later flowers, which tastes richer. That might be my imagination, but a world of elderflower cordial tasting is a pleasant place to be for a while. There are loads of cordial recipes out there but this is a combination of the Pam Corbin version in River Cottage Handbook No 2 Preserves (a must have) and the Fern Verrow version (another must have book for both the recipes and the photography). I have no idea if there is any medical sense behind this, but I have heard that children with hay fever were given elderflower cordial in olden days, in order to provide them with small doses of pollen to accustom their immune systems to the allergen in harmless amounts. A similar role has been claimed for honey. I’m not saying there’s any medical benefit to elderflower cordial, only that it tastes superb and you are using a bountiful natural resource. Depending on the space in your fridge or freezer and how long you want your supply to last, you can make this without the citric acid if you like. Then it will keep only a few weeks on the shelf and will need to be refrigerated once open. You can make it and freeze it in plastic bottles, but I never have the room in my freezer for that and am trying to minimise my use of plastic in food preparation anyway. I use old glass olive-oil bottles, the ones with the swing-cap lids and I find that the cordial keeps several months in a cool place, which is as long as the supply lasts in our house and by that time we’re into the more winter-ish fruity cordials as the season rolls round. You can make up the cordial with water, fizzy water or lemonade. If you want a Hugo Cocktail, add lime juice, mint leaves and prosecco and waft around the garden looking and feeling lovely. Makes about 2 litres Timings: 1 hour to pick and start the steeping, overnight steeping, then about 30 minutes to boil up and bottle
Pick your elderflowers and bring them home as soon as possible, breathing in the scent from the bag every now and then. Shake off any insects or dust but don’t wash them. Put them in a large bowl (not plastic) or pan. Using a potato peeler, peel the lemons and the orange and add the peel to the flowers while you boil the kettle. Keep the peeled fruit in the fridge. Pour the boiling water over the flowers/peel, cover the bowl with a tea towel and leave to infuse and steep overnight. Next day, strain the liquid out through your jelly bag. I hang mine from the cupboard where we keep our glasses so I have to be sure to start the straining only after we’ve laid the table for breakfast. Let the liquid strain for about 30 minutes and don’t squeeze the bag or you will get a cloudy cordial. While it’s dripping through, squeeze the lemons and the orange, and strain out any pips. Measure all the liquid that you have – the juice and the strained elderflower liquid – into a large pan – you should have about 2 litres. Per litre of liquid add 700g sugar and 2 teaspoons of citric acid, if using. Bring to a rolling boil and skim off the pollen-laden scum that comes to the surface. While it’s coming to the boil, boil up your kettle and sterilise your bottles. Bottle the cordial while it’s still hot and clip the lids on, so the cooling down closes the lids more tightly. When cool, wipe the bottles, label and keep them in a darkish place.  Creamy tangy potato salad made with stock instead of mayonnaise - delicious and different. South German Potato Salad (vegan optional)
Actually, “Swabian” Potato Salad, but not everyone outside of Germany (and not everyone inside Germany either) knows where the unofficial district of Swabia belongs. You won’t find it on a postcode or town name but it’s an area taking in parts of Bavaria and Baden-Wuerttemburg with about 7 million inhabitants. It has it’s own culinary traditions and specialities which I was fascinated to learn about when I lived in Ulm - a beautiful town on the Danube. Eating new food when you’ve moved to a new country is a bit different from eating new things on holiday. You aren’t going back, so you have to get used to them and work out what you like to eat on a daily basis, and what your friends are likely to serve you. I’ve always loved the English version of potato salad: perky little new potatoes, rich with mayonnaise, piquant with spring onions and chives, spritzed with lemon juice and sparkled with ground black pepper. I was initially suspicious of Swabian Potato Salad – the potatoes melt almost to a slurry in the stock, there’s no creamy mayonnaise in sight, and it is served at room temperature – how odd is that? But if you come at it from another angle, don’t see it as competition to a much-loved favourite, you will also find this delicious and quite different. It is a perfect accompaniment to a barbeque, it matches with grilled meat or sausages as effortlessly as you might expect from a German dish. It’s also great with cold meat from a next-day roast leftovers or with a big salad. Try it and be brave. I’m sure you’ll enjoy. Serves 6 Timings: 1 hour preparation, then time to cool.
Scrub then boil the potatoes in their skins until tender – about 30 minutes depending on their size. Meanwhile make up the stock in a jug if you are using cubes or powder, or warm it up in a small pan if you are using home made stock. Slice 2 of the shallots and the leek up very finely and put them into the warm stock to tenderise. Reserve the remaining shallot and also slice it up very finely. When the potatoes have boiled and are tender inside, drain them and let them cool a little and then peel them while they are still warm. As you peel them, chop them in slices and drop them into your serving bowl, adding ladles of warm stock as you go. Don’t use all the stock to start with. When you’ve sliced up about half the potatoes, add the vinegar to the bowl. Go on peeling and slicing potatoes and add them to the bowl along with the reserved shallot. Add more stock until you have quite a loose mixture. Taste and adjust the seasoning – you might need more salt depending on the stock you used and you might need a good grind of black pepper. Add the parsley and mix, then allow to cool and serve at room temperature. The salad can be kept in a sealed container in the fridge for at least a day but I wouldn’t freeze it.  Fresh and interesting - Green Bean Curry. Green Beans Curry (vegan)
Another recipe from my neighbour, Asha, who makes such glorious food. It’s called a “dry curry” – it’s not completely dry but there is no sauce to be mopped up. The fresh green beans still have their snap, and they end up coated in a savoury paste with spicy tomato flavour and the faintest background nuttiness from the coconut. You don’t taste or feel the desiccated coconut, so this can be served even to people who generally avoid the texture of coconut, and it just adds the extra nutrition and slight creaminess. I like to serve it with a dhal or other quite liquid dish for contrast. I’ve never seen this recipe in a restaurant, so I don’t know exactly where it came from. I’ve seen a Sri Lankan green bean curry that uses coconut milk but that’s a lot more sauced than this version. If anyone knows any more about it, please let me know – I’d be interested to hear. You can of course add other things to the basic vegan dish – cubed paneer or leftover cooked chicken are lovely mixed into the beans. Serves 4 as a main dish alongside Makhani Dhal or other Dhal dish Timings: 45 minutes
Ground spices: 2 teaspoons turmeric, 1 teaspoon chilli powder, 2 teaspoons garam masala Whole spices: 2 teaspoons cumin seeds, 2 teaspoons mustard seeds Top and tail the French beans and if they are thicker than a pencil, slice them down the middle to make thinner slices – you are cooking them quite quickly so they need to be thin. Put the beans, the ground spices, coconut, ginger and tomato puree into a microwave bowl with 2-3 tablespoons of water and cook on full power for 6 minutes. You can of course cook them in a pan with only a small amount of water – you are looking to steam the beans quite lightly. When finished cooking, leave them in their pan until the next stage. In a large frying pan, fry the onion in a little oil until transparent. You don’t want it to brown, so keep stirring and don’t heat too much. Add the potato cubes and continue stirring to warm them through. Add the whole spices and cook to release the flavours. Tip the beans and any liquid they have into the pan and turn up the heat a bit. Stir through and cook finally for another 2-3 minutes. Adjust the seasoning – it will need salt and pepper and add the lemon juice. Serve sprinkled with fresh coriander. 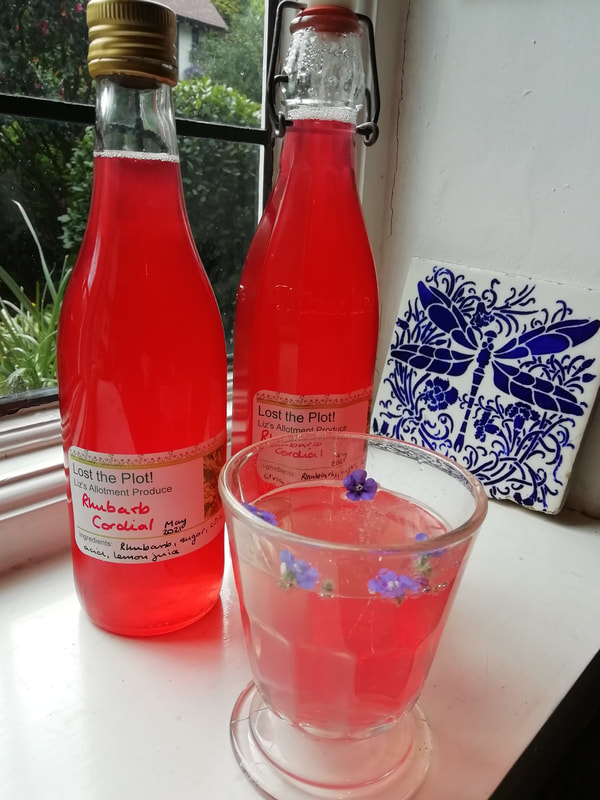 Rhubarb cordial - sweet, pink and rhubarby. Perfect for summer fizz and cocktails. Rhubarb Cordial
Once you’ve made your own fruit cordials, your family will beg you to continue and you won’t look back. You'll start collecting bottles like a mad thing. You can make them out of pretty much any fruit you can lay your hands on. I know that rhubarb isn’t a fruit, but we eat it as such, and you can make the prettiest cordial out of it with an unusual but wonderful flavour. I got the idea for this recipe from Fern Verrow – an inspirational book about a farm run on organic and biodynamic principles and using seasonal produce for sensational taste. Anyone with a garden patch of rhubarb or an allotment will know that it’s difficult to keep rhubarb under control once it gets going. This year, with the rains in January – which turned into a full-on flood in my allotment as the Mersey overflowed – the ground was saturated. Rhubarb loves that; you even need to water rhubarb when it’s raining, it’s that thirsty. This spring, it’s so happy, you can nearly hear it singing as it grows. Once you’ve made enough crumble, cakes, and pies to keep you going, give this cordial a go as well. I use a jelly bag which I hang from a wooden spoon handle put through two cupboard doors in the kitchen, but you can line a sieve with cheesecloth and let it drip through that also. As with all preserving, sterilise your bottles, funnel, jugs, and spoons well to help the cordial keep without spoiling. Makes about 1 litre Timings: 1 hour work with overnight straining
Clean your rhubarb but don’t peel it as if you were making a compote. You want as much of the pink outside string bits as possible for the colour. Cut it into 2cm chunks and put it in a large pan with the water over medium heat. Bring to a simmer and let it cook for about 30 minutes until it is really soft. Spoon the liquid and pulp into a jelly bag and let it drip through into a bowl overnight. Don’t squeeze the bag as you want the juice to be clear. Measure your juice and put it in a large pan. I had 1 litre of juice from this much rhubarb but you might have more or less depending on your type and juiciness of stalks. For every 1 litre of juice add 600g sugar, the juice of 2 lemons and a teaspoon of citric acid. The citric acid helps the cordial keep longer but you can leave it out if you don’t have it – you just need to keep the cordial in the fridge or freezer if you aren’t going to use it in a couple of weeks. Bring to the boil, stirring to dissolve the sugar and then bottle into sterilised bottles. Add sparkling water and a few blue flowers for a perfect summer drink or make a cocktail for something a bit different for your garden party.  Golden potatoes, rolled in whole spices and oven roasted for a warming crunch Bombay Potatoes (vegan)
Just spectacular. The family gobbled them up and would have eaten twice the portions. Another lesson in why the simplest things are often the best. This is a dish you find all over India, so I don’t know why Bombay, now Mumbai, became specifically associated with them. Every family and every restaurant have their own way of doing it – some recipes are more roasted, some have more sauce, some include tomatoes and some don’t. I make a potato and spinach curry that has more sauce, so I decided to make this one dry and crispy. The whole spices are quite important as they give flavour and a little crunch to the dish. Serves 4 Timings 90 minutes although you can boil the potatoes beforehand
Boil the potatoes for about 15 minutes in water with the teaspoon of turmeric added – the water will turn bright yellow and so will the cut surfaces of your potatoes. Try to avoid splashing the water on your kitchen work surfaces as it will stain. Drain the potatoes – they should be tender but not falling apart. Heat your oven to 205°C. In a large oven proof pan or metal oven tray, gently fry the whole spices in 2 tablespoons of vegetable oil until they release their fragrance – about 2 minutes. Tip the potatoes into the pan and mix well, sprinkling over the garam masala, curry powder and a generous pinch of salt. Put the roasting tin into the oven for 45 minutes. Every now and then turn the potatoes with a spatula to ensure all the surfaces get crispy. Serve either as a side dish to another meal or on their own with some fresh relishes and chutneys. 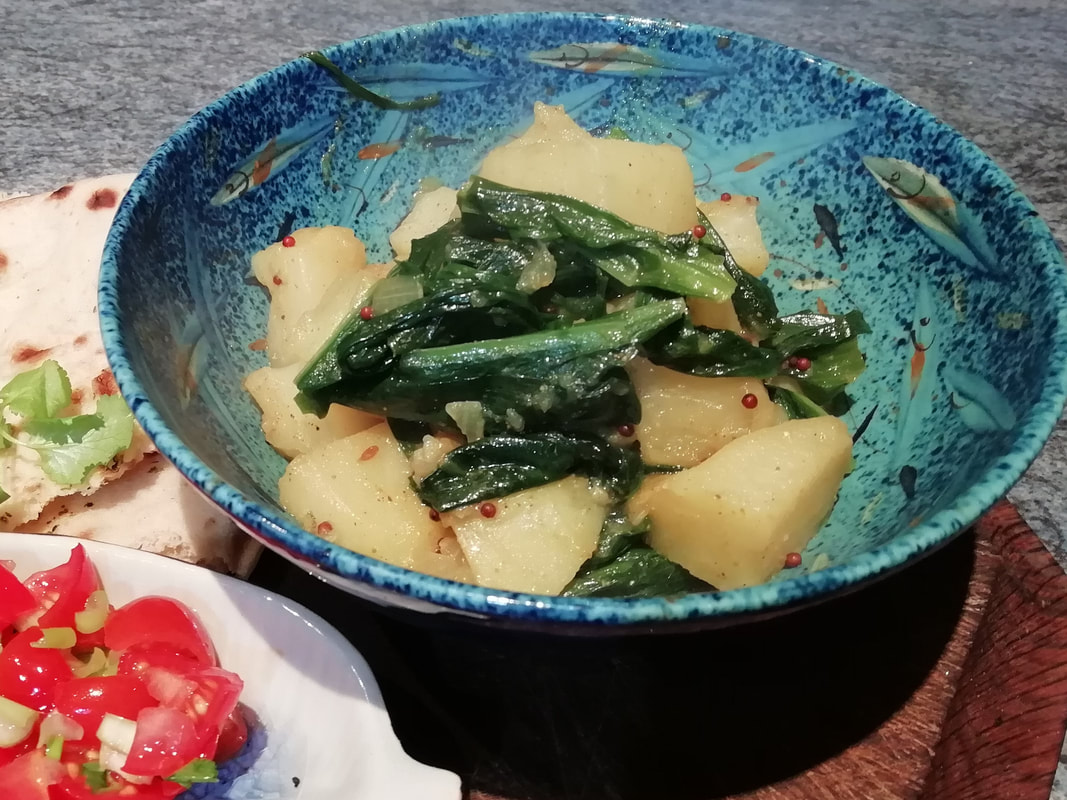 Foraged Wild Garlic, simple spices, comforting potatoes - ideal lunch time meal Wild Garlic and Potato Curry (vegan)
Another seasonal wild garlic recipe to make the most of the delicious harvest before it vanishes back underground for another year. You can substitute spinach for the wild garlic leaves at other times of the year and in that case you might want to add a crushed clove of garlic to the frying onions at the start of the recipe. As always, please forage responsibly. Take your pick from an area where dogs and walkers don't go, and don't take all the leaves from one plant or denude an whole patch. A little goes quite a long way! Combine with other curries in different sauces for a Curry Night Feast with friends and family; or make a simple meal with some warm naan and home-made chutneys and relishes. Chutneys and relishes could include:
Serves 4 as a lunch or as part of a combined curry meal Timings: 30 minutes
In a wide flat pan, fry the mustard seeds and cumin seeds in vegetable oil for a few minutes while they sizzle. Tip in the chopped onion and chilli, and fry for a few minutes. Add the cubed potato and pour in water from the kettle to just cover the cubes. Mix the powdered spices with some water in a glass to give you a light paste and pour into the pan of potatoes. This avoids you burning the ground spices in the hot oil and gives a more balanced flavour. Add the lemon juice, a sprinkle of salt and a grind of pepper, then put the lid on and leave over a low heat to simmer for about 15 minutes. The potatoes will absorb the water and flavourings. Don’t let the pan boil dry, keep topping up with a little water if it’s all absorbed. After 15 minutes the potatoes should be tender and cooked and there should be a little flavoured gravy in the bottom of the pan. Add the torn up wild garlic leaves and put the lid back on again for a few minutes as they wilt down and cook. Adjust the seasonings and serve with plain rice, fluffy naan and your relishes. |
Some Changes - April 2022
Thanks to my friends and followers for your patience, and for your encouragement to start blogging again. Archives
April 2022
Categories
All
|
 RSS Feed
