 Chewy, oaty, syrupy and delicious. Homemade Anzac Biscuits are perfect for an Autumn picnic. Anzac Biscuits
These are a bit like the Australian version of scones – not that I mean they’re actually like scones to eat, they’re more like thin flapjacks, but I mean that every family has their own recipe, thinks it’s the best, and the taste is evocative of home, family cooking, Saturday afternoon in the garden, packed lunch boxes and good times. They are also a commemoration of resistance in bad times – traditionally these are the biscuits that were made, packed up and sent off by communities to their troops on the front line in Europe in the First World War, far away from home. They’re sugary, chewy, full of calories and they’re a blend of the taste and texture of the North and the South – oats and coconut. Having no egg, they keep well, as they would have to, being sent half-way across the world, and that makes them ideal for all family occasions – picnics, long walks, movie nights on the sofa. They’re also easy to make, which means children can really let their creative instincts run riot. I’ve seen recipes with added dried fruit, or added chocolate chunks – not part of the classic canon but why not? This recipe is based on the one given by Kate Young in the Little Library Cookbook, with some tweaks suggested by other Australian friends. The magic ingredient is of course golden syrup, which has properties that enhance just about any recipe – it provides that chewy sweetness and binds all the more substantial ingredients together. They don’t rise much but they do spread out in the oven, so give them a bit of space. I made them for the Seniors Lunch Club group and we had a discussion on all things Australian – ranging from the animals to the wine, to the geography, to history. Some of our members have relatives who were deported, some have relatives who have emigrated. Many have visited and have happy memories. One of our volunteers is Australian and loves to make these for the group on Australia Day – coming up in January. Makes about 30 medium sized cookies. Timing 40 minutes.
Pre heat your oven to 180°C and line two baking trays with greaseproof paper. Put the butter, sugars and golden syrup into a small pan and melt over a low heat. Sieve the flour into a large bowl and add the oats and coconut. Mix the bicarbonate of soda and water, add to the pan of butter and stir in, then tip the pan of liquid mixture into the bowl of dry ingredients and mix briefly. Put walnut sized spoonfuls of the mixture on the baking trays. I get about 4 in a row along one of the short sides of a tray. Some recipes say flatten the spoonfuls of mixture to get a more biscuit shaped outcome and some don’t, which gives a more domed outcome, but it’s up to you. I get about 12 on a tray. Put the trays in the oven for 8 minutes and then swop over the position on the shelf – it does make quite a different to this mixture where in the oven they are cooked. Cook for another 5-6 minutes and then take them out when they are still soft and golden brown, not deep brown. They are very soft when taken out, so let them harden on the tray for a couple of minutes before sliding the whole sheet of baking paper onto a rack to cool.
0 Comments
 British Oysters, sustainable and delicious Fresh Oysters on their shells, as simple as could be
Yes I know. Not everyone likes them or can be persuaded to try them. But think, what a memorable party it’s going to be! Check with your guests first (they’re quite expensive at £1-£2 per oyster) and throw a packet of crisps at the ones who just won’t try delicious, sustainable, chic, British seafood. There are people who are allergic as well, and we can’t blame them for that. Crisps for them too. You’re lucky if you live near a fishmonger who sells them on ice, maybe tell them of your plans and order in advance. You can also get them online, fresh from Cornwall or Essex. Native oysters and farmed ones spawn at different times, so you can get them most of the year. Serves 6 (three each) Timings: about an hour, but it's all prep, no cooking involved
Slice the shallots and start them pickling. Get some wide flat bowls ready. Open the oysters. You need a firm flat blade, like the widest flat screwdriver you can find, or a short heavy bladed knife. Wrap one hand in a teatowel and hold the oyster – this gives you a better grip and protects your hand from inadvertent stabs. With your knife hand, gently get the tip under the top shell of the oyster near the hinge – you can generally see where the top shell sits inside the lower shell, and twist slightly, moving the knife from side to side and then round the whole shell. You will need to cut the attachment on the top shell. Leave the oyster in its juices on ice and move on to the next. You will get quicker as you go along. Once you’ve taken the top shells off all of them, go back and loosen the oysters from their bottom shells. To Serve: Arrange three oysters per plate on ice. Add a slice of lemon to the side of the plate, a spoonful of shallots in vinegar to one oyster, a shake of Tabasco to another, and serve. Your guests just slide them down their throats. Or you can just make up a big iced platter of oysters and let everyone add their own flavours. Don't forget to keep the shells as garden decorations, they make a great addition to a flower bed and the birds love to turn them over to reveal whatever's taken shelter underneath. 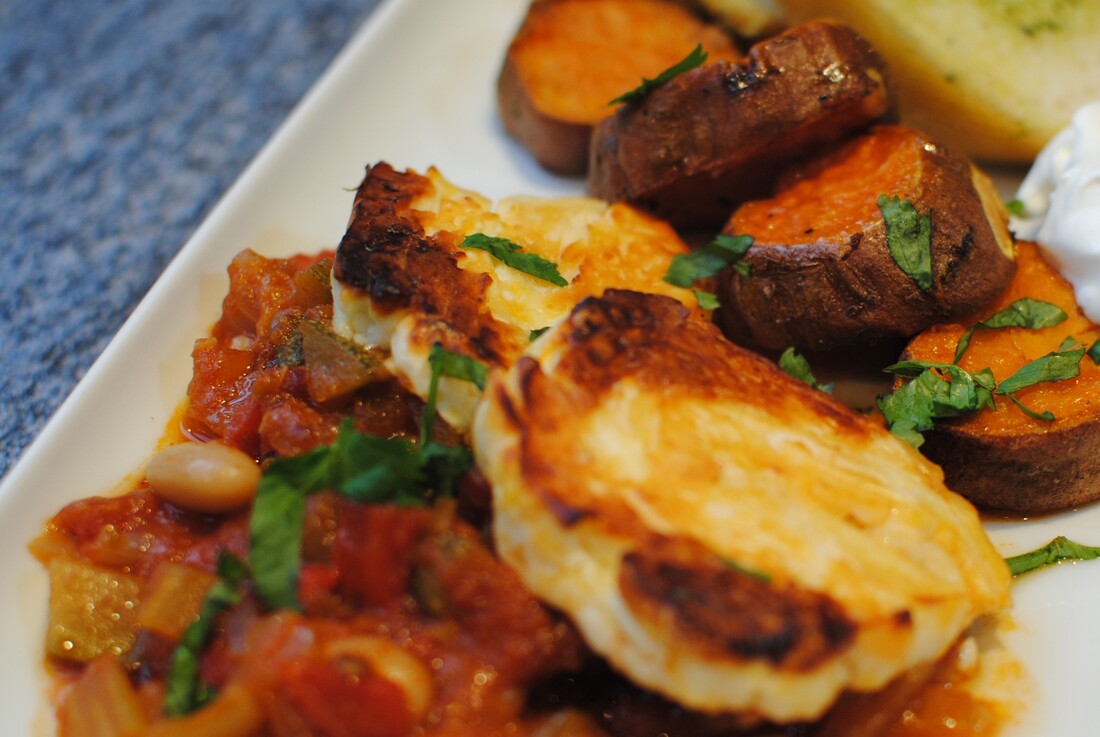 Spicy vegetable mix topped with roasted halloumi and served with sweet potato slices Spicy Beany Ratatouille topped with Grilled Halloumi (vegetarian)
You can top anything with halloumi, more or less. It’s so versatile, and such a friendly cheese. Like an egg, it keeps its shape, but nestles down into the spicy mix you cook it into. This meal is sort of like a shakshuka with halloumi instead of eggs, and with beans. So not very like a shakshuka except that it’s warm, comforting, tasty, spicy, tomatoey and gorgeous. The bean stew is very adaptable according to the ingredients you have in your cupboard or receive in your vegetable box. I think halloumi goes very well in a mix with celery and peppers, but you can add aubergines (I would have, just didn’t have any in the vegetable drawer) or green beans, any firm veg you have around. The spices are important, and a good warm mix of cumin, paprika and some chipotle in adobe gives you a glorious glow. It’s a wonderful dish to have made ahead of time and just pop it in the oven when you get home from parents’ evening to have ready in 40 minutes with no hassle while you unpack the school bags and wash out the lunch boxes. I served it with roasted slices of sweet potato, to make the most of the oven being on, and with a dollop of plain Greek yoghurt sprinkled with fresh coriander and a baton of garlic bread. My friend Louise inspired me to make this when she hosted our Fine Wine and Dine Book Club recently, so thanks to you, Louise for the idea. Serves 4 Timings: 30 minutes initial preparation, then it can be left for a day, and 40 minutes in the oven before you eat.
Extra: About 750g sweet potatoes, sliced into rounds 1cm thick, a tub of plain Greek yoghurt, and a handful of fresh coriander, chopped. 1 baguette of garlic bread. In a heavy pan (I use my Le Creuset), gently fry the onion, pepper and celery in a little vegetable oil until softened. Add the garlic, fresh chilli and the dried oregano. Stir and fry for a minute, then add the ground spices, stir well, and add the tins of beans and tomatoes. Add another half tin of water and the chilli sauce and chopped chipotle, along with the Henderson’s Relish, marmite and bay leaves. Stir well together and simmer for about half an hour to deepen the flavours. Taste, add salt or a little more water if needed. You don’t want too liquid a mix, so don’t add too much water. You will be able to taste the lovely warmth of the herbs and adobo sauce but it shouldn’t blow your head off. At this stage, you can cool down the mixture and keep it in the fridge for up to 2 days. When ready to cook, heat the bean stew gently in a pan and pre heat the oven to 200°C. Prepare your slices of sweet potato – about 1cm thick, and toss them with oil, salt and pepper in a roasting tin. Place the bean stew in a roasting tin that will take the stew about 3cm deep – you might need a smallish square tin rather than the big tin you'd use for roast chicken. Remove the bay leaves. Slice the halloumi into 8 slices and place on top of the bean stew. Put the sweet potato slices in the top of the oven and bean stew on the second shelf for about 40 minutes. Turn the sweet potato slices occasionally. At the end, the halloumi should be lightly browned on top – if not, give it a quick flash under the grill just to get that lovely sticky texture. Serve with a dollop of cool Greek yoghurt and some chopped fresh coriander.  Chocolate sponge studded with boozy cherries, vanilla sponge in waves, topped with chocolate fudge icing. Not a lot like a river though! Danube Waves Cake (Chocolate and vanilla with fresh cherries and fudge icing)
Well, an adaptation of the traditional German “Donauwelle” recipe. The “waves” are the curves made by the vanilla and chocolate cake mixes and the wavy top of the icing. I’m not convinced it looks like the Danube, but it tastes very good, which is the main thing. The combination of boozy cherries and chocolate is a classic, from which the Black Forest Cake also gets its fabulous flavours, so you can hardly go wrong. At Seniors Lunch Club this week we played “What Have I Got to be Grateful For?” - a pretty simple exercise but always brings up surprises. This time, we had a strong theme of Community developing. Many members felt grateful not only for their family but for their community, valuing the feelings of togetherness and friendship. We felt grateful for art and music, local art galleries and for great composers and the joy they have brought to so many. Being able to watch great music and concerts on TV was highly valued. Ballroom dancing was something appreciated and remembered by several; both watching it and taking part. We know we’re lucky to live where we do, in a beautiful suburb of Manchester, we love our homes and our environment. Inspiring as ever, talking to the group. Makes 16-20 pieces Timings: 2 hours
For the icing: 200g softened butter, 250g icing sugar, 75g chocolate, melted (I used a mix of dark and milk), 1 tablespoon of sour cream, 1 tablespoon of Camp Coffee Essence Stone and snip up your cherries and soak them in the liqueur for half an hour. Pre heat the oven to 180°C, and grease and line a 22cm square baking tin. Sieve the flour. Beat the butter and caster sugar and vanilla sugar together until creamy and then add the eggs one at a time alongside a tablespoon of flour each time. Add in the rest of the flour and mix well to a fluffy cake batter. Spoon half of the batter into the prepared tin. Now mix the cocoa powder into the remaining batter and stir again. Blob the chocolate mix over the top of the vanilla cake mix. Drain the cherries (keep the liqueur for a warming nip at dinner time, no sense in wasting good liqueur, especially now it has an extra tang of cherries to it) and drop them over the chocolate part of the batter. Place in the oven and cook for 45-50 minutes until risen, golden and a skewer comes out clean. Leave on a wire rack to cool. For the icing, beat the butter until soft and add the icing sugar a spoonful at a time. Melt the chocolate in a bowl over hot water. Add the sour cream and Camp Coffee essence to the icing and then scrape in the melted chocolate and beat well. You will get a fluffy fudgy mixture. Spoon the icing over the top of the cooled cake and make wavy patterns with a fork. Keep in a cool place until ready to eat.  Creamy, spicy and delicious. A bite of chicken or prawn, a crunch of vegetable and a slippery noodle in every mouthful. Tom Yum Noodle Soup (pescatarian or vegan option)
Maybe this is an odd memory to associate with Dublin. You’d think oysters, Guinness, champ. But I used to catch an early plane to Dublin on a regular basis and meet colleagues in the airport. I’d been up so early, the meal felt like lunch to me and I didn’t fancy bacon and eggs, so we used to gather at the food court, and indulge in a Tom Yum soup. The combination of spice and creamy coconut, Thai red curry and coriander, tender prawns and juicy mushrooms was exactly right to re-set my inner clock and perk me up ready for the afternoon meetings. I still find that a home made version makes an energising and easy lunch, if you keep a few staples around. I like the base made with chicken stock, of which I usually have a plentiful supply in the freezer, but you can make it with vegetable stock and use a stock cube. Infusing the stock with the aromatics is a key part of the recipe but you could do this ahead of time, reduce the stock again and keep it in the fridge to assemble the meal with only a few minutes notice. A combination of prawns and chicken is traditional but you can change around the protein and the vegetables to suit your tastes and what you have in the house. Some chopped mushrooms add that chewy texture and contrast very nicely with the slippery rice noodles, so mushrooms, courgette and spring onion would make a good vegan option, maybe with some sliced baby corn for the protein. Try it and leave me a comment, I’d love to hear other versions. Serves 4 Timings: 1 hour
Heat up your stock and add the infusion ingredients. Let it simmer for a few minutes and then leave to cool down with the spices in the liquid. Strain the stock, discard the spices. As above, you can poach the chicken breast in the stock while you do this. Warm up the stock in your soup pan, add the Thai red curry paste and stir in well. Add the chopped green vegetables, the mushrooms and most of the spring onions, simmer for a few minutes. Add the prawns and the chicken pieces. Add the fish sauce and the lime juice to the soup, bring to a simmer and cook for about 3 minutes. Add the coconut milk to the pan and bring to a slow simmer – do not boil vigorously as this can curdle the milk. Add the rice noodles in, stir and simmer for 2-3 minutes to soften the noodles, they don’t need a lot of cooking. Taste and adjust the seasoning, you might need a touch more lime juice or a little shot of soy. Sprinkle with coriander and the remaining chopped spring onions to serve. 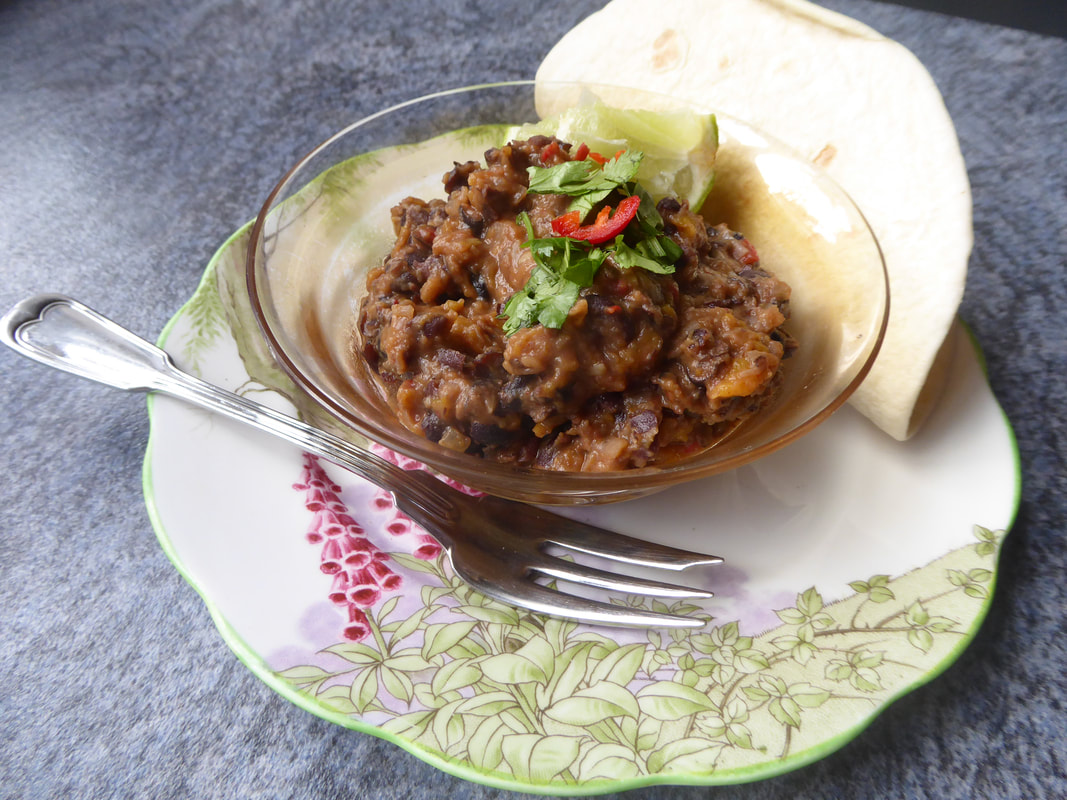 Spicy, satisfying black beans cooked with vegetables and aromatic herbs. Refried Beans (vegan)
If you’re thinking of the Mexican restaurant meal where you don’t eat the refried beans, then think again; you won’t push these to the side of your plate! Home-made refried beans are superb, so much better than the tinned or packet version. They really make a genuine addition to a home cooked Mexican meal, are so easy to make and of course offer a vegan alternative to the meaty filling of tacos so you can cater to all tastes in one meal. Use them as a side dish to your meat meals, or stuff a wrap or a taco with them along with some cheese, or lettuce and a salsa. Great for a light lunch with a friend or for school holiday lunches at home. Serves 6 as a side to a Mexican meal Timings: 30 minutes 1 x medium onion, about 150g, peeled and chopped quite finely ½ yellow pepper, de-seeded and finely chopped 1 x mild jalapeno chilli, chopped finely. 1 x clove garlic, squashed with salt 1 x 400g tin black beans, drained Ground spices: ½ teaspoon cumin, ½ teaspoon garlic powder, ½ teaspoon cayenne pepper, ½ teaspoon mild paprika, ½ teaspoon smoked paprika. Henderson’s Relish and a teaspoon of marmite. Vegetable oil to cook. Juice of ½ lime. Handful fresh herbs chopped – you could use coriander, or parsley or chives. Fry the onion, pepper, chilli and garlic in the vegetable oil for a few minutes until tender. Add the ground spices and fry to release the flavour. Add the black beans and ½ tin of water. Stir up and allow to simmer. Add the Henderson’s Relish and the marmite, stir in and simmer for a few minutes. Using a potato masher, mash the beans into the sauce quite roughly. They will release their starchiness and make a thick puree. Add the lime and adjust the seasoning, you might want a little more salt or some ground pepper. Add the fresh herbs just before you serve.  Rich, smooth, fruity, and packs a real punch. Divine. Banana Daiquiri
This recipe is from my Christmas in the Caribbean menu which will be published in full shortly. Have a look at the Cake de Ron from August, and look out for more recipes in the series. Of course, a Banana Daiquiri is appropriate at any time of year, so don't restrict yourself to the colder months. Creamy, delicious and fruity. The original Daiquiri, invented in Cuba in 1900, consisted only of lime juice, rum and sugar combined with shaved or crushed ice. It must have been very like the original Mojito too, but now the two cocktails are delightfully different. Along the way, some genius decided to add fruit to the blended mixture and the Daiquiri we know and love was born. You can use many fruit flavours, but banana was made in heaven to pair with rum and gives such a lovely creamy texture, it has to be the best. You can make up a jug full by multiplying the quantities; stir well on serving to mix up the layers as it might separate if left to stand. Although it seems unlikely that any party with interested guests is going to let this jug of wonder stand for any length of time. It’s a deceptive cocktail. Feeling gentle and fruity, it slips down easily; if you wanted to reduce the alcohol content you could substitute another shot of sugar syrup for the Cointreau. Makes one Daiquiri
Simply blend all the ingredients together until a smooth creamy liquid can be poured out of the blender into your tall frosted glass.  Tender marinated chicken, grilled on skewers and served with peanut sauce. Chicken Satay Skewers
Sizzling like a hive of bees, street food smells waft from the open grills in Petaling Street Market in Kuala Lumpur. Tourists and locals flock to eat skewers of satay meats and prawns, crowded on benches, elbows in each other’s sides. The delicate meat, marinated in spices and drizzled with peanut sauce, is quickly grilled over high heat to sear the outside and give it that smoky crunch. The street vendors whip the bamboo skewers off the coals and throw them onto flat banana leaves, used as plates. Delicious! Manchester is a long way from Malaysia, and the recipe for Satay has travelled a long way itself since it started in Indonesia. It’s always been a street food – meat is kept in a marinade, threaded onto skewers and grilled over hot coals as customers order it. You can make a really good imitation at home under the grill but it would be even better on the barbeque. As the recipe moved through the far East, the marinade took on different characters according to the cultures. The Thai version uses coconut milk in the marinade, which gives a creamier result than the original lime, turmeric and spice marinade. As a street food, you just eat the meat from the skewers, but at home you can make some plain rice, relishes, pickles and green vegetables to turn it into a full meal. Serves 4 Timings: 4 hours to marinade, about 30 minutes to assemble the meal
Marinade:
Satay sauce:
Relishes: mango, red onion, chilli and lime salsa; red onion slices pickled in vinegar with a teaspoon of sugar and salt added; sliced cucumbers; brined chilli peppers from a jar. Make up the marinade, mix well. Add the chicken strips and marinade for 4 hours or overnight. The turmeric gives a lovely golden colour to the meat over time. To make the sauce, mix all the ingredients together in a small bowl and gradually add in cold water, a spoonful at a time, whisking in as you go. Keep going until you get a thick glossy sauce of the right consistency to spoon over the kebabs. Soak your bamboo skewers in water for an hour before cooking. Thread the chicken pieces onto the bamboo skewers, concertina-ing up the strips. You will need 2-3 skewers per person. Grill the skewers under a hot grill, turning now and then. They will take about 10 minutes to cook through under a grill, or a little less on a barbeque. Serve with plain rice, the tasty relishes and salsa, and maybe some steamed pak choi or tender stemmed broccoli drizzled with sesame oil. Or wrap them in a tortilla wrap and slather them with sauce. 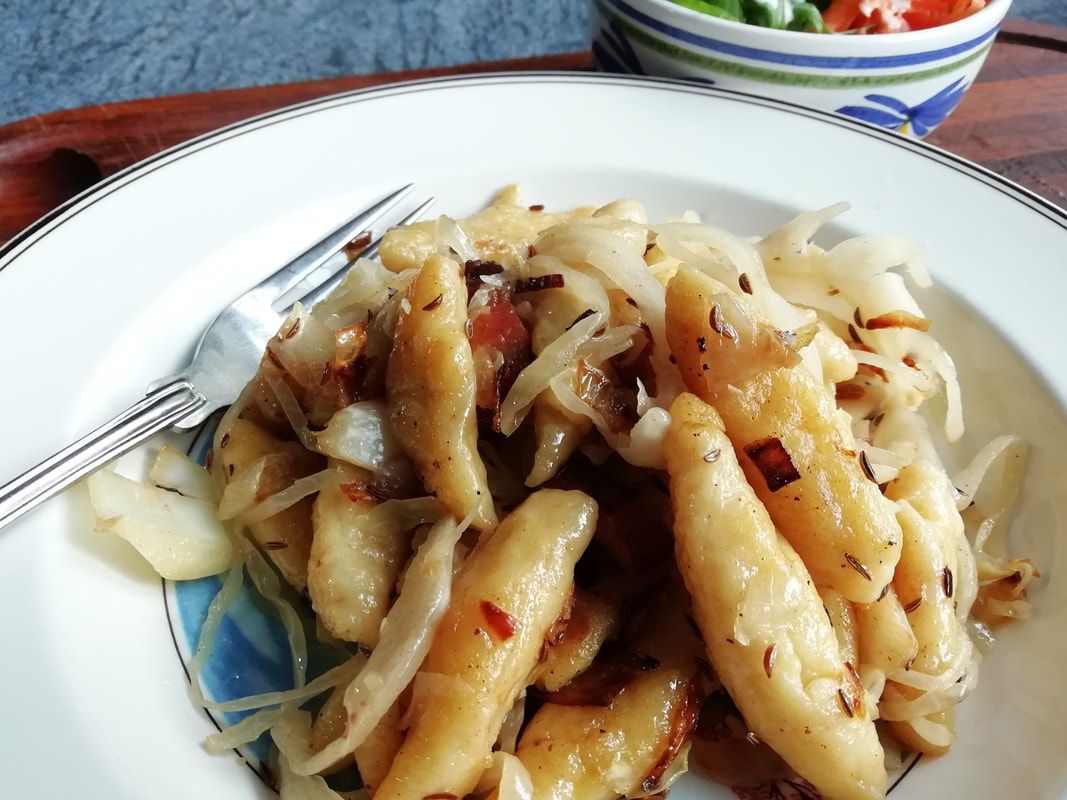 A German version of gnocchi - little potato/flour dumplings, fried with onions and bacon, scented with caraway. Schupfnudeln (vegetarian optionally)
They sound odd, but they’re plump and fluffy and delicious, and surprisingly easy to make. They’re the German equivalent of the Italian gnocchi, which gives you an idea of the texture. The name just means “pinched dumplings” which indicates that you don’t need a machine to make them. They’re not usually eaten with a tomato sauce (for no good reason that I can think of, it’s one of those “just so” questions), but are fried up with some well flavoured meat, soaking up the fat and pan juices. In the Munich Christmas Market you will find schupfnudeln billowing their savoury smell along the alleys of wooden huts, heaving with woolly-wrapped merry makers. The dumplings are fried up with smoked bacon, sweet onions, tangy sauerkraut and a sprinkling of caraway seeds for a very characteristic taste. Spear them with a fork; and enjoy a genuine continental Christmas treat. Preparation: Peeling and boiling potatoes – 30 minutes. Then making the dumplings – 1 hour. Final preparation – 20 minutes.
Mix the mashed potato, flour and eggs together, season with salt and pepper. Use your hands to form a soft dough and mix well, but don’t knead. Cover the dough and chill in the fridge while you bring a large pan of salted water to the boil. Remove 1/6th of the dough from the lump. Roll it on a floured worktop, like rolling playdough into a long snake about 2cm thick. Pinch off pieces about 2cm long and roll on your palm - the shape of your hand will naturally make a worm-shaped piece of dough, thinner at the ends than at the middle. This is what you want. Roll about 25 pieces like this and drop them into the boiling water. Don’t overload the pan, you want the water to retain the heat and boil the batch up quickly. They will rise to the top and expand as they cook, taking about 1-2 minutes. Scoop out the cooked dumplings and place them on a fine wire rack or on a tea towel, so they don’t sit in liquid. Keep going until you’ve done all the dough. You get quicker as you go along! At this stage you can cool your schupfnudeln and keep them for a day covered in the fridge until you want to cook them. You can also freeze them on a metal tray and put them in a bag once frozen. Cook straight from frozen, without thawing if you do this. About 30 minutes before eating, start to fry your bacon in your largest frying pan in a generous amount of vegetable oil. Fry until browned and starting to crisp, then add your onions to the pan. Fry for a few minutes until transparent and starting to brown and then add the shredded cabbage. Fry for another few minutes and then add the butter to the pan. When sizzling, add the caraway seeds and tip in your schupfnudeln. Turn with a spatula to brown all sides and warm through, then add the sauerkraut to the pan. Fry a little longer to cook through, adding a little more butter if you need. 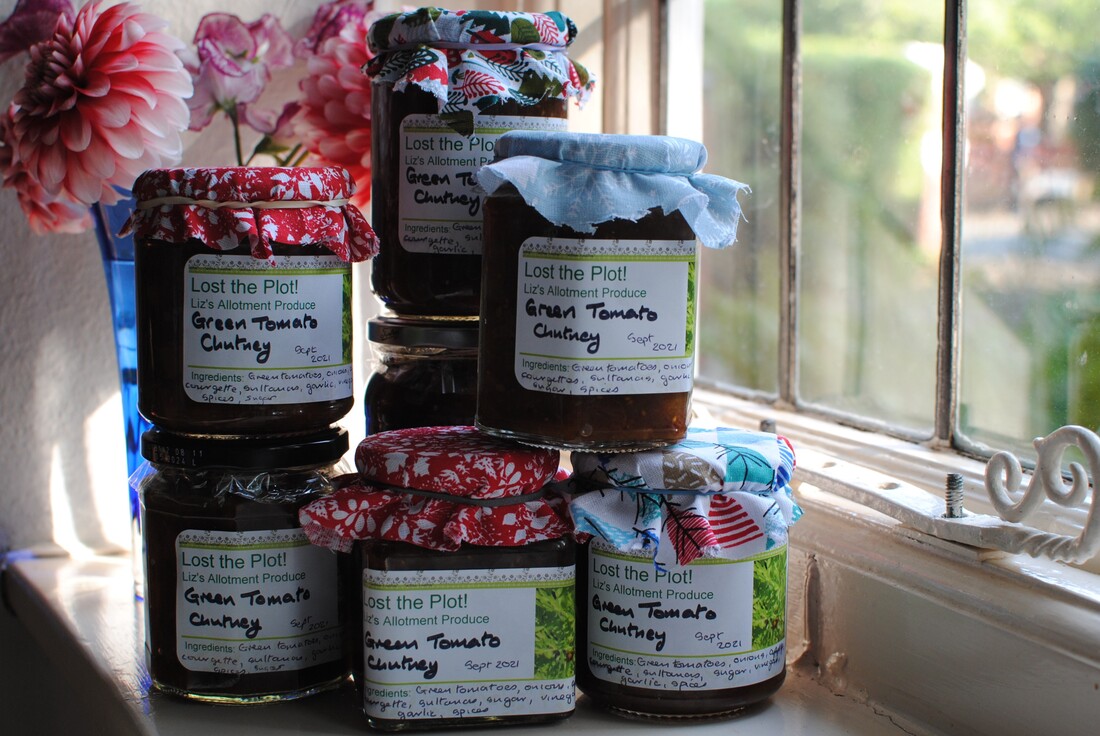 Green Tomato Chutney
We all love chutney in a cheese sandwich or with a slice of cold meat, and home made is of course nicest. You can adjust to your own tastes. I like a chutney with small pieces, nothing big that feels like a mouthful, and I like a dark sweet deep tasting mixture rather than a light fruity jammy product. But that’s my preference and you might love a light spreadable apple chutney best. I also like a textural contrast, the sweet softness of the courgette pieces against the popping crunch of tiny green tomatoes. This year, my tomatoes got blight quite early, so I had to take the plants down and remove all the fruit, so I had a good harvest of unripe small tomatoes. Last year, the blight arrived late, so I’d eaten all my own tomatoes ripe off the plants and had to buy green tomatoes from my friendly grocer (thanks, FreshSave of Didsbury!). You never know, and that’s the wonderful thing about chutney. Not only is it seasonal, it’s very much of THIS season, the way that things have grown this year. One batch is never quite the same as the next. You have to be a bit nimble about your ingredients and be prepared to change around – adding some sliced green beans if you haven’t got enough green tomatoes for instance. This is the basic recipe, found in many books and on scraps of paper in your grandmother’s recipe drawer. I’ve again used Pam Corbin’s River Cottage Handbook No 2 for the basic inspiration and great advice on making all sort of preserves, but I’ve changed to suit my own harvest and preferences, and you should do the same. I like a malt vinegar/cider vinegar mix because I like the malt vinegar’s dark muscularity, but again, if you prefer a lighter gentler chutney, use all lighter vinegar. The main thing about this sort of chutney (which is quite like the famous brown pickle you buy) is that all the ingredients are chopped up to about the same size little pieces. It does take time, but it give you a very consistent result, so it’s worth the trouble. That means tiny tiny green tomatoes can stay whole, little ones get halved or quartered, and bigger ones (larger than your thumbnail) might go into 6. Make it on an afternoon where you can be in the kitchen. You don’t need to keep an eagle eye on it constantly but don’t leave it for more than 10 minutes at a time. Everyone in your family will come in now and then, have a sniff and say “vinegar”. It’s one of the joys of the season. Makes about 6 x jam jars Timings: 1 hour to prepare, 3-4 hours simmering
A little bag of muslin (can be the corner of an old teatowel, or the piece of old muslin nappy you keep for such things, surely we all do that?) tied up tightly with string, containing a 2cm piece of fresh ginger, 2 teaspoons coriander seed, 1 teaspoon black pepper corns, 1 teaspoon cloves. Put a podcast on and cut up all your fruit. Place in a large deep saucepan with the other ingredients and bring to a simmer. Simmer over a low heat and stir every now and then to stop anything catching on the bottom of the pan; burned bits you don’t want. Stir and simmer for 3 hours with the lid on the pan and then take the lid off and simmer another hour or so to reduce the liquid. You will have a brown sticky fruity vinegary gloop. It’s ready when you can draw a wooden spoon through it and still see the bottom of the pan in the trail of the spoon for a few seconds. You can cook it until you reach the consistency you like. Spoon carefully into sterilised jars (I fill them with boiling water, empty out and leave them upside down in a coolish over to dry out so they’re ready when the chutney is), cover with jam pot covers, put the lids on and label the jars. The chutney is better if you leave it a few weeks to mature, so it’s an ideal Christmas gift. It will keep at least a year, more like two years, on a cool dark shelf. |
Some Changes - April 2022
Thanks to my friends and followers for your patience, and for your encouragement to start blogging again. Archives
April 2022
Categories
All
|
 RSS Feed
